3D Meshing for the component using Hypermesh
AIM :
Create 3D Meshing for the given component as per given Element sizes and Tet collapse values.
OBJECTIVE :
1. Create Tetramesh for Housing model with 5mm element size.
2. For the given models, Create a 3D tetra mesh with a 6mm element size.
PROCEDURE :
MODEL -1: HOUSING
Importing the Model :
1. Importing the given model by using File-->Open-->Model
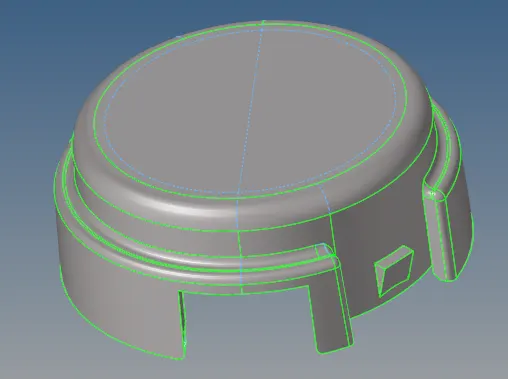
Fig: Cover
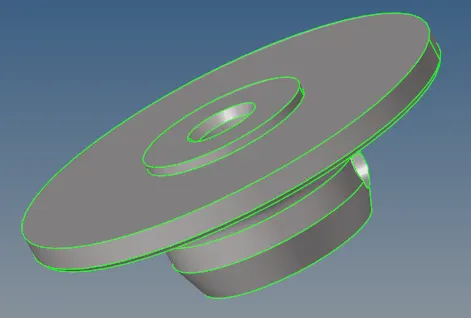
Fig: Hub
Meshing :
1. After Importing the model, Go to View-->Browser-->Hypermesh-->Utility option
2. Select Geomesh and Select Quicktetramesh in Mesh tools.
3. Select the component to mesh and set the mesh size, minimum elem size value as per given conditions, and Mesh type and select the Perform mesh cleanup only option to clean up geometry.
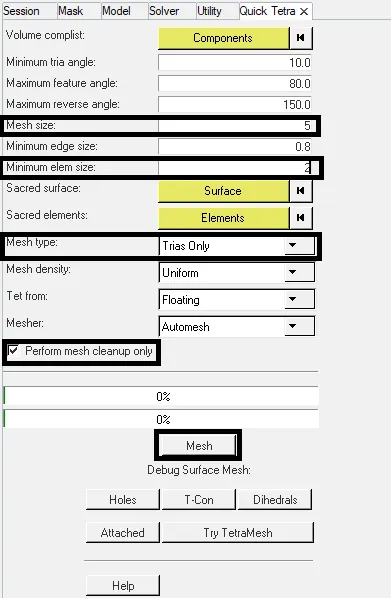
Fig: Quicktetra mesh Tool settings
4. Finally Click mesh and Quicktetra mesh will be created in the model.
5. Delete 2D elements by using Delete-->elems option and Select by config-->tria3 elements and click delete entities.
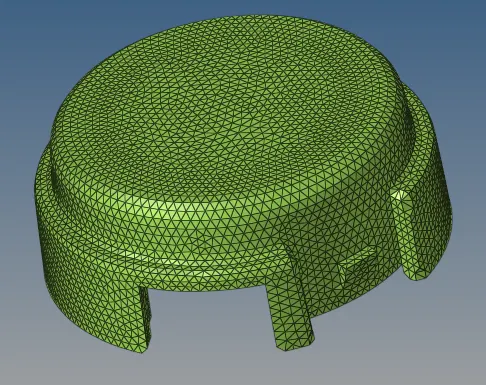
Fig: Cover 3D Mesh
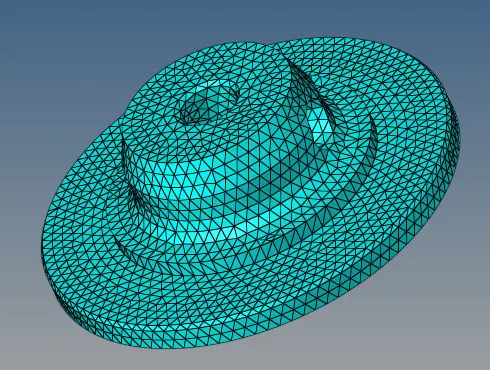
Fig: Hub 3D Mesh
6. After meshing and Go to Tools-->check elems option and check tet collapse.

Fig: Checking tet collapse (0.2% failed)
7. Click Save failed option and Click F5-->elements(retrieve)--> mask and click reverse to display failed elements.
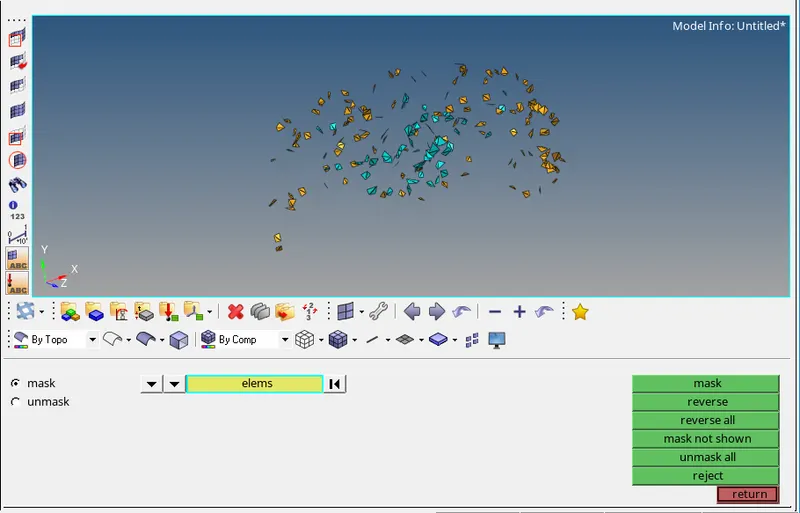
Fig: tet collapse 0.2% Failed elements
8. Bring back the neighboring elements by using Unmask Adjacent option.
9. Click F3 and use the replace option to replace two nodes.
10. Go to 3D-->tetramesh option and set tetra mesh parameters and Select tetra remesh and select the failed elements and click remesh.
11. Click F4 and measure the distance between two nodes and increase the size of elements to correct the tet collapse manually.

Fig: tet collapse (0.0% failed)
MODEL-2: CRANK HOUSING
Importing the Model :
1. Importing the given model by using File-->Open-->Model
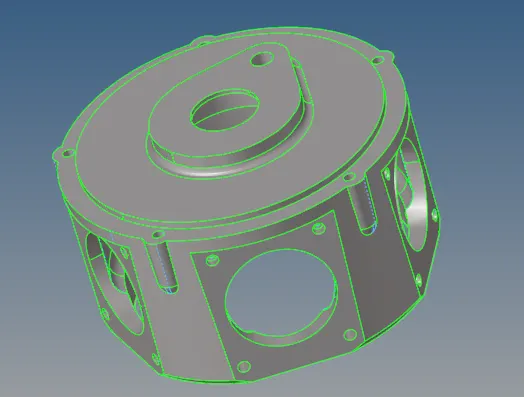
Fig: Crank Housing
Meshing :
1. After Importing the model, Go to View-->Browser-->Hypermesh-->Utility option
2. Select Geomesh and Select Quicktetramesh in Mesh tools.
3. Select the component to mesh and set the mesh size, minimum elem size value as per given conditions, and Mesh type and select the Perform mesh cleanup only option to clean up geometry.
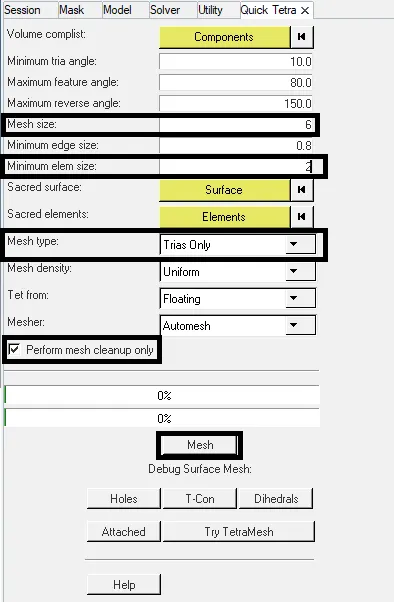
Fig: Quicktetra mesh Tool settings
4. Finally Click mesh and Quicktetra mesh will be created in the model.
5. Delete 2D elements by using Delete-->elems option and Select by config-->tria3 elements and click delete entities.
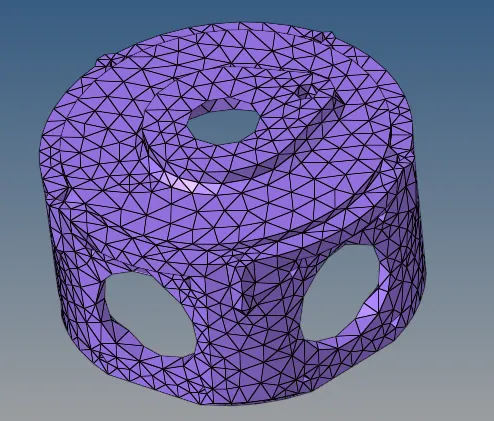
Fig: Crank 3D Mesh
6. After meshing and Go to Tools-->check elems option and check tet collapse.
7. Click Save failed option and Click F5-->elements(retrieve)--> mask and click reverse to display failed elements.
8. Bring back the neighboring elements by using Unmask Adjacent option.
9. Click F3 and use the replace option to replace two nodes.
10. Go to 3D-->tetramesh option and set tetra mesh parameters and Select tetra remesh and select the failed elements and click remesh.
11. Click F4 and measure the distance between two nodes and increase the size of elements to correct the tet collapse manually.

Fig: tet collapse (0.0% failed)
MODEL-3:
Importing the Model :
1. Importing the given model by using File-->Open-->Model
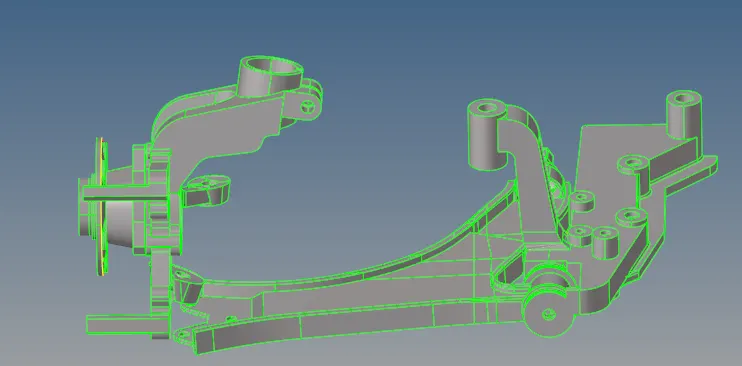
Fig: Model-3
2. Cleanup the Geometry and Mesh the Component separately.
3. Check if there are any red lines, remove teeth in the component before meshing.
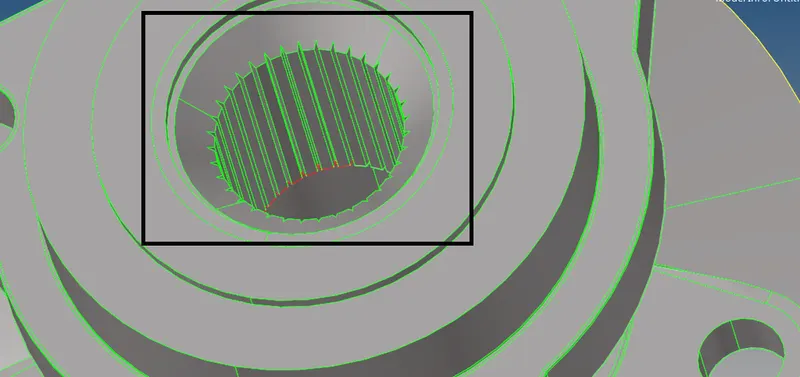
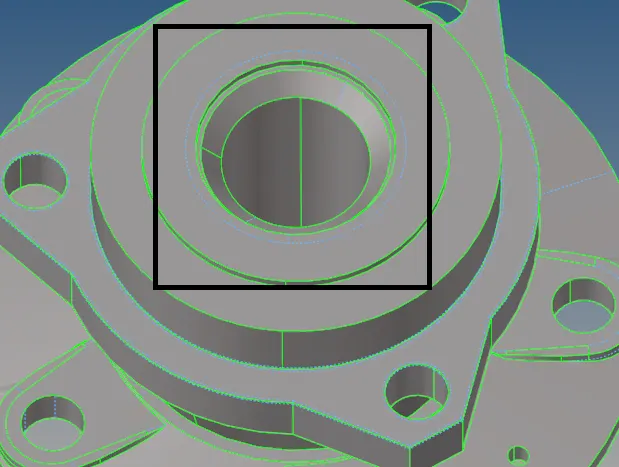
Fig: Before Geometry Cleanup Fig: After Geometry Cleanup
Meshing :
1. After Importing the model, Go to View-->Browser-->Hypermesh-->Utility option
2. Select Geomesh and Select Quicktetramesh in Mesh tools.
3. Select the component to mesh and set the mesh size, minimum elem size value as per given conditions, and Mesh type and select the Perform mesh cleanup only option to clean up geometry.
Fig: Quicktetra mesh Tool settings
4. Finally Click mesh and Quicktetra mesh will be created in the model.
5. Delete 2D elements by using Delete-->elems option and Select by config-->tria3 elements and click delete entities.
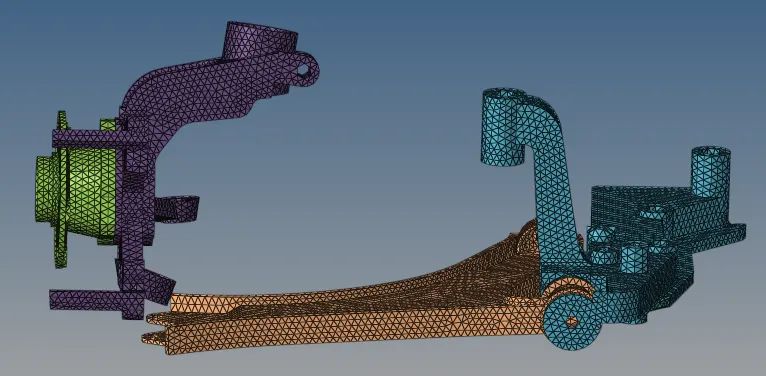
Fig: Model-3 3D Mesh
6. After meshing and Go to Tools-->check elems option and check tet collapse.
7. Click Save failed option and Click F5-->elements(retrieve)--> mask and click reverse to display failed elements.
8. Bring back the neighboring elements by using Unmask Adjacent option.
9. Click F3 and use the replace option to replace two nodes.
10. Go to 3D-->tetramesh option and set tetra mesh parameters and Select tetra remesh and select the failed elements and click remesh.
11. Click F4 and measure the distance between two nodes and increase the size of elements to correct the tet collapse manually.

Fig: tet collapse (0.0% failed)
RESULT :
3D Meshing was created for the given model as per given element size and Tet Collapse and also verified tet collapse as 0.0% failed.