Week 8-3D Tetra Meshing Challenge
WEEK - 8
3D-TETRA MESH GENERATION AND SOLVING TET-COLLAPSE USING VARIOUS APPROACHES IN HYPERMESH
Model-1
Objective:
- To create a Tetra-mesh for Housing component with the following quality criteria.
- To deploy 2D surface mesh and convert it into 3D mesh.
- The minimum length and the maximum length are to be checked only for 2D elements when performing a 2D to 3D Mesh.
- To rectify all the Tet collapses in 3D mesh.
Tetra-mesh Generation Method: 2D to 3D Conversion
Quality Parameters:
|
S. No |
Quality Criteria |
Value |
|
1 |
Minimum |
2 |
|
2 |
Target element length |
5 |
|
3 |
Maximum |
7 |
|
4 |
Tet collapse |
0.15 |
PROCEDURE:
1. Import Geometry:
- Go to File >> Import >> Model/Geometry
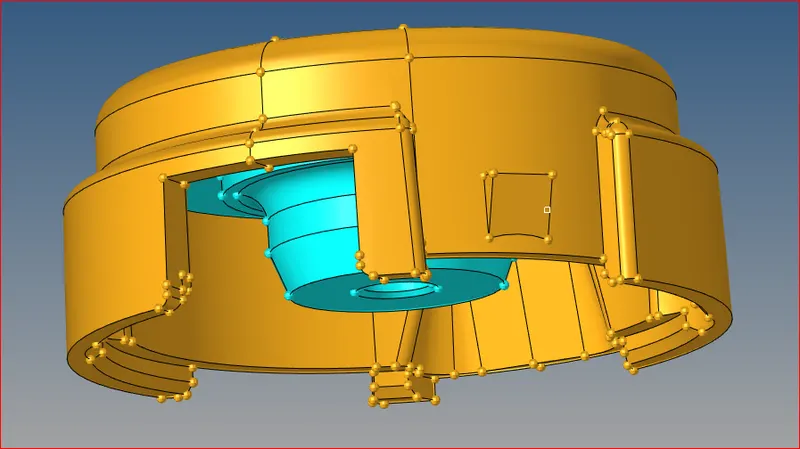
Imported housing Component
2. Defeaturing Fillets:
- Go to Geometry >> Defeature >> Surface fillets. Assign minimum and maximum values.
- Select all the surfaces where the fillets need to be removed.
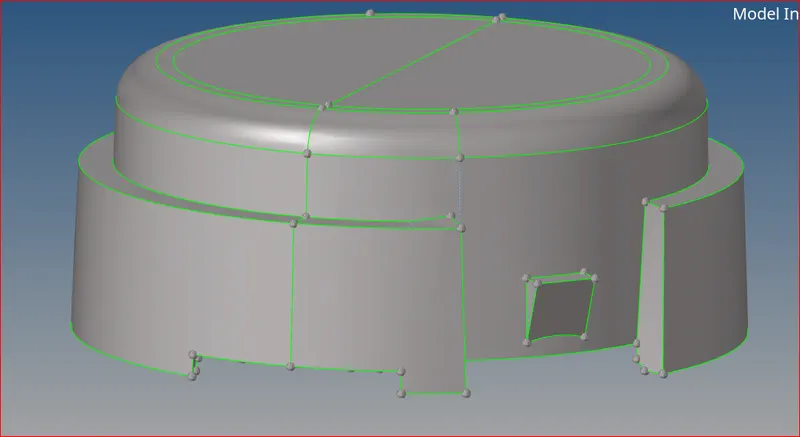
Fillets removed on geometry
3. Generate 2D Surface mesh on Geometry:
- To deploy the mesh, go to 2D >> auto mesh >> select all the surfaces.
- We need to use 2D tis elements while generating surface mesh
- After meshing we need clear all the quality issues on surface mesh before converting it into 3D mesh.
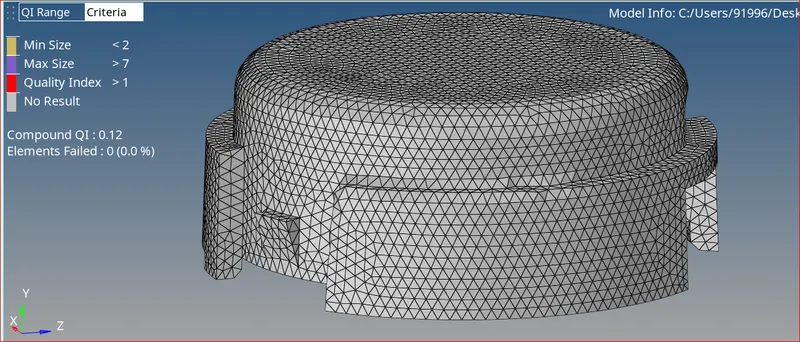
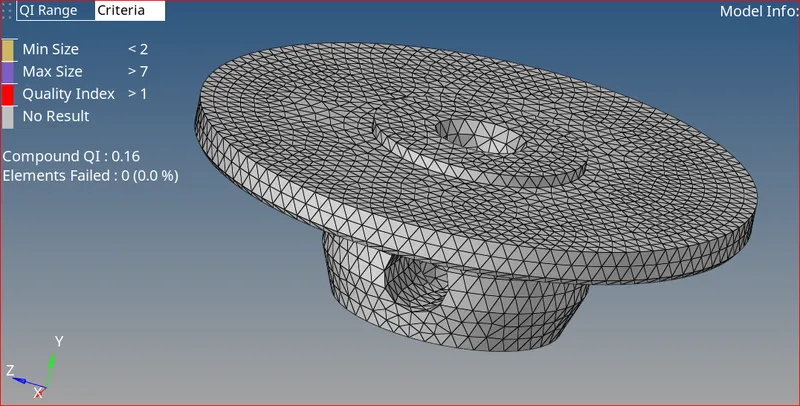
2D Surface Mesh 2D Surface Mesh
- All the off elements are cleared successfully.
- Now we should convert these 2D elements into 3D elements.
4. Converting 2D mesh to 3D mesh:
- Solid mesh will be deployed only if the component is either solid or all the surfaces are closed.
- To deploy mesh, go to 3D >> tetra mesh >>select the component >> mesh.
- Also, check the tetra mesh parameters for better quality of mesh.
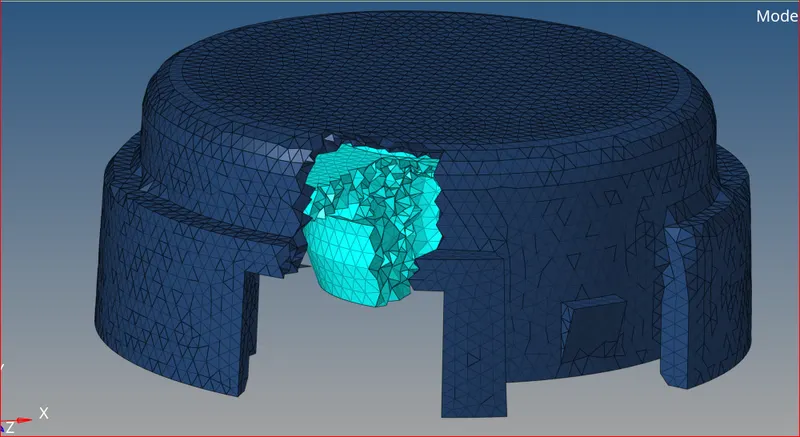
3D mesh generated
5. Solving Tet Collapses (Manually):
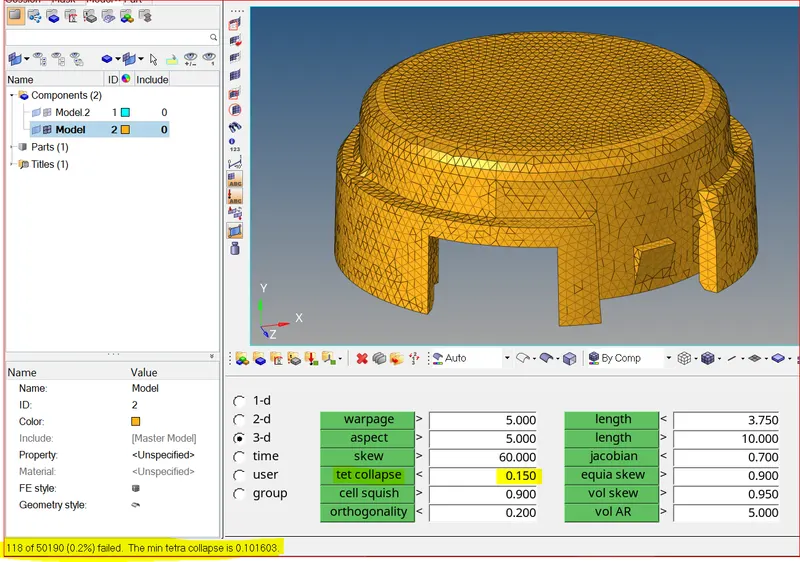
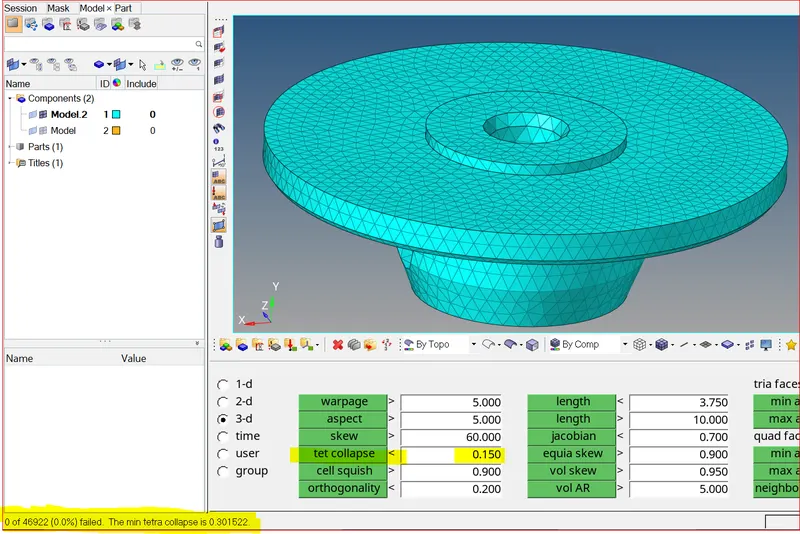
Checking 3D elements for Tet Collapse
- Isolate all failed elements and using mask option
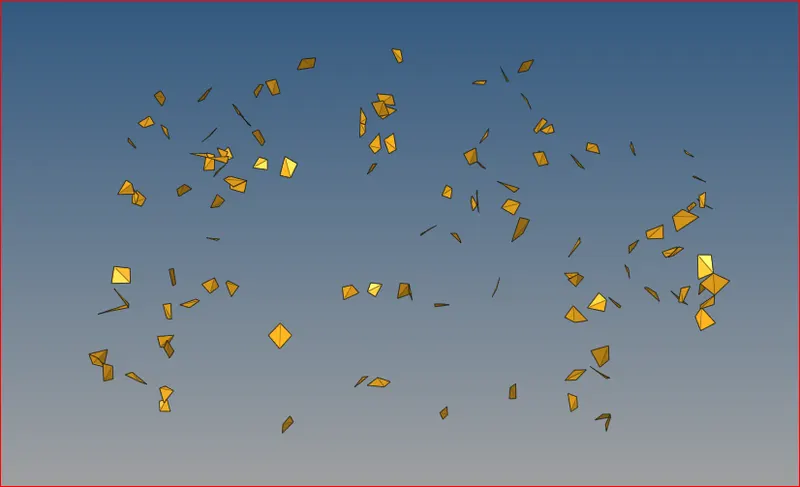
Isolating Failed elements
- There are 118 off elements. We can either remesh them or solve them manually by increasing their size
- Use tools >> Translate option. Do this individually for each element.
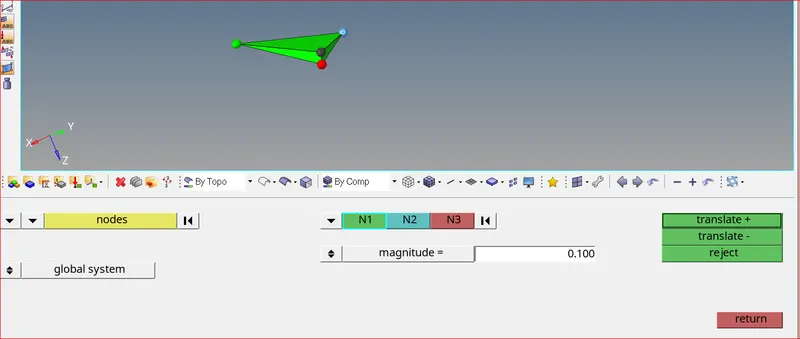
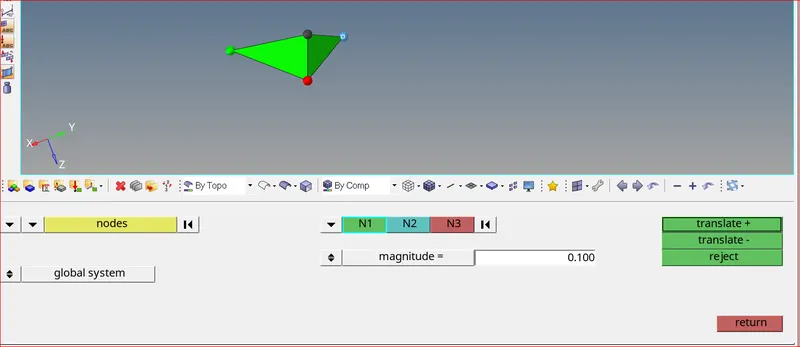
Solving failed elements manually using Translate option
Result for MODEL 1:
- The surface mesh is generated and it is converted into volume mesh successfully.
- In both cases, all quality parameters are cleared successfully.
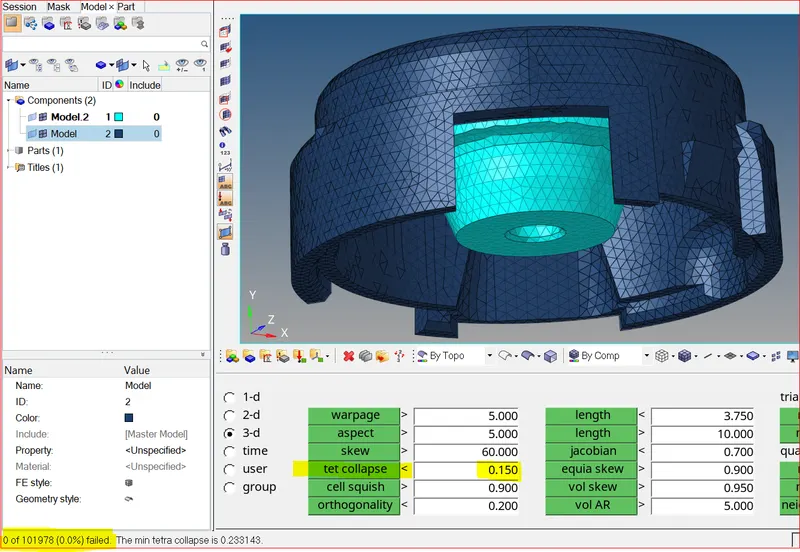
Model-2
Objective:
- For the given model, Create a 3D Tetra mesh with the following quality criteria.
- Tetra mesh Generation Method: Quick Tetra Mesh/ Volume Tetra Mesh.
Quality Parameters:
|
S. No |
Quality Criteria |
Value |
|
1 |
Target Element size |
3 |
|
2 |
Tet Collapse |
0.15 |
Procedure:
1. Import Geometry:
- Go to File >> Import >> Model/Geometry
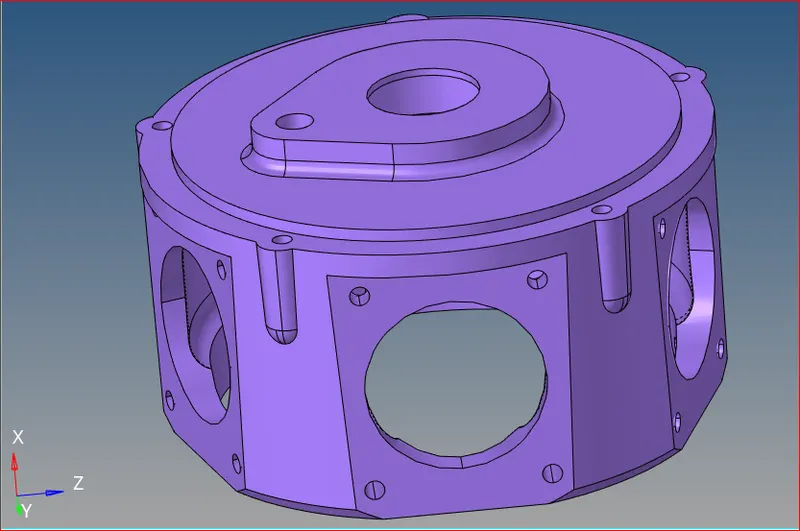
Imported geometry
2. Quick Tetra mesh:
- In this method, it automatically generated 2D mesh and converts that into 3D mesh.
- This method is not preferred as the mesh quality will be bad.
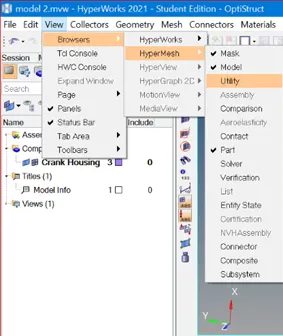
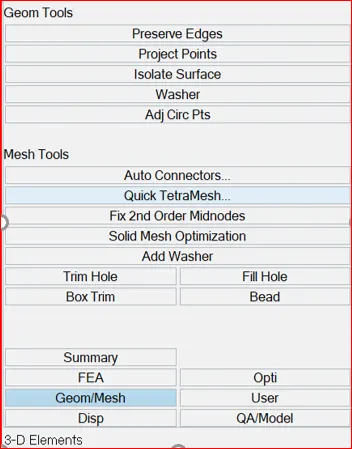
Dialog box of quick Tetra mesh
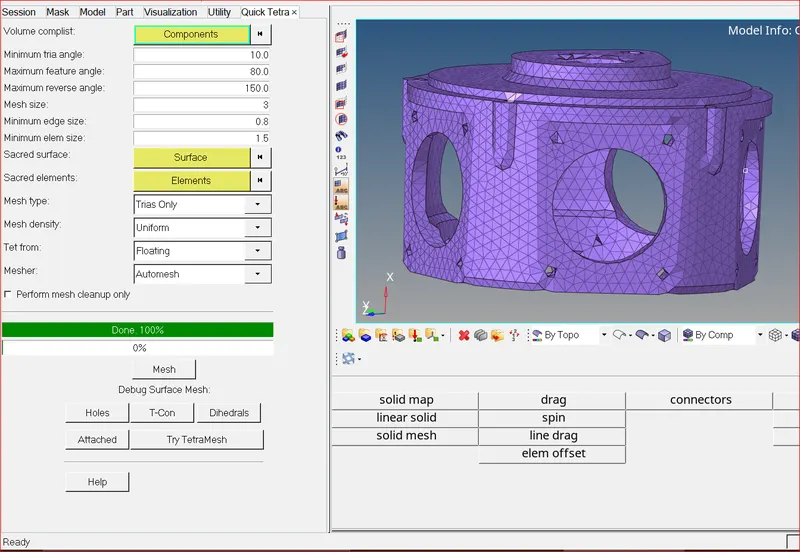 Features not captured perfectly
3. Volume Tetra mesh :
- You can see the holes are not captured properly, so we need to try another method for better mesh generation.
- Go to 3D >> tetra mesh >>select the component >> mesh.
- Also, check the tetra mesh parameters for better quality of mesh (Assign minimum tetra value, maximum tetra value, Tet collapse value).
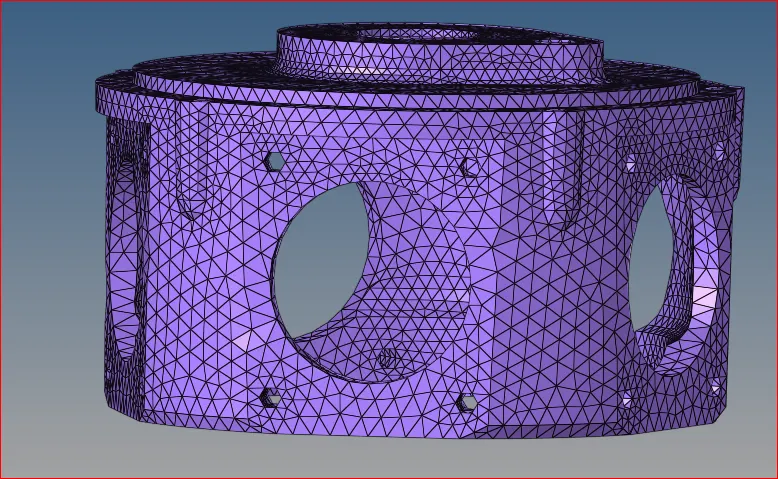
Features are captured perfectly
4. Solving Tet Collapses (Using Remesh):
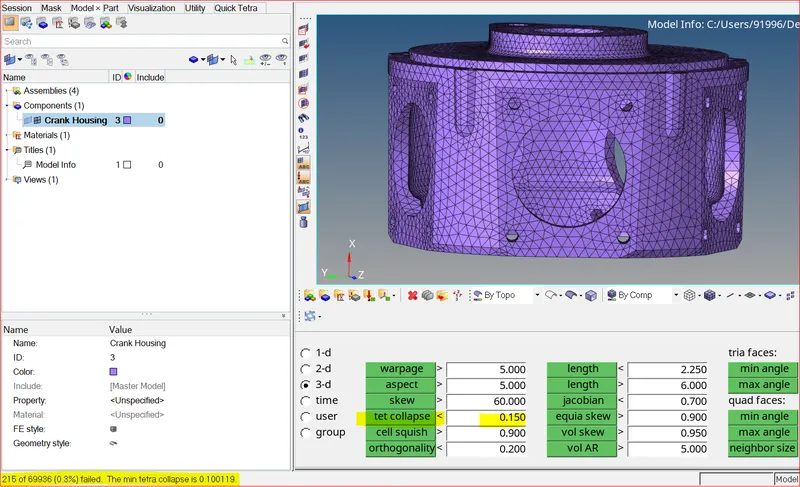
- We can see there are 215 elements failed for Tet collapse.
- Now isolate all the failed elements using mask option.
- Use unmask adjacent option to view neighboring elements.
- Now remesh the displayed elements i.e, failed and neighboring elements.
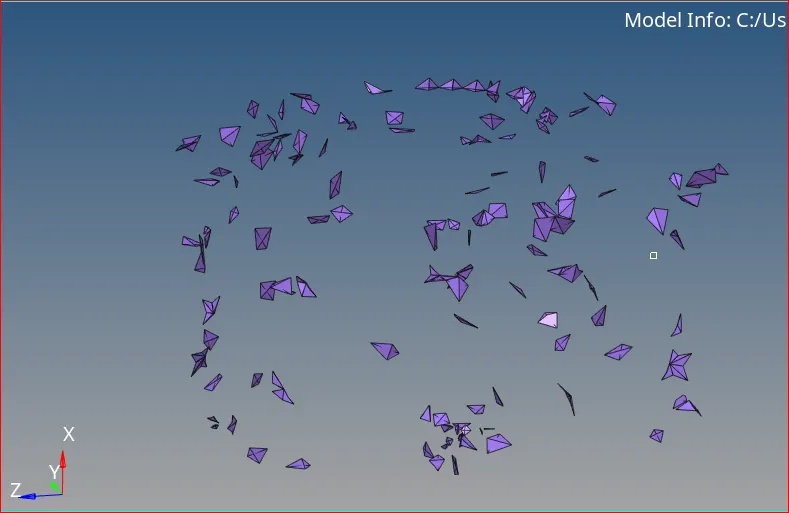
215 elements isolated
- After remeshing the failed elements are reduced to 49.
- Do this process again until all the off elements are cleared.
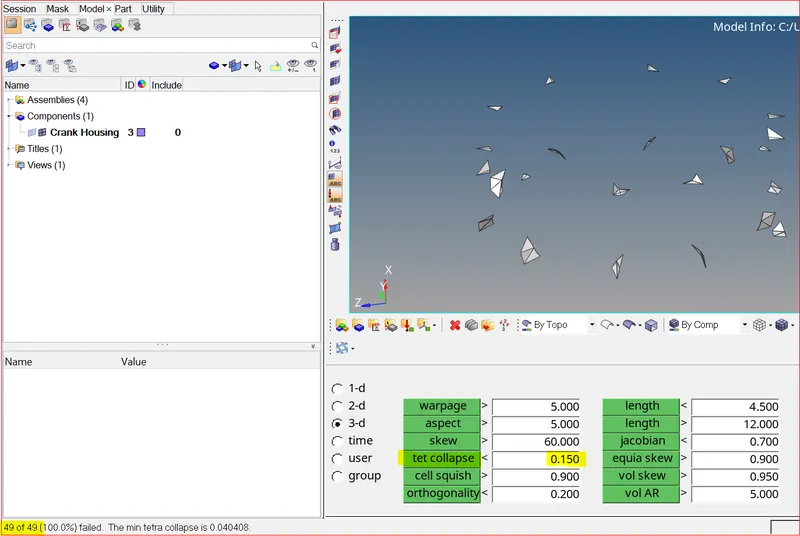
Elements after remeshing are reduced to 49
Result for MODEL 2:
- Volume mesh is generated successfully without any quality issues.
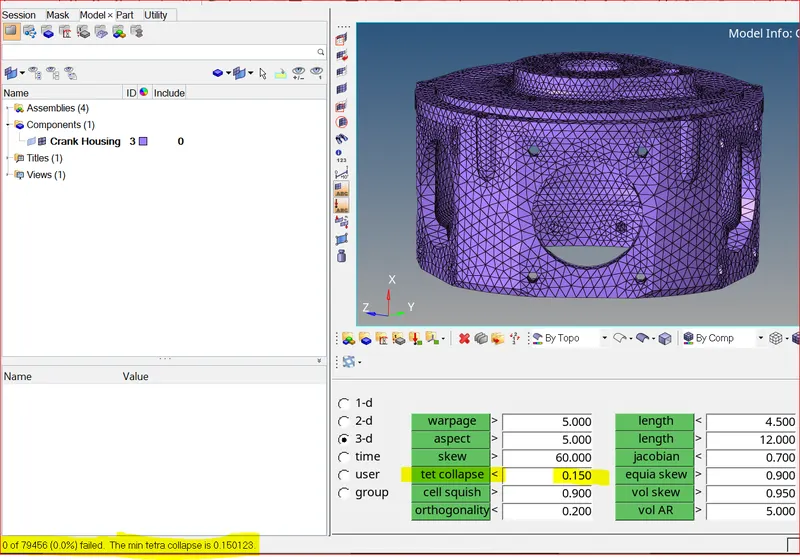
Model-2
Objective:
- To Create a 3D Tetramesh with the following quality criteria,For the given assembly model,
- Tetra Mesh Generation Method: Quick Tetra Mesh/ Volume Tetra Mesh
Quality Parameters:
|
S. No |
Quality Criteria |
Value |
|
1 |
Target Element size |
4 |
|
2 |
Tet Collapse |
0.15 |
Procedure:
1. Import Geometry:
- Go to File >> Import >> Model/Geometry
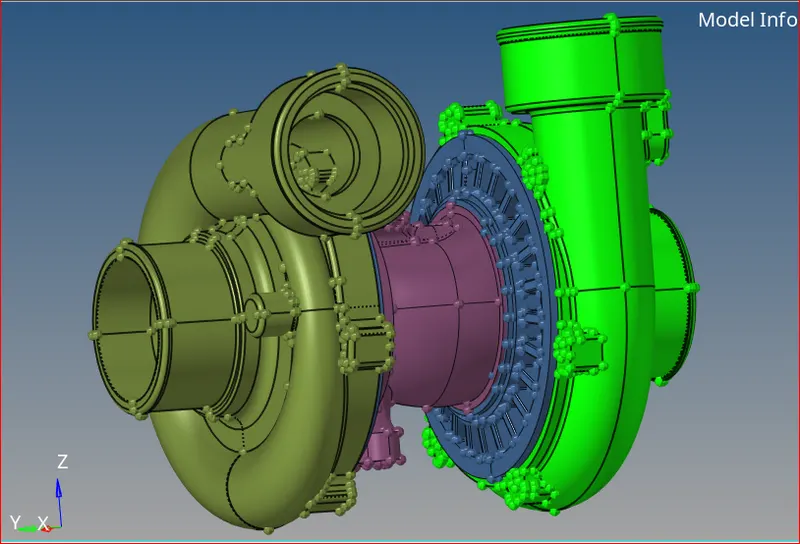
Imported geometry
2. Volume tetra mesh:
- Go to 3D >> tetra mesh >> Volume mesh
- Tick curvature and proximity options for better feature capturing of mesh.
- Select the required solids or surfaces of each component individually

Volume Tetra dialog box
3. Solving Tet Collapses (Using Fix 3D elements option):
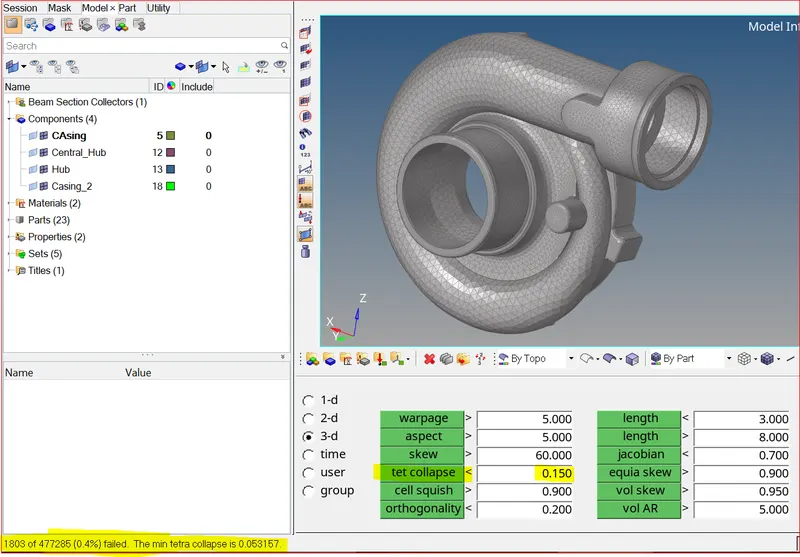
1803 elements failed for Tet Collapse
- 3D mesh is generated and there are 1803 elements failing for Tet collapse
- Now go to tetra mesh >> fix 3D elements
- Select all the elements and give Tetra collapse value and number of iterations and click Fix
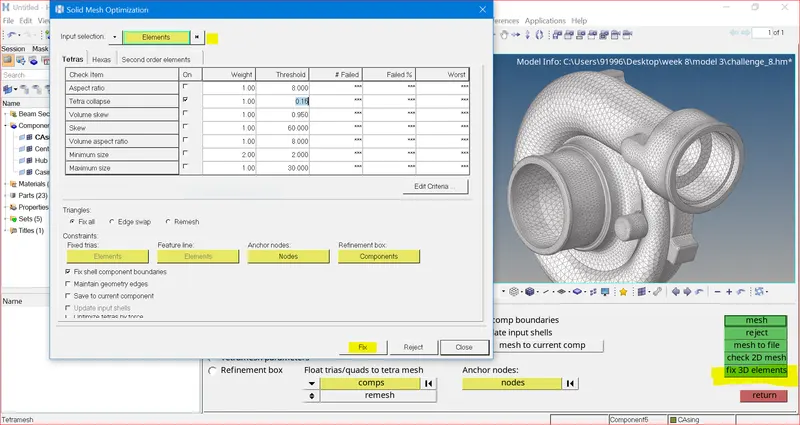
Fix 3D option for Failed elements
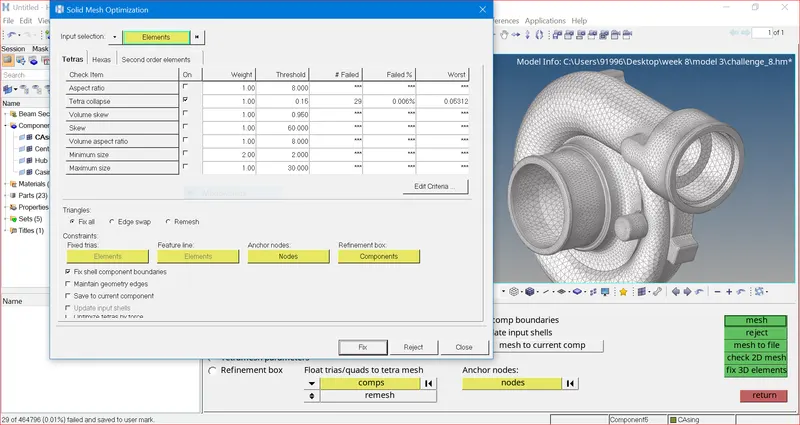
After fixing only 29 elements failed
- The majority of the elements are solved automatically
- The remaining elements can be remeshed or solved manually until all the tet collapses are solved
Result for MODEL 3:
Note:
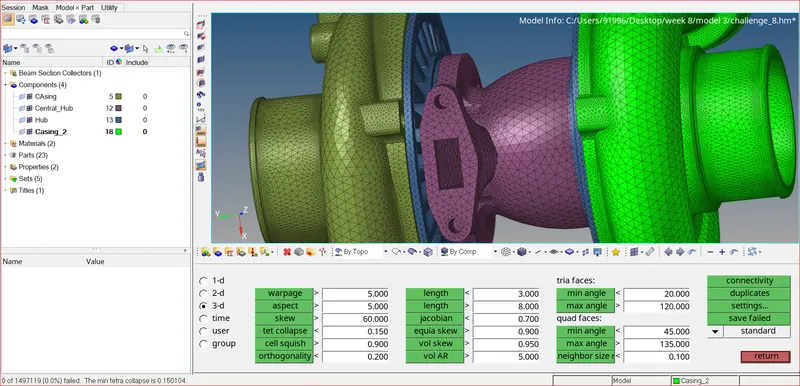
- As I have used student version software, I can only save up to 100000 nodes. Now we have 1497119 nodes. Therefore, we can’t save these 4 parts in one file.
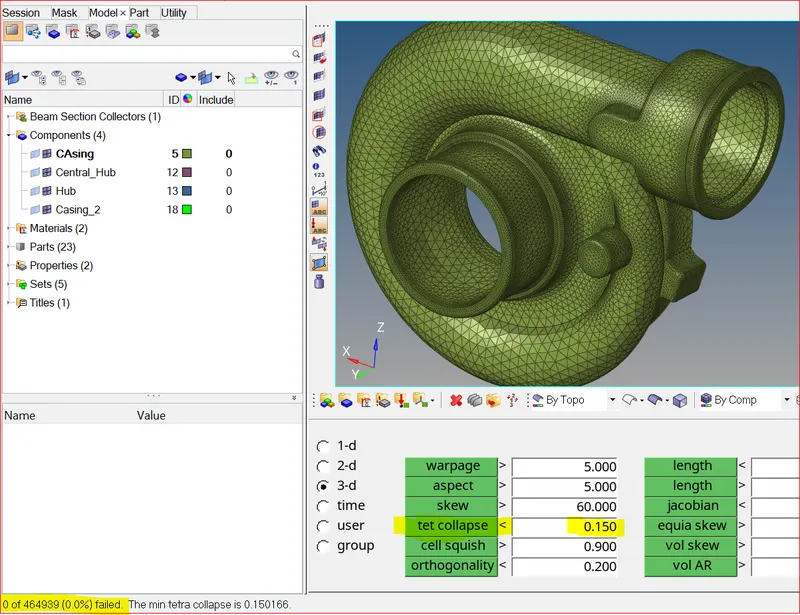
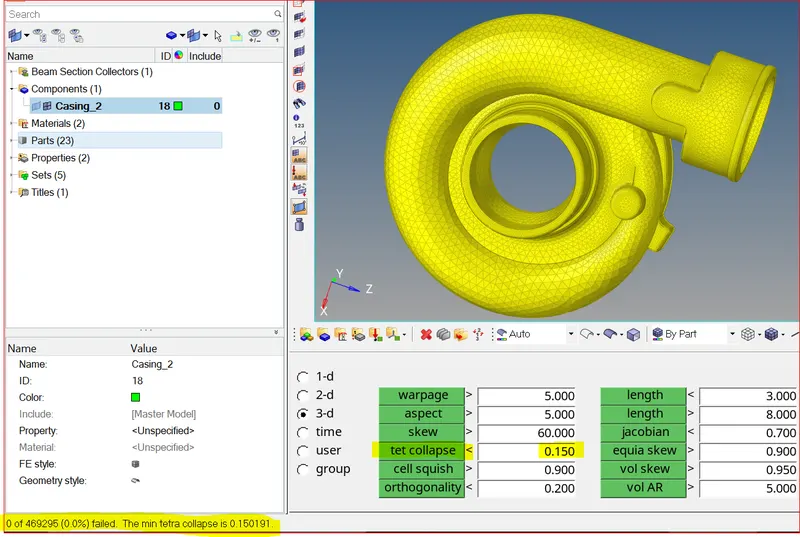
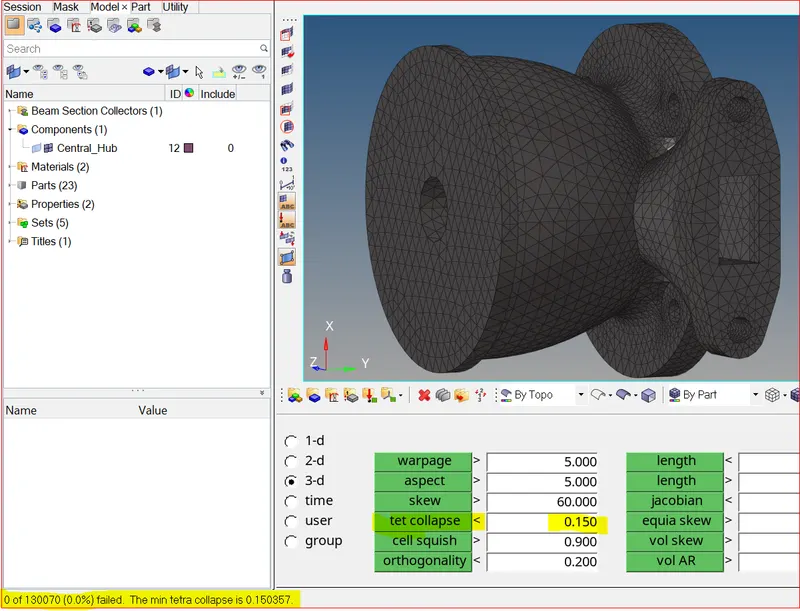
- I have created 4 different files with 4 different parts for challenge submission.

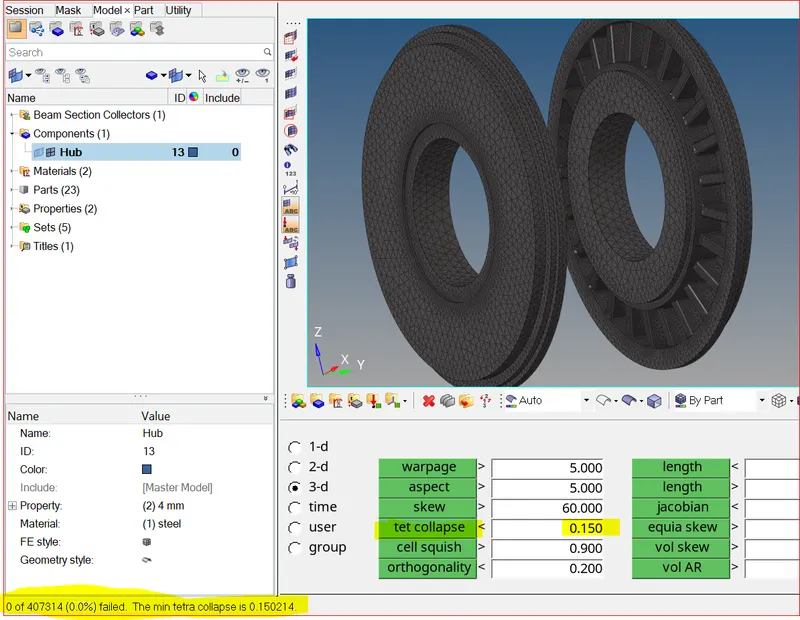
- All the individual solids are volume meshed successfully.
- There are no quality issues (0 Tet collapses out of 1497119).
Part 1 Part 2
Part 3 Part 4
Learning Outcomes:
- Understood different ways of generating volume mesh
- Used different methods to solve Tet collapse
Conclusion:
After completion, Volume mesh is successfully generated for all the 3 MODEL'S and there are no quality issues or Tet collapses found.