Week 8-3D Tetra Meshing Challenge
3D TETRA MESH
OBJECTIVE: To create 3D tetra mesh on the given models.
INTRODUCTION:
3D mesh are of two type’s tetra (tetrahedron) and hexa (hexahedron). A tetrahedron has 4 vertices, 6 edges, and is bounded by 4 triangular faces. A tetra mesh is easier to do and is generally preferred over hexa mesh. A hexahedron, a topological cube, has 8 vertices, 12 edges, bounded by 6 quadrilateral faces. A hexa mesh is more accurate than tetra mesh. There are specialist engineers who do hexa mesh.
Here we are going to do tetra mesh. First we will do 2D mesh then convert it into 3D tetra mesh.
CAD MODEL:-
Here we are going to mesh 3 models.
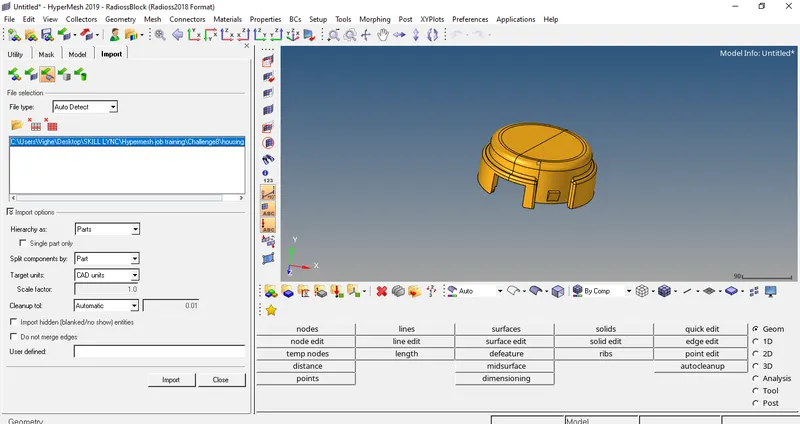
MODEL1
The model is imported in hypermesh using option of import model in tab bar.
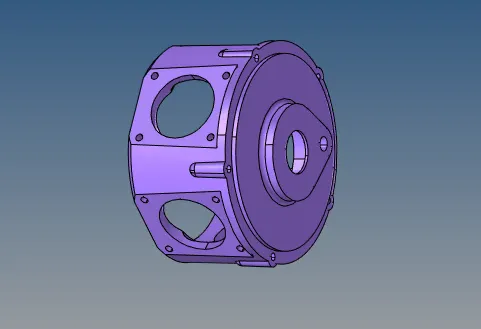
MODEL2
The model is imported in hypermesh using option of import model in tab bar.
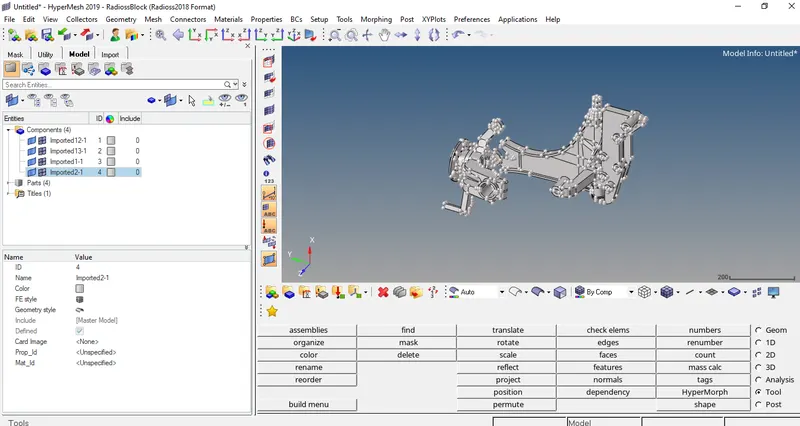
MODEL3
The model is imported in hypermesh using option of import model in tab bar.
QUALITY CRITERIA:-
|
MODEL1 |
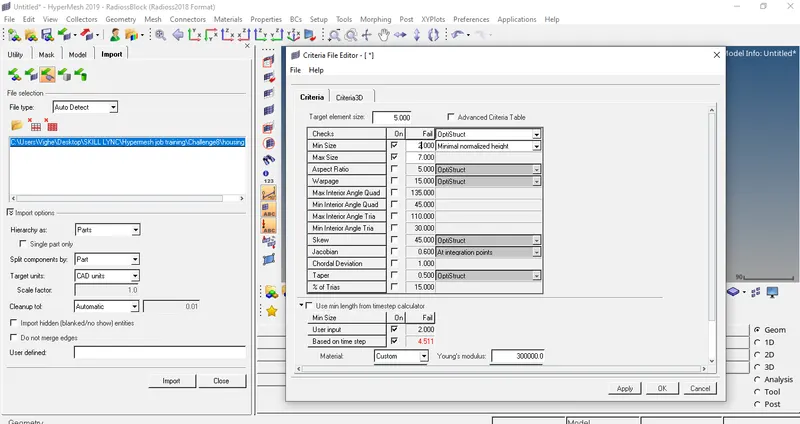
Min. size= 2 units, max size = 7 units, element size = 5 units, Tet collapse = 0.15 |
|
MODEL2 |
element size = 3 units, Tet collapse = 0.15 |
|
MODEL3 |
element size = 6 units, Tet collapse = 0.15 |
PROCEDURE:-
MODEL1
- First the model which is in .stp format is imported using import geometry option in tab bar in Hypermesh.
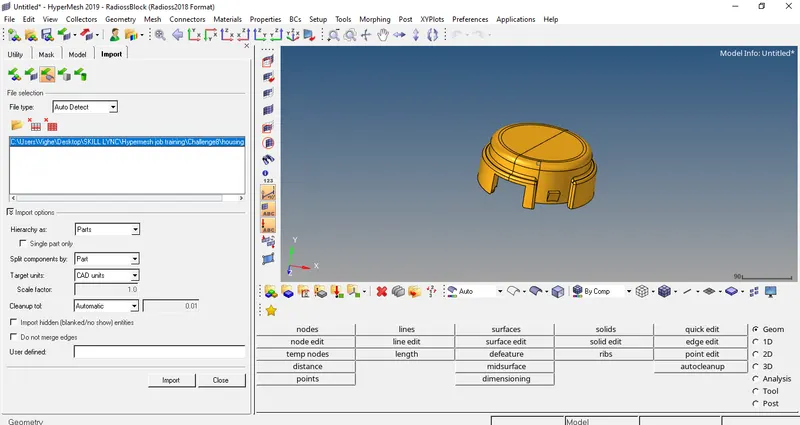
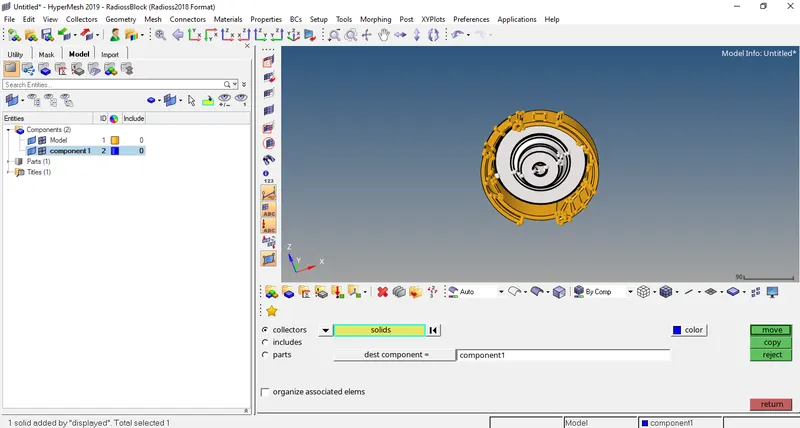
- Now we have to separate the solid part of the model and name it component 1 (Tool>Organize>collectors) and then we have to delete the solid.
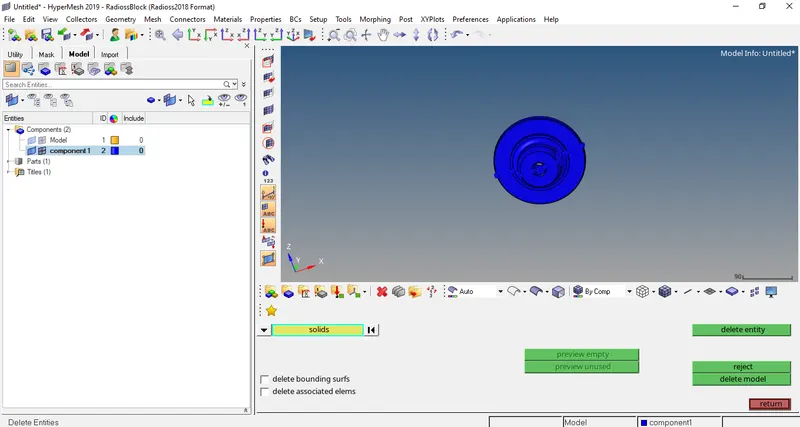
- We have to set quality criteria in criteria preference option.
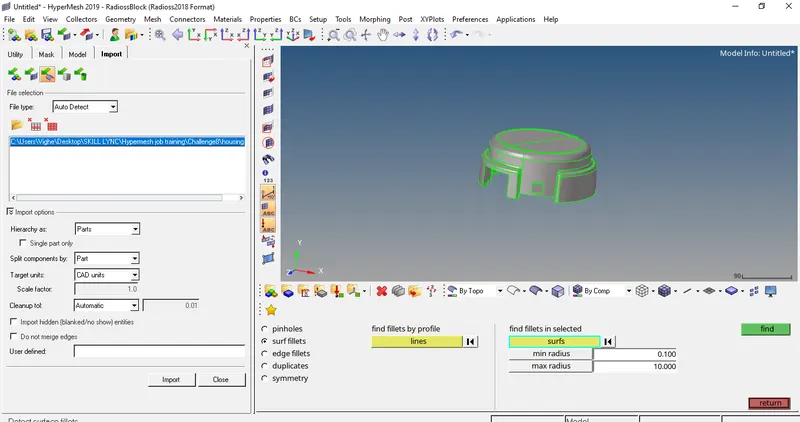
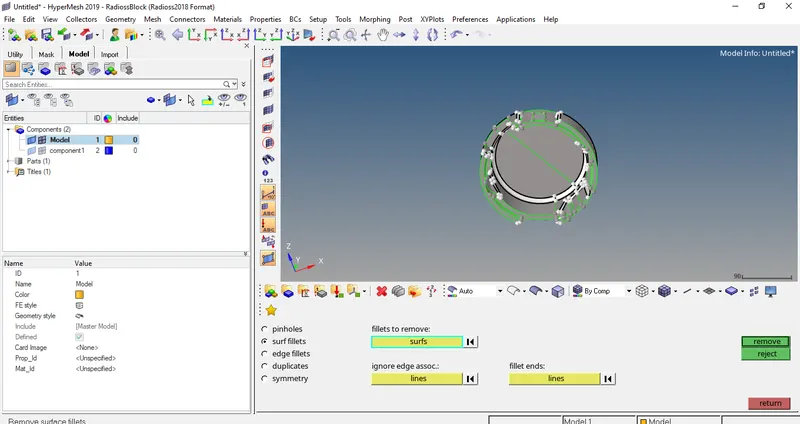
- We get rid of surface fillets using defeature option (Geom>Defeature>surfs fillets) also we have to do geometrical cleanup using quick edits options like add/replace points, toggle edge, split surfs etc (Geom>quick edits).
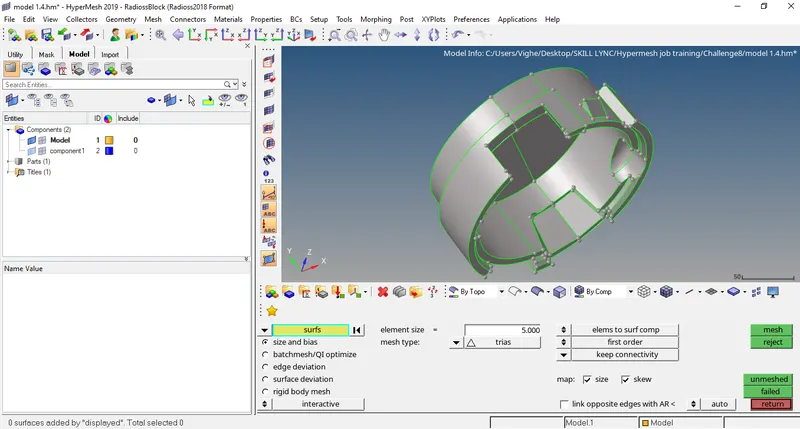
- The meshing of the model with target element= 5 mm and mesh type = trias is done (2D>automesh).
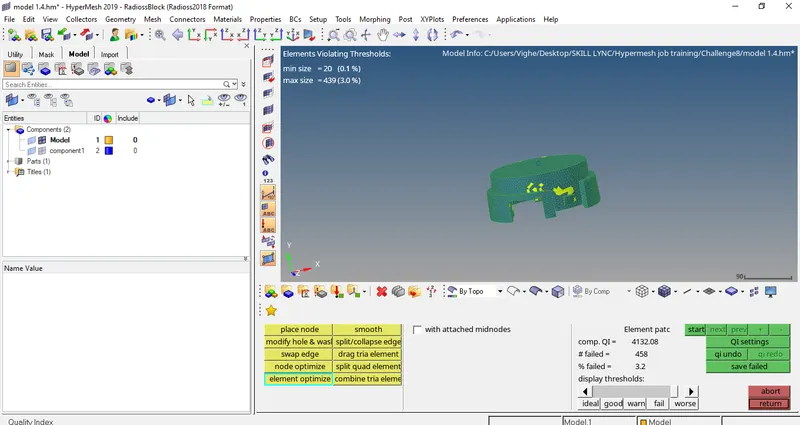
- The mesh created is not proper as the parts gets complex so the mesh needs to be improved.
- To check the quality of meshing the quality criteria option is opened and the highlighted elements are improved using QI tools given till all the elements are unhighlighted. (2D>Quality Criteria).
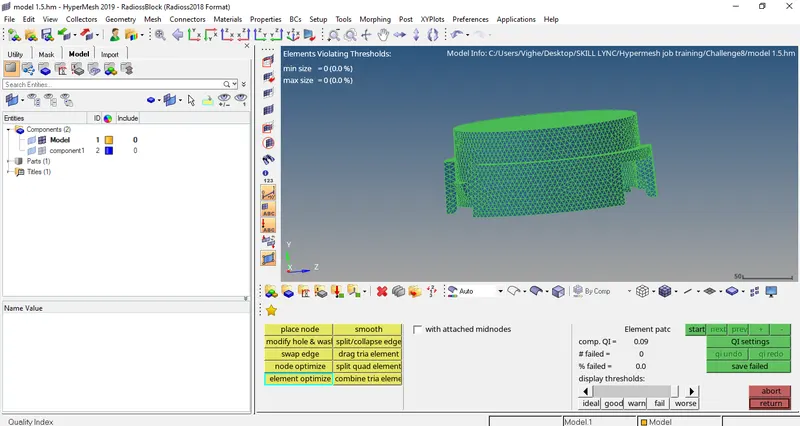
- Now the 2D mesh are of required quality we can do 3D tetra mesh. Here we convert 2D mesh to 3D mesh. Go to (3D>tetramesh>tetra mesh).
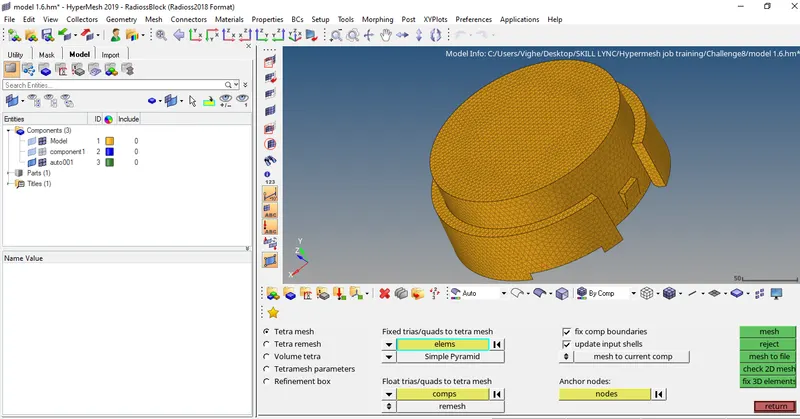
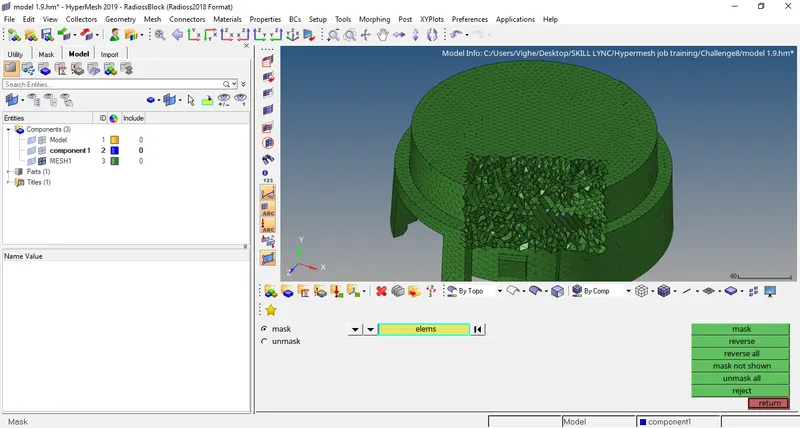
- Lets mask the elements to see whether 3D tetra elements are created or not (Tools>Mask).
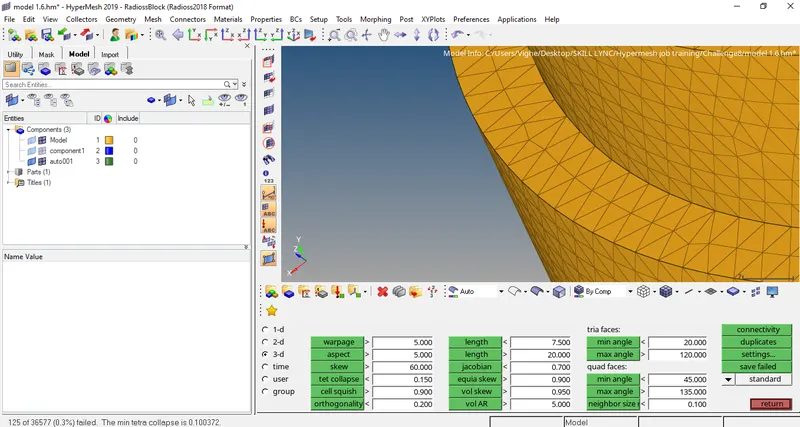
- Now we check that how many elements have failed 3D mesh quality criteria (Tools>Check elems>3D>tet collapse).
- We manually try to increase the shortest distance between the common node and vertex node. Even after trying this there some failed elements we have remesh them. First we have set the tetramesh parameters (3D>tetramesh>tetramesh parameters).
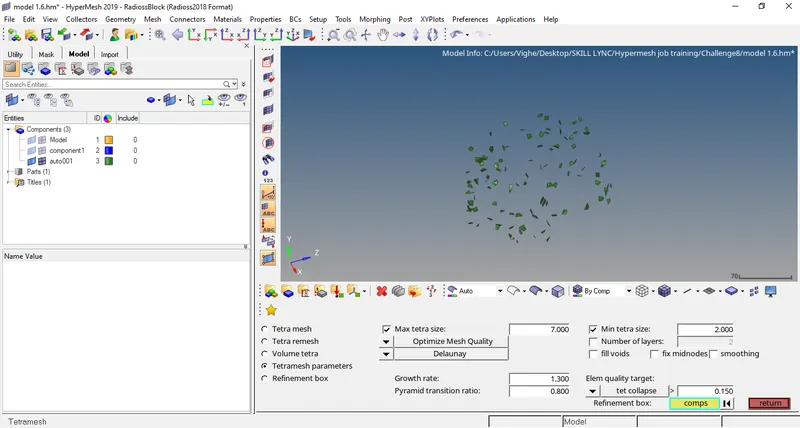
- After setting the parameters we have to remesh the mesh (Tools>tetramesh>tetra remesh).
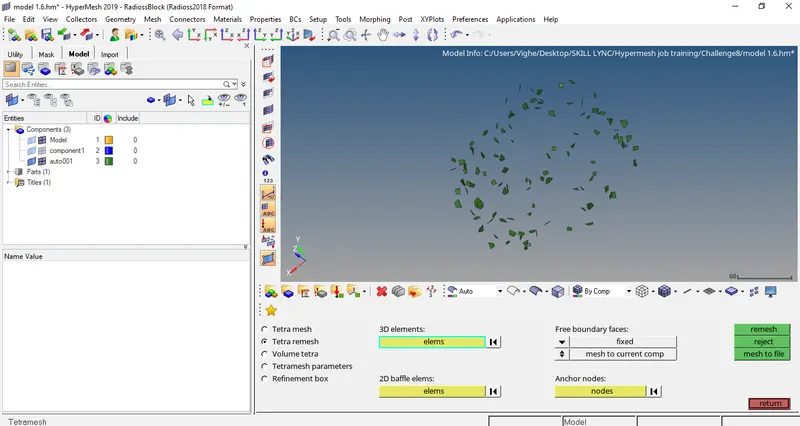
- After remeshing we have to again check for the tet collapse (Tools>Check elems>tet collapse).
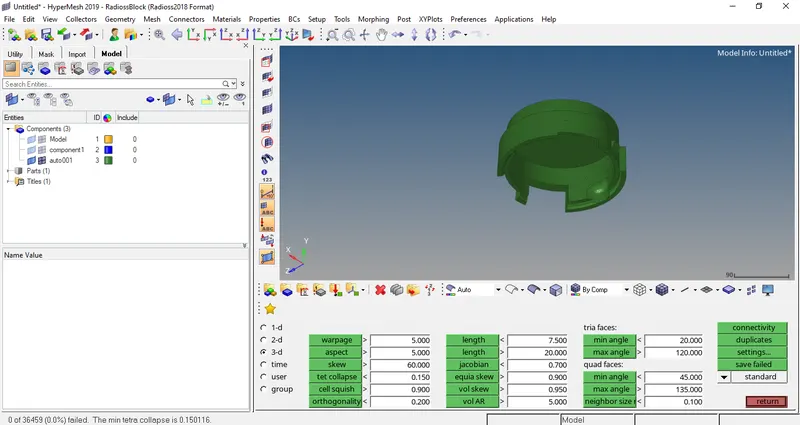
- Now we have to check whether there is some connectivity issue in the mesh (Tools>edges>find edges) and also check for equivalence (Tools>edges>equivalance).
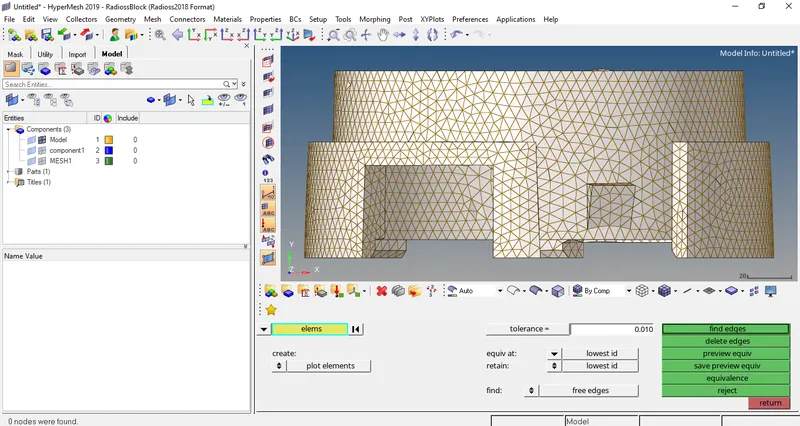
- Now we have to delete the 2D mesh using delete option (Delete>by config>trias)
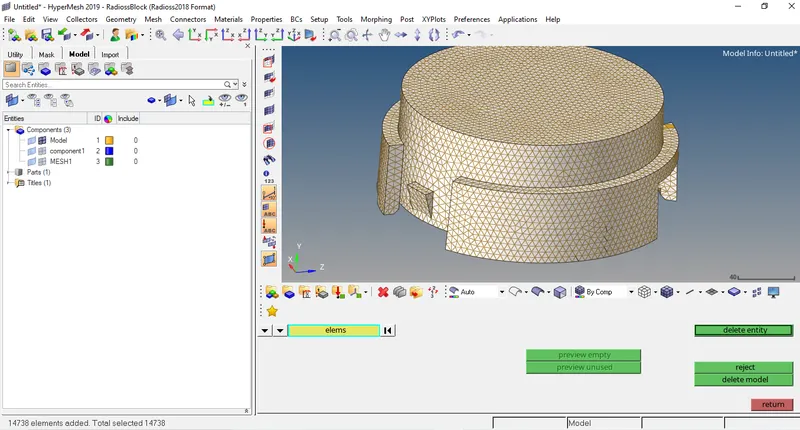
- Now the similarly way as above we have to mesh the component 2. First we have defeature it also we have to do geometrical cleanup using quick edits options like add/replace points, toggle edge, split surfs etc (Geom>quick edits).
- After defeature we have to 2D mesh with element size = 5 units, element type = trias (2D>automesh).
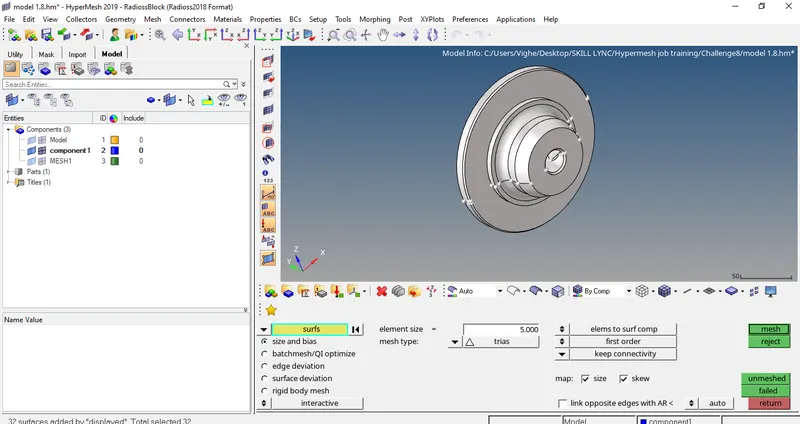
- The mesh created is not proper as the parts gets complex so the mesh needs to be improved.
- To check the quality of meshing the quality criteria option is opened and the highlighted elements are improved using QI tools given till all the elements are unhighlighted. (2D>Quality Criteria).
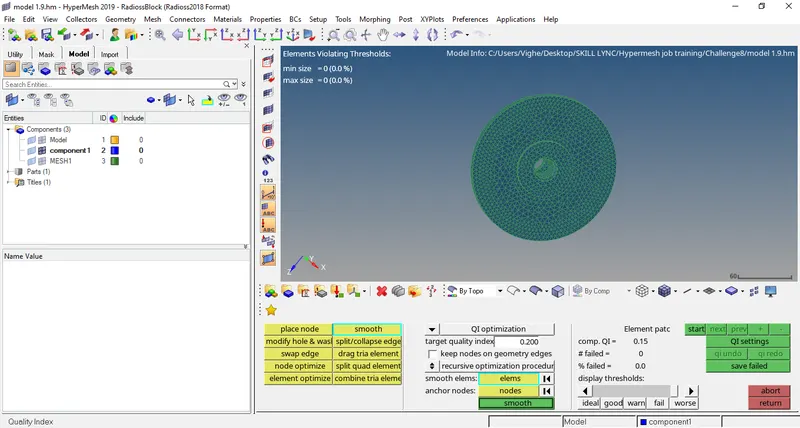
- Now the 2D mesh are of required quality we can do 3D tetra mesh. Here we convert 2D mesh to 3D mesh. Go to (3D>tetramesh>tetra mesh).
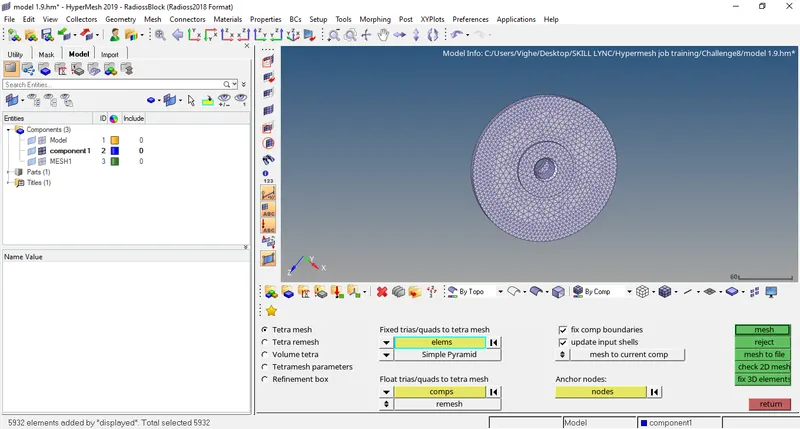
- Lets mask the elements to see whether 3D tetra elements are created or not (Tools>Mask).
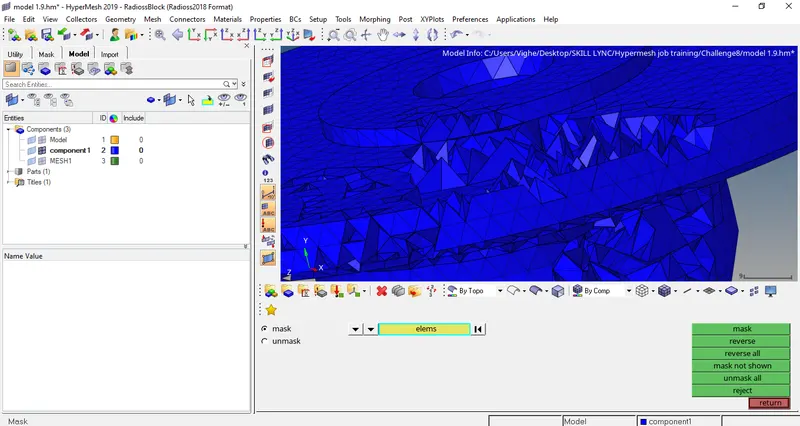
- Now we check that how many elements have failed 3D mesh quality criteria (Tools>Check elems>3D>tet collapse).
- We manually try to increase the shortest distance between the common node and vertex node. Even after trying this there some failed elements we have remesh them. First we have set the tetramesh parameters (3D>tetramesh>tetramesh parameters).
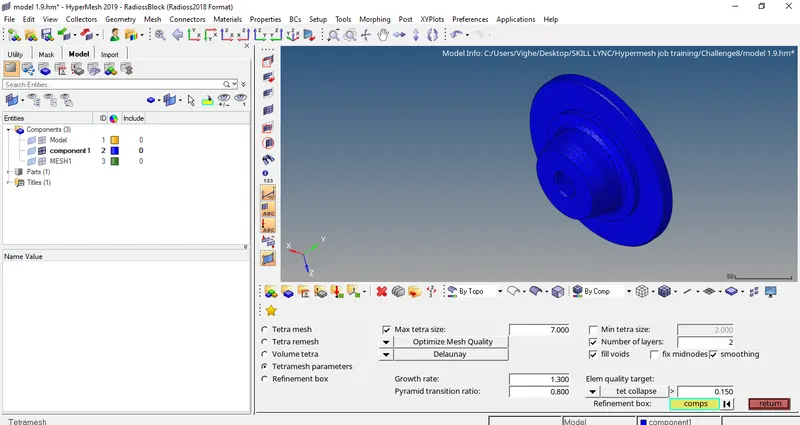
- After setting the parameters we have to remesh the mesh (Tools>tetramesh>tetra remesh).
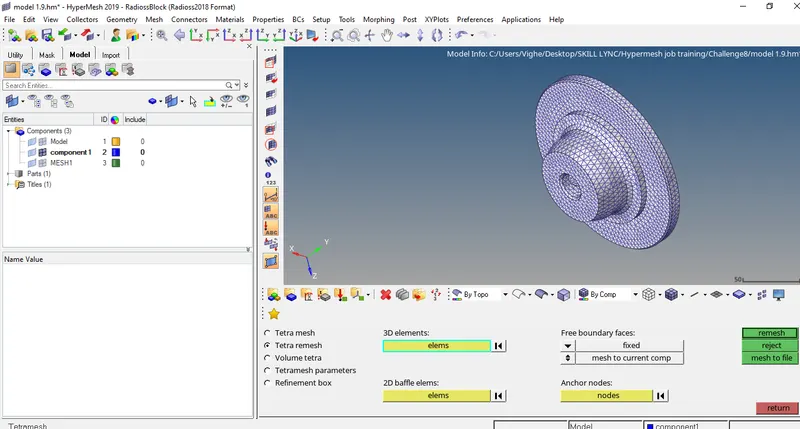
- After remeshing we have to again check for the tet collapse (Tools>Check elems>tet collapse).
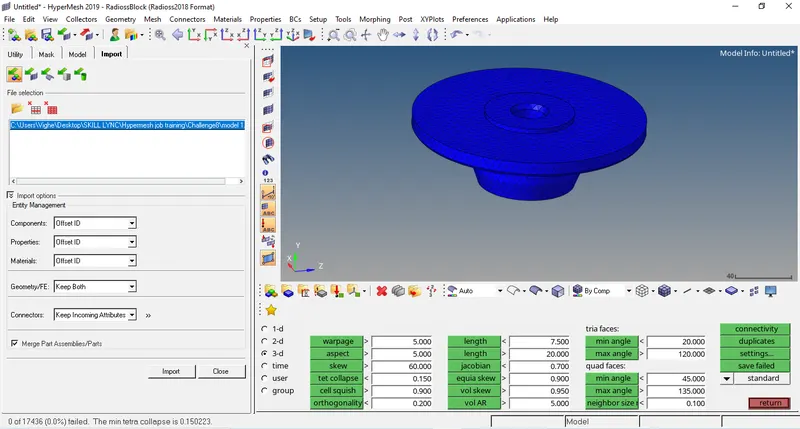
- Now we have to check whether there is some connectivity issue in the mesh (Tools>edges>find edges) and also check for equivalence (Tools>edges>equivalance).
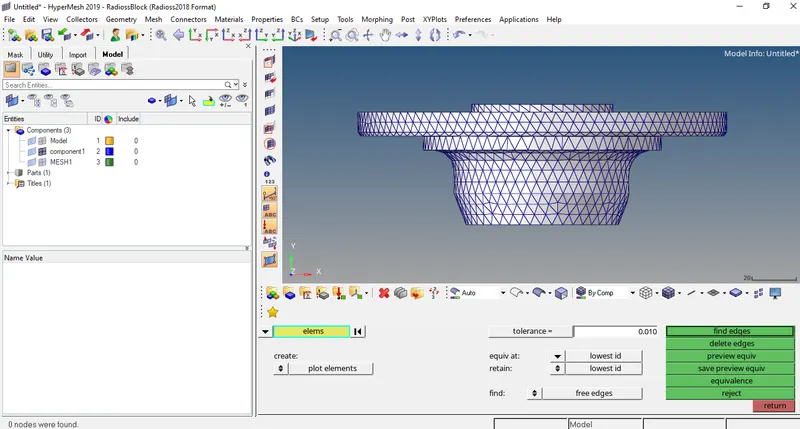
- Now we have to delete the 2D mesh using delete option (Delete>by config>trias)
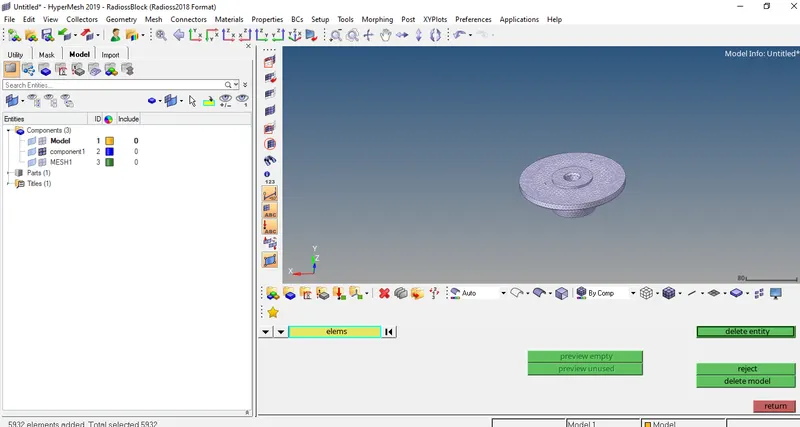
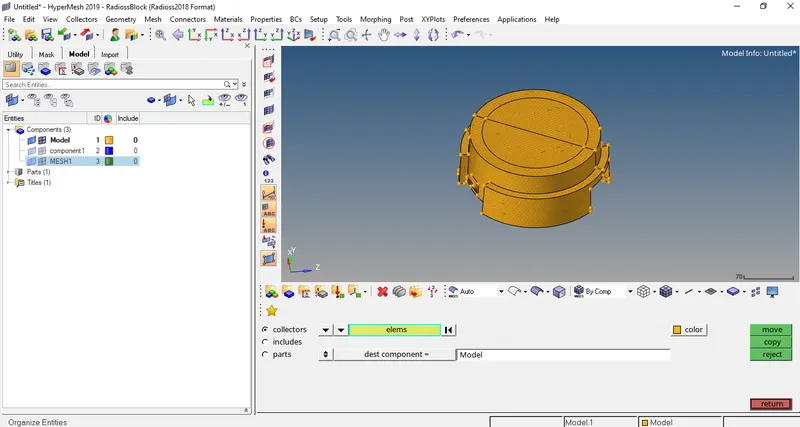
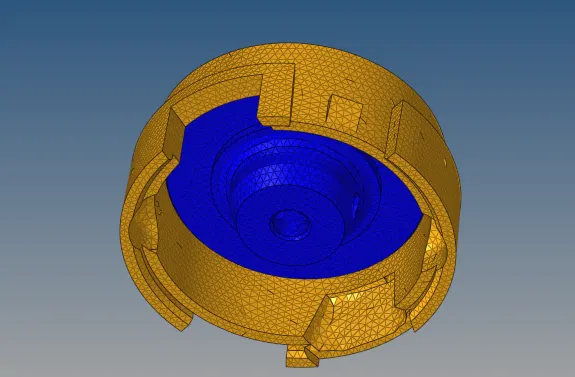
- Now we have to put mesh1 in model using organize option (Tools>Organize>collectors).
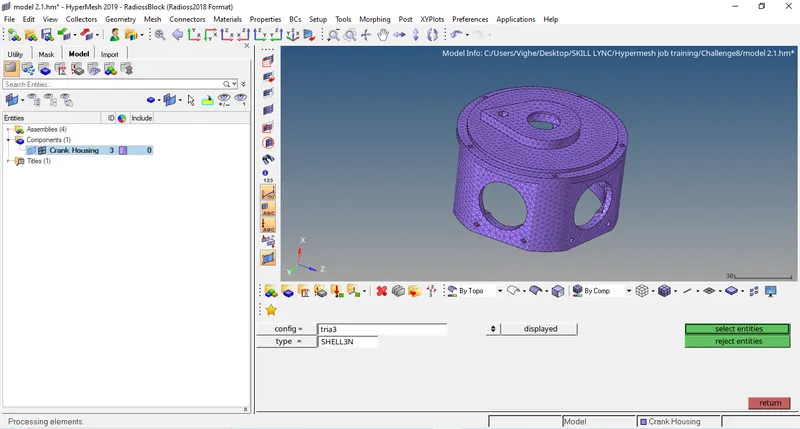
MODEL2:-
PROCEDURE:-
- First the model which is in .igs format is imported using import geometry option in tab bar in Hypermesh.
- We get rid of surface fillets using defeature option (Geom>Defeature>surfs fillets) also we have to do geometrical cleanup using quick edits options like add/replace points, toggle edge, split surfs etc (Geom>quick edits).
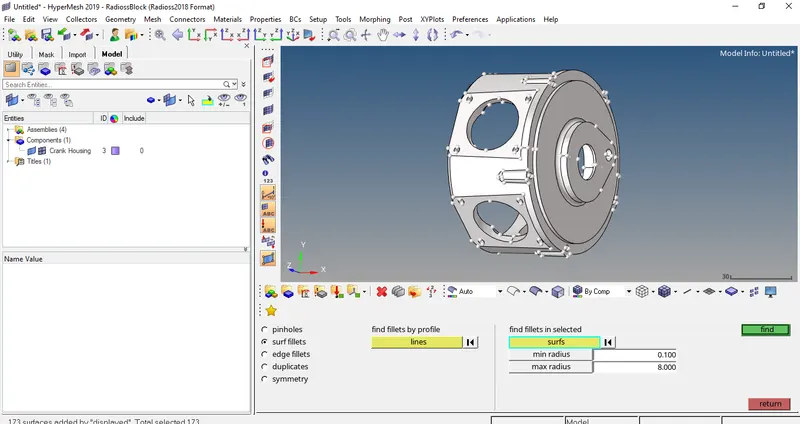
- The meshing of the model with target element= 3 mm and mesh type = trias is done (2D>automesh).
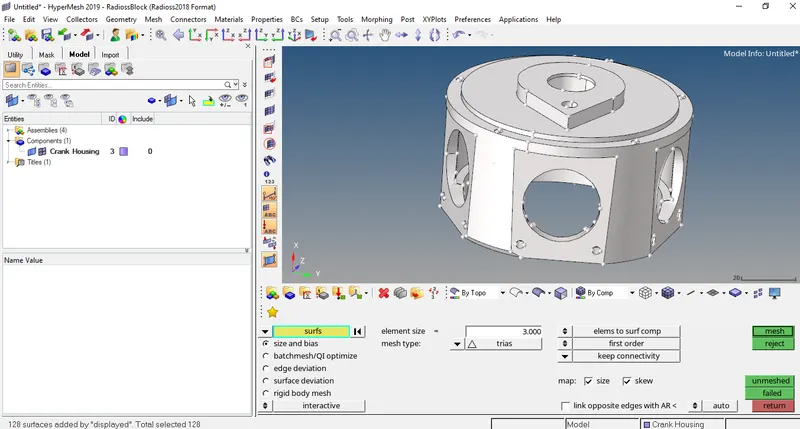
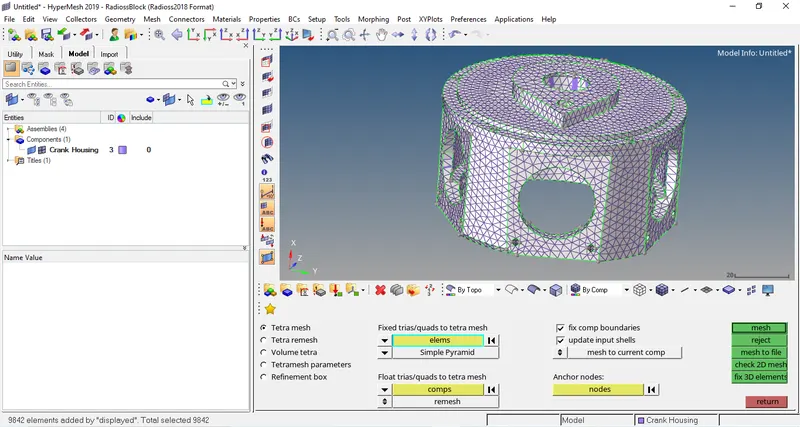
- Now the 2D mesh are of required quality we can do 3D tetra mesh. Here we convert 2D mesh to 3D mesh. Go to (3D>tetramesh>tetra mesh).
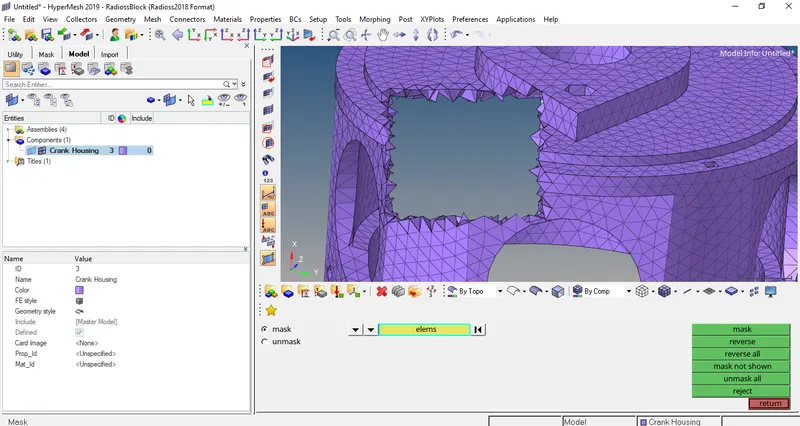
- Lets mask the elements to see whether 3D tetra elements are created or not (Tools>Mask).
- Now we check that how many elements have failed 3D mesh quality criteria (Tools>Check elems>3D>tet collapse).
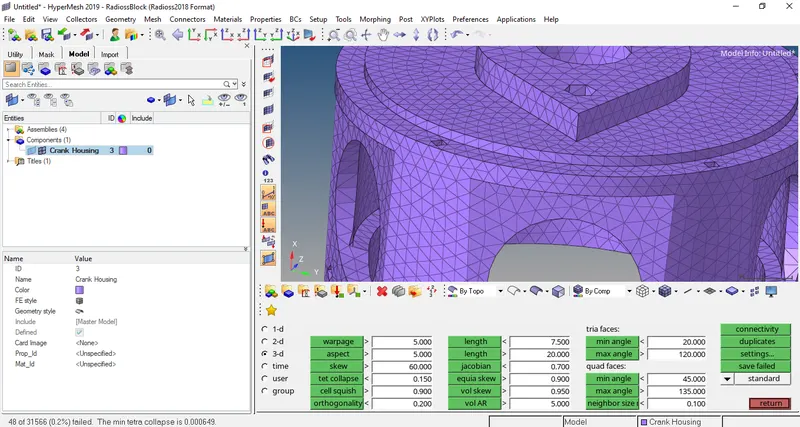
- We manually try to increase the shortest distance between the common node and vertex node. Even after trying this there some failed elements we have remesh them. First we have set the tetramesh parameters (3D>tetramesh>tetramesh parameters).
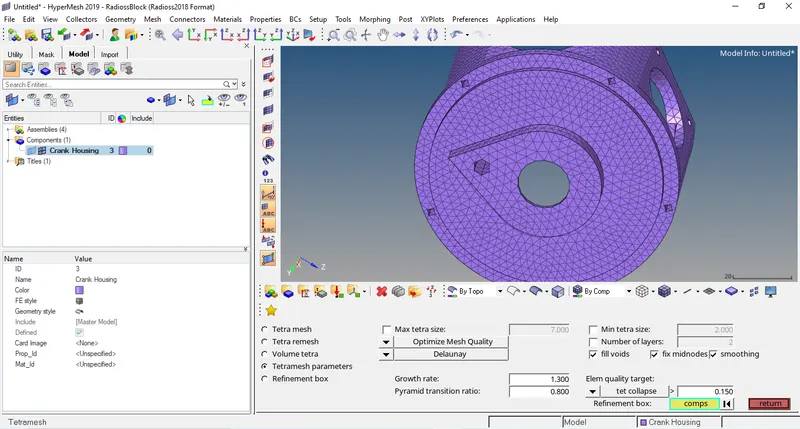
- After setting the parameters we have to remesh the mesh (Tools>tetramesh>tetra remesh).
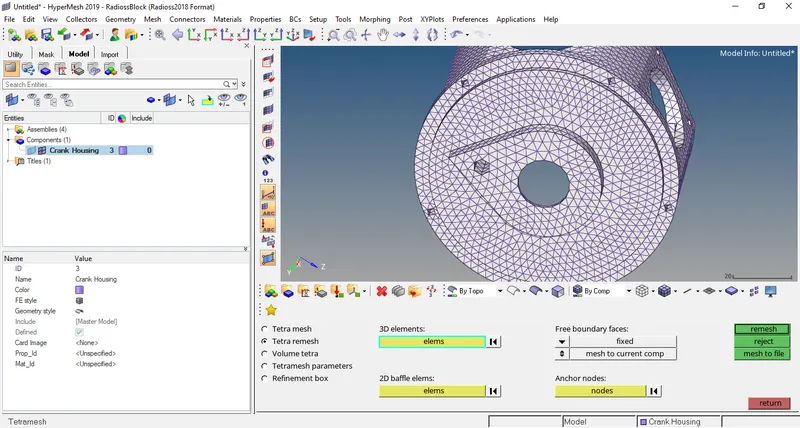
- After remeshing we have to again check for the tet collapse (Tools>Check elems>tet collapse).
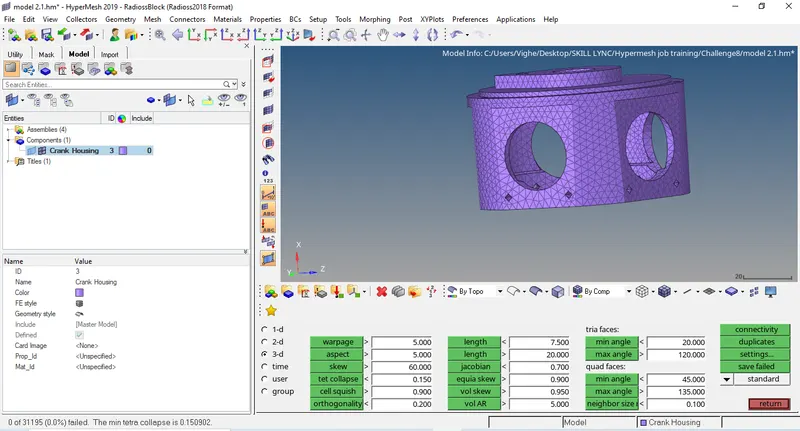
- Now we have to check whether there is some connectivity issue in the mesh (Tools>edges>find edges) and also check for equivalence (Tools>edges>equivalance).
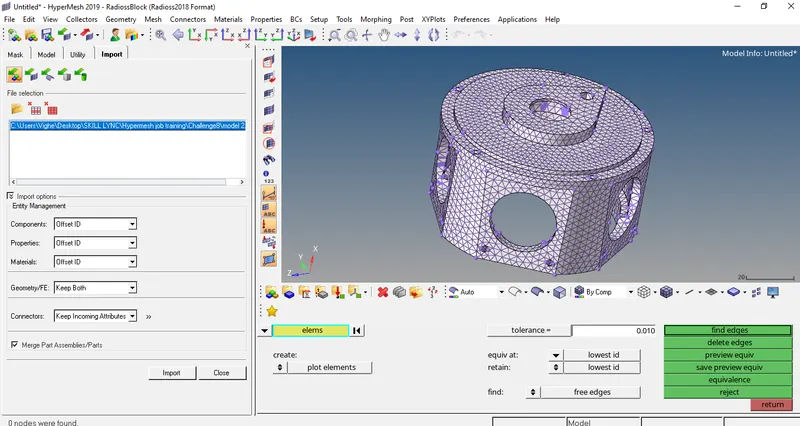
- Now we have to delete the 2D mesh using delete option (Delete>by config>trias)
MODEL3:-
PROCEDURE:-
- First the model is imported using import model option in tab bar in Hypermesh.
COMPONENT1
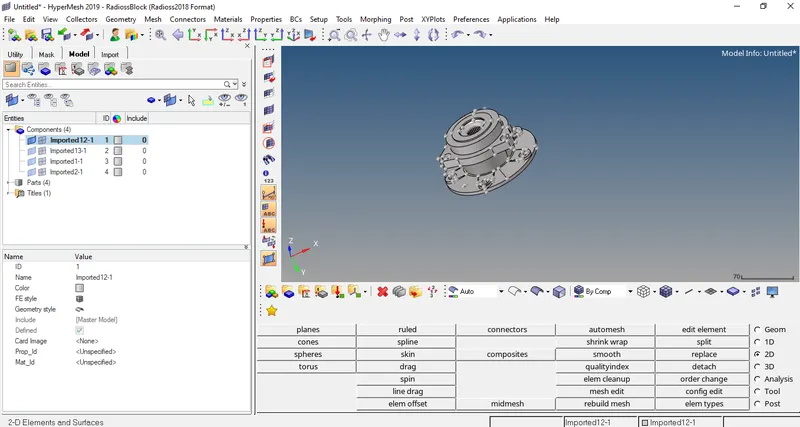
- We get rid of surface fillets using defeature option (Geom>Defeature>surfs fillets) also we have to do geometrical cleanup using quick edits options like add/replace points, toggle edge, split surfs etc (Geom>quick edits).
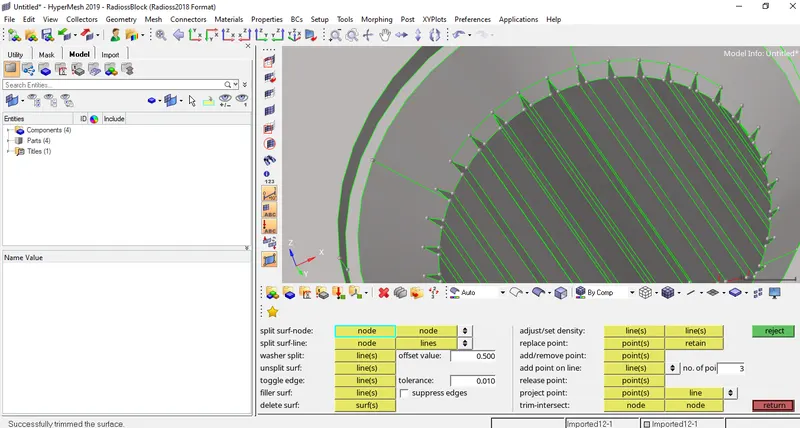
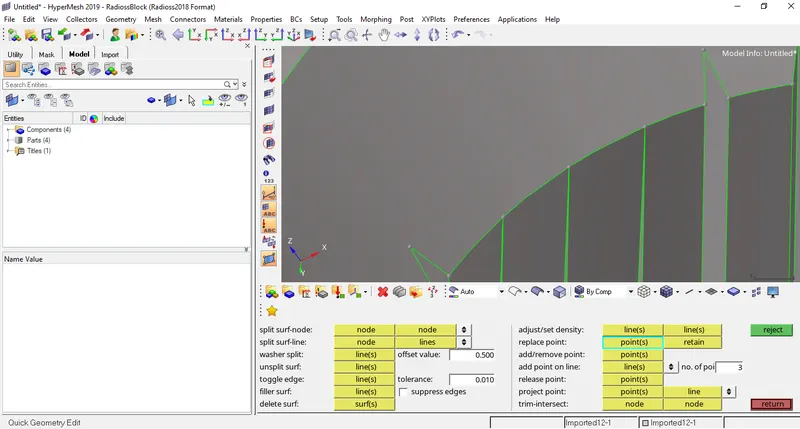
- The meshing of the model with target element= 6 mm and mesh type = trias is done (2D>automesh).
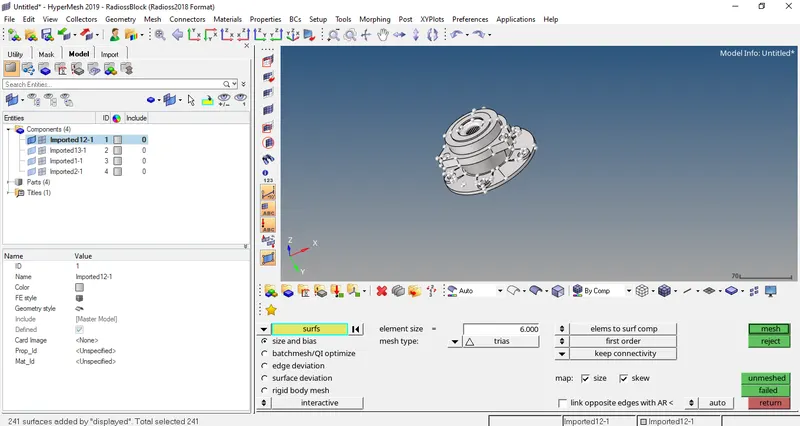
- Now the 2D mesh are of required quality we can do 3D tetra mesh. Here we convert 2D mesh to 3D mesh. Go to (3D>tetramesh>tetra mesh).
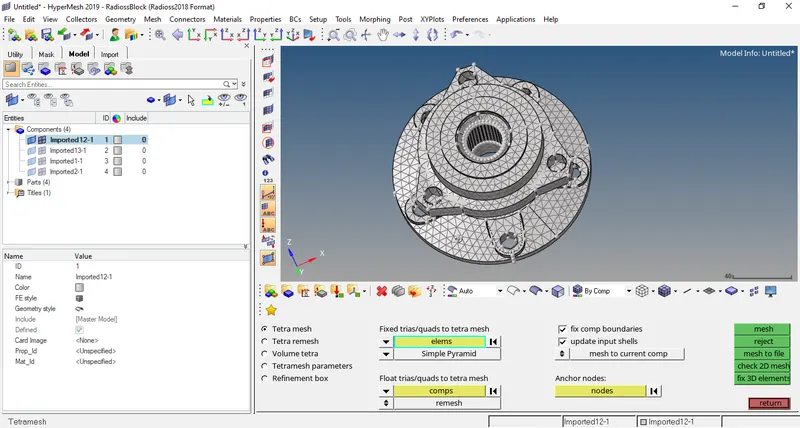
- Lets mask the elements to see whether 3D tetra elements are created or not (Tools>Mask).
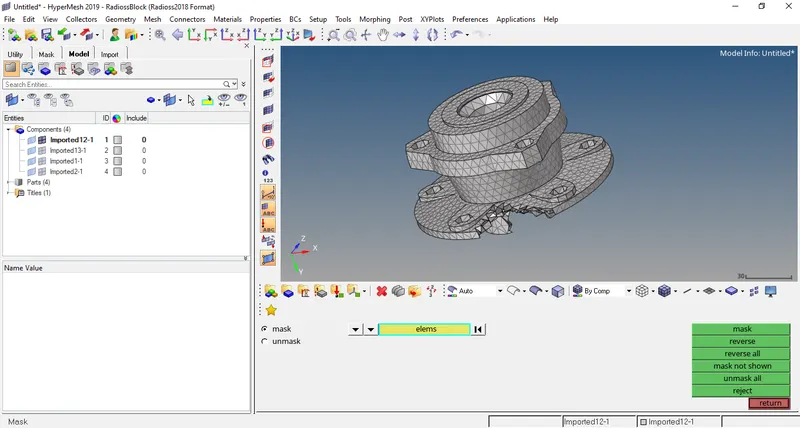
- Now we check that how many elements have failed 3D mesh quality criteria (Tools>Check elems>3D>tet collapse).
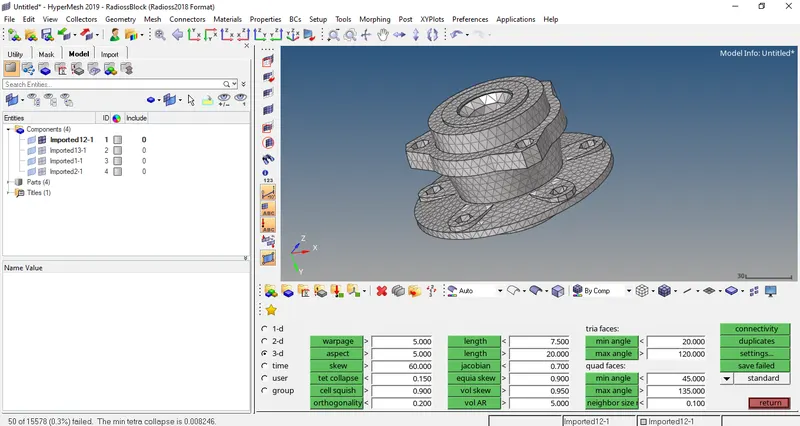
- We manually try to increase the shortest distance between the common node and vertex node. Even after trying this there some failed elements we have remesh them. First we have set the tetramesh parameters (3D>tetramesh>tetramesh parameters). After setting the parameters we have to remesh the mesh (Tools>tetramesh>tetra remesh).
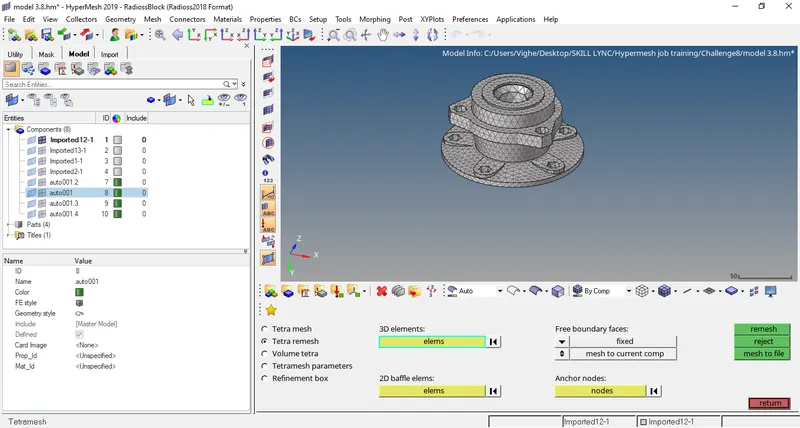
- After remeshing we have to again check for the tet collapse (Tools>Check elems>tet collapse).
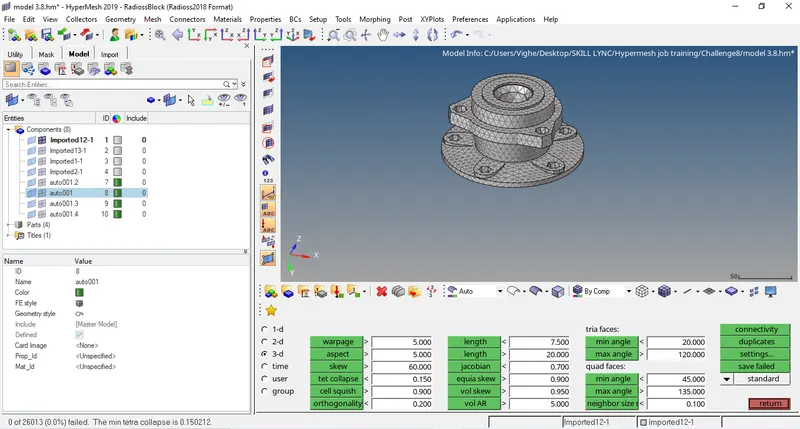
- Now we have to check whether there is some connectivity issue in the mesh (Tools>edges>find edges) and also check for equivalence (Tools>edges>equivalance).
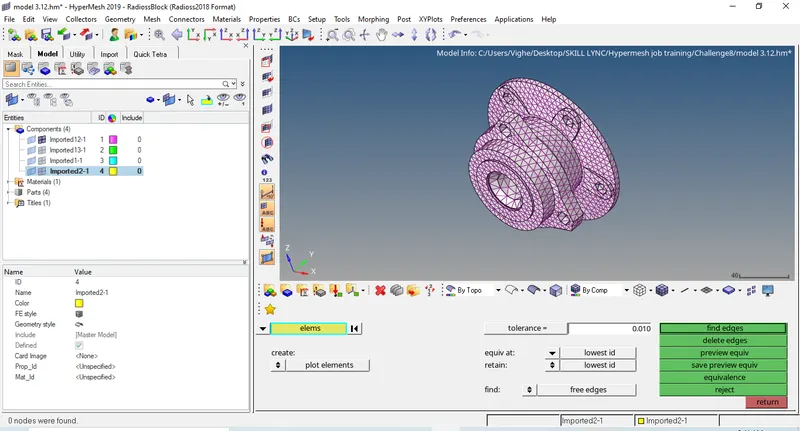
- After this we have to delete the 2D mesh using delete option (Delete>by config>trias)
COMPONENT2
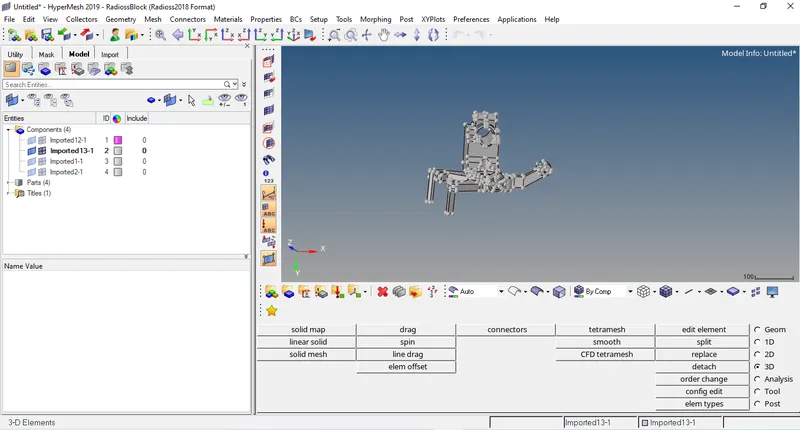
- We get rid of surface fillets using defeature option (Geom>Defeature>surfs fillets) also we have to do geometrical cleanup using quick edits options like add/replace points, toggle edge, split surfs etc (Geom>quick edits).
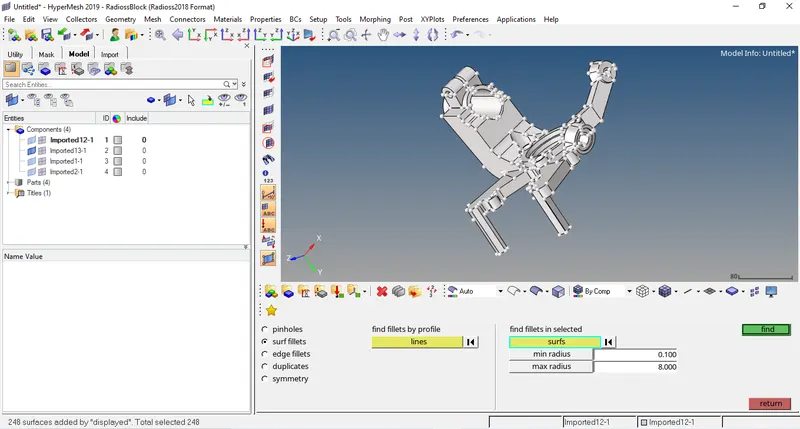
- The meshing of the model with target element= 6 mm and mesh type = trias is done (2D>automesh).
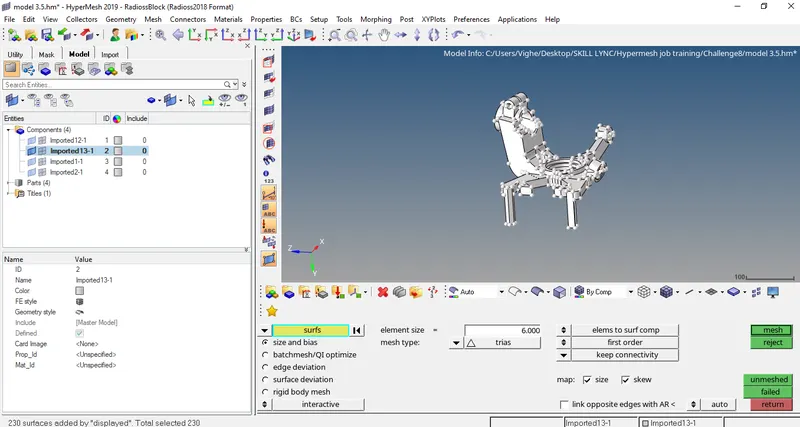
- Now the 2D mesh are of required quality we can do 3D tetra mesh. Here we convert 2D mesh to 3D mesh. Go to (3D>tetramesh>tetra mesh).
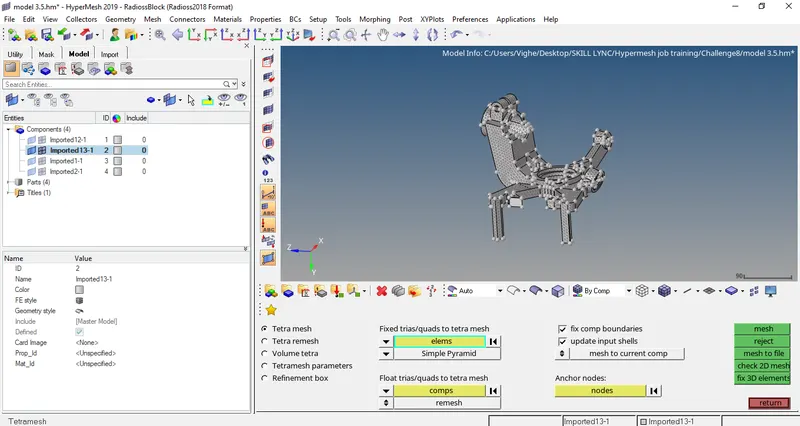
- Now we check that how many elements have failed 3D mesh quality criteria (Tools>Check elems>3D>tet collapse).
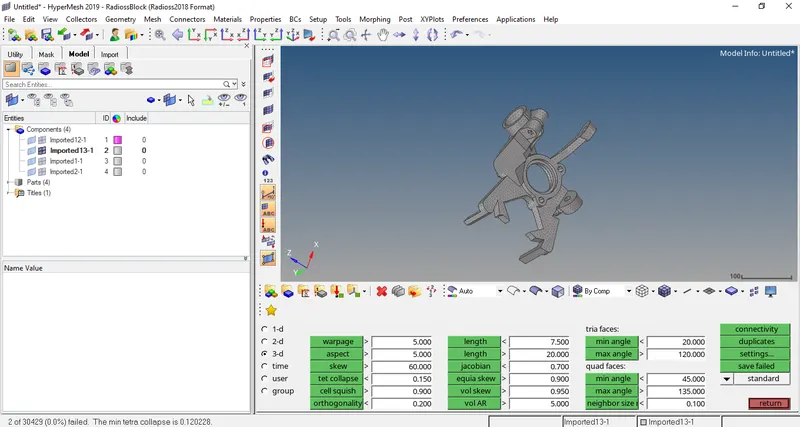
- We manually try to increase the shortest distance between the common node and vertex node. Even after trying this there some failed elements we have remesh them. First we have set the tetramesh parameters (3D>tetramesh>tetramesh parameters). After setting the parameters we have to remesh the mesh (Tools>tetramesh>tetra remesh).
- After remeshing we have to again check for the tet collapse (Tools>Check elems>tet collapse).
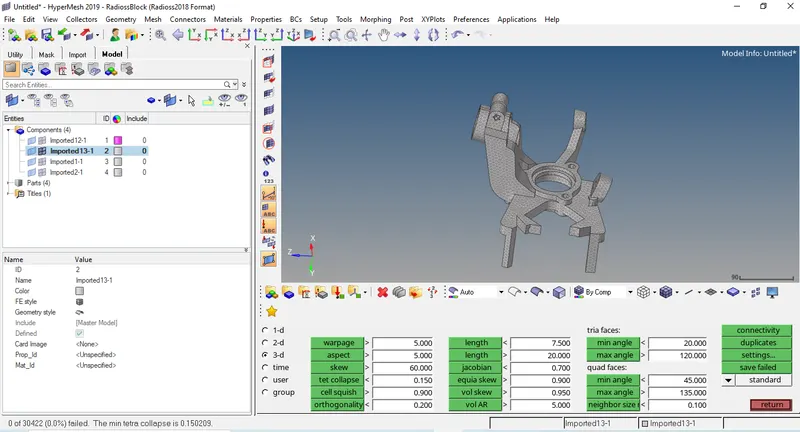
- Now we have to check whether there is some connectivity issue in the mesh (Tools>edges>find edges) and also check for equivalence (Tools>edges>equivalance).
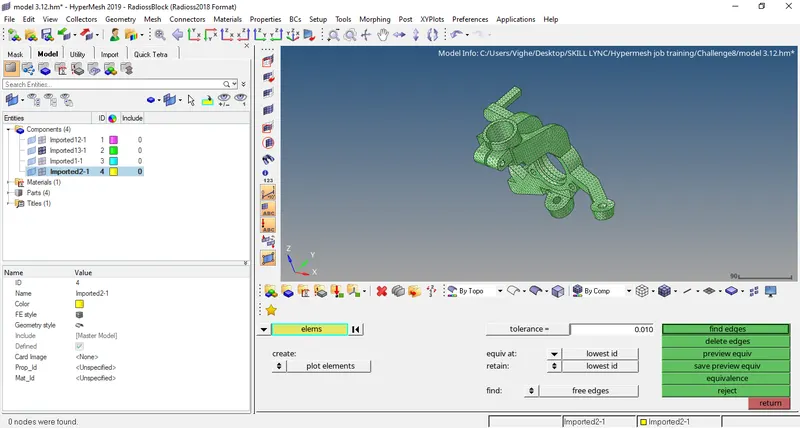
- After this we have to delete the 2D mesh using delete option (Delete>by config>trias).
COMPONENT3
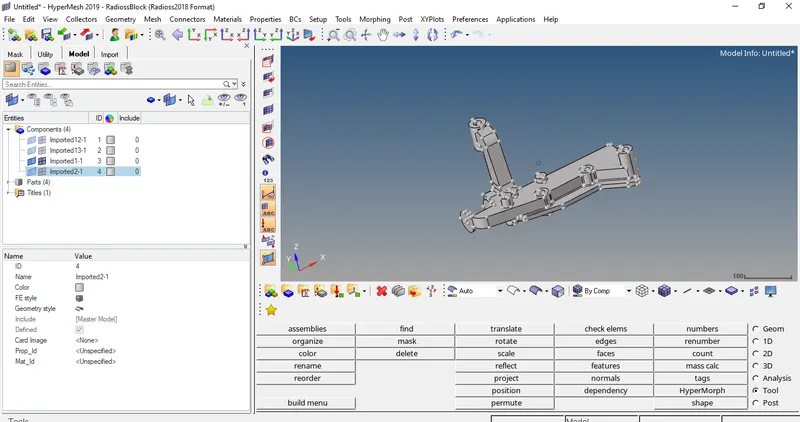
- We get rid of surface fillets using defeature option (Geom>Defeature>surfs fillets) also we have to do geometrical cleanup using quick edits options like add/replace points, toggle edge, split surfs etc (Geom>quick edits).
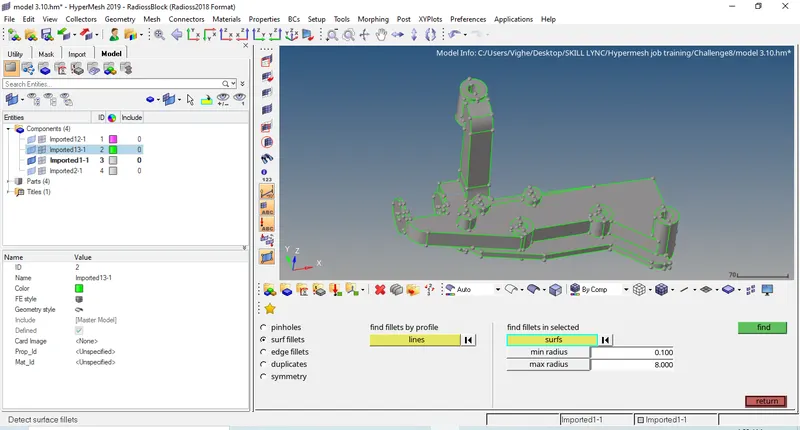
- The meshing of the model with target element= 6 mm and mesh type = trias is done (2D>automesh).
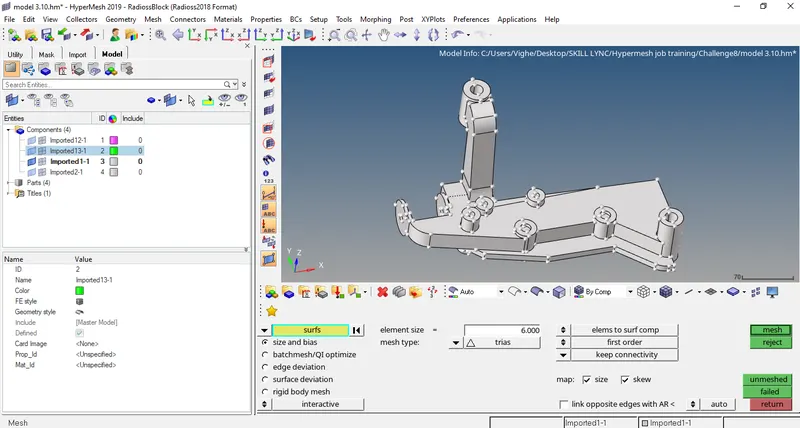
- Now the 2D mesh are of required quality we can do 3D tetra mesh. Here we convert 2D mesh to 3D mesh. Go to (3D>tetramesh>tetra mesh).
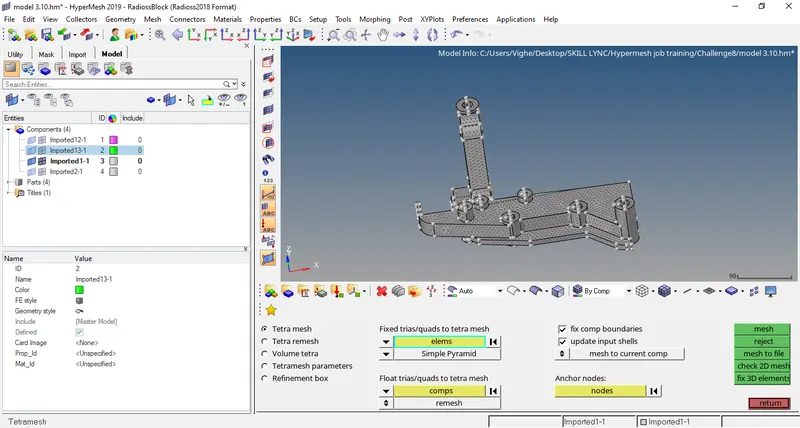
- We tried to create 3D tetra mesh from the above method but we are unable to create it.
- Now we are going to do quick tetra mesh option in Utility to create tetra mesh (Utility>Geom/Mesh>Quick tetra mesh). In component option select the component 3 and put the required values according to quality criteria.
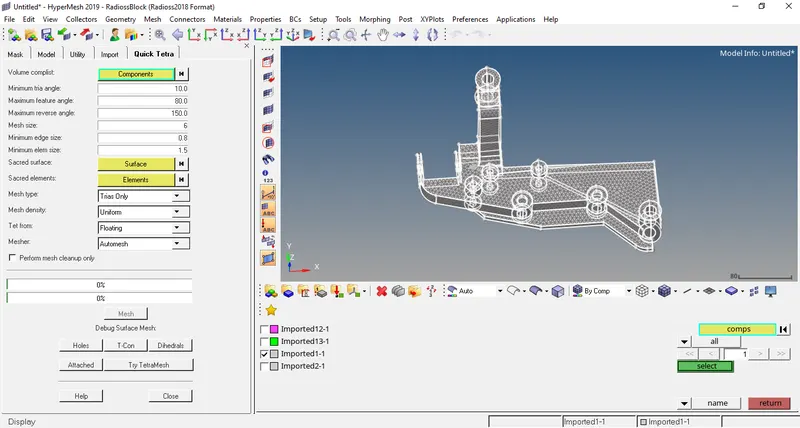
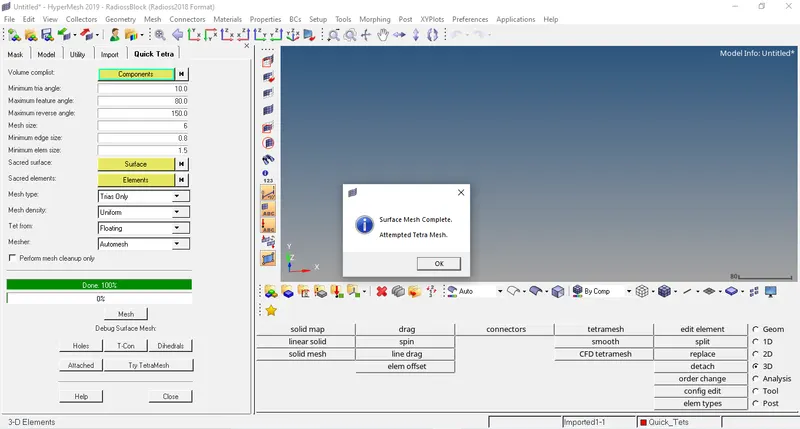
- Lets mask the elements to see whether 3D tetra elements are created or not (Tools>Mask).
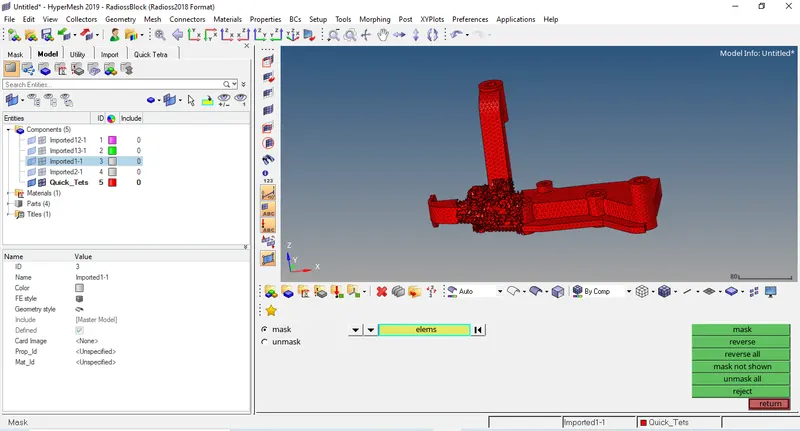
- Now we check that how many elements have failed 3D mesh quality criteria (Tools>Check elems>3D>tet collapse).
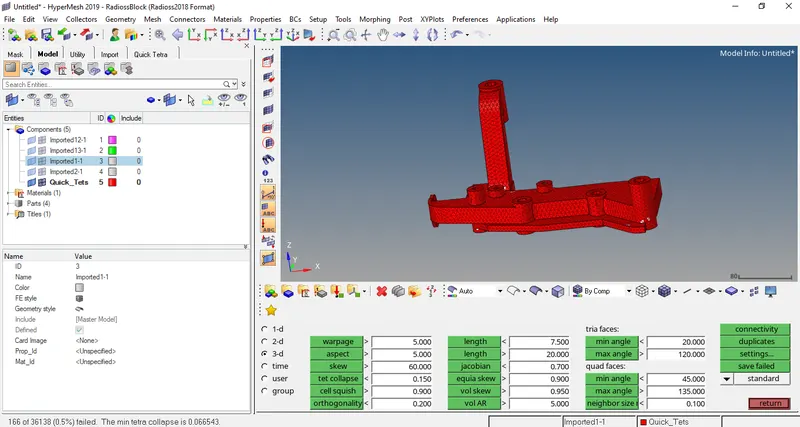
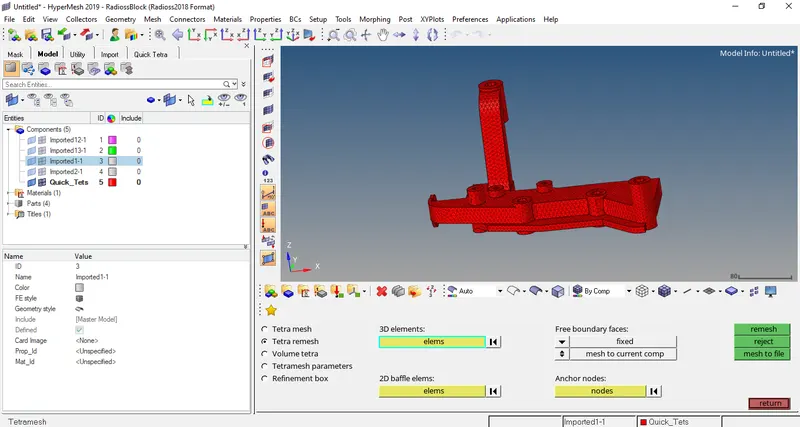
- We manually try to increase the shortest distance between the common node and vertex node. Even after trying this there some failed elements we have remesh them. First we have set the tetramesh parameters (3D>tetramesh>tetramesh parameters). After setting the parameters we have to remesh the mesh (Tools>tetramesh>tetra remesh).
- After remeshing we have to again check for the tet collapse (Tools>Check elems>tet collapse).
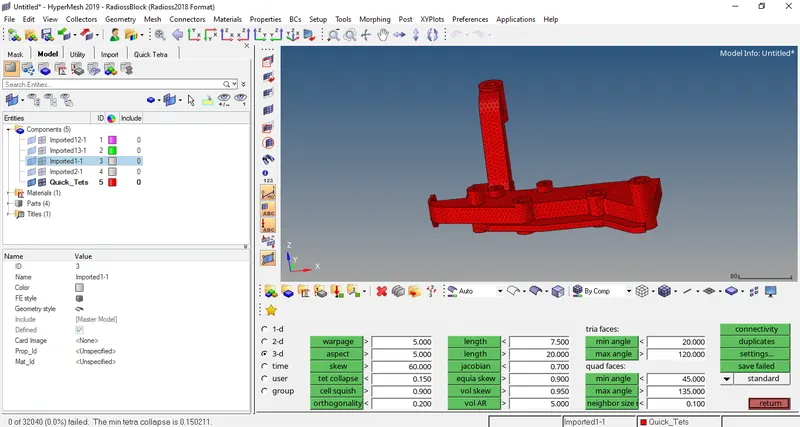
- Now we have to check whether there is some connectivity issue in the mesh (Tools>edges>find edges) and also check for equivalence (Tools>edges>equivalance).
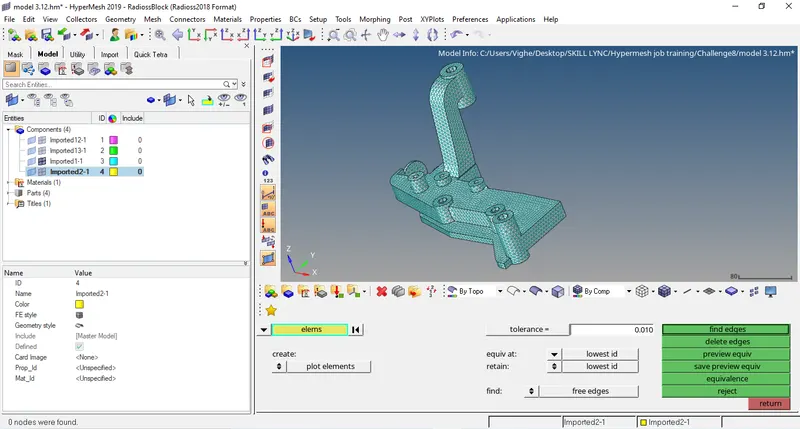
- Now we have to delete the 2D mesh using delete option (Delete>by config>trias).
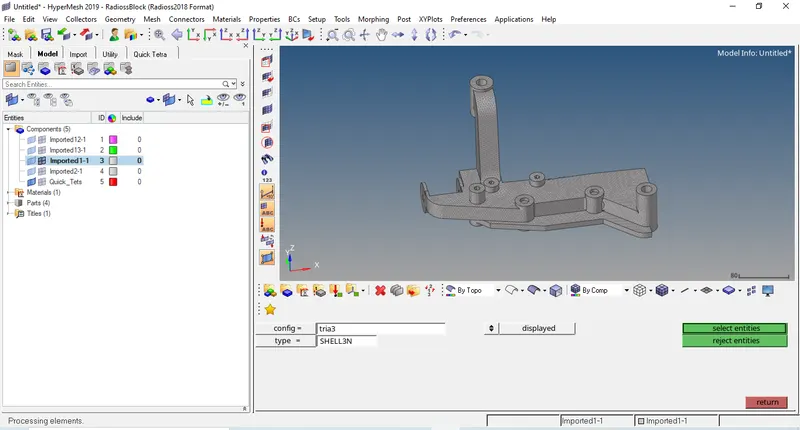
COMPONENT4
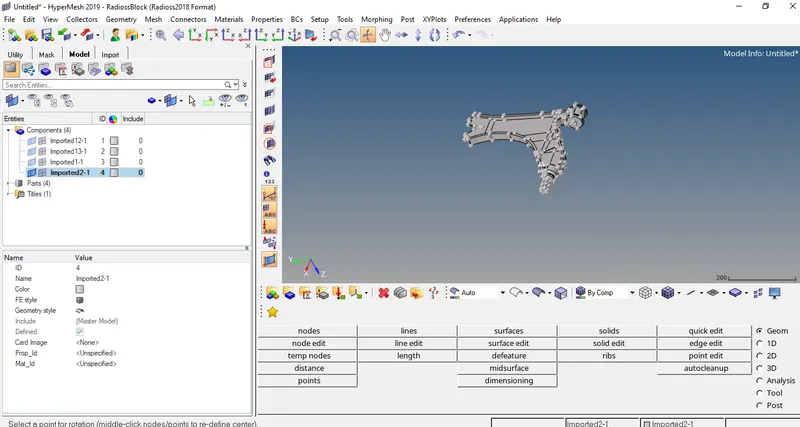
- We get rid of surface fillets using defeature option (Geom>Defeature>surfs fillets) also we have to do geometrical cleanup using quick edits options like add/replace points, toggle edge, split surfs etc (Geom>quick edits).
- The meshing of the model with target element= 6 mm and mesh type = trias is done (2D>automesh).
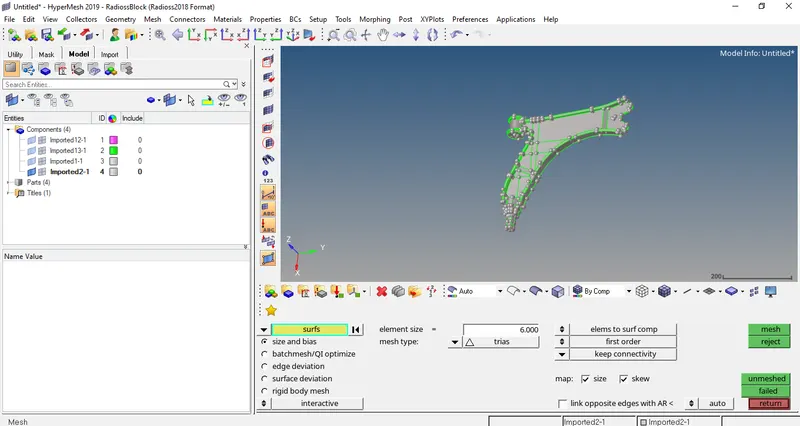
- Now the 2D mesh are of required quality we can do 3D tetra mesh. Here we convert 2D mesh to 3D mesh. Go to (3D>tetramesh>tetra mesh).
- We tried to create 3D tetra mesh from the above method but we are unable to create it.
- Now we are going to do quick tetra mesh option in Utility to create tetra mesh (Utility>Geom/Mesh>Quick tetra mesh). In component option select the component 3 and put the required values according to quality criteria.
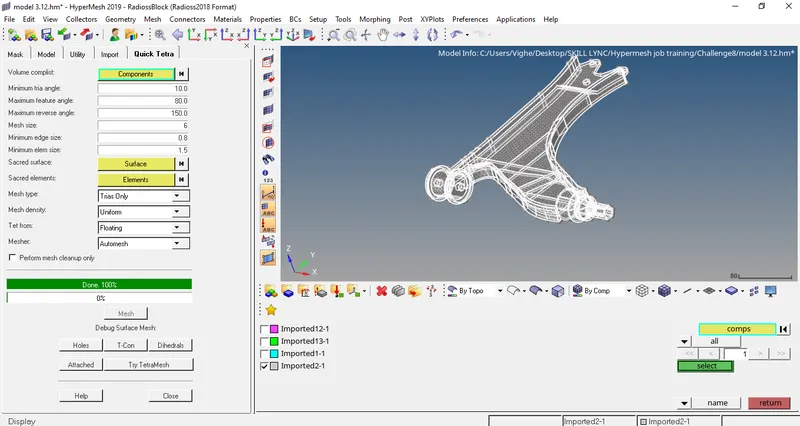
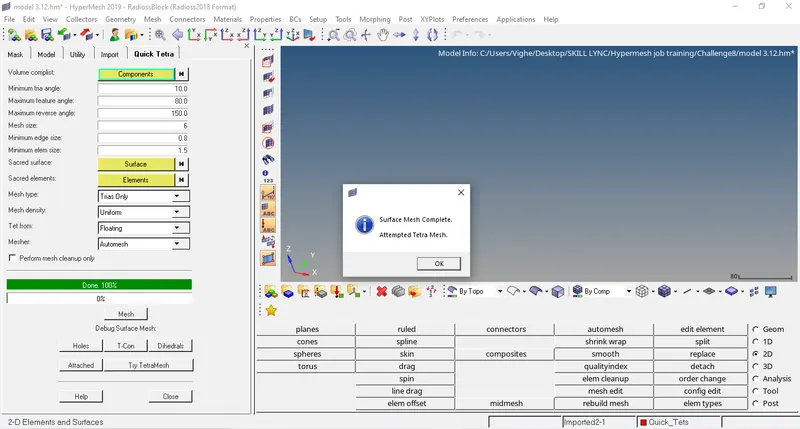
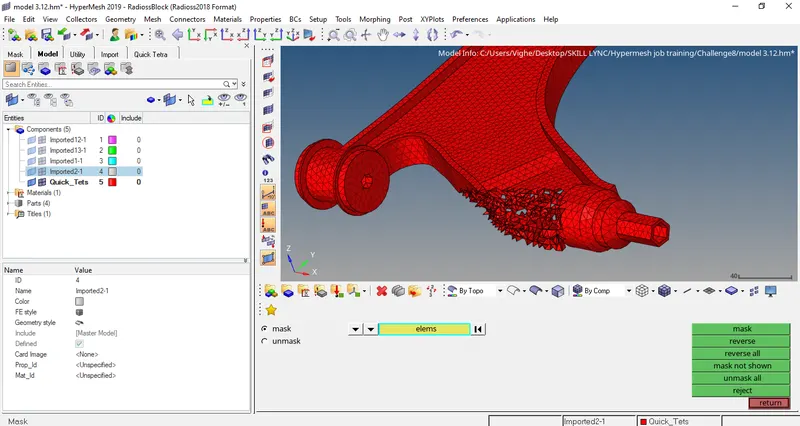
- Lets mask the elements to see whether 3D tetra elements are created or not (Tools>Mask).
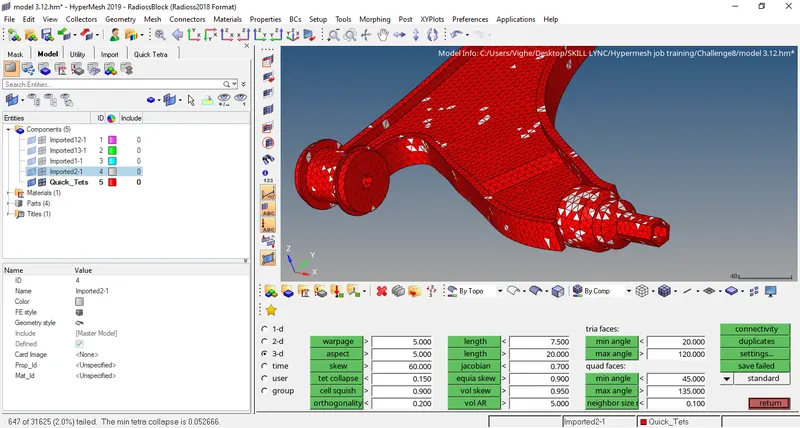
- Now we check that how many elements have failed 3D mesh quality criteria (Tools>Check elems>3D>tet collapse).
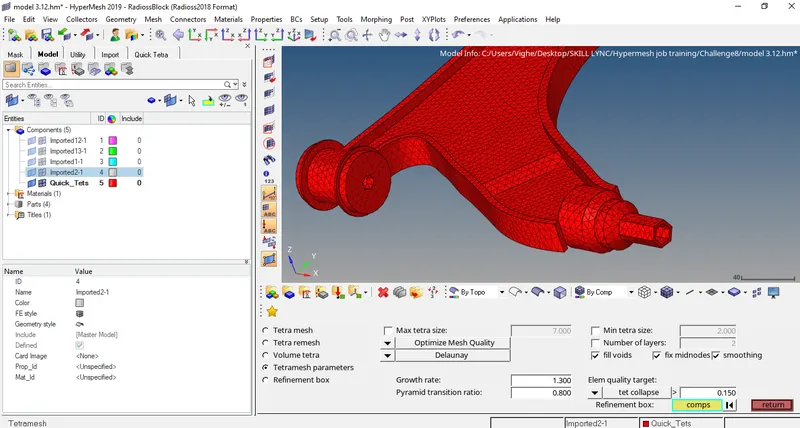
- We manually try to increase the shortest distance between the common node and vertex node. Even after trying this there some failed elements we have remesh them. First we have set the tetramesh parameters (3D>tetramesh>tetramesh parameters). After setting the parameters we have to remesh the mesh (Tools>tetramesh>tetra remesh).
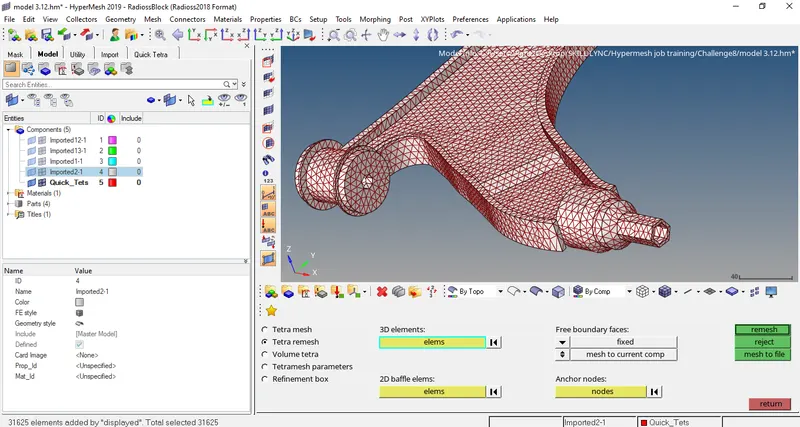
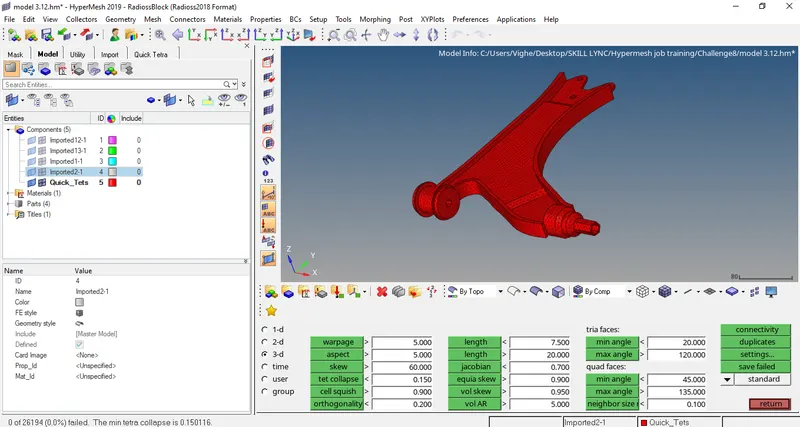
- After remeshing we have to again check for the tet collapse (Tools>Check elems>tet collapse).
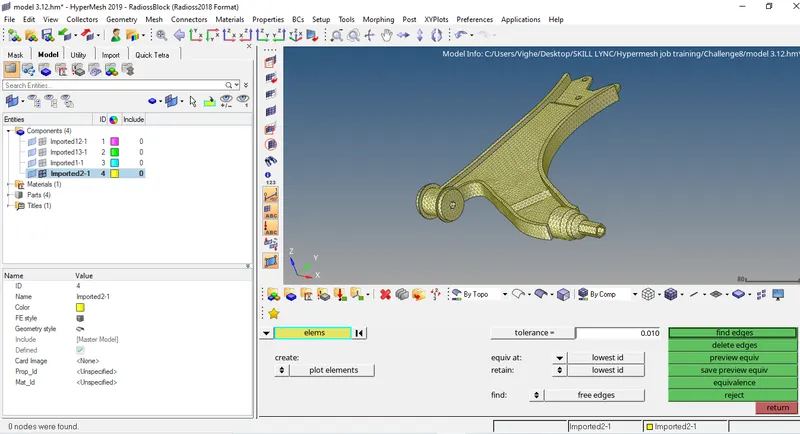
- Now we have to check whether there is some connectivity issue in the mesh (Tools>edges>find edges) and also check for equivalence (Tools>edges>equivalance).
- After this we have to delete the 2D mesh using delete option (Delete>by config>trias).
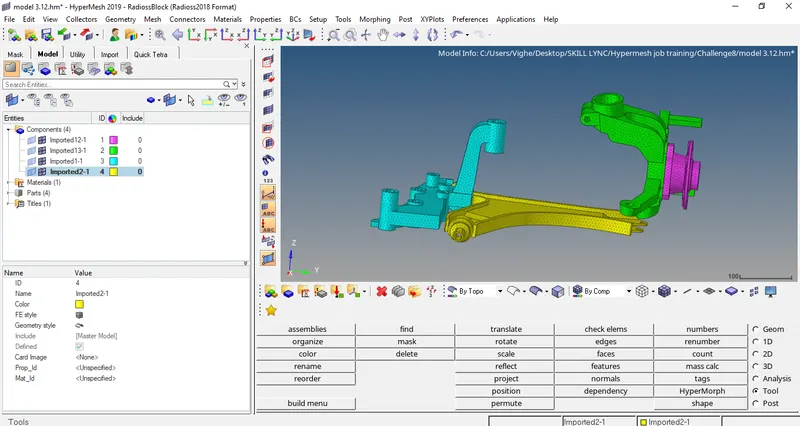
CONCLUSION: The 3D tetra mesh was created successfully.