Week 8-3D Tetra Meshing Challenge
#10 // Week 8-3D Tetra Meshing Challenge
AIM: To perform 3D tetra meshing for the given components which satisfies the given element quality parameters.
OBJECTIVE:
> To create a tetra mesh for the given component.
- 2D to 3D Conversion for Model 1.
- Quick Tetra Mesh/ Volume Tetra Mesh for Model 2.
- Quick Tetra Mesh/ Volume Tetra Mesh for Model 3.
> To do the solid mesh clean-up.
> Perform the different solid mesh techniques to remove the errors.
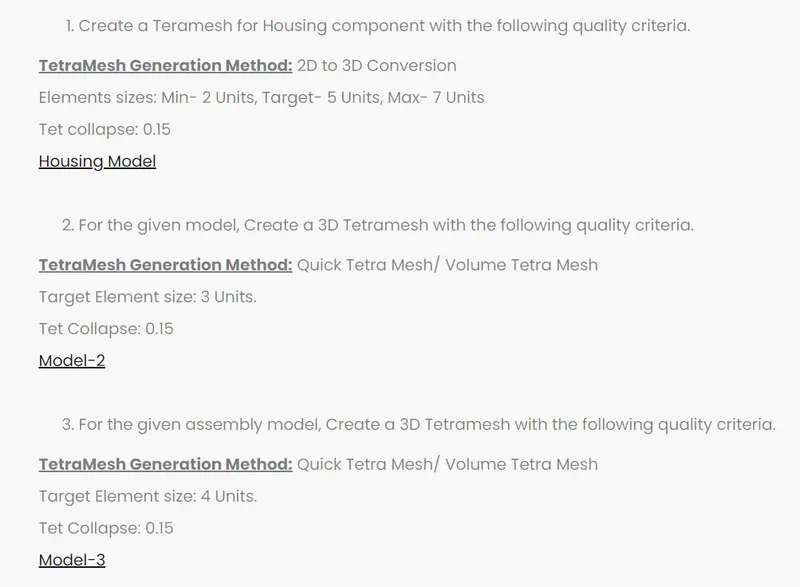
PROCEDURE:
>> Model 1 (Housing):
- Firstly, import the geometry (IGES) file from the System files.
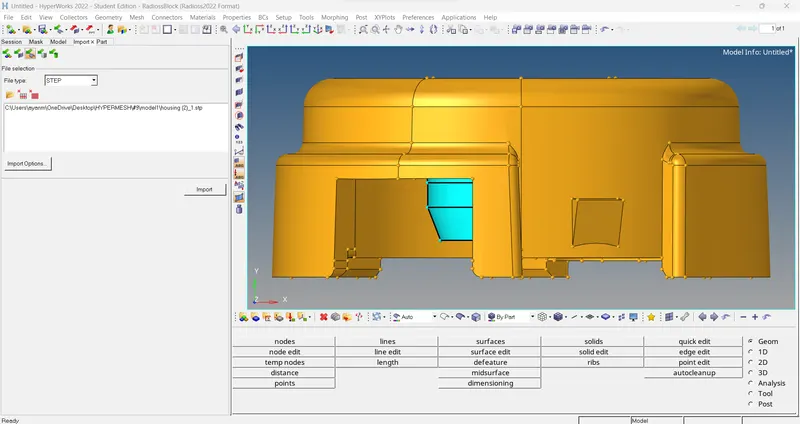
- After importing the model 'Delete' the solid parts of the component.
- Defeature the surface fillets which are having low fillet radius that may result in failure of elements.
- Perform the Geometry clean-up wherever it is required to get rid of failed elements by using quick edit (F11).
- Go to 2D mesh panel > Automesh, select the preferred element size as 4mm.
- Select the 'Tria' elements as we have to generate a tetramesh.
- Generate the mesh with the mentioned criteria.
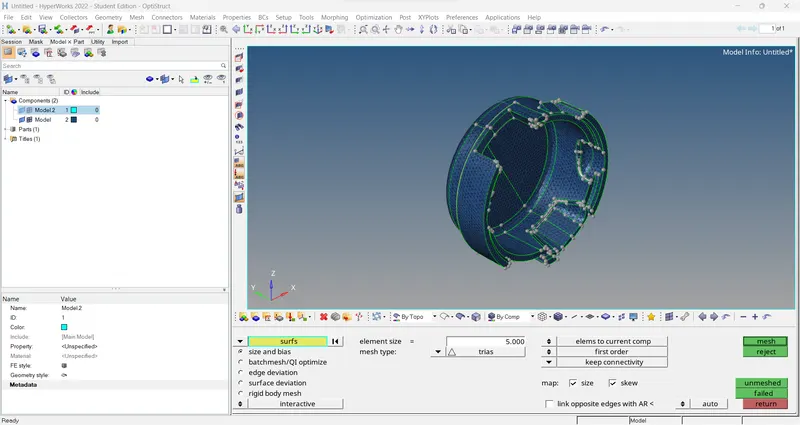
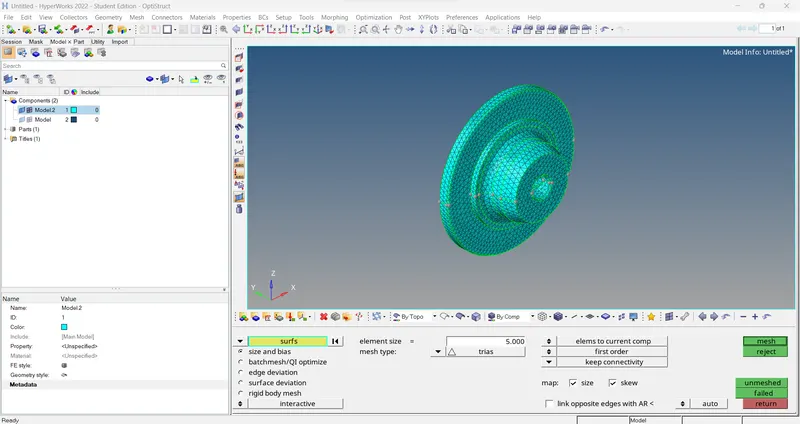
- After meshing check the elements for quality check-up in Tools > Check elements panel > 2D or use element color mode > by element quality.
- Do the quality check-up for the minimum and maximum lengths.
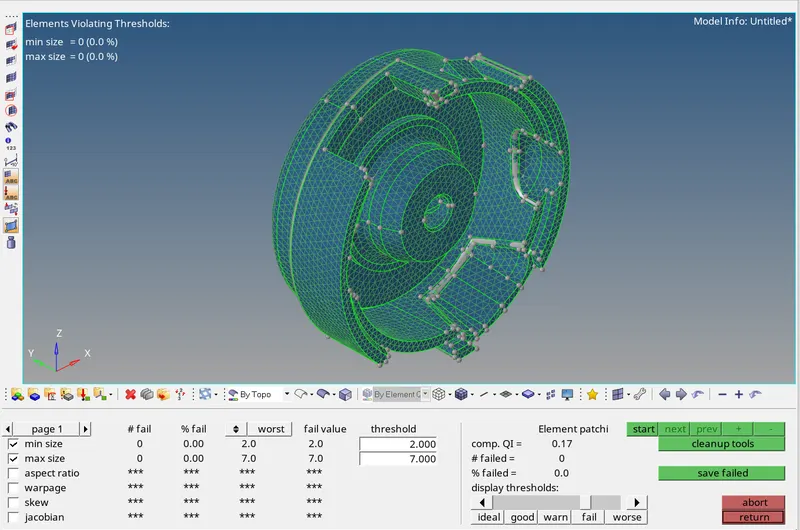
- After quality check-up is done, convert the model from 2D tria elements to 3D tetra elements.
- Then Go to 3D mesh > Tetra mesh and select the elements option that has to be converted from 2D tria to 3D tetra. (First go to Tetramesh parameter & set appropriate tet collapse value)
- Generate the 3D tetramesh of the component.
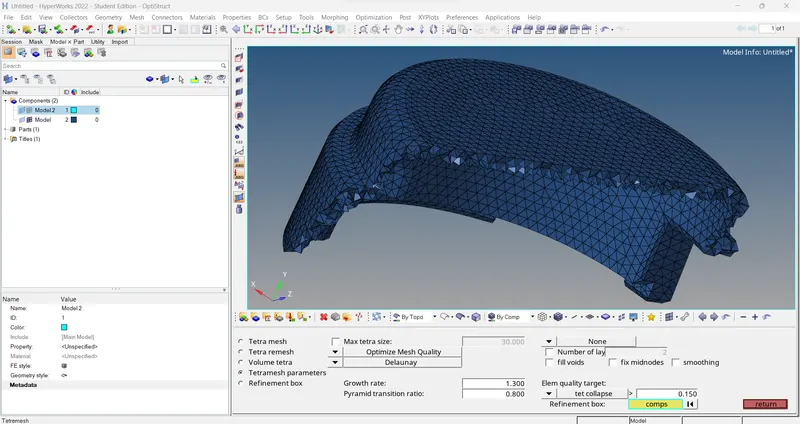
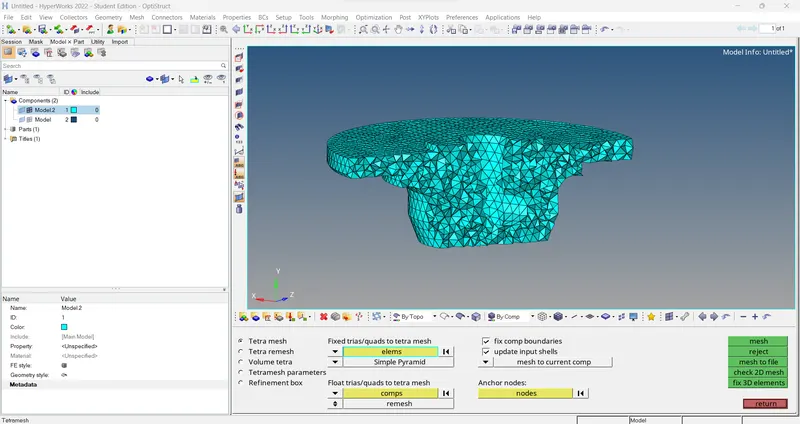
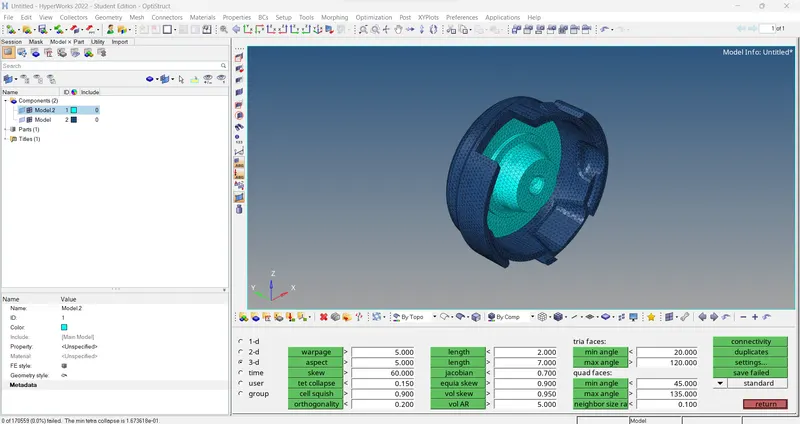
- After that 3D tetra meshing check the elements for quality check-up in Tools > check elements > 3D for Tet collapse.
- Do the quality check for the tet-collapse elements.
- And then for the failed tet-collapse elements we have to do Tetra Remesh by assigning the tetra mesh parameters in the 'Tetramesh' parameters panel.
- By performing Tetra Remesh, we can get rid of the failed tet-collapse elements.
- For tetra-remesh go the 3D > tetramesh > Tetramesh parameters.
- After that assign the max-tetra and min-tetra size by checking the check-box in 'Tetra-mesh parameter' panel.
- Under 'Element quality target' assign the tet-collapse value and tick the check-boxes of fill-voids, fix mid-nodes and smoothing.
/ Note: If after remesh still tet-collapse left then go for Tool > Translate (shift + f4) & move nodes a bit to remove tet-collapse manually until zero tet-collapse. /
Result:
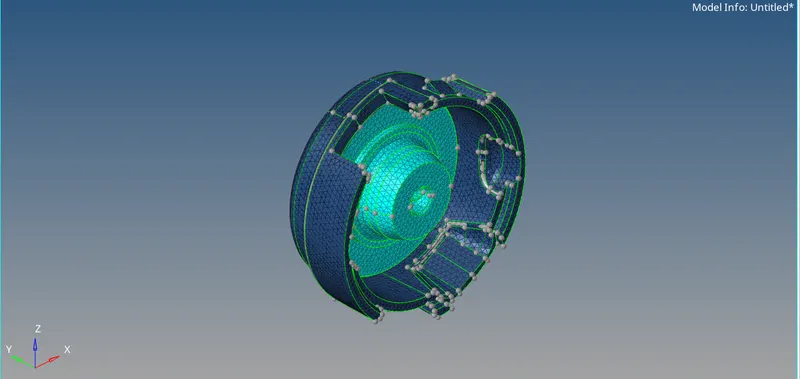
For the given housing component Tetra mesh is generated by converting 2D tria elements to 3D tetra elements, The Final model image is as follows.
Final Model Image:
----------------------------------------------------------------------------------------------------------------------------------------
Model-2:
To create a 3D Tetra mesh by using 'Quick Tetra mesh method for the given component with the mentioned quality criteria.
Procedure:
- Firstly, import the IGES model from the system files.
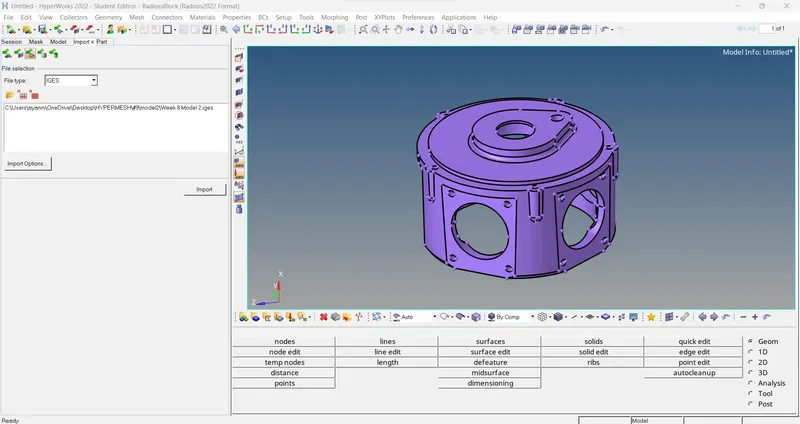
- After importing the model delete the solid parts of the component.
- Defeature the surface fillets which are having low fillet radius which may result in element failures.
- perform the geometry clean-up wherever it is required.
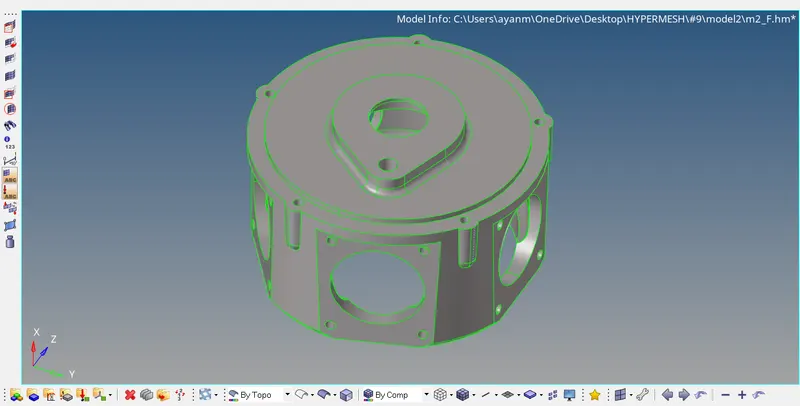
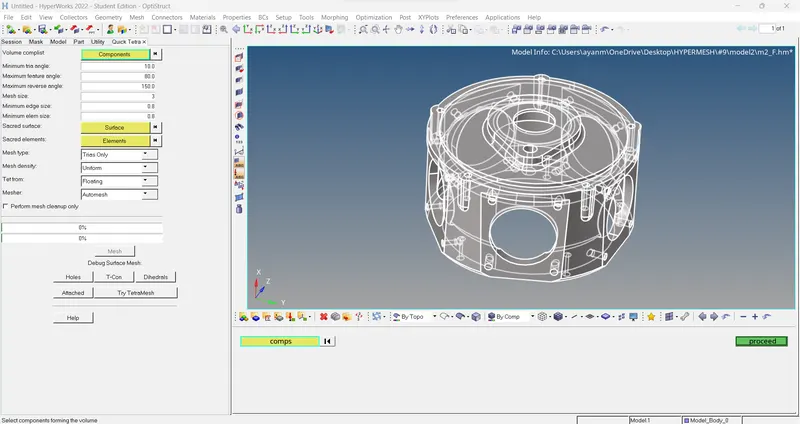
- For meshing the model using the 'Quick Tetra mesh method we have to go to the Utility panel.
- For Utility panel use view option view > Browsers > Hypermesh > utility.
- After that select Geom / Mesh from 'Utility Menu'.
- Then select Quick Tetra mesh as it opens a panel named as 'Quick TetraMesh panel'.
- In that panel select the component to be meshed and specify the mesh size, and change the mesh type to 'Trias only'.
- Click on the 'Mesh' option to generate the tetra mesh.
- After generating the tetramesh we need to check for the Failed tet-collapse elements.
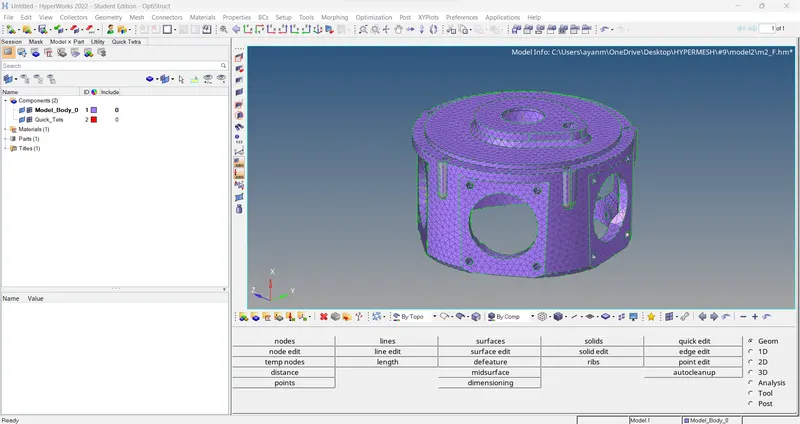
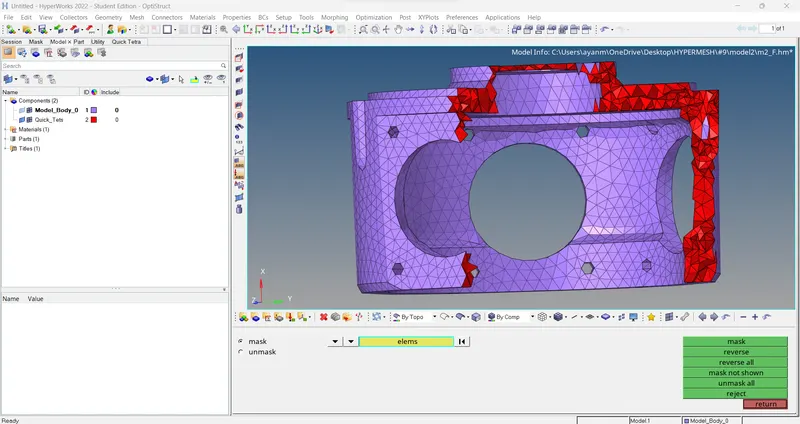
- For checking the failed elements select Tools > check elements > 3D > tet collapse.
- For clearing the Tet-collapse elements we have to try to Ramesh the failed elements.
- If the failed tet-collapse elements still exist we have to follow other method as 'Translate' / 'Distance' option & fix tet-collapse manually.
- To clear tet-collapse select Tools > Translate option(shift + F4). [Also we can use Geom > distance (F4) option]
- Pick a node of the failed element which has minimum height.
- Select other nodes as N1, N2 & N3 for the translation.
- Assign the magnitude for Translating the node.
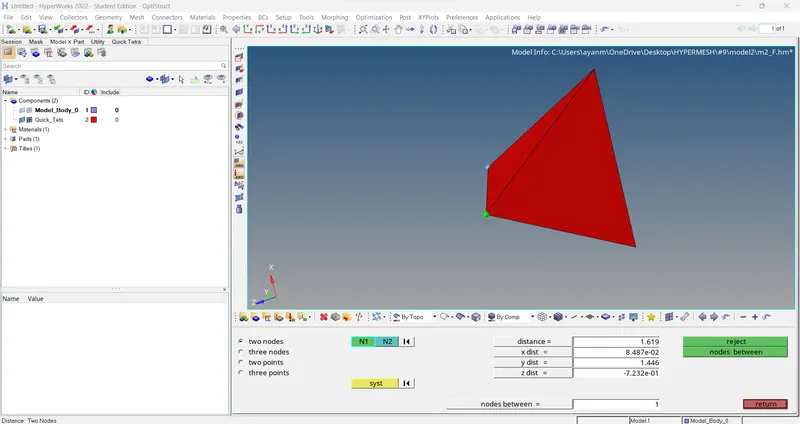
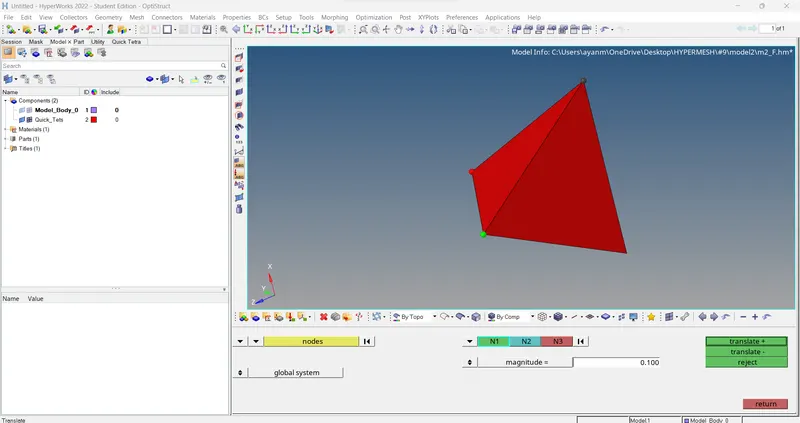
- After correction of the Failed elements check the tet-collapse value in 'Check elements' option.
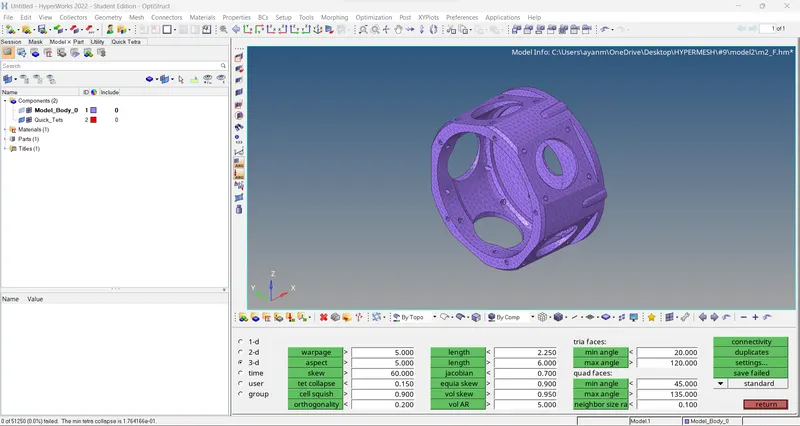
Result:
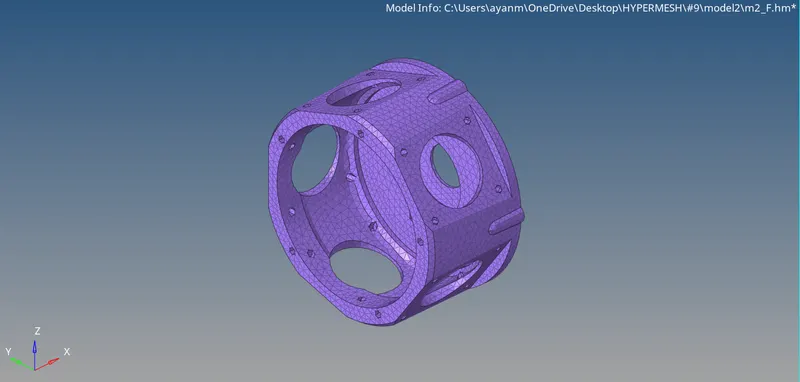
For the given model tetra mesh is generated by using 'Quick Tetra mesh method' with the mentioned criteria, The final model image is as follows.
Final Model Image:
----------------------------------------------------------------------------------------------------------------------------------------
Model-3:
To create a 3D tetra mesh by using 'Volume tetra method' for the given component with mentioned quality criteria.
Procedure:
- Firstly, import the model from the system files.
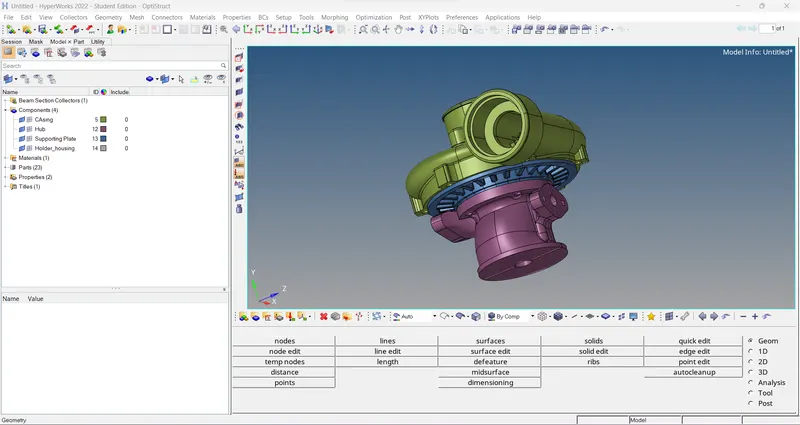
- For volume tetra mesh method, we can mesh it without deleting the solid component of the model.
- After importing the model into the hypermesh cleanup the geometry.
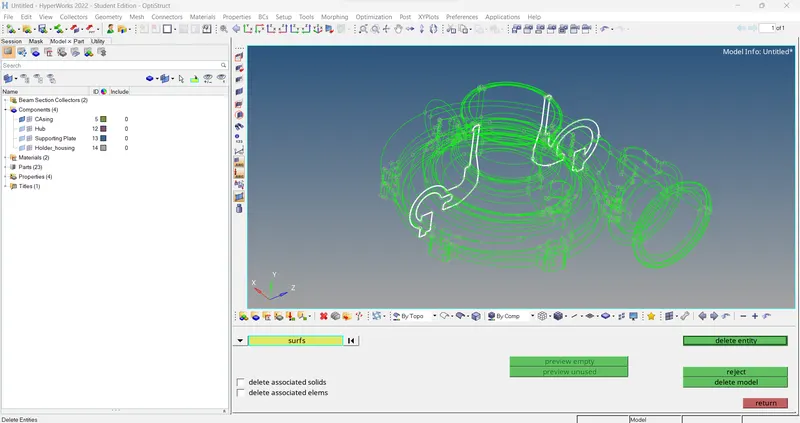
- In this model we have to geometry cleanup manually by using delete(f2) unwanted surf inside & then in quick edit(f11) > toggle those lines and closed all volume.
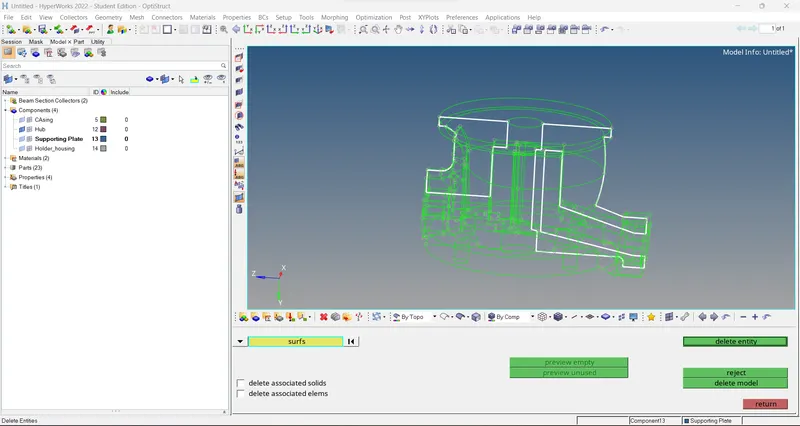
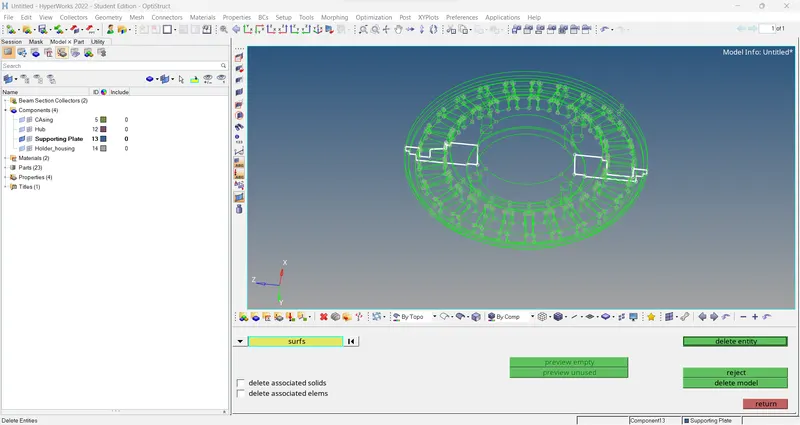
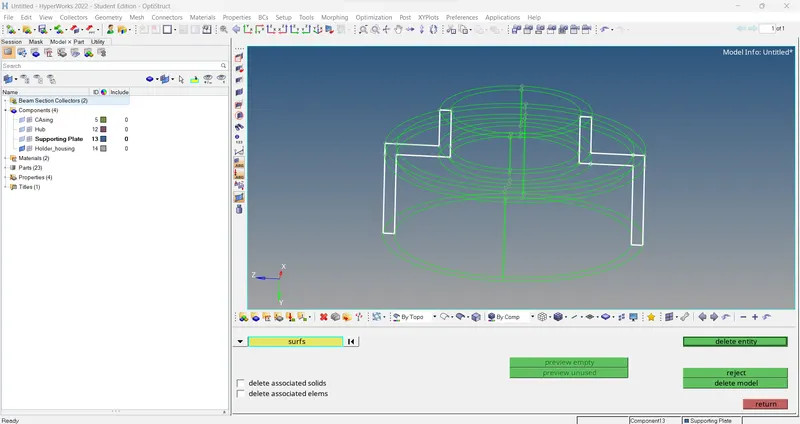
- First go the 3D > tetramesh > Tetramesh parameters.
- After that assign the max-tetra and min-tetra size by checking the check-box in 'Tetra-mesh parameter' panel.
- Under 'Element quality target' assign the tet-collapse value and tick the check-boxes of fill-voids, fix mid-nodes and smoothing.

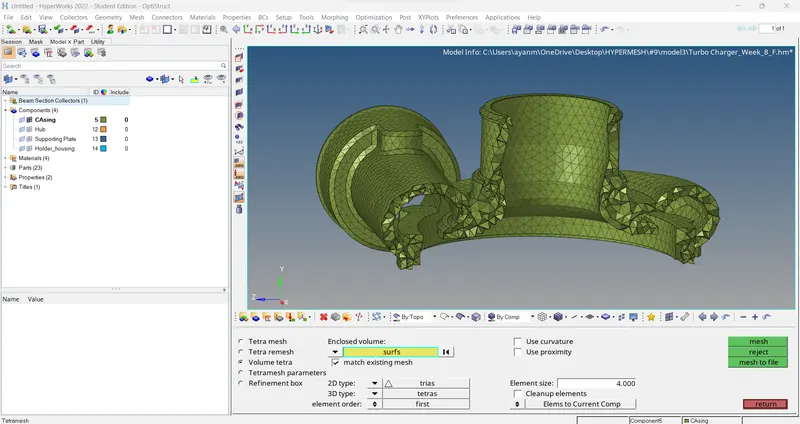
- After that keep the solid of the model and then select 3D > tetramesh and then click on the Volume tetra option by selecting the solid / surf of the model.
[Note: Uncheck the checkboxes 'Use curvature' and 'Use proximity', because by this option in curvature & fillets region software provides refine elements so that’s why node counts are increasing & in student edition we can’t exceed 1000000 node count this is the reason we can’t save it]
- And after that, specify the minimum element size and select the checkbox of 'Clean-up elements'.
- Then click on the 'Mesh' to generate the volume tetramesh.
- After generating the volume tetramesh check for the failed tet-collapse elements.
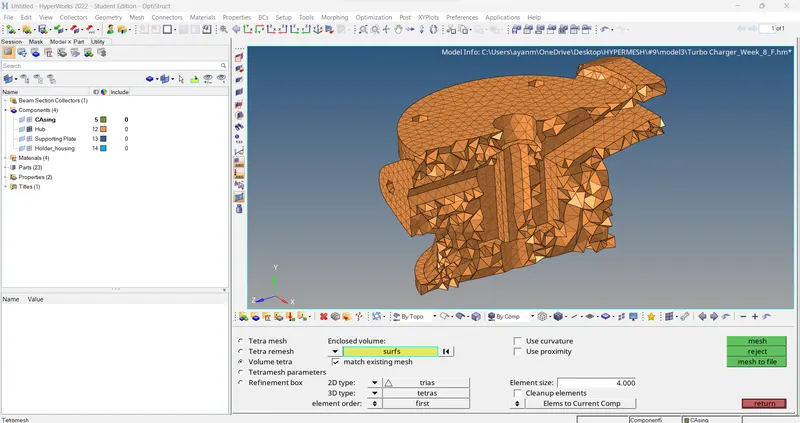
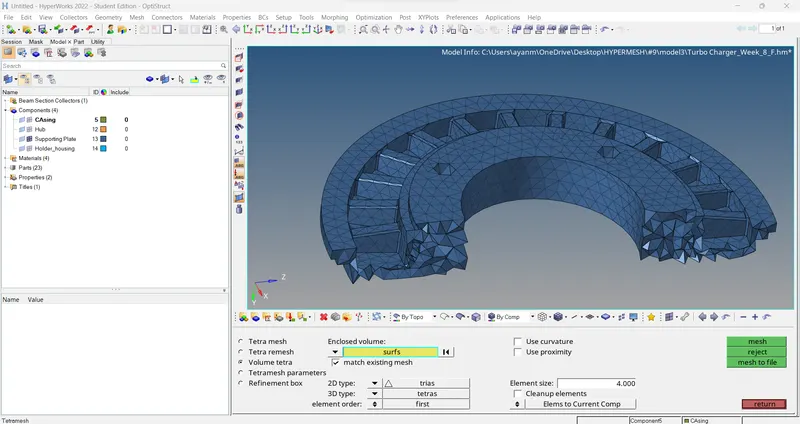
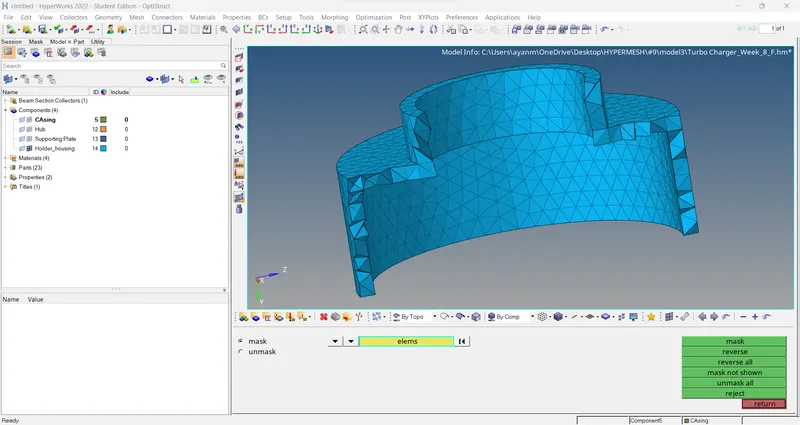
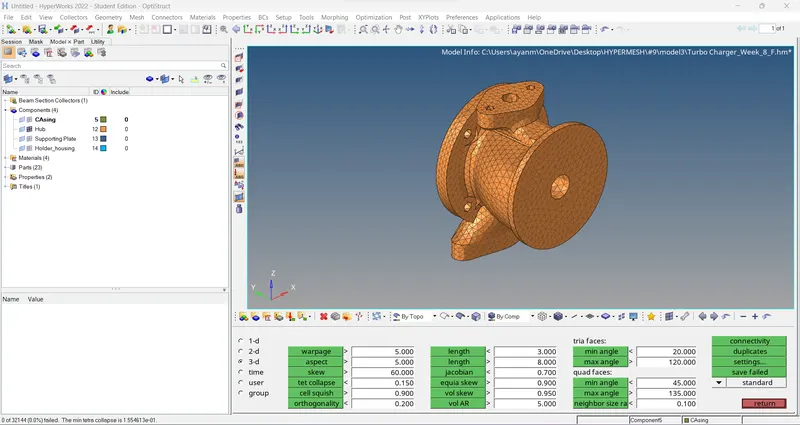
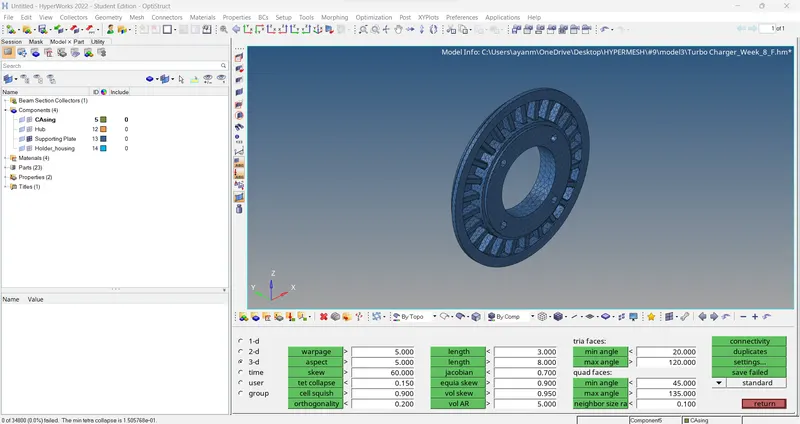
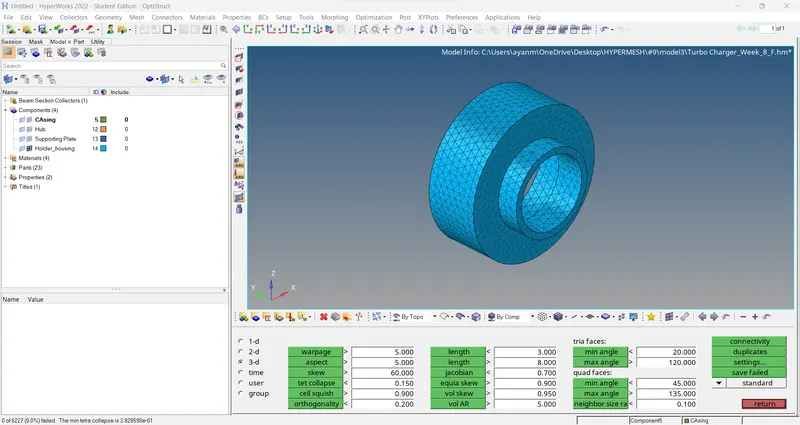
The Volume Generated tetra mesh components are as follows:
- For checking the failed elements select Tools>check elements.
- Then after to get rid of the Tet-collapse failed elements use Tetra re-mesh method (or) 'Translate' command option.
- For Tetramesh Select Tools > tetramesh > tetramesh parameters.
- Then after assign the Max tetra and Min tetra size by checking the checkbox in Tetramesh parameters panel.
- Under element quality target assign the tet-collpase value and tick the checkbox Fill voids, fix mid-node and smoothing.
- And there is another way of getting rid of tet-collapse failed elements.
- To clear tet-collapse select Tools>Translate option.
- Pick a node of the failed element which has minimum height.
- Select the nodes N1, N2 & N3 for translation.
- Assign the magnitude for translating the nodes.
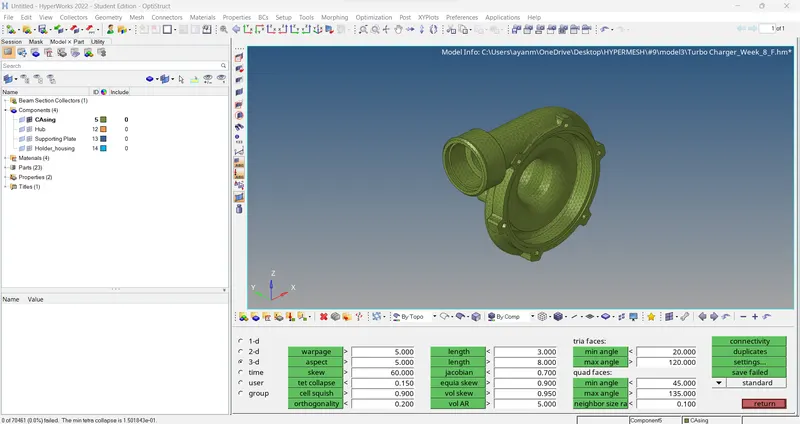
- Do the translate process for all the tet-collapse failed elements until it reaches the failure elements to zero.
Result:
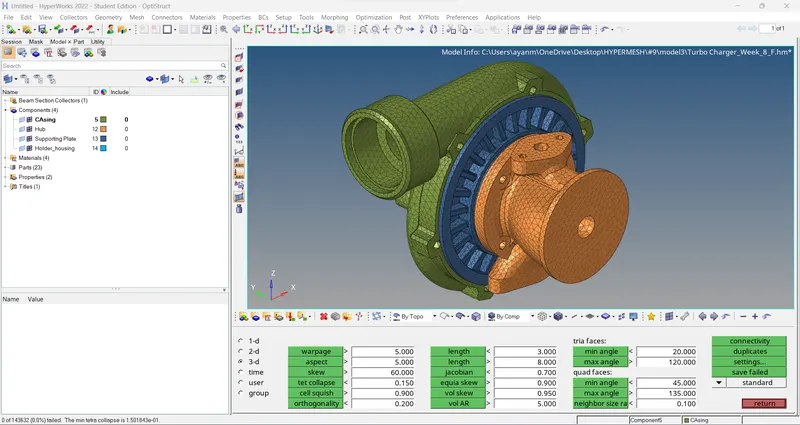
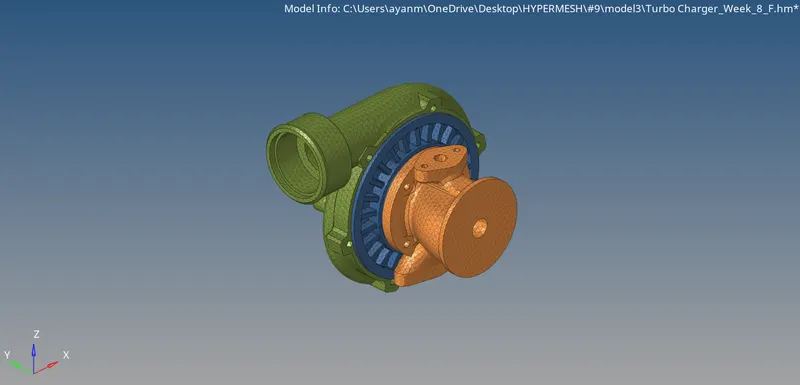
For the given model Tetra mesh is generated by using 'Volume Tetra mesh method' with the mentioned criteria, The final model image is as follows.
Final Model Image:
Learning Outcome:
- To perform the auto mesh for the given solid component.
- Implementing different ways of performing 3D mesh.
- Fixing of tet collapse elements.
CONCLUSIONs:
Successfully done geometry clean-up, & then 2D to 3D Conversion for model 1, Quick Tetra Mesh for model 2, Volume Tetra Mesh for model 3. And also clear the off elements as per given quality criteria.