Week 8-3D Tetra Meshing Challenge
Model 1 Tetramesh for housing and hub assembly: -
Tetrahedral elements are solid elements which have been extracted from 2-D tria elements. HyperMesh provides two methods of generating a tetrahedral element mesh. The volume tetra mesher works directly with surface or solid geometry to automatically generate a tetrahedral mesh. The standard tetra mesher requires a surface mesh of tria or quad elements as input, then provides us with a number of options to control the resulting tetrahedral mesh. we will be going with the second approach for this model.
Objective
- Use standard tetramesh technique to mesh the components.
- Check the quality (tet collapse) of the tetra elements.
TetraMesh Generation Method: 2D to 3D Conversion
Quality Criteria: Min Lenght - 2 Units, Target Lenght - 5 Units, Max Lenght - 7 Units. Tet collapse: 0.15
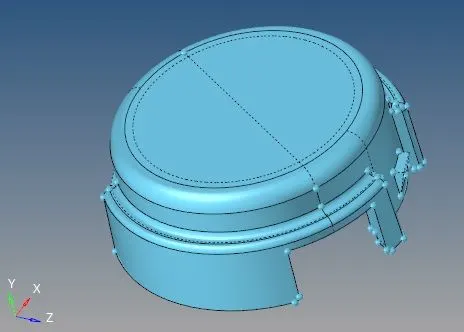
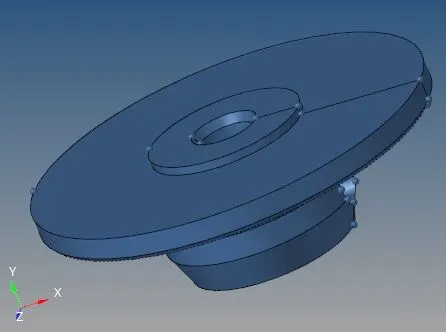
image 1 and 2 - imported model 1
Procedure:
- Import: The given model is in .STP format hence we need to import using Import>Geometery>.STP>Import.
- Deleting Solids: Once the model is imported we will delete the solids in the model, the below image shows the same.
- Geometery Cleanup and Defeaturing: We will check model for any free surface by viewing the model in wireframe mode.
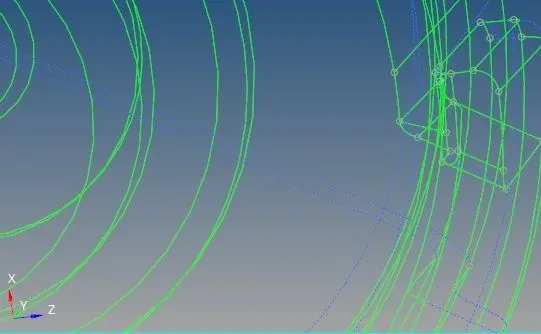
image 3 - geometry cleanup
- Click on automesh panel from the 2-d elements page. Select the surfaces and put element type as trias. We will set the target element length as 5 units.
- After meshing the surfaces, we can proceed to convert the 2-d tria elements to 3-d tetra elements.
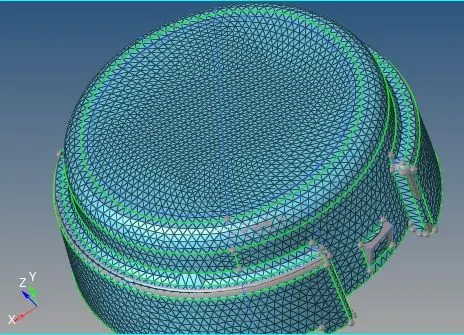
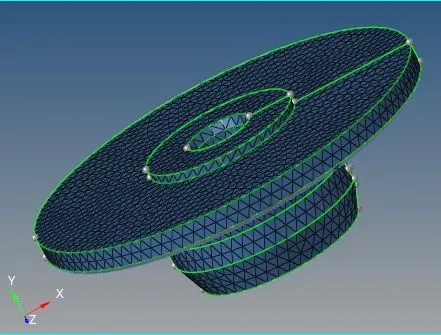
image 4,5 - 2D Shell Mesh
- Access the Tetramesh panel from 3D page, and then click on tetramesh subpanel.

image 6 - 3D tetra mesh command
- Select the elements selector under Fixed trias/quads to tetra mesh. Click mesh to generate the tetrahedral elements.
- Use Check Elements panel and go to the 3-d subpanel. Identify elements having a tet collapse value smaller than 0.15.
- Remesh the hub’s displayed tetra elements to improve their tetra collapse. Under tetramesh parameters check the minimum tetra and maximum tetra element length box. Also, check the fill voids, fill midnodes and smoothing box. Set the tet collapse value as 0.15.
- Another method to improve the tet collapse is by using distance option. The elements that failed the tetra collapse check is saved in the user mark by clicking on save failed, and can be retrieved in mask panel using the extended selection menu.
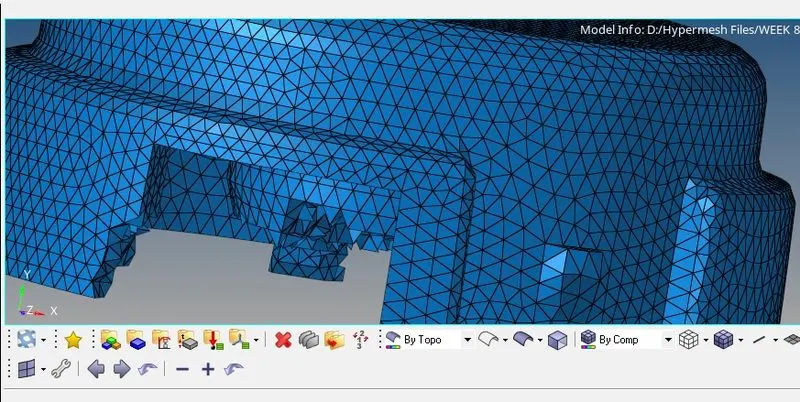
image 7 - 3D tetra mesh
- We can increase the distance to improve the tet collapse value.

image 8 - TET COLLAPSE CHECK
CONCLUSION -
- Performed tetrahedral mesh generation by converting the 2D elements into 3D.
- Achieved a better mesh by clearing the 3D mesh quality errors.
LEARNING OUTCOME -
- Learned tetrahedral mesh generation by converting the 2D elements into 3D.
- Understanding the 3D mesh quality error and Clearing that.
Model 2 Creating tetramesh for Crank Housing
OBJECTIVE
- Mesh the geometry using the quick tetra mesh.
- Review the quality of the tetra mesh to validate its integrity.
For the given model, Create a 3D Tetramesh with the following quality criteria.
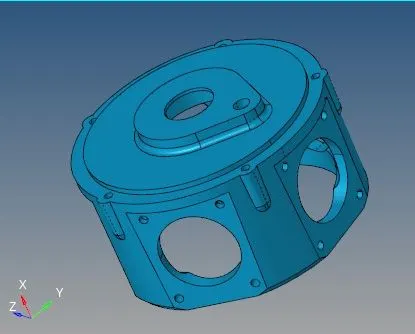
image (a) - imported model 2
Quality Criteria: Target Element size: 3 Units. Tet Collapse: 0.15
TetraMesh Generation Method: Quick Tetra Mesh/ Volume Tetra Mesh
Procedure: For doing Quick Tetra it is important to make sure that the model is c losed completely. Hence we look for any free edges in the model. The below image shows the free edge which was resolved by pasting the lines together.
Meshing: In order to mesh the given model in with tetra elements we will use you use Quick Tetra meshing, this method is comparitively very less time consuming. In order to mesh we will go to
View>Browsers>Geom/Mesh>quick Tetra Mesh.
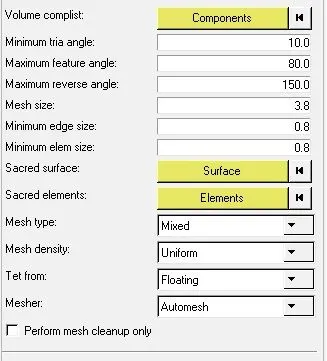
image (b) - Quick Tetra
Once we have reached the above page, we can select the component and surface. We can enter mesh size which is our Target element lenght and proceed. This method first creates 2d mesh and using it Tetra mesh is created. The 2d mesh can be deleted after Tetra mesh is created.
- Element Cleanup: Once elements are we will check for Tet Collapse, to check we will go to Tool>Element Check>3d>Element Check>Tet collapse. Initially the mesh had 147 elements with Tet Collapse. In order to resolve the we will go to Tetra Mesh tool> Mesh Parameters> Enter elem. quality target> Tet Collapse(0.15). Now go to Tetra remesh>Elements> Displayed> confirm. After this we will again check for Tet Collapse, this method resolved all tet collapse. Below image shows the procedure and result.

image (c) - Tetra Remesh

image (d) - TET COLLAPSE CHECK
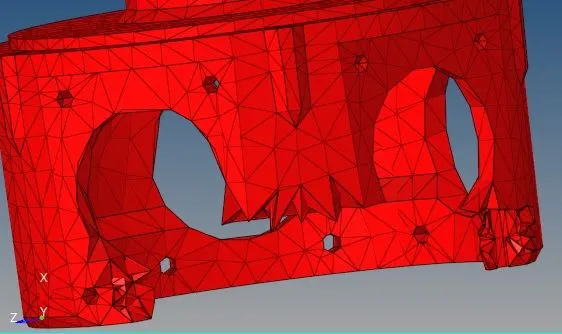
image (e) - 3D tetra mesh
Model 3 Creating tetramesh for Turbo charger
Objective For the given assembly model, Create a 3D Tetramesh with the following quality criteria.
Quality Criteria: Target Element size: 4 Units.Tet Collapse: 0.15
TetraMesh Generation Method: Quick Tetra Mesh/ Volume Tetra Mesh
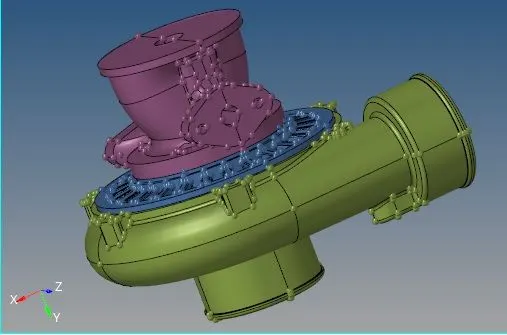
image 1 - imported model 3
Procedure: For doing Quick Tetra it is important to make sure that the model is c losed completely. Hence we look for any free edges in the model. The below image shows the free edge which was resolved by pasting the lines together.
Meshing: In order to mesh the given model in with tetra elements we will use you use Quick Tetra meshing, this method is comparitively very less time consuming. In order to mesh we will go to
View>Browsers>Geom/Mesh>quick Tetra Mesh.
image 2 - Quick Tetra
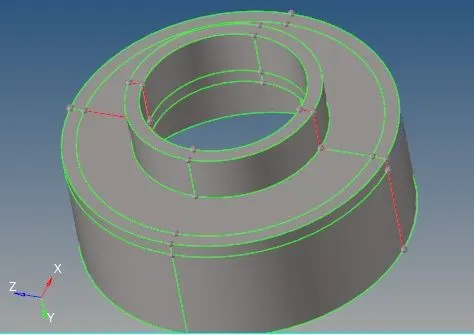
image 3 - Geometry error
*Note - Error was observed while performing quick tetra and geometry cleanup couldn't be done so further actions couldn't be completed after having discussions with TSE.