Week 8-3D Tetra Meshing Challenge
Question:
01.
Create a Tetramesh for Housing component with the following quality criteria.
TetraMesh Generation Method: 2D to 3D Conversion
Elements sizes: Min- 2 Units, Target- 5 Units, Max- 7 Units
Tet collapse: 0.15
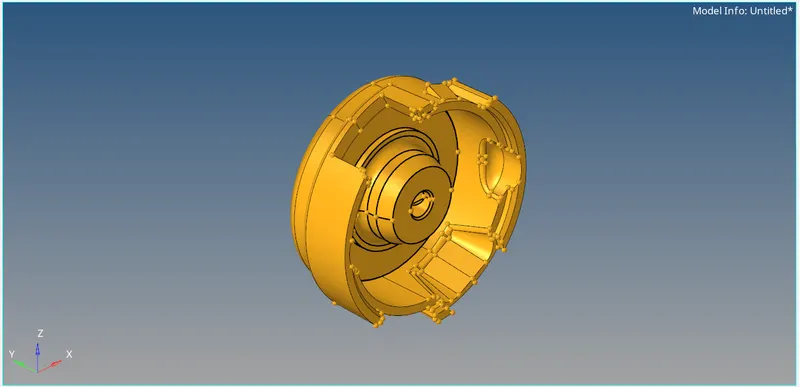
Fig1.1: Housing.
02.
For the given model, Create a 3D Tetramesh with the following quality criteria.
TetraMesh Generation Method: Quick Tetra Mesh/ Volume Tetra Mesh
Target Element size: 3 Units.
Tet Collapse: 0.15
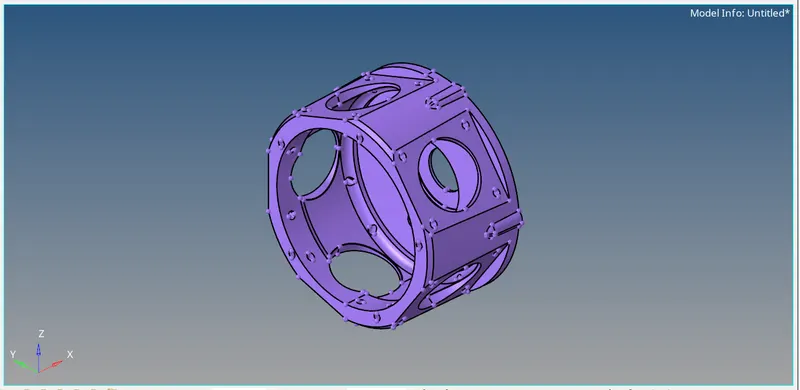
Fig1.2: Component-02.
03.
For the given assembly model, Create a 3D Tetramesh with the following quality criteria.
TetraMesh Generation Method: Quick Tetra Mesh/ Volume Tetra Mesh
Target Element size: 4 Units.
Tet Collapse: 0.15
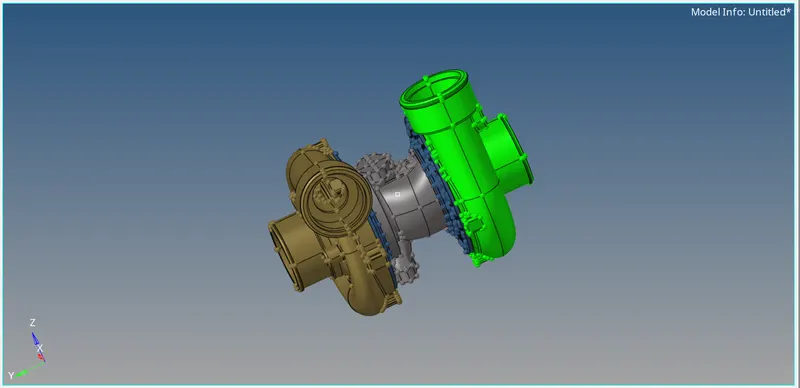
Fig1.3: Component-03.
Solution:
01.
Shown in figure 1.1 is the Housing component and we will see how to create tetra 3D mesh for it using shell elements.
Select the component under working and define it as a 'Current component'.
I]
Delete all the solids of the geometry.
For deleting solids:
Goto => Tool => delete => solids => all => 'delete entity'
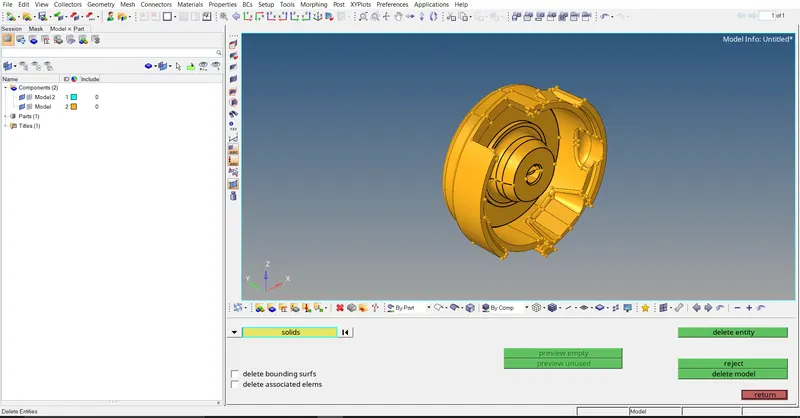
Fig1.4: Deleting solids of the geometry.
II]
Cleaning up the geometry:
For clean up:
Goto => Geometry => quick edit
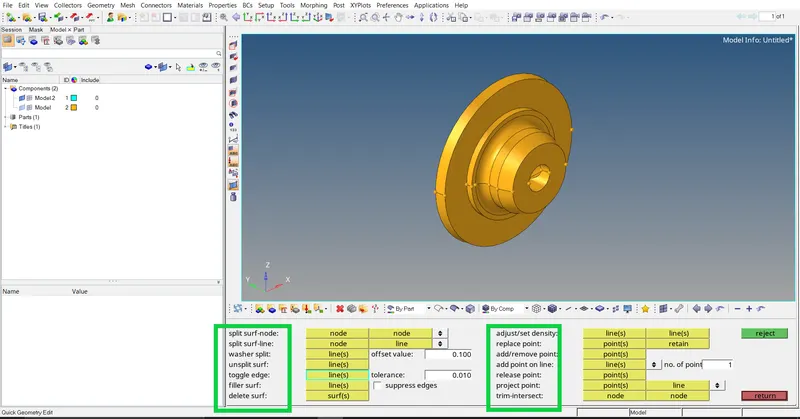
Fig1.5: Cleaning up the geometry.
In same manner clean up the whole geometry before meshing. Toggle the unwanted construction lines, create lines and avoid creating regions of smaller areas.
III]
Meshing of geometry:
For meshing:
Goto => 2D => automesh => select surfaces => element size: 5 units => 'mesh'
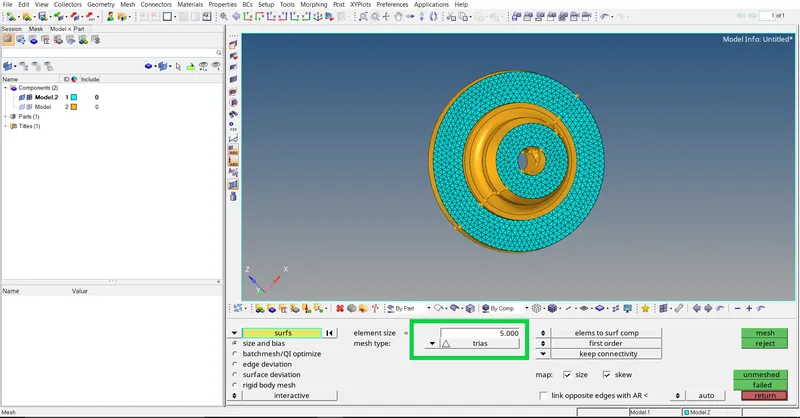
Fig1.6: Meshing flat surfaces using regular trias.
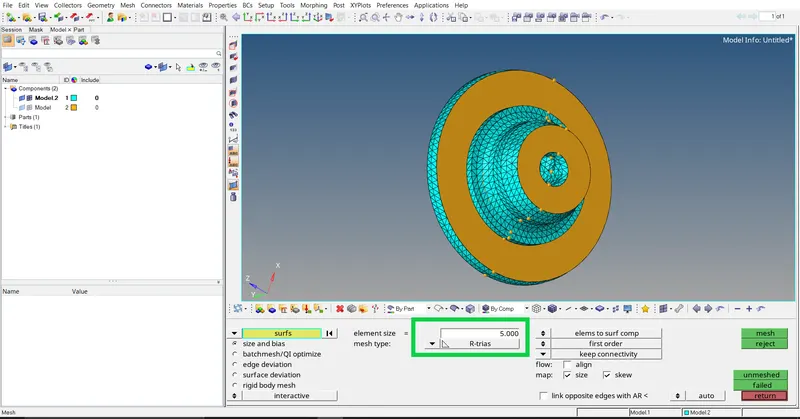
Fig1.7: Meshing curved surfaces using R-trias.
IV]
Meshing of geometry:
For 3D meshing:
Goto => 3D => tetramesh => Tetra mesh =>select elements => 'mesh'
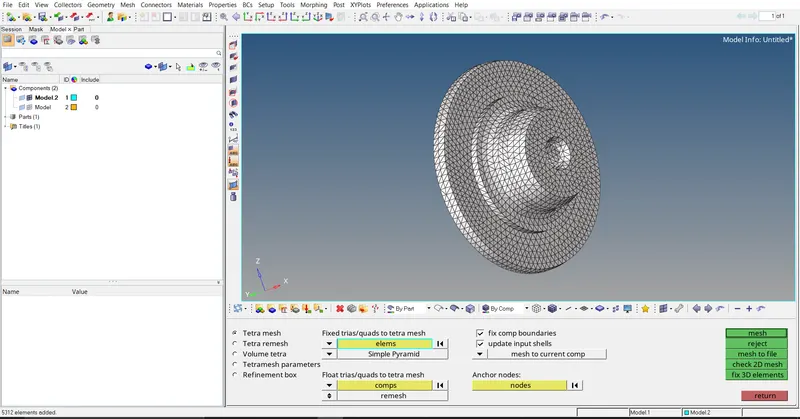
Fig1.8: 3D meshing of the shell elements using 'Tetra mesh' .
V]
Checking quality of mesh:
For quality check:
Goto => Tools => check elements => 3D => tet collapse:0.15 => check status.
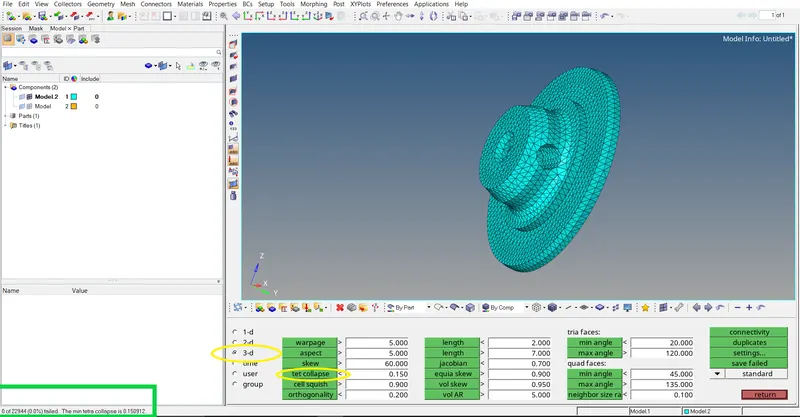
Fig1.9: Quality check of the 3D tetra mesh for tit collapse .
Here zero elements were failed for tet collapse.
VI]
Correcting quality of mesh:
Select the failed elements and elements adjacent to those using 'mask' command.
For quality correction:
Goto => 3D => tetramesh => Tetramesh parameters => tet collapse:0.15 => Tetraremesh => select elements => remesh
Repeat the same until and unless elements meets the required quality criteria.
For smaller elements failing for 'tit collapse' we can use the equivalence option too.
Follow the same procedure to mesh the another component of housing.
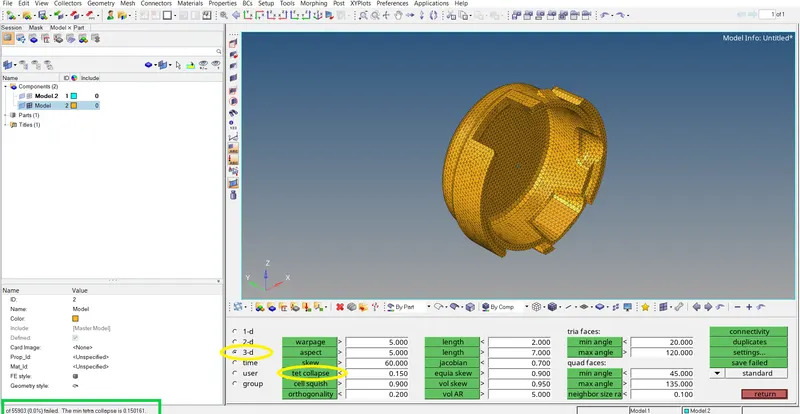
Fig1.10: Quality check of the 3D tetra mesh for tit collapse for second component .
02.
Select the component under working and define it as a 'Current component'.
I]
Firstly delete all the solids of the geometry.
For deleting solids:
Goto => Tool => delete => solids => all => 'delete entity'
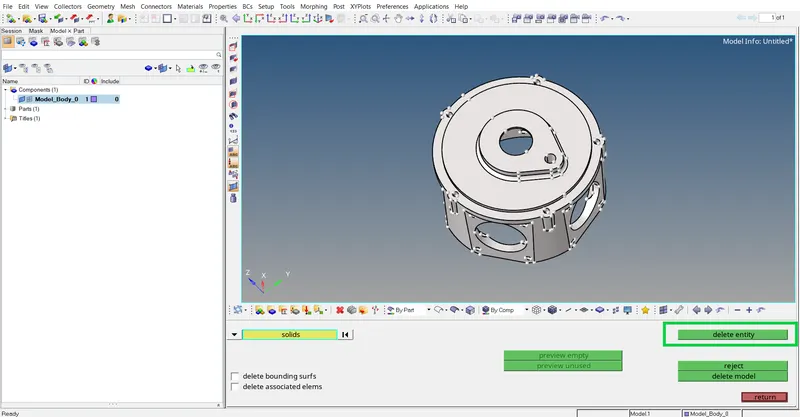
Fig2.1: Deleting solids of the geometry.
II]
Meshing of geometry:
For 3D meshing:
Goto => 3D => tetramesh => Volume tetra => select: surfaces => element size: 4 units => 'mesh'
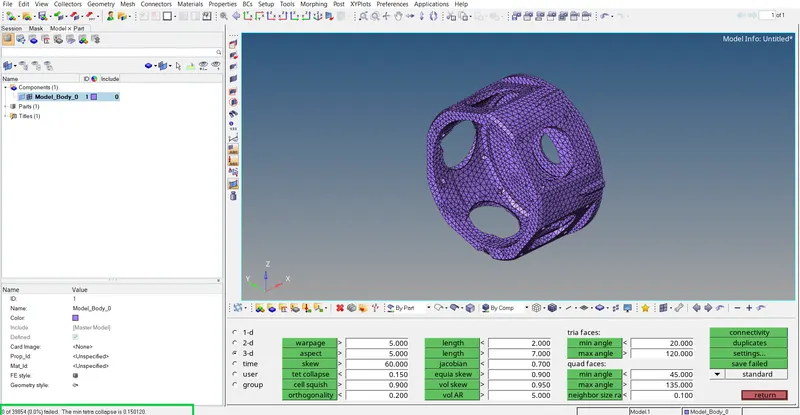
Fig2.2: 3D meshing using 'Volume Tetra' .
Check and correct the 3D mesh for the 'tet collapse'.
03.
Create a 3D mesh for all the components in the assembly one by one as explained in objective-02.
Try to reduce the number of elements failing for 'tet collapse' since we directly meshed the component with toggling unnecessary lines and features which creates a room for failed elements therefore eliminating the failed elements becomes difficult and time consuming.
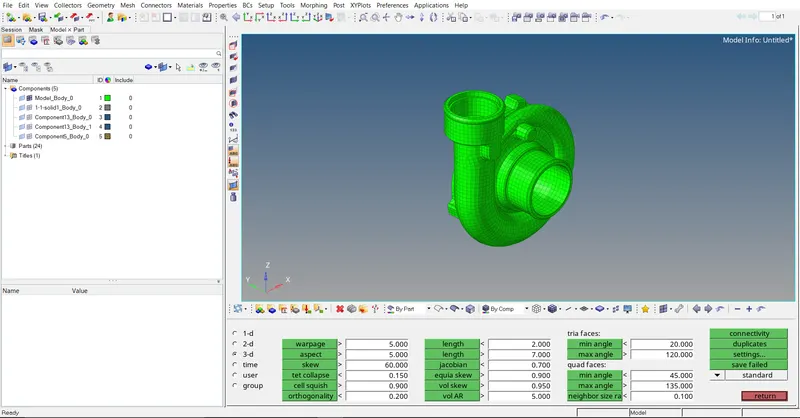
Fig3.1: 3D meshing using 'Volume Tetra' component-01.
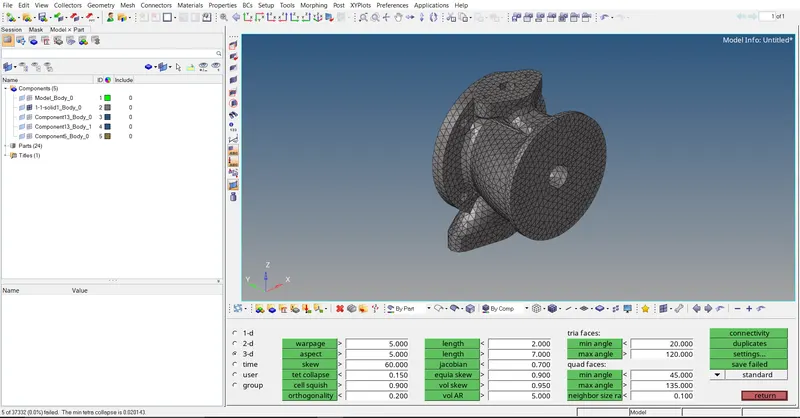
Fig3.2: 3D meshing using 'Volume Tetra' component-02.
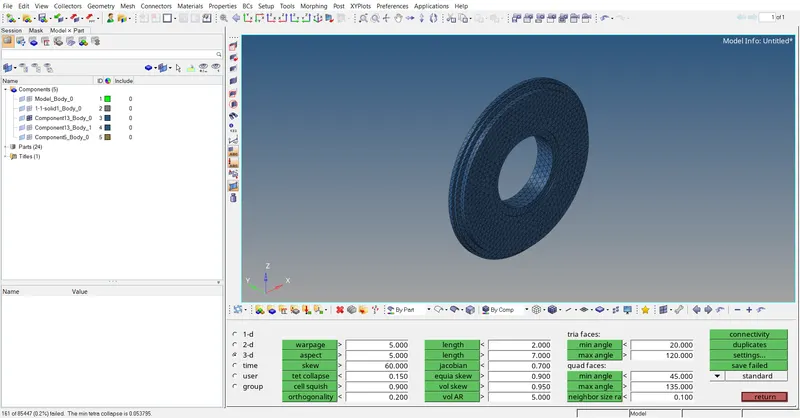
Fig3.3: 3D meshing using 'Volume Tetra' component-03.
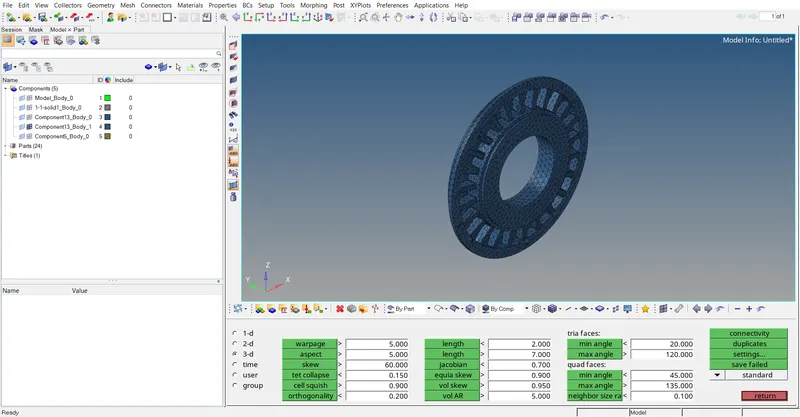
Fig3.4: 3D meshing using 'Volume Tetra' component-04.
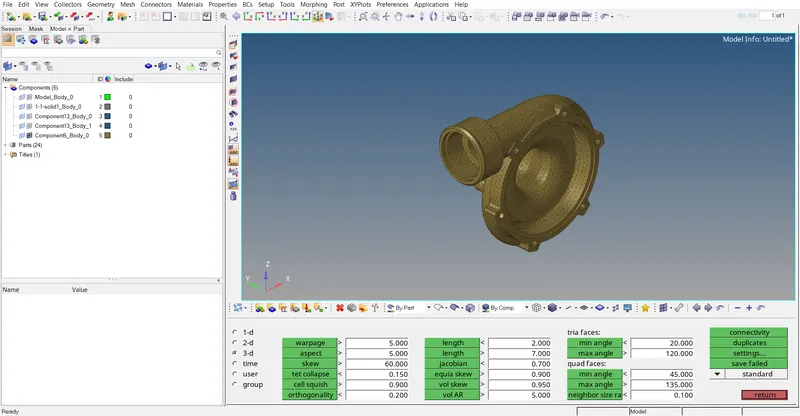
Fig3.5: 3D meshing using 'Volume Tetra' component-05.