Week 6-Meshing of Hood Challenge
Question:
Follow the below-mentioned quality criteria, mesh the component given below and assign thickness:
Target Element Length = 5 Units
| Sr.No. | Quality Criteria | Value |
| 1 | Aspect Ratio | 5 |
| 2 | Skewness | 45 |
| 3 | Warping | 15 |
| 4 | Taper | 0.5 |
| 5 | Min. Length | 2 Units |
| 6 | Max. Length | 8 Units |
| 7 | Min angle Quad | 45 |
| 8 | Max angle Quad | 135 |
| 9 | Min angle Tria | 20 |
| 10 | Max angle Tria | 120 |
| 11 | Tria % | 10 |
Solution:
Introduction:
Engine Hood:
The hood which is also known as ENCON, serves as an access panel to engine compartment of an automobile. It is an assembly made of Outer an Inner panels to meet various safety and design requirements.
The following are the design considerations involved in the design of Engine Hood.
- Pedestrian safety.
- Vehicle quality.
- Occupant safety.
- Styling.
- Manufacturability.
Types of Hoods:
- Invalid hood or Build N.
- Wrap around hood.
- Hood with fenders.
- Hood with border diagonal frames.
- Hood with brace frames.
Meshing of hood:
Here we will see the meshing of different parts of hood.
Hood consists of four different components as given below.
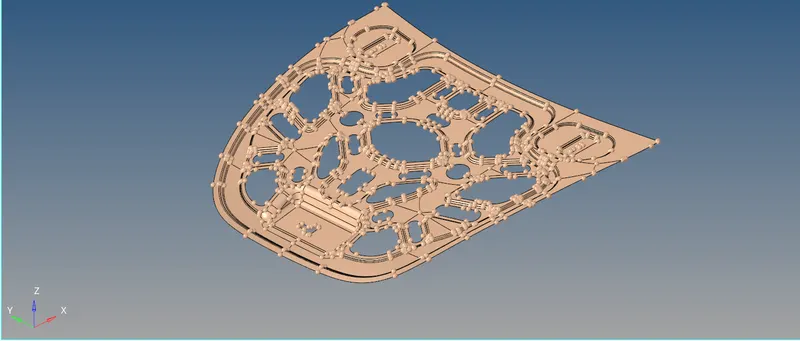
Fig1.1: Inner extract.
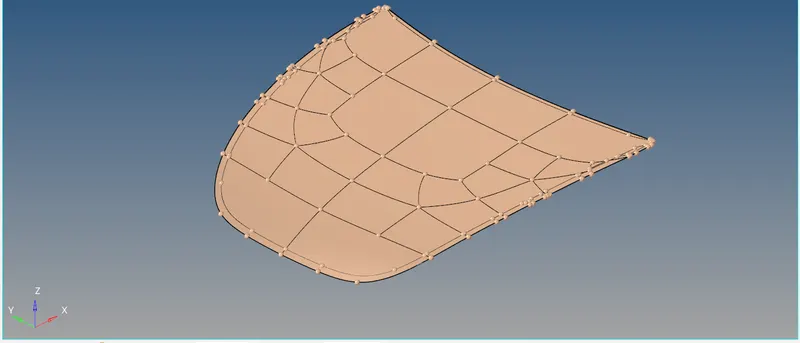
Fig1.2: Outer extract.
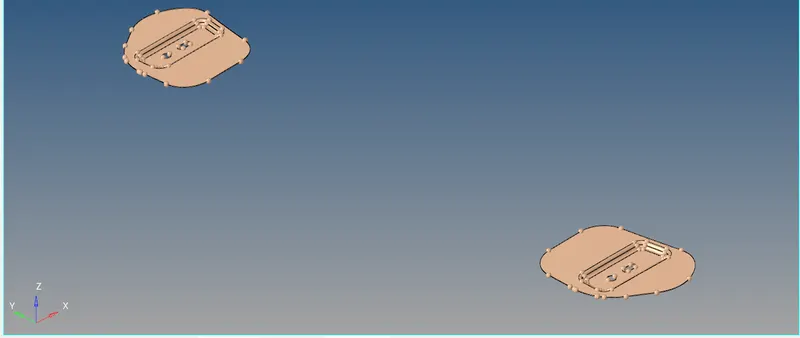
Fig1.3: Hinge.
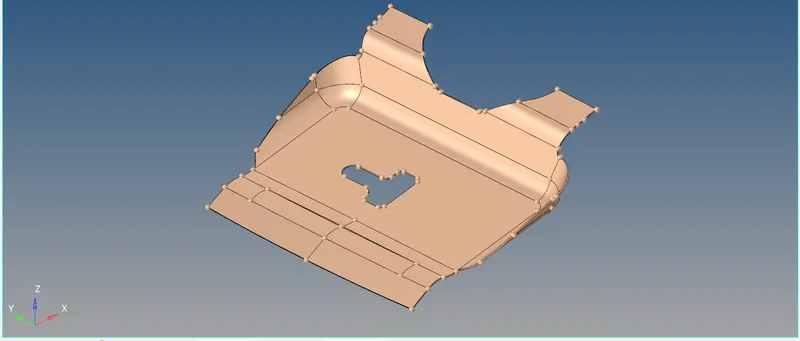
Fig1.4: Latch.
Now we will look at meshing of these components one by one.
Quality Criteria:
Quality criteria for the meshing of all the components are given as follows:
- Target Element Length: 5 Units.
| Sr. No. | Quality Criteria | Value |
| 1 | Aspect Ratio | 5 |
| 2 | Skewness | 45 |
| 3 | Warping | 15 |
| 4 | Taper | 0.5 |
| 5 | Min. Length | 2 Units |
| 6 | Max. Length | 8 Units |
| 7 | Min angle Quad | 45 |
| 8 | Max angle Quad | 135 |
| 9 | Min angle Tria | 20 |
| 10 | Max angle Tria | 120 |
| 11 | Tria % | 10 |
Procedure:
There are some basic steps involved in order to mesh the given component as per the quality requirements which are as follows:
A]
Firstly delete all the solids from the given component.
For deleting solids:
Goto => Tool => delete => solids => all => 'delete entity'
B]
Extract the midsurface of the component under study.
For extracting midsurface:
Goto => Geometry => midsurface => extraction option: skin offset => auto extraction: select surfaces => 'extract'
C]
Enter the quality criteria as per the quality requirements:
For defining quality criteria:
Goto => 2D => qualityindex => tick the paras => enter magnitude => 'return'
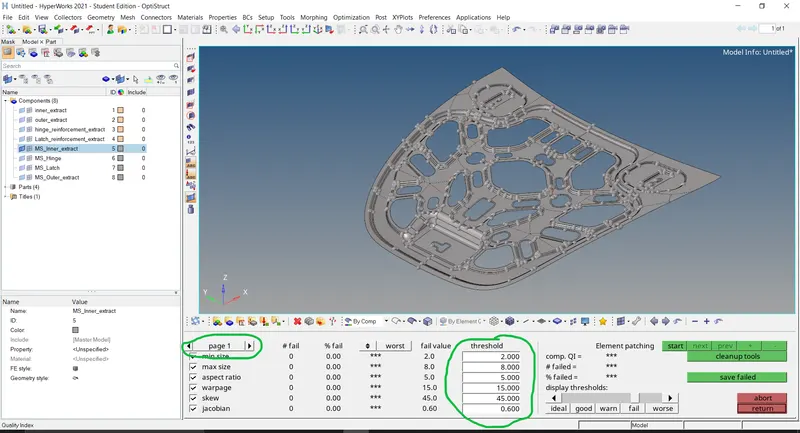
Fig1.5: Defining the quality parameters.
D]
Setting the Element colour mode:
For setting the Element colour mode:
Goto => Element colour mode => 'By element quality'
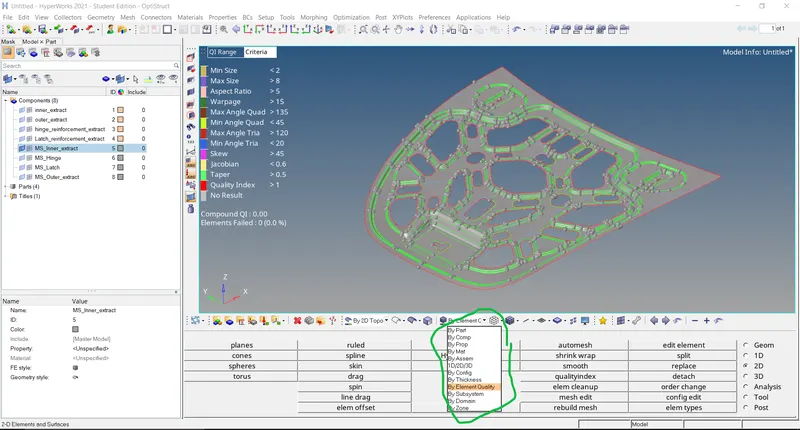
Fig1.6: Defining Element colour mode.
This mode helps us to check the elements of the given geometry as per the quality requirements. This makes the editing of the elements easy and convinient.
E]
Setting the Geometry colour mode:
For setting the Geometry colour mode:
Goto => Geometry colour mode => 'By 2D Topo'
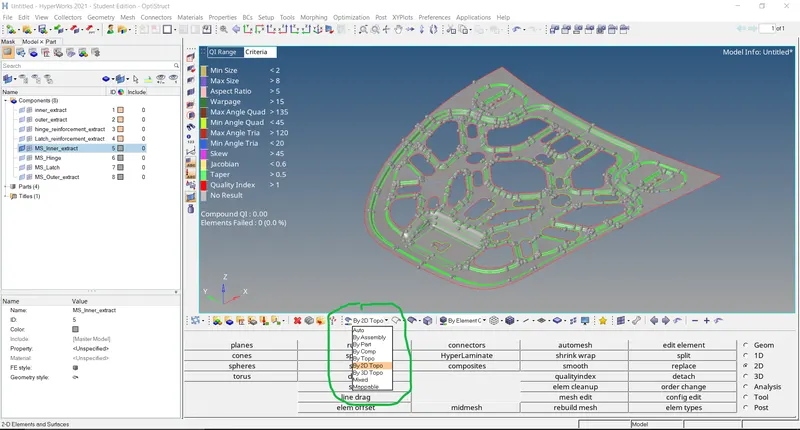
Fig1.7: Defining Geometry colour mode.
This mode helps us to check the construction and feature lines of the given geometry. This makes the toggling of the unwanted contruction lines easy and convinient during cleaning of the geometry.
01.
Inner extract:
I]
Extracting midsurface:
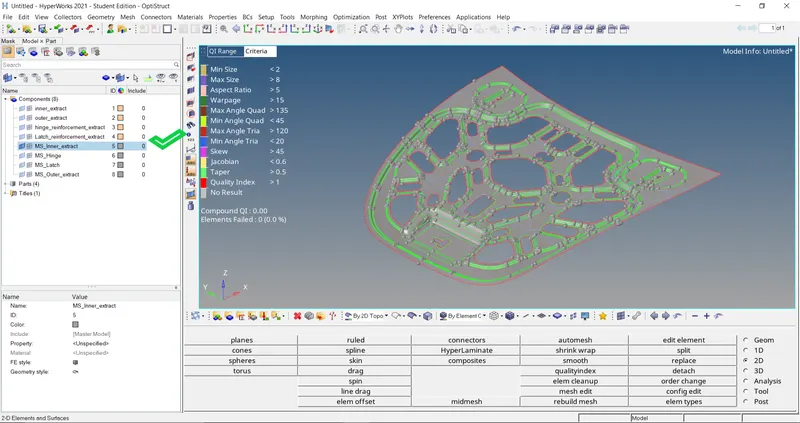
Fig1.8: Midsurface of the inner extract.
II]
Cleaning up the geometry:
For clean up:
Goto => Geometry => quick edit
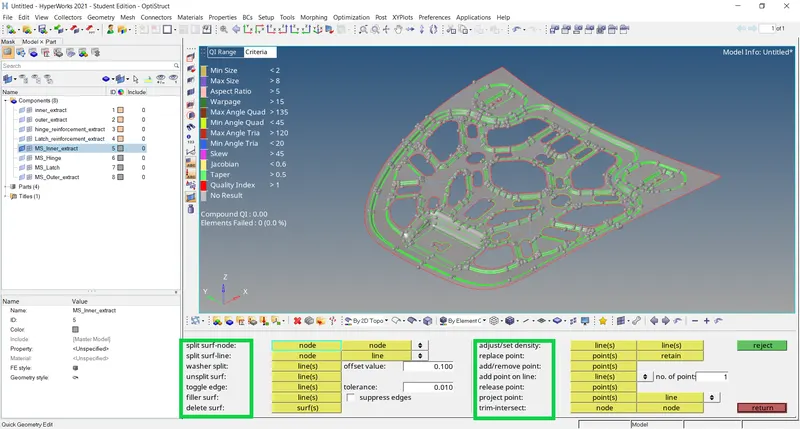
Fig1.9: Clean up tools from quick edit.
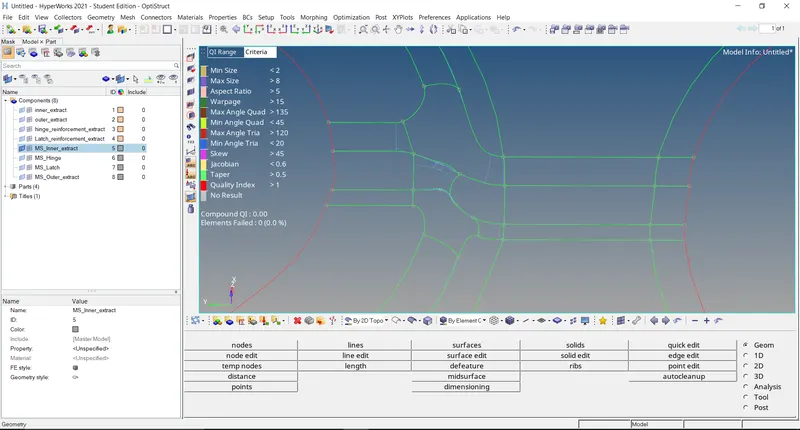
Fig1.10: Fillets of the geometry after clean up.
In same manner clean up the whole geometry before meshing. Toggle the unwanted construction lines, create lines and avoid creating regions of smaller areas.
III]
Meshing of geometry:
For meshing:
Goto => 2D => automesh => select surfaces => element size: 5 units => 'mesh'
IV]
Correcting meshing elements:
For correcting:
Goto => 2D => qualityindex => cleanup tools
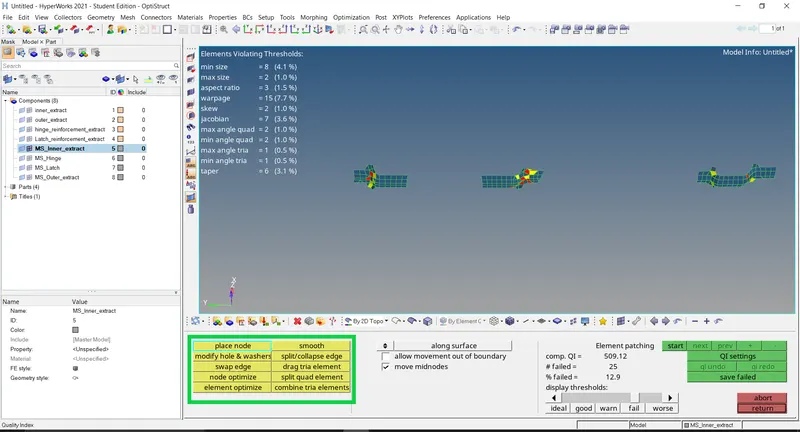
Fig1.11: Correcting meshing elements.
Using cleanup tools we can optimize nodes, elements. Also smoothing of elements, spliting and combining can be done to better the quality of mesh.
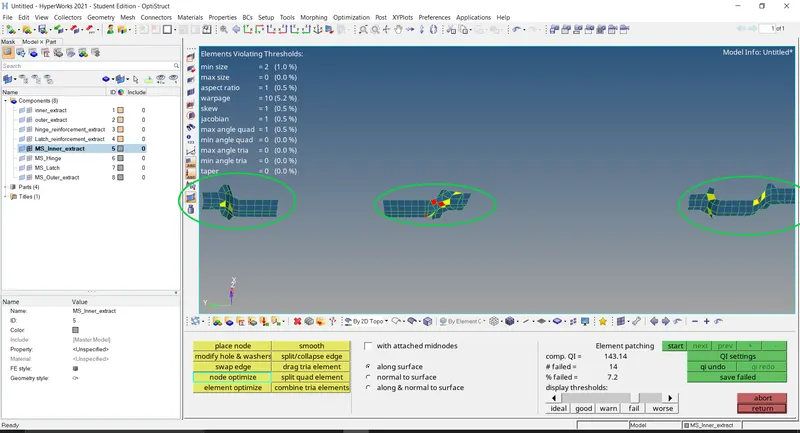
Fig1.12: After correcting meshing elements.
V]
Rebuild mesh:
For rebuilding:
Goto => rebuild mesh => select elements => 'rebuild'
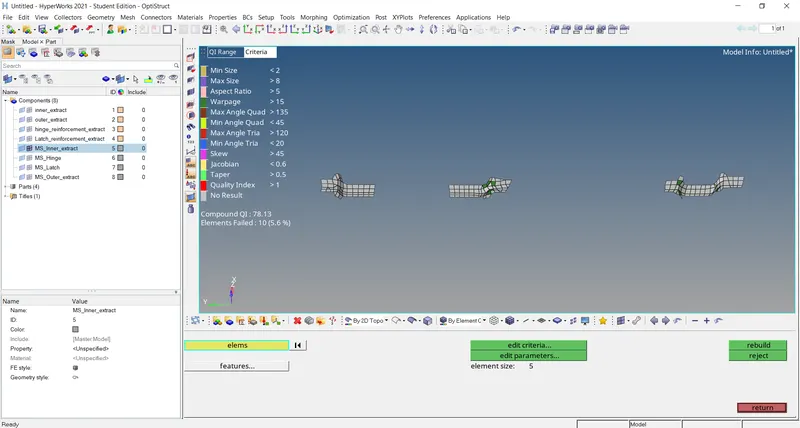
Fig1.13: Rebulding the mesh to minimize the triangular elements and improvise the mesh flow.
Using the tools and rebulding command we will get mesh without any errors for the one half of the symmetry.
Firstly one by one we will mesh all the fillet surfaces and then again one by one we will mesh all the plain surfaces.
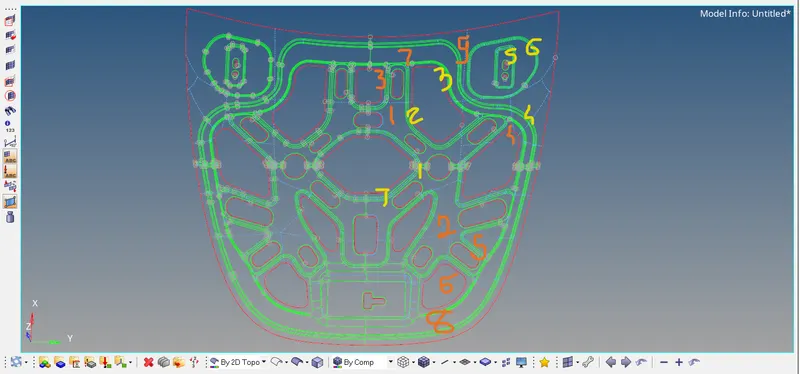
Fig1.14: Sequence of surfaces selected for meshing.
In Figure1.14:
Yellow numbering represents fillet surfaces.
Orange numbering represents plian/flat surfaces.
We can also use operations like replace nodes, node edit commands and element edit commands to build the proper mesh manually wherever necessary.
VI]
Reflect the mesh:
For reflecting:
Select inner extract as current component.
Goto => Tool => reflect => elements: duplicate => current component => select N1,N2,N3,B => 'reflect'
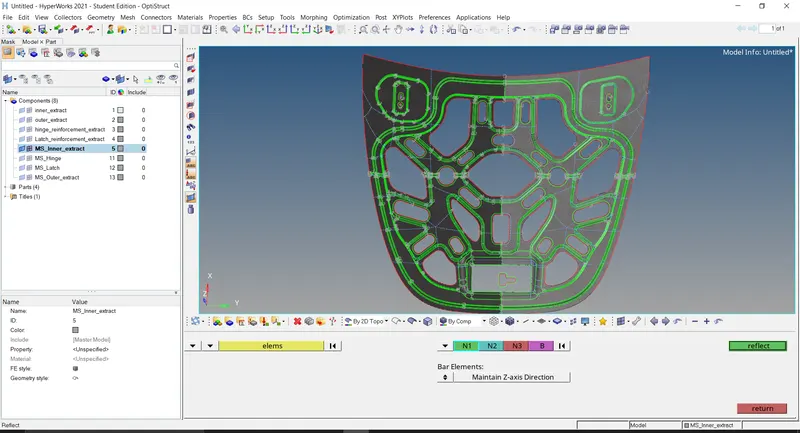
Fig1.15: Reflecting elements on other half of the symmetry.
VII]
Check for equivalence:
For equivalence check:
Goto => Tool => edges => elements: by attached => preview equivalence => equivalence => return
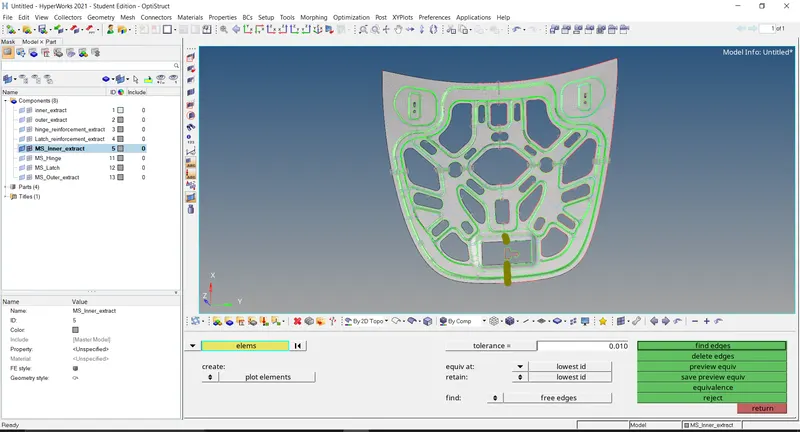
Fig1.16: Checking the equivalence.
VIII]
Mesh the unsymmetric regions:
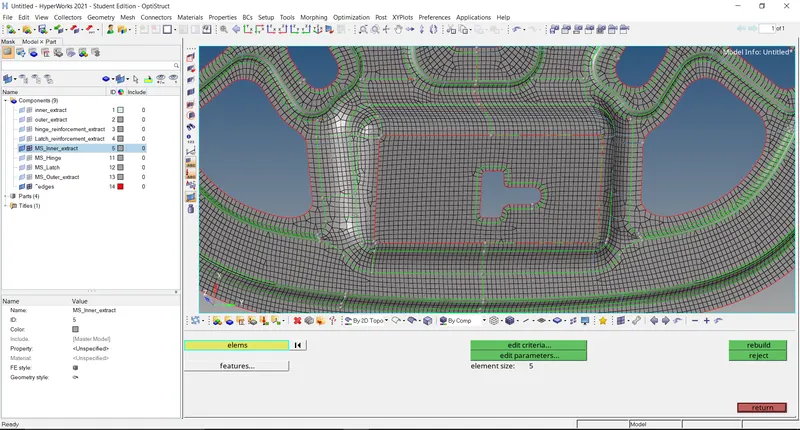
Fig1.17: Meshing unsymmetric regions.
IX]
Deleting Free edges:
For deleting free edges:
Goto => Tool => edges => elements: by attached => 'find edges' => 'delete edges'
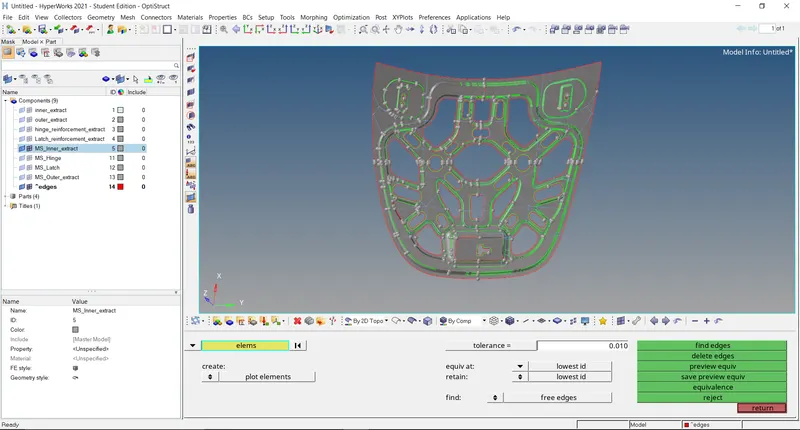
Fig1.18: Deleting free egdes.
X]
Assigning thickness:
Create new property => Assign thickness to property => Assign property to required component.
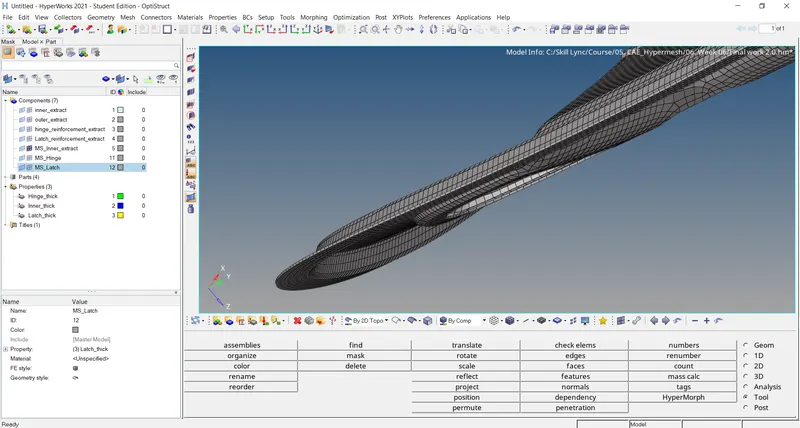
Fig1.19: Assigning thickness to the inner extract.
In this way we mesh the inner extract.
02.
Outer extract:
I]
Extraction of midsurface:
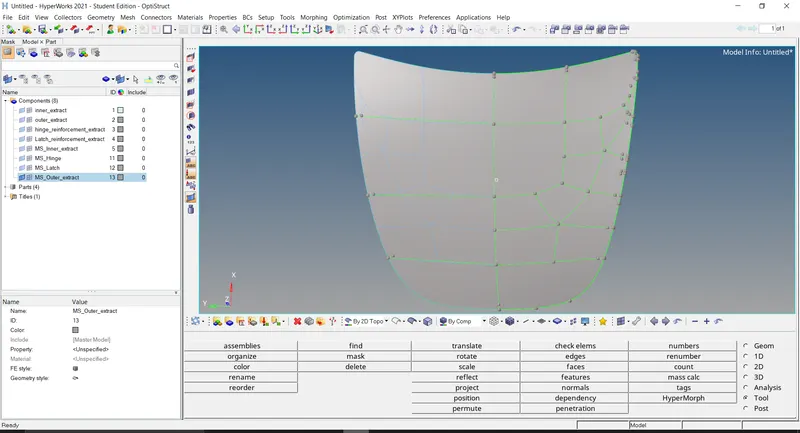
Fig2.1: Extracted and cleaned up midsurface of outer extract.
II]
Cleaning up the midsurface:
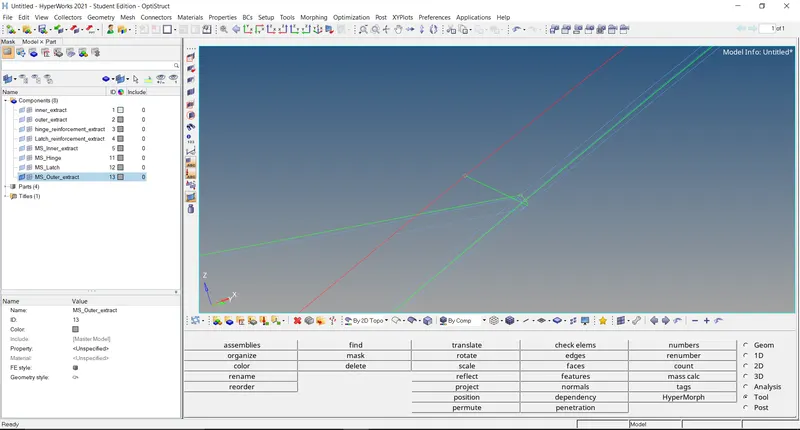
Fig2.2: Cleaned up midsurface of outer extract on rear side.
The rear section and side edges of the geometry must be cleanup as shown in Figure2.2
III]
Meshing:
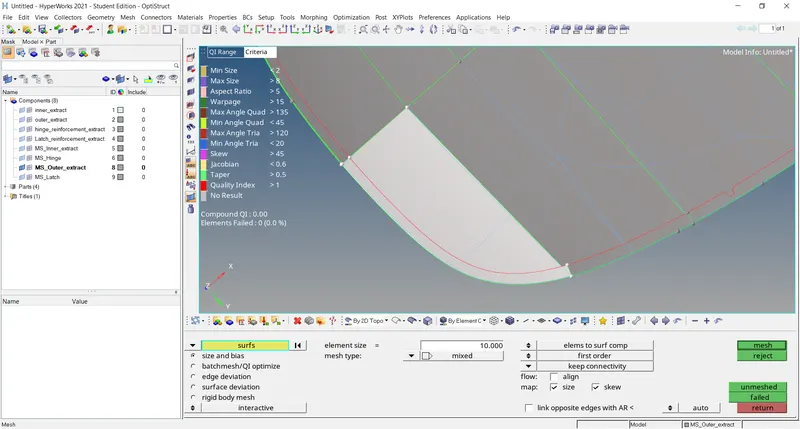
Fig2.3: Meshing first surface.
Rebuild the mesh to reduce the trias. Further drag the trias out and smooth the mesh for proper flow. Use the cleanup tools whenever and wherever necessary.
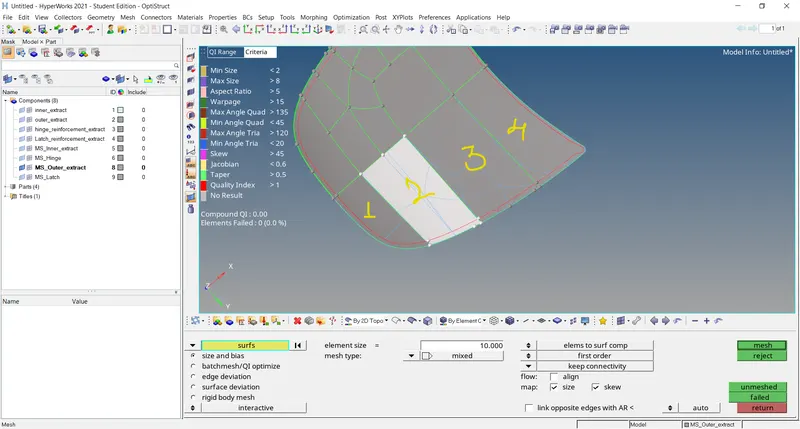
Fig2.4: Sequence of surfaces for meshing.
IV]
Reflect the mesh:
For reflecting:
Select outer extract as current component.
Goto => Tool => reflect => elements: duplicate => current component => select N1,N2,N3,B => 'reflect'
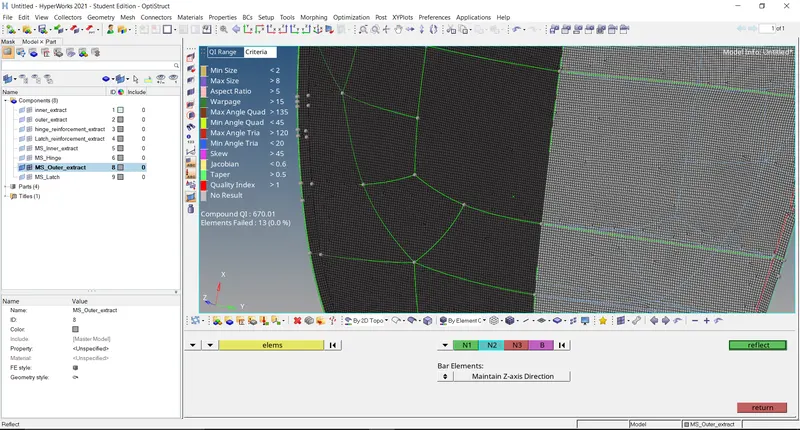
Fig2.5: Reflecting elements on other half of the symmetry.
V]
Check for equivalence:
For equivalence check:
Goto => Tool => edges => elements: by attached => preview equivalence => equivalence => return
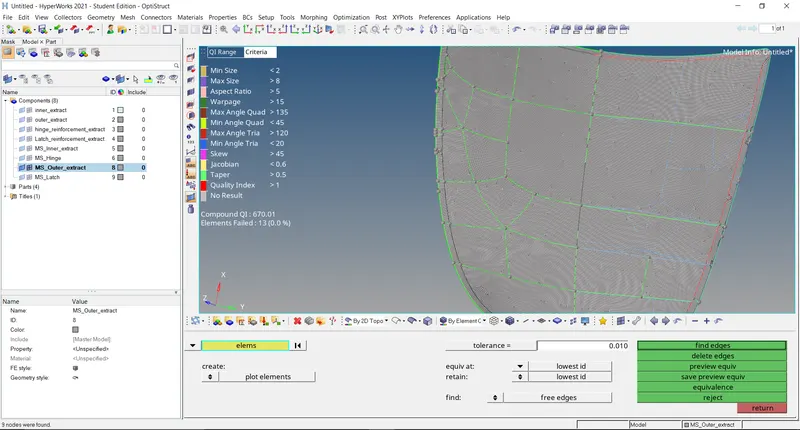
Fig2.6: Checking the equivalence.
VI]
Deleting Free edges:
For deleting free edges:
Goto => Tool => edges => elements: by attached => 'find edges' => 'delete edges'
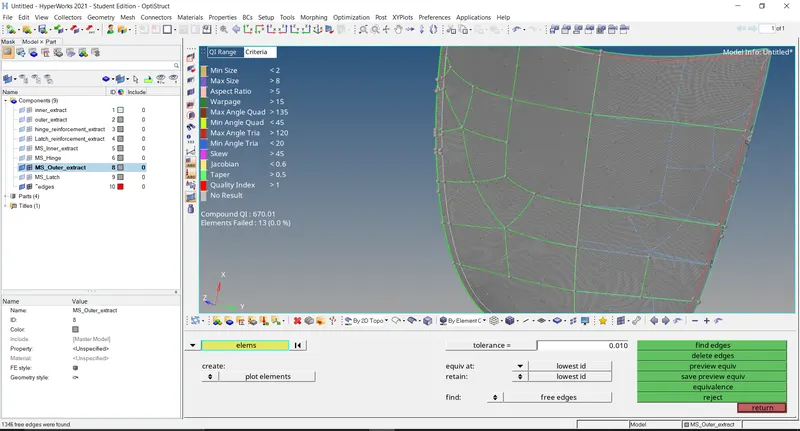
Fig2.7: Deleting free egdes.
VII]
Assigning thickness:
Create new property => Assign thickness to property => Assign property to required componenet.
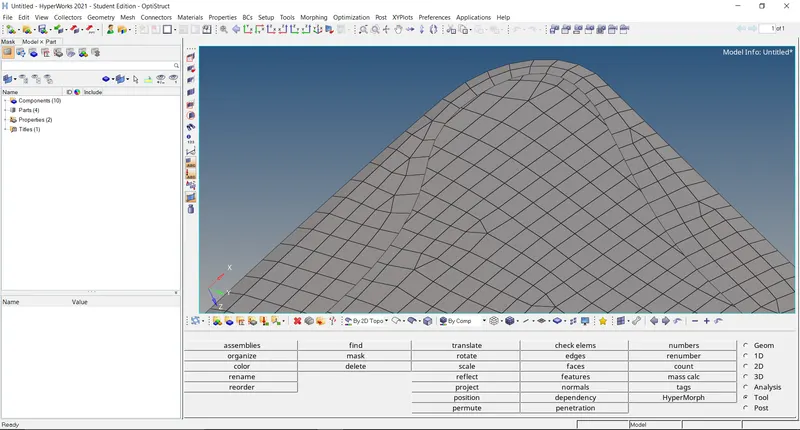
Fig2.8: Assigning thickness to the outer extract.
In this way we mesh the outer extract.
03.
Hinge:
I]
Extraction of midsurface:
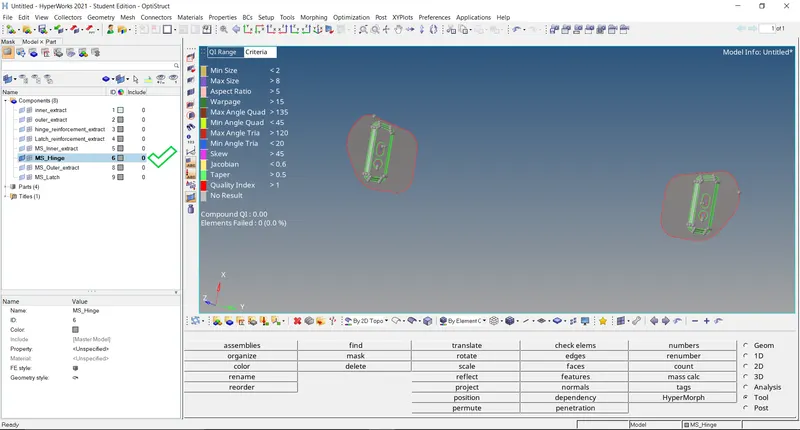
Fig3.1: Extracted midsurface of hinge.
II]
Cleaning up the midsurface:
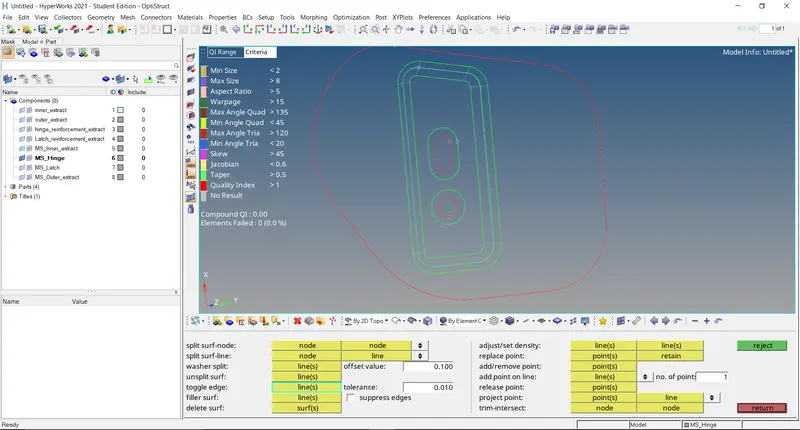
Fig3.2: Cleaned up midsurface of hinge.
Geometry must be cleanup as shown in Figure3.2
III]
Meshing:
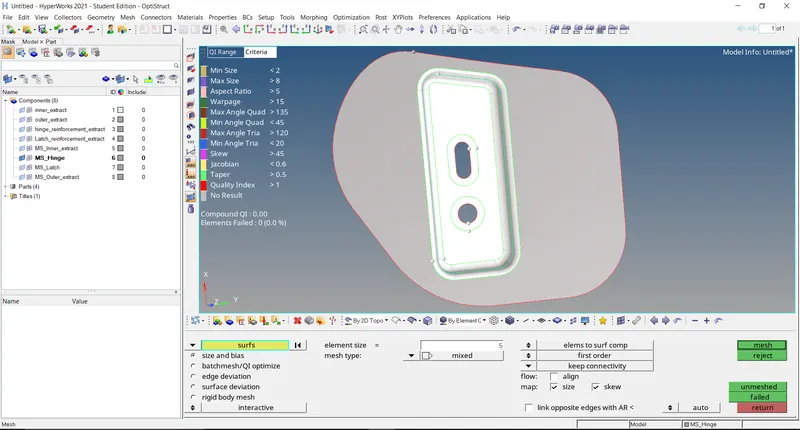
Fig3.3: Meshing first surface.
Rebuild the mesh to reduce the trias. Further drag the trias out and smooth the mesh for proper flow. Use the cleanup tools whenever and wherever necessary.
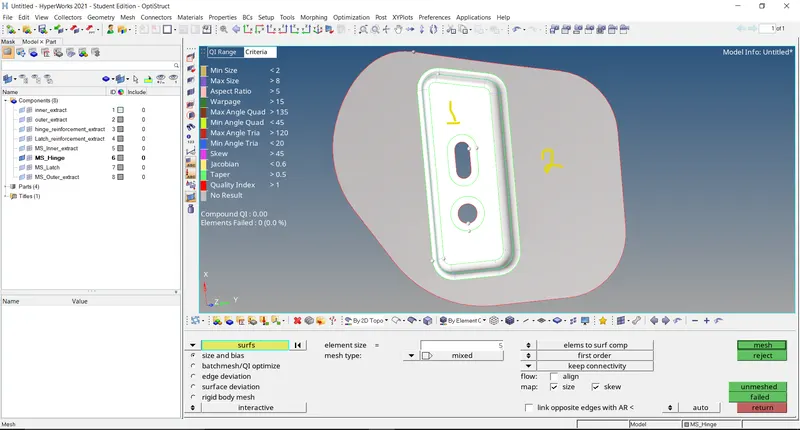
Fig3.4: Sequence of surfaces for meshing.
IV]
Check for equivalence:
For equivalence check:
Goto => Tool => edges => elements: by attached => preview equivalence => equivalence => return
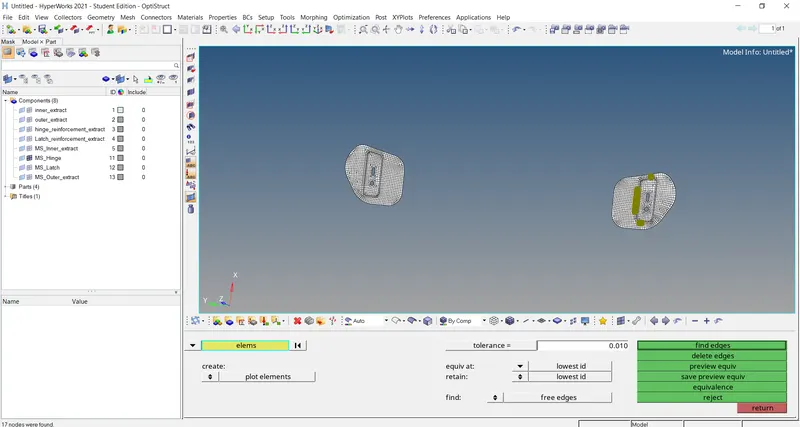
Fig3.5: Checking the equivalence.
V]
Deleting Free edges:
For deleting free edges:
Goto => Tool => edges => elements: by attached => 'find edges' => 'delete edges'
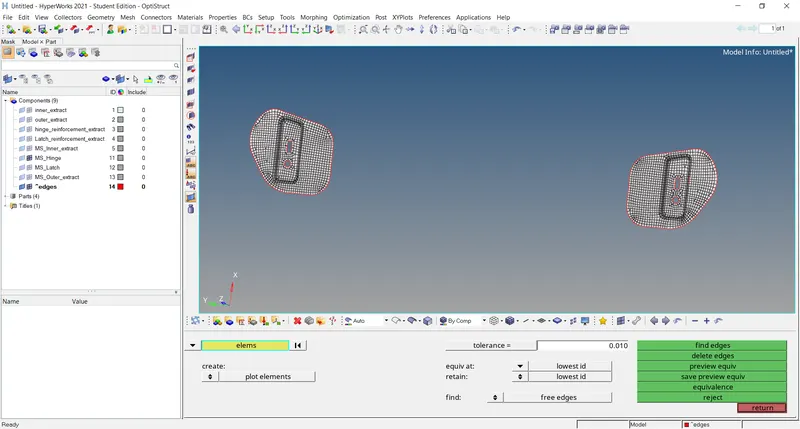
Fig3.6: Deleting free egdes.
VI]
Assigning thickness:
Create new property => Assign thickness to property => Assign property to required componenet.
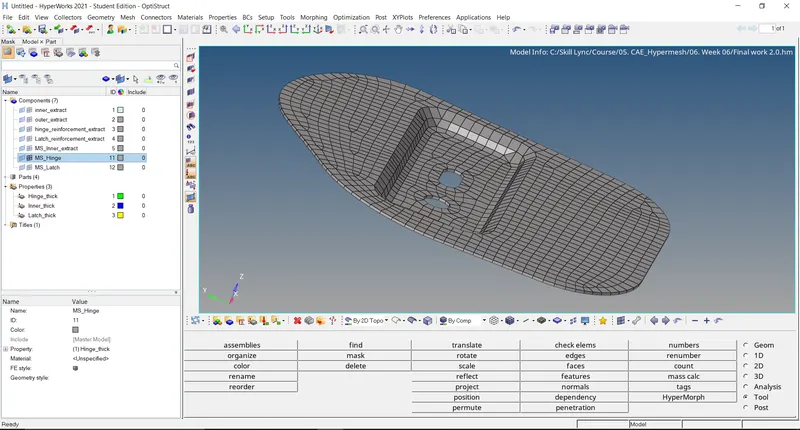
Fig3.7: Assigning thickness to the hinge.
In this way we mesh the hinge.
04.
Latch:
I]
Extraction of midsurface:
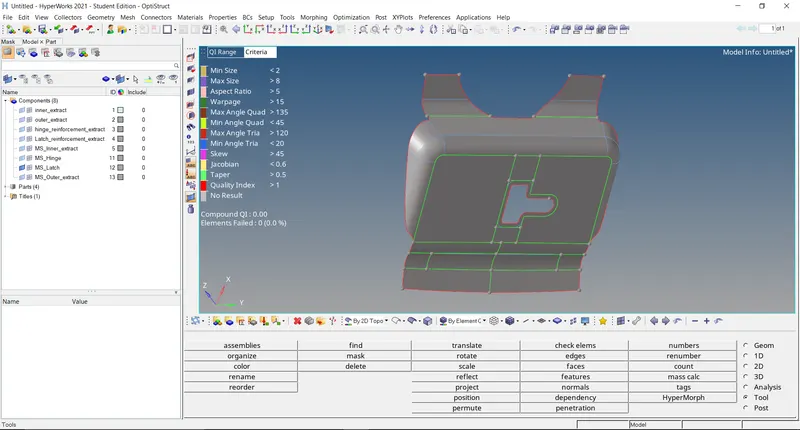
Fig4.1: Extracted and cleaned up midsurface of latch.
II]
Meshing:
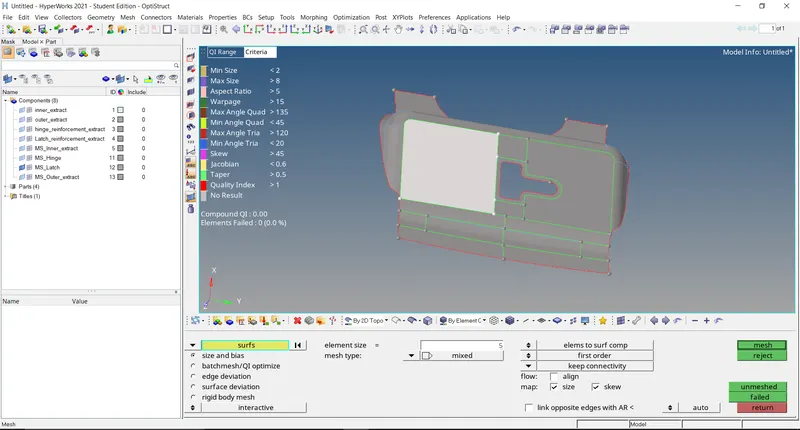
Fig4.2: Meshing first surface.
Rebuild the mesh to reduce the trias. Further drag the trias out and smooth the mesh for proper flow. Use the cleanup tools whenever and wherever necessary.
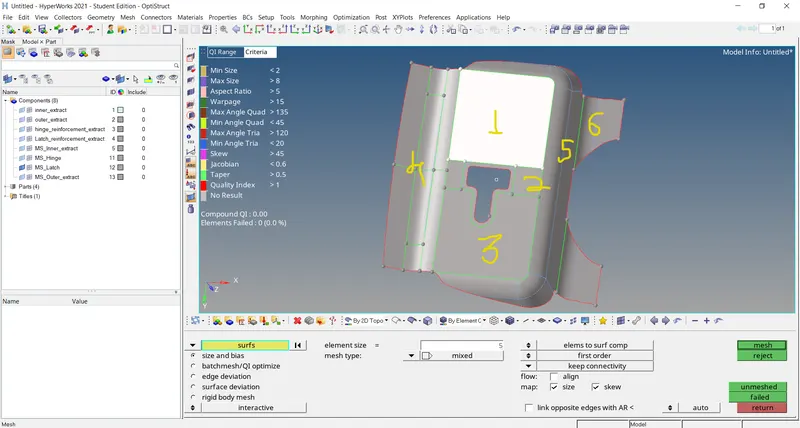
Fig4.3: Sequence of surfaces for meshing.
III]
Check for equivalence:
For equivalence check:
Goto => Tool => edges => elements: by attached => preview equivalence => equivalence => return
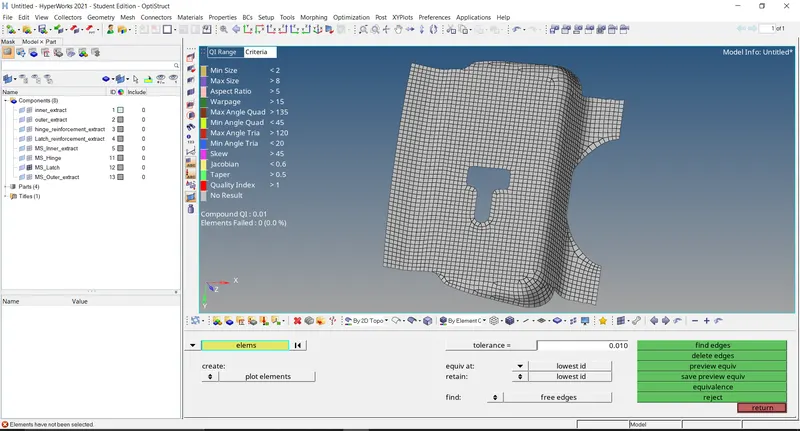
Fig4.4: Checking the equivalence.
IV]
Deleting Free edges:
For deleting free edges:
Goto => Tool => edges => elements: by attached => 'find edges' => 'delete edges'
Fig4.5: Deleting free egdes.
V]
Assigning thickness:
Create new property => Assign thickness to property => Assign property to required componenet.
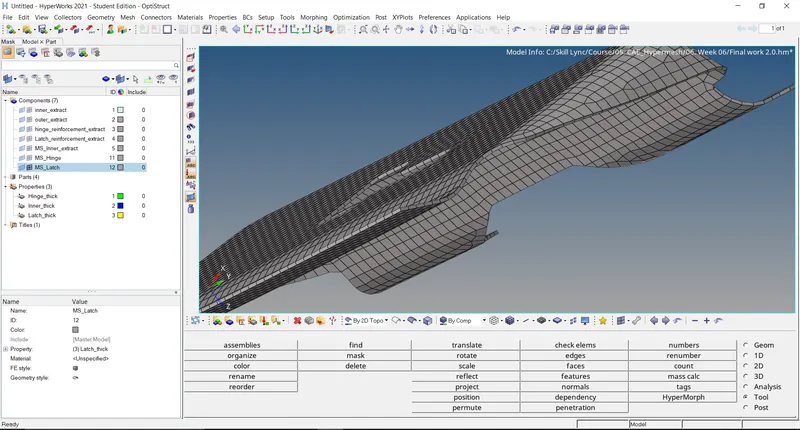
Fig4.6: Assigning thickness to the latch.
In this way we mesh the latch.