Week 6-Meshing of Hood Challenge
Pre-Processing of a Car Hood by Hyper mesh
AIM: The aim of this project is to mesh the complete hood of the passenger car, the meshing should accept the quality criteria given.
Procedure:
- Import the model
- Check the model for errors
- Extract Mid Surface.
- Geometry clean up
- Meshing
- Check for quality criteria
Import the model:
To Import the model in Hyper mesh open Hyper mesh, go to import the model and import it by browsing into the system.
Note: All parts are given in the same file.
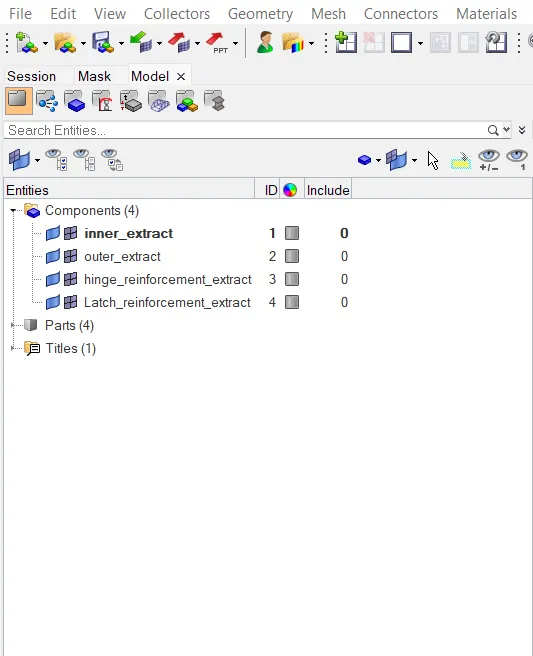
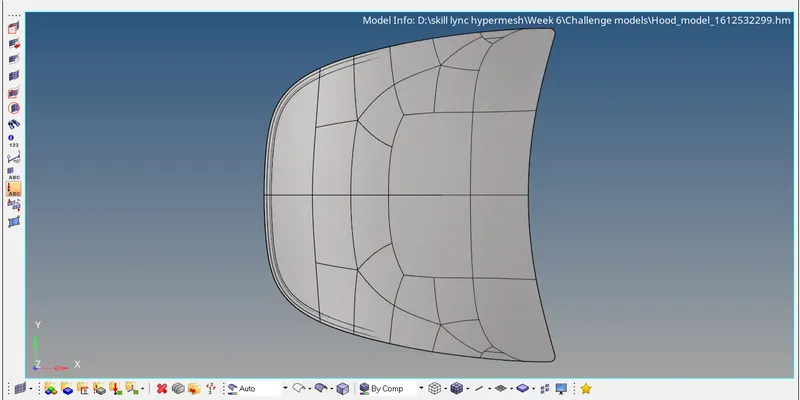
Model has been imported to hyper mesh window.
Check the model for errors:
Visually check for the errors in the geometry i.e. if there are any failed surfaces or missing surfaces or overlapped surfaces. Solve the errors if there are present.
Extract Mid Surface.
The midsurface for the model has to be extracted individually and saved it individually. As there are assembled component extract the midsurface individually.
To extract midsurface go to Geo-Midsurface. In auto midsurface option select the method Skin Offset because, this method captures the fillets accordingly.
Midsurface for Outer pannel.
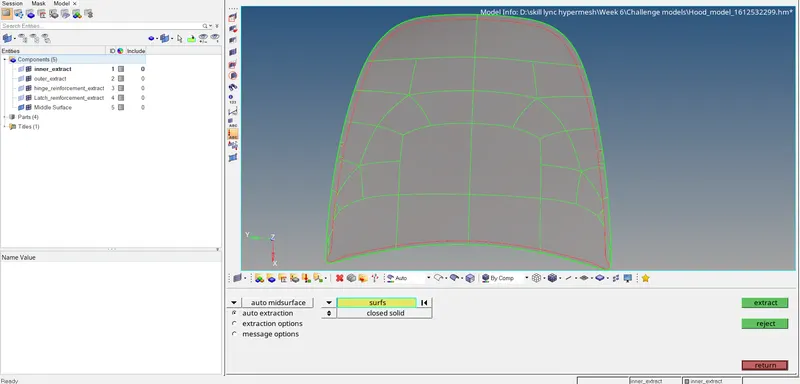
Above in the model tree we can observe that outer panel midsurface is created.Like wise follow the same method for all the remaining geometry.
Inner pannel Midsurface
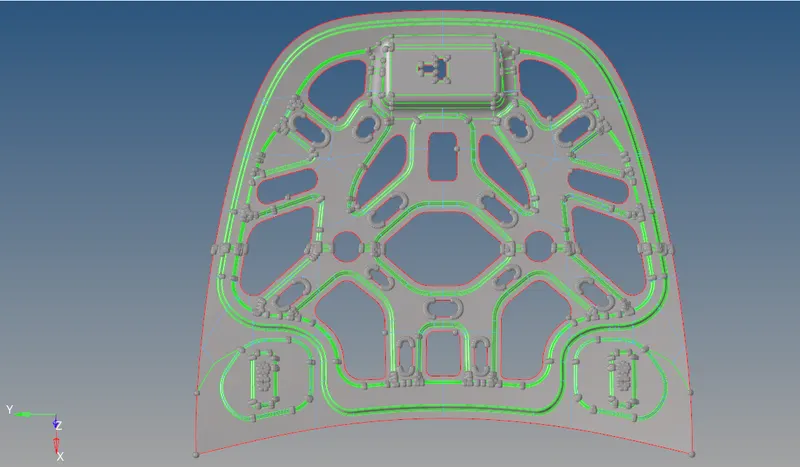
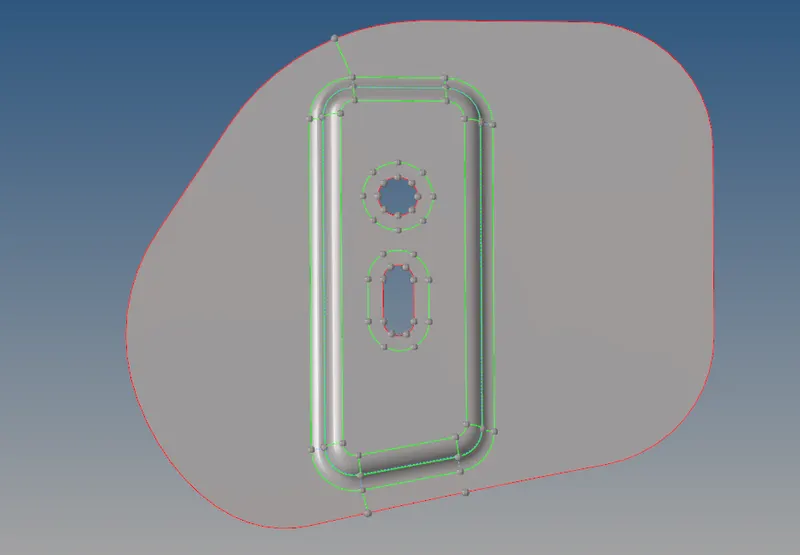
Hinge Midsurface
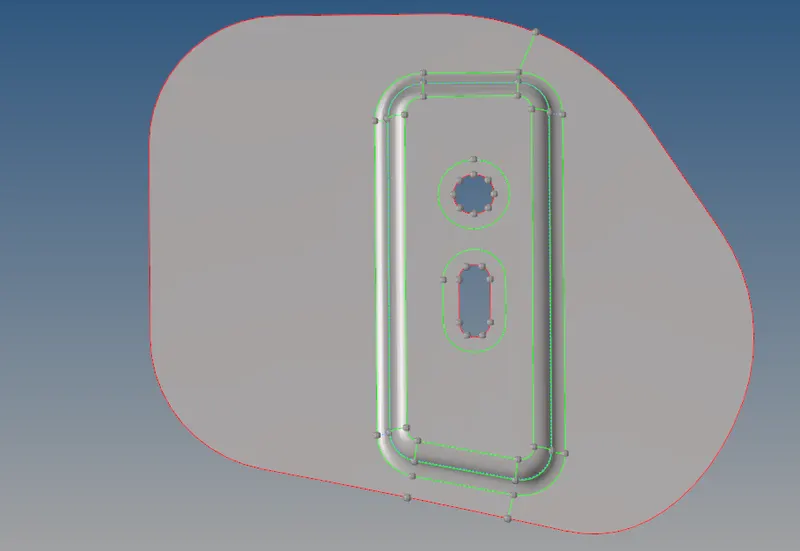
Hinge Midsurface
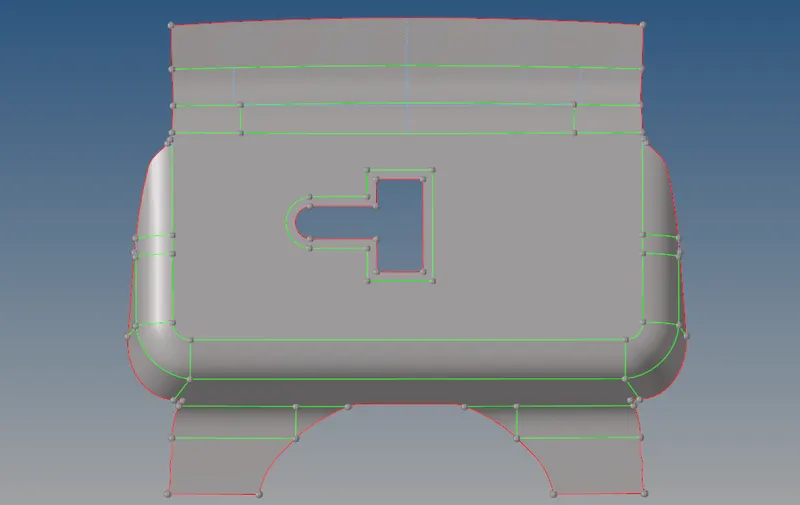
Latch Midsurface
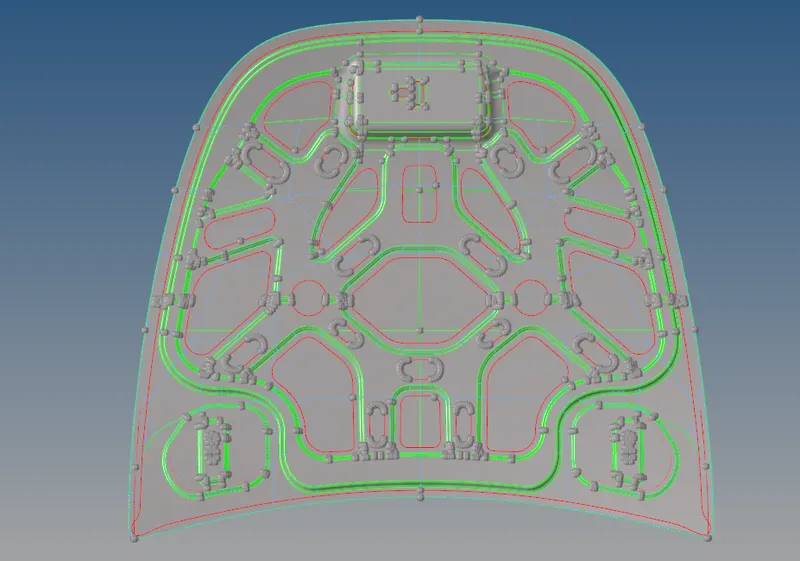
Assembly of complete midsurfaces of the components.
Geometry clean up
Geometry clean-up is nothing but, removing the unwanted lines from the midsurface. This has to be done because; the elements will fail for Quality criteria during meshing. To reduce and to get the good mesh flow we do geometry clean-up for every part.
To do geometry clean up go to Geo-auto clean up. Select surfaces in the selection tab. In surfaces click on displayed and proceed to auto clean up.
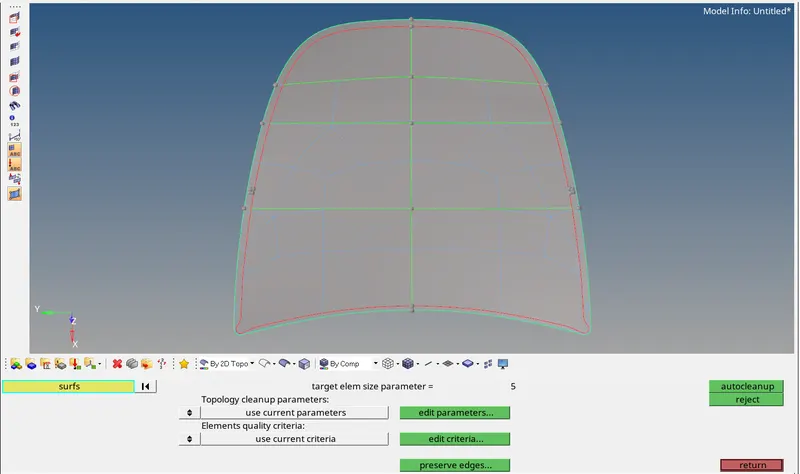
For outer panel. Autoclean up is done. But as the surface is big surface, for user convinence to get better mesh quality the large surface is divided into smaller surfaces by doing construction lines. This can be done by splitting the surfaces.
To split the surface go to quick edit select split surface node.

Meshing
Meshing is one of the most important steps in performing an accurate simulation using FEA. A mesh is made up of elements which contain nodes (coordinate locations in space that can vary by element type) that represent the shape of the geometry.
Types of Mesh:
- Quads
- Trias
- Mixed(Quads and trias)
- R-trias
- Quads only.
For our model we are using Mixed elements which means both quads and trias will present.
Why performing Mixed mesh type?
Because as the model is automotive component further simulated to Durability test. Durability test gives best result when the elements are mixed type.
To perform meshing go to 2D-automesh. Select the surface in selection tab.The element size for this challenge is 5, Mesh type is mixed. Check all the options in flow map. This gives good mesh flow.

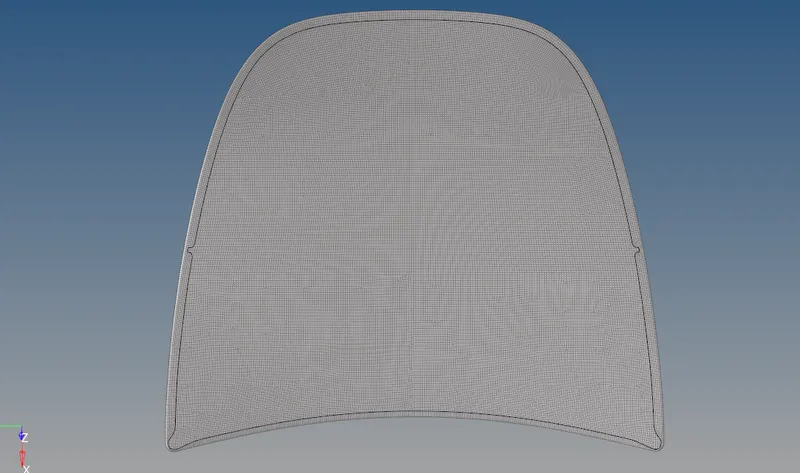
Outer panel meshed part.
Note: Follow the same procedure for all the components. The assembled Mesh components are shown below.
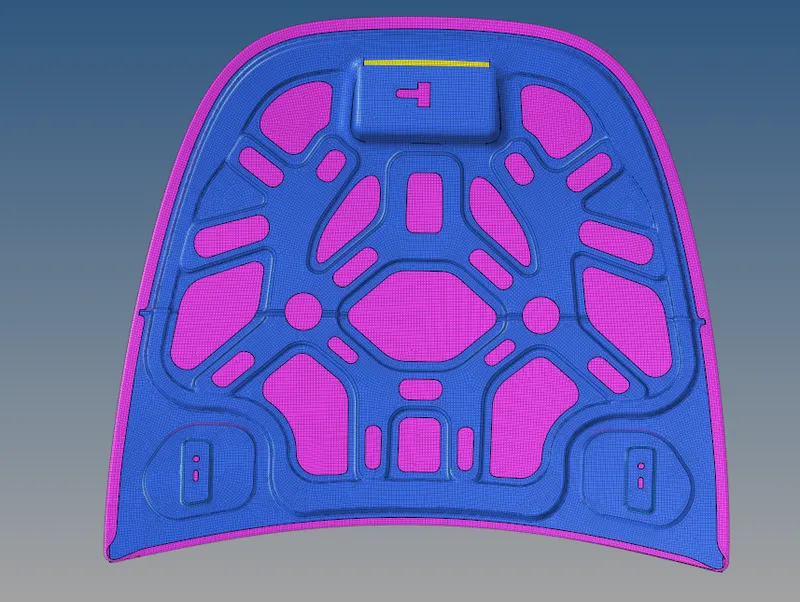
Assigning Property:
The property is assigned to differentiate the components with different colours an type. In property we can assign thickness colour etc.
To assign property go to model in tree. Right click and create property. Create different property for all the components.
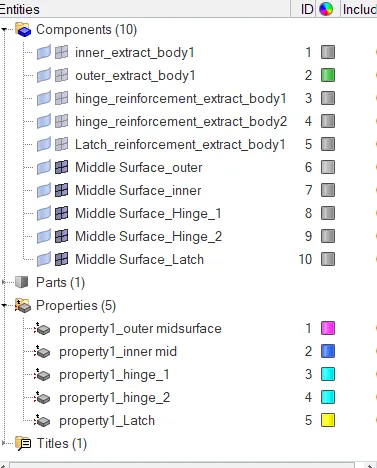
After creating the properties assign the properties for the midsurfaces.
Check for quality criteria:
The quality criteria is shown below.
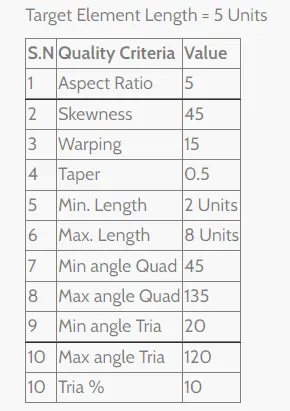
After meshing the some of the elements will fail for quality criteria. These should be resolved by the user manually by using some tools in Hyper mesh.
In Hyper mesh we have a tab called Element clean up in 2d. From this go to edit criteria tab and edit the values as given in the challenge.
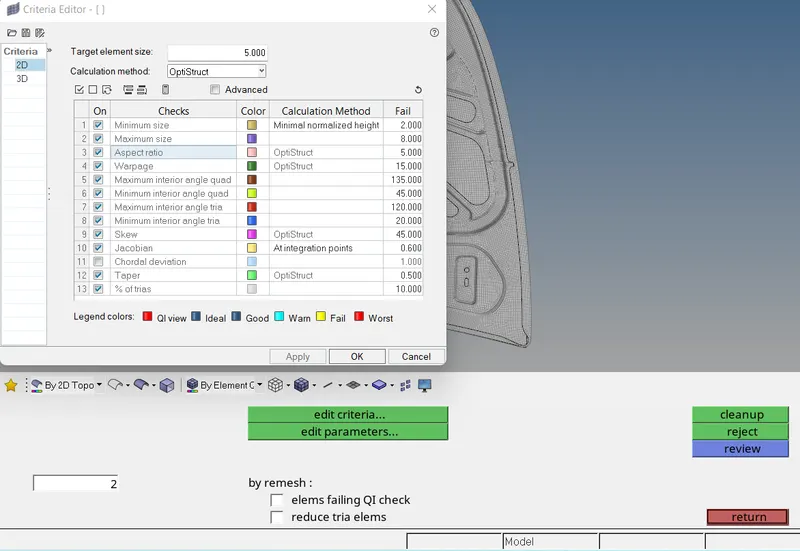
Click on apply/ok.
When elements fail use the tools rebuild mesh. It is best practice to rebuild mesh as we complete automesh for the particular surface. This mostly gives good mesh flow.

Go to element edit and spli the elements when both the trias are near tio each other. Combine the tria elements to Quadwhen there are two trias at the same place.

In 2d go to Quality index, and decrese the filed elements by using above options.
Swap the display Thershold to fail and check for filed elements and clear them off.
At last the failed elements should be Zero for all the Quality.
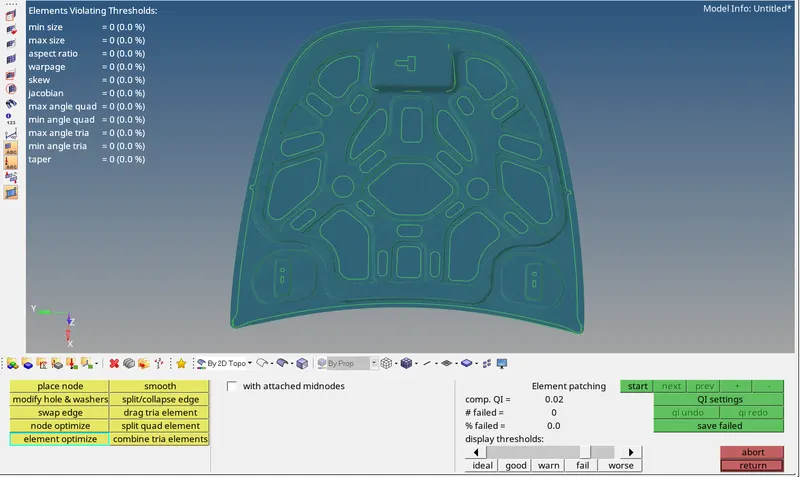
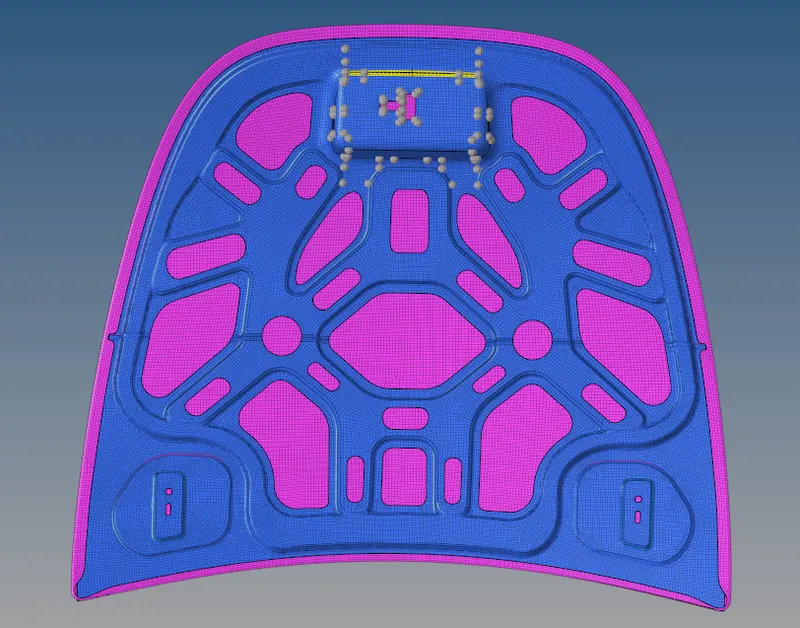
Final output model:
CONCLUSION:
In this project, i have learnt how to check the model for errors,extracting the midsurface and meshng the geometry for quality criteria and Debugging the failed elements. Hecnce the given geometry is meshed according to the quality criteria.
Link of the model: https://drive.google.com/file/d/1kAWmMIBQNwdnQ0jewks3Tj7a2Q5vBGir/view?usp=sharing