Week 5 Challenge : Surface wrap on Automotive Assembly
Objective :
- For the given models ,we have to check for the geometrical errors and delete surfaces which are unwanted for surface wrap .
- After clearing geometry we have to merge all 3 models .
- Then finally we have to perform surface wrap for the merged model.
Introduction :
ANSA :
- ANSA is a Computer-aided engineering tool for Finite Element Analysis and CFD Analysis widely used in the automotive industry. It is developed by BETA CAE Systems. The software is distributed world wide by a number of BETA CAE Systems subsidiaries and business agents.
- ANSA maintains the association between CAD geometry and the FE mesh. This means that the FE meshes are better representations of their geometric parents. Also it is easy to maintain and update any changes in the geometry by simply reworking the updated area instead of recreating the FE from scratch.
- It carries several proprietary algorithms for meshing suitable for both CFD and structural models. ANSA was initially standing for 'Automatic net generation for structural analysis', but the software has gone beyond that very quickly. ANSA has broadly six menus which are used to do various activities those are: TOPO MESH, VMESH ,DECK-SOLVER, MORPH ,HBLOCK.
Surface wrap :
- Surface wrap is used for meshing the component .
- If the geometry is very complicated and doing topo cleanup and creating single volume is very difficult , in that scenario we use surface wrap to create mesh ,were it creates a single volume .
- It creates a wrap either inside or outside depending upon the input .
- In our model we wrap it from outside and doesn't deal with inner surfaces .
- To get the exact surface wrap output we need to delete all unnecessary surface which we don't want and we need to close all the open surfaces .
- On this type of models we do outerflow analysis ,when air flows through grills and then over engine and we see how effective the air flow over engine and see the convective heat transfer from engine to the air .So we need exterior mesh ,so for that purpose here surface wrap mesh is much preferable .
- If you have a complex model like this then if you go with surface mesh for individual component and if you are trying to make a single volume and define volume and delete all those , instead of such large and complicated process , we can do surface wrap and we get directly common volume for all the three components after merging and doing wrap .
Different type of modules in ANSA :
- TOPO - Set of tools for Geometry clean-up and for setting up of PIDs.
- MESH - Tools to generate Surface Mesh or 2D Mesh.
- VOLUME MESH - To generate solid or 3D Mesh.
- SOLVER DECKS - Tools based on different solvers such as ABAQUS, RADIOSS ,ANSYS etc.
- MORPH - Advanced tool to capture geometry more accurately while meshing.
Solution procedure :
- For solving we follow the below procedure ,
- Import the CAD model.
- Identifying & cleanup of the topological / geometry errors for all the 3 models .
- Merging all the 3 models.
- Close the open surfaces / holes in the model .
- Setting the mesh parameters , selection of meshing type .
- To perform surface wrap for the merged model .
- Finally conclude by comparing between the surface wrap generated with 3 mm mesh target length and 5 mm mesh target length .
- Let us start solving one by one by following above steps :
- Let us identifying & clean all the topological / geometry errors for all the 3 models by selecting one by one i.e., first engine then gearbox and then transmission model.
1) Importing CAD the model :
Model -1 :- Engine :
- Let us start with engine model and clear topological errors .
- To import the CAD model we follow below steps,
Go to file -> open -> browse the location of the CAD model -> select it click on open.
- The model which we have imported opened in ENT mode , we can see the PID mode by selecting PID mode in the bottom layout.The below image is the PID mode of our model .
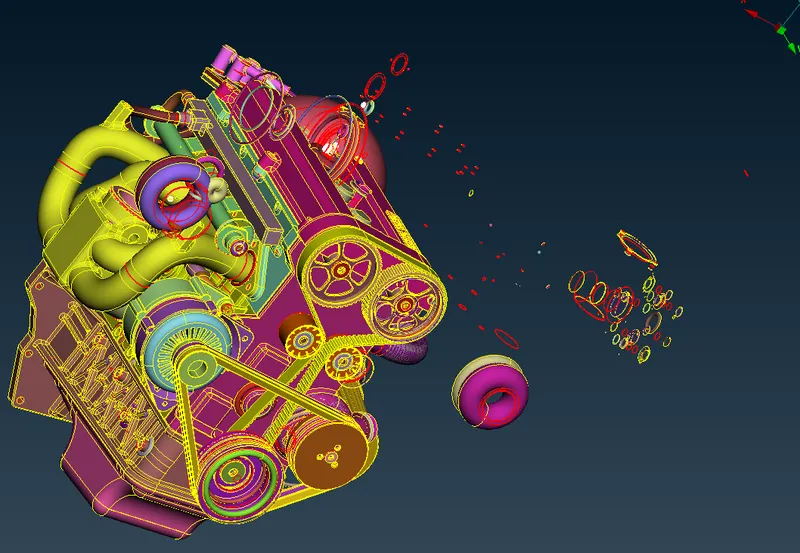
- In our model model we can see the errors like unnecessary surfaces , single cons , triplecons etc. Let us clear the topo errors one by one.
2) Identifying & cleanup of the topological / geometry errors :
- Before performing any topo clean up , we seen that the given geometry has several topological errors . To do surface wrap we should make the components such that no unwanted surfaces or components are present outside the geometry .
- Firstly we can see lot of unchecked surfaces ,which are to be directly selected by using show only and then delete , they are the surfaces which are smaller than the mesh length or minimum width surfaces which are not supposed to have and donot have any significance.
- In the below image we can see the unchecked surface , which we drag and select all and then delete.

- Here, we are much concerned about outside features of the models and not about inside features .We start deleting the outside surfaces which are unwanted and then patch the surface if there are any holes are open surfaces such that we do not make any error to the wrap .
- We delete the unwanted surfaces by using universal delete and select directly or by box selection and delete them by setting the view , which is more comfortable ,so that we can delete exact surfaces to delete .
- We should mainly guess the unwanted surfaces by seesing the circular rings or disks ,which are created to create some slots or fillet in the design and also delete unwanted surfaces which are far away from main geometry without any connection.
- If you are not clear about the selection always zoom in and select the right surface . Also use wireframe mode for proper selection (Cntrl + shift or directly turn off shadow mode ) .
- We have to also delete the duplicate surfaces ,you can hide the top part and delete the inner unwanted extra surface .
- We will delete one by one surface which are unnecessary and after deleting some visible ,it is better to hide all the necessary required surfaces or major PID and then after hiding ,we will find a lot of delete of unnecessary surfaces and then we will delete all of them in one shot .Here mostly surfaces which are not in the shape of ring are required one .
- While selcting the required surfaces ,we change the selction type from PID to PID reg or entity depending on the situation .Also we use wireframe mode for proper selection .
- The below image is the image of surfaces left after hiding required surfaces , we delete all them in one shot by using universal delete .
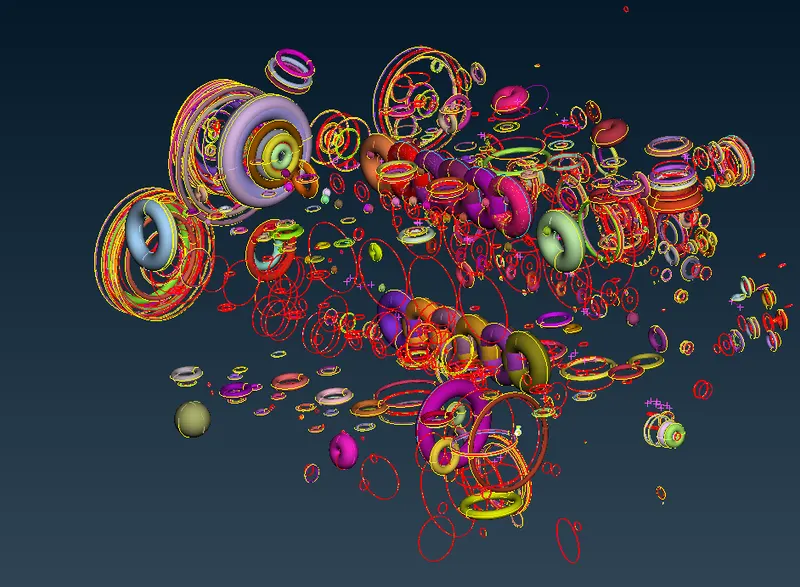
- Here , triple conoverlapped surfaces and inner surfaces doesn't make any problem because as we are doing surface wrap , it creates wrap only on the top part and keep inside part hallow making whole 3 models as single volume .We just delte all the unnecssary surfaces just to make sure that we don't have any error after doing the wrap .
- Finally make sure that we don't have any outside surface error or deleting any required surface .If we have these outisde ring type of surfaces left undeleted then they will also present in the wrap ,which changes the shape of surface wrap than actual , which is bad .In order to have good CFD results we have to delete those surfaces .
- Once after deleting those surfaces , you will find our surfaces or geometry is much better than earlier .
- In the below image you can see that we have deleted all topo errors and next thing to do is to save this model and open another model .
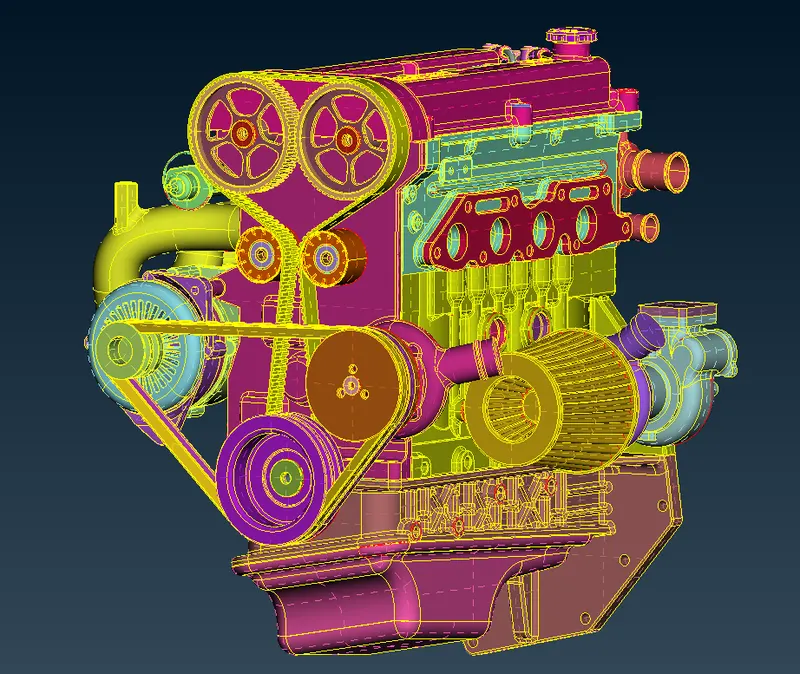
- So by following above points , let us clear topo errors if present for the other two models.
Model -2 :- Gear box :
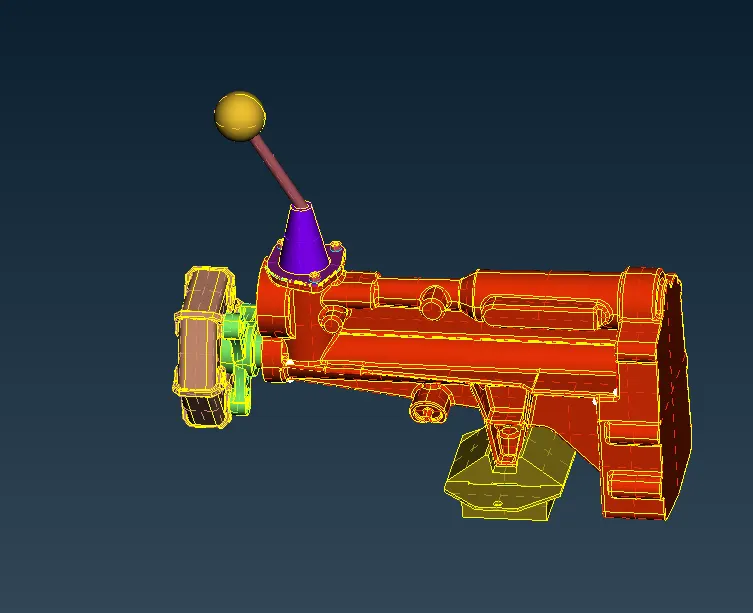
- The below image is the PID mode of our gear box model after import .
Model -3 :- Transmission model :
- The below image is the PID mode of our transmission model after import .
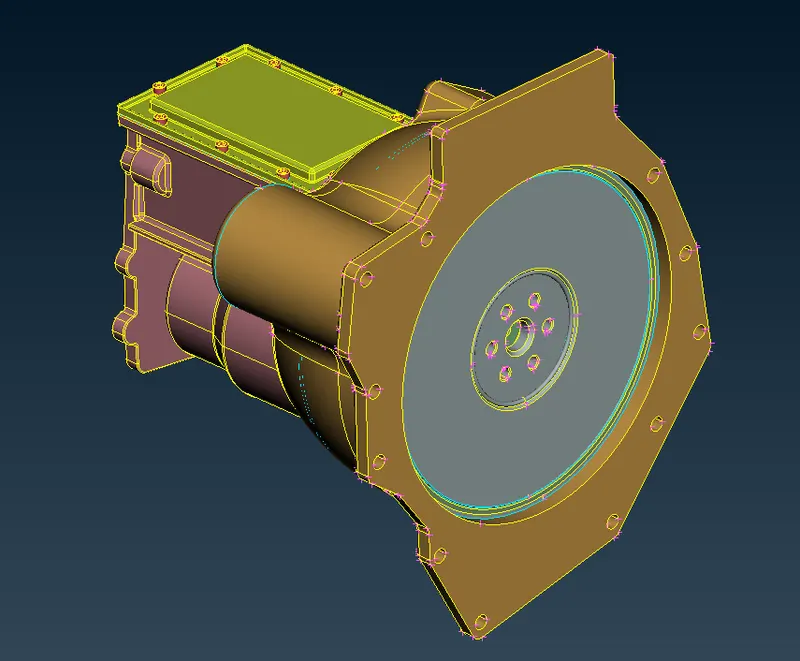
- There are not much topo errors for these gear box and transmission model ,we cleared those by following the same methods as above and next thing is to do surfcae wrap .But before surface wrap we have to close the holes or open surface in our 3 models .If we have open holes it may lead to meshing error i.e., distortion may happen which may lead to skewed elements .So as not to get such types of errors, we have to close all the holes in our model .
3) Closing the open surfaces / holes in the model and merging all the 3 models :
- The way we do this is ,we clear/ patch the open surfaces /holes of our engine model and then merge other two models into the same file and then patch the holes for other two models .
- Before filling the holes for the engine model , we can see that there are belts present on the pulley .You can observe those in the below image .We can remove belts on the pulley , because it is very thin and surface wrap for these will not be captured well .
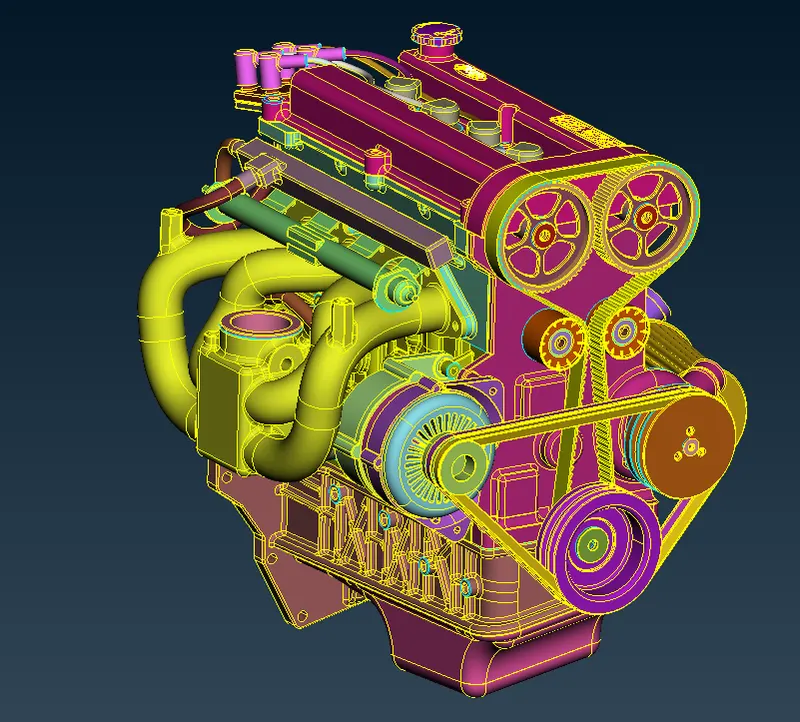
- The below image is the PID mode of our engine model after belts were removed .
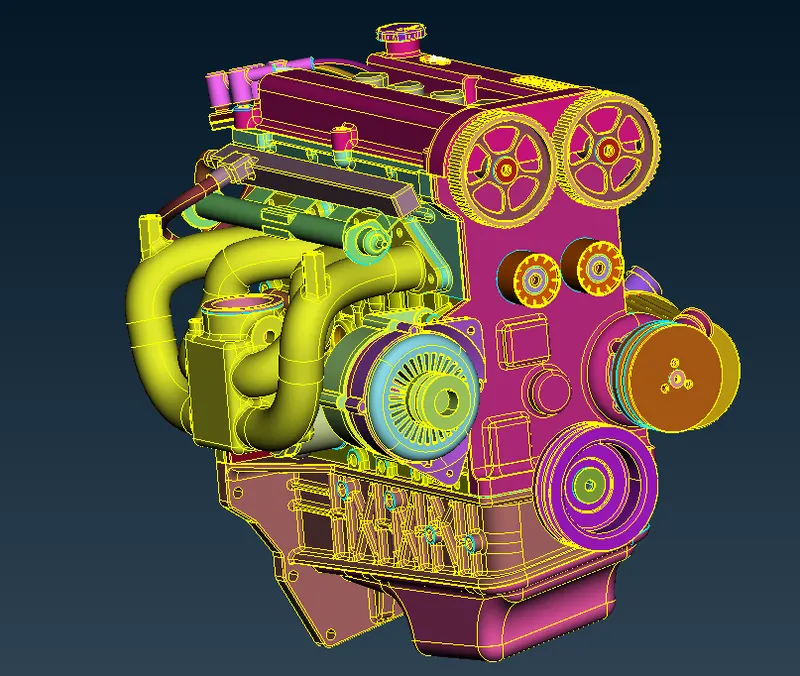
- Now next thing to do is to patch the open surfaces .Here in all the cases , depending on the situation we use any one of the coons or fitted to create new surface /patch the holes .
- So we start with patching the surface for engine model and then merge other two files and patch for the also .
- We have to mainly fill the large holes , the smaller holes may automatically closed after wrap ,but it's better to close all open surfaces , in order to avoid any mesh error afterwards .
- The below image is of the engine model after closing open surfaces .
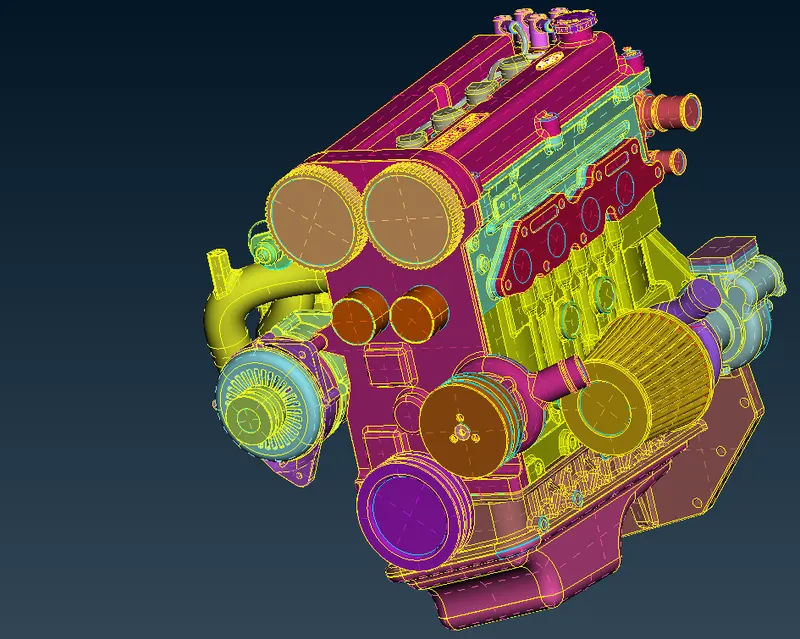
- Now let us merge all the three models and close holes for other two models , if any present .
- To merge i.e., to have all the three models in a single GUI , we have to go to file -> merge -> then select the file and then open -> then again the pop up window merge action -> select merge model with current model -> then click ok .
- In the similar way open another file and merge , so that we have all the three models in a single GUI .
- The below image is of the whole model after merging all the three models .
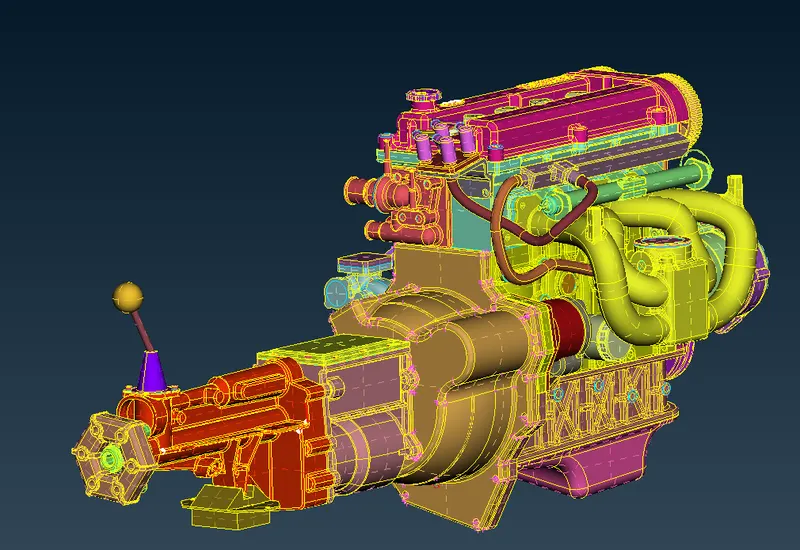
- Now check , if any open surfaces present , if yes then close the surfaces for whole model wherever they are present .
- The below image is of the merged model after closing open surfaces .
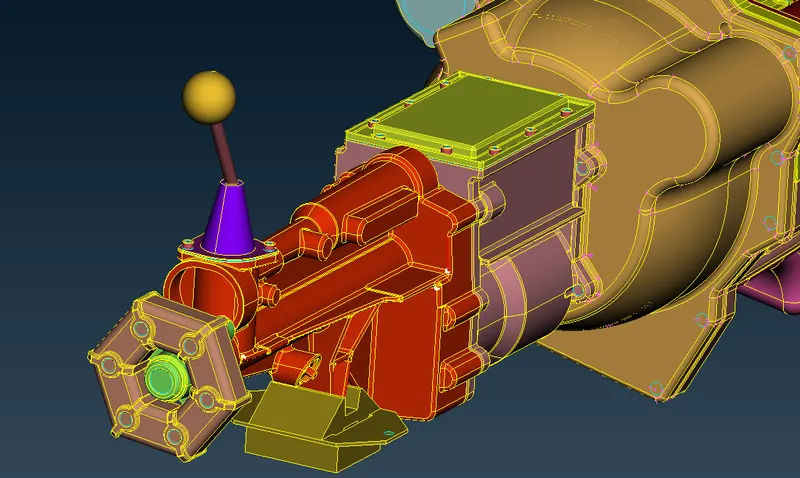
- So ,we can conclude that all the topo errors have been corrected & the model is ready to be meshed.
4) Setting the mesh parameters , selection of meshing type and to perform surface wrap for the merged model :
- Before doing the surface wrap wrap let us delete all the empty and unwanted PID's by using compress .
- Then next thing is to do surface wrap .To do surface wrap we have to follow below steps ,
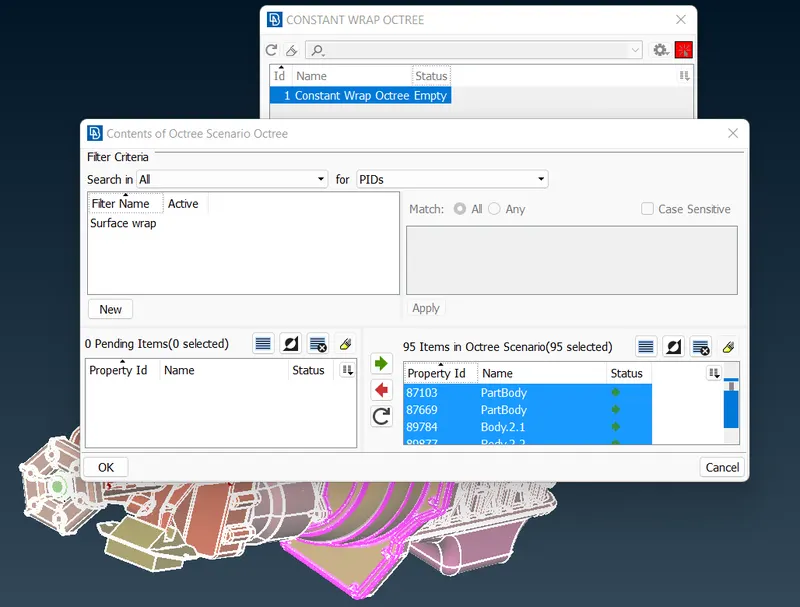
We have to go to mesh deck -> then under elements select wrap -> then under wrap select constant length -> then a pop up box opens -> then double click on empty under status then another pop up opens -> then you can give name for wrap and -> double click on perimeters to give target length i.e., 3mm -> then keep remaining as default i.e.,nodes out of structure and assign properties from structure under perimeters for mesh -> then click ok -> then under contents double click on '0' -> then new pop up opens -> you can give name here and select all the PIDs ( cntrl+A ) , then you can see whole model is selected in the GUI -> then click on green arrow and then ok -> now you will see '95' PIDs in the content which was earlier '0' -> then click on run to complete wrap .
- In the below image you can see the same thing that 95 PIDs are selected for wrap .
- Finally you will see status 'ready' which was 'empty' before .You can observe the same thing in the below image .
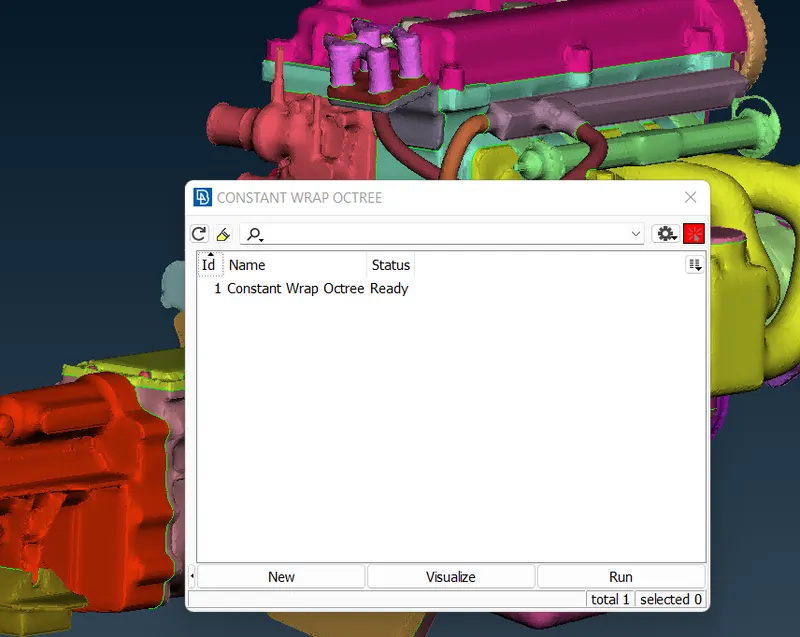
- This complete creation of wrap .
- Here each element will take the PID of parent geometry because as we gave it in mesh controls , in the perimeter we enabled that option .
- We can compare parent geometry with the surface wrap , by displaying both at a time for that we have to select both geometry and FE mode at a time in the bottom in visible options .
- You will observe that wrap is very much perfect with 3mm mesh , and observe that wrap of shell elements is very much obeying parent geometry .
- You can observe the same thing in the below image that wrap of shell elements is very much obeying parent geometry .
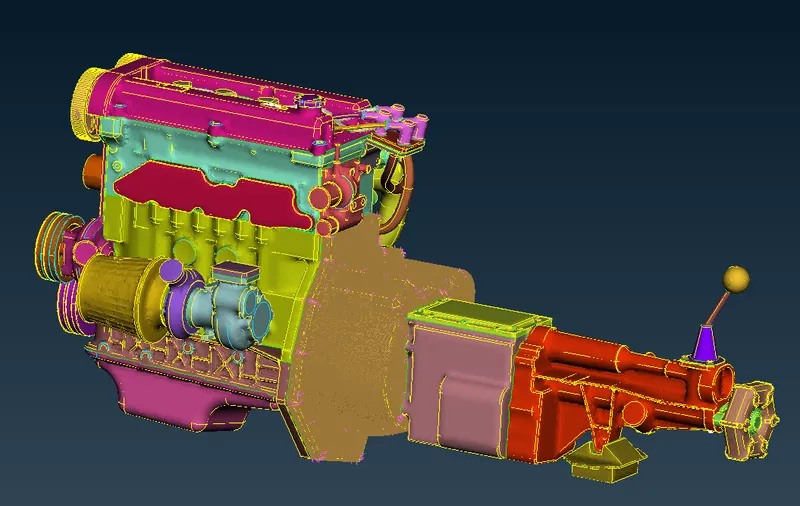
- The below image is the final view of mesh/wrap after surface wrap has performed with a target mesh length of 3 mm .
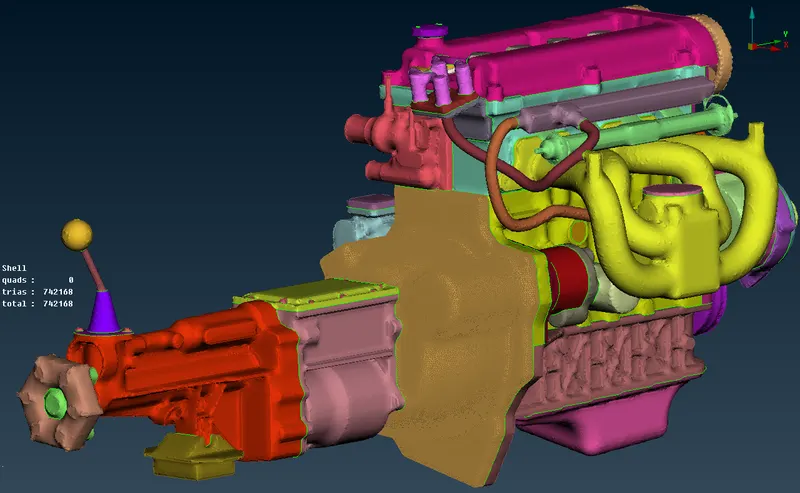
5) Comparision of quality of the surface wrap generated between 3 mm mesh target length and 5 mm mesh target length :
- Let us go one step further by increasing target mesh length to 5 mm and create surface wrap. If we use large target length the quality of wrap may not be good and even at some places the mesh may not be captured well if element length is greater than surface size .But it will make less time to mesh and also for solving for CFD analysis , there also the computaional effort will be less .
- You can observe the quality of 5 mm wrap in the below image were the quality of wrap is not that much good and the number of elements is alos less.
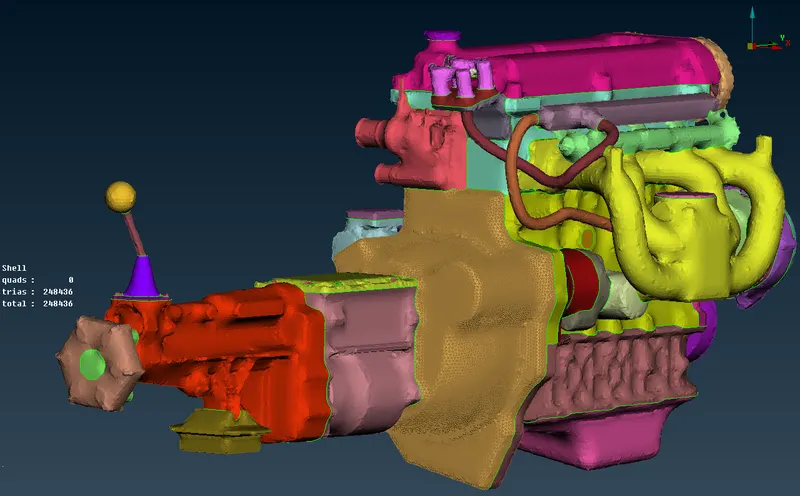
- If we use target length of very small , the quality of your surface wrap will improve which may increase lot of elements and mesh generation time and also for solving for CFD analysis , there also the computaional effort will increase .
- In the below image you can clearly see the quality of wrap between two different target lengths( left - 3mm target length , right - 5 mm target length ) .
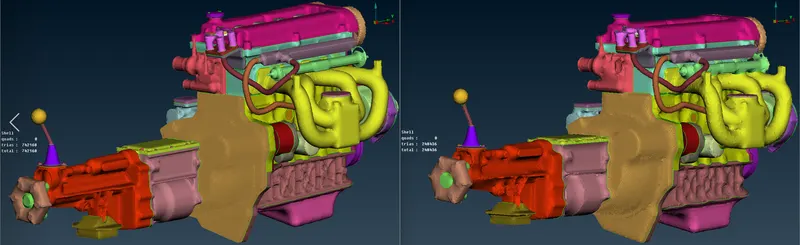
- So , we have to give the mesh target length such that all of our surfaces are captured well .
Learning outcome:
In this process of working on this project we have learned how to,
- Identifying & cleanup of the topological / geometry errors for all the 3 models .
- Merging all the 3 given models.
- Setting the mesh parameters , selection of meshing type and to perform surface wrap for the merged model .
Conclusion :
- We have succesfully merged all the 3 components and completed the meshing with surface wrap for the full merged model with a target mesh length of 3 mm .
Google drive link for challenge file folder :
https://drive.google.com/file/d/1oivemne2G2nA0xcg9ZZt9v9LCQMoNG-R/view?usp=sharing