Week 4 Challenge : CFD Meshing for BMW car
-
For the given model, check and solve all geometrical errors on half portion and Assign appropriate PIDs. Perform meshing with the given Target length and element Quality criteria. After meshing the half model, Do symmetry to the other side.
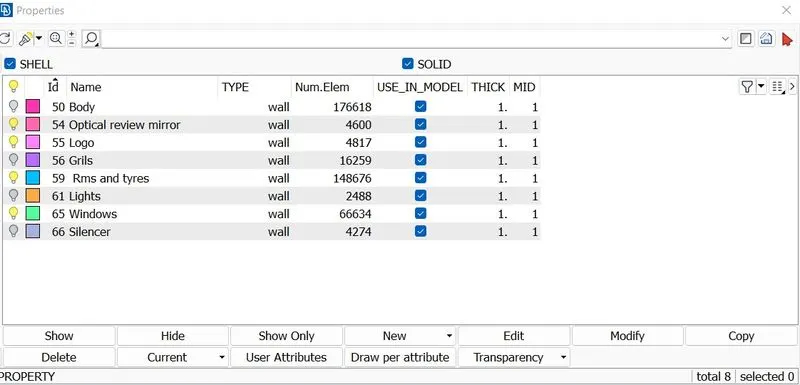
- Target lengths for the different parts of a model are as follow:
- Body - 3 mm
- Lights - 4 mm
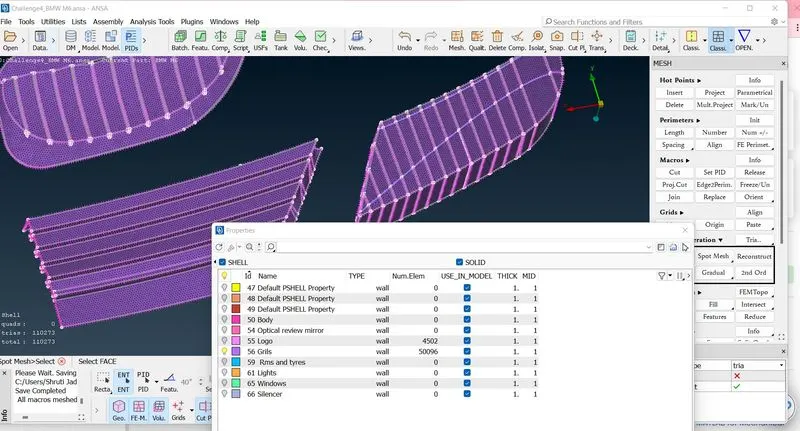
- Grills - 1 mm
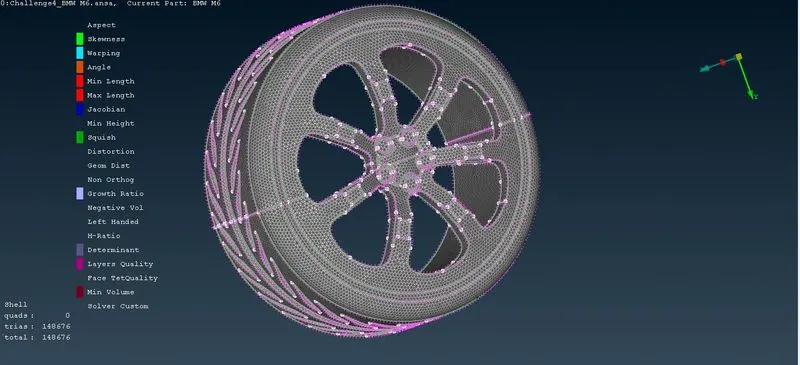
- Rims and Tyres - 2 mm
- Optical Rear view mirror - 2 mm
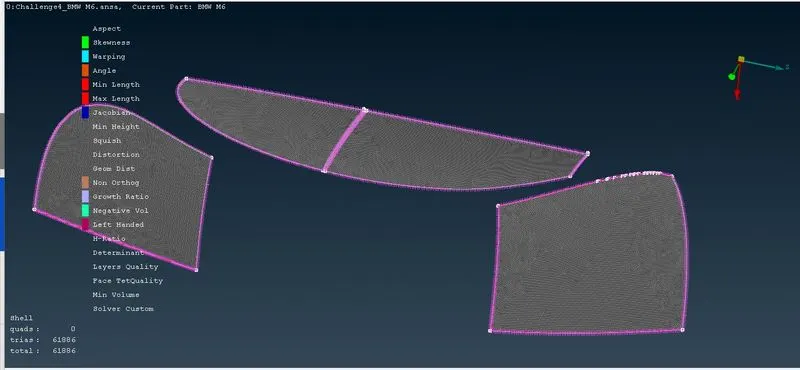
- Window - 2 mm
- Silencer - 3 mm
- Logo - 1 mm
- Objective- To perform CFD Meshing for BMW car with appropriate target lengths and assign appropriate PIDs.
- CFD meshing applies a numerical grid to the fluid body and boundary.
- The main importance of meshing in CFD or FEA lies in the ability to solve the governing partial differential equations in the assigned cell.
- Meshing is done to discretise the given model into finite number of elements
- Meshing is one of the most important steps in performing an accurate FEA simulation.
- A mesh consists of elements that contain nodes (coordinate locations in space that can vary by element type) that represent the shape of the geometry.
- When Mesh length is small, the number of nodes should be high.
- when Mesh length is small, the number of nodes should be low.
- Mesh length is the distance between two nodes.
- Surface Meshing -An area mesh is a representation of a surface that consists of vertices, edges, and faces.
- A surface mesh consists of a set of polygonal surfaces, often triangles, which together form the surface covering of an object.
- There are currently two distinct alternatives for surface representation in the deformable mesh literature, namely triangular and simplex meshes.
- Triangular meshes consist of triangular faces that share each of their edges with exactly one other triangular face. Simplex networks are topological duals of triangular networks.
- Volume Meshing- Solid meshes, also known as solid meshes, use three-dimensional elements—typically tetrahedra, hexahedra, and polyhedra—to define both surface and internal structure.
- One application of solid meshes is in finite element analysis, which can use regular or irregular solid meshes to calculate internal stresses and forces in an object throughout the volume of the object.
- Cad model
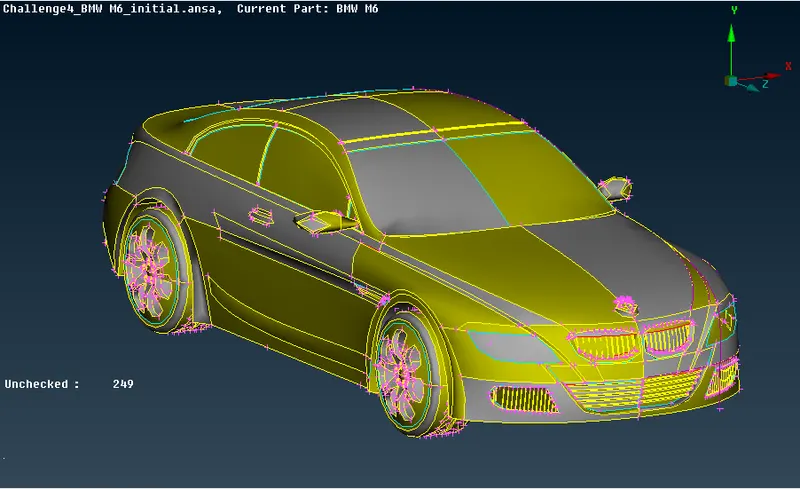
- Procedure
- Topo clean up
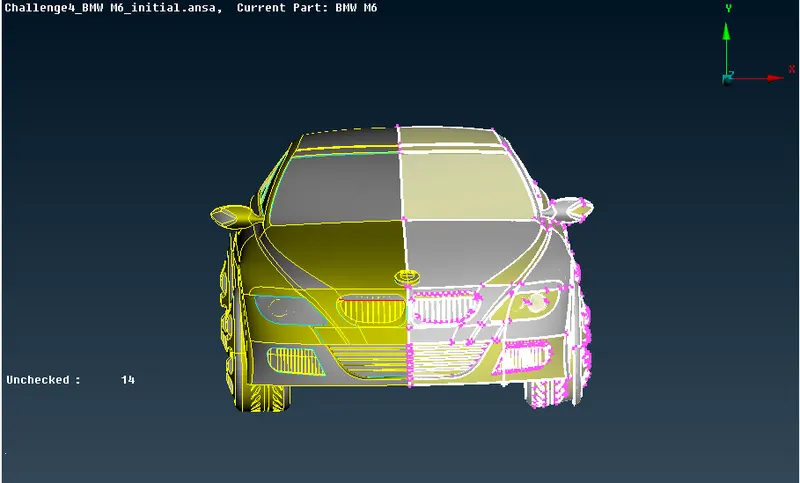
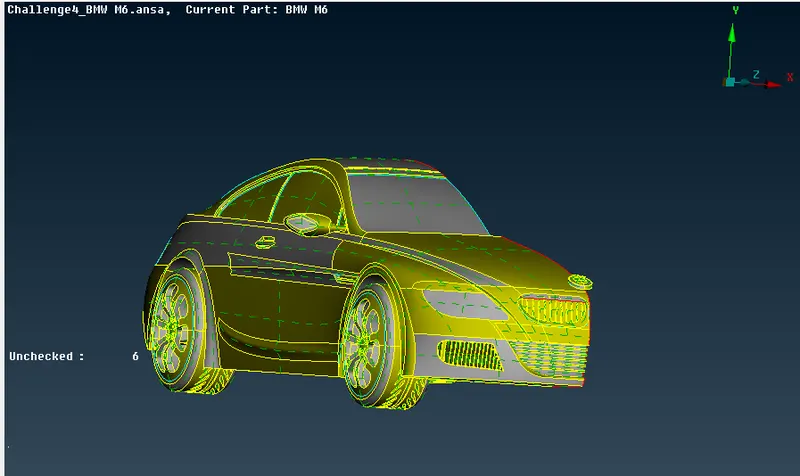
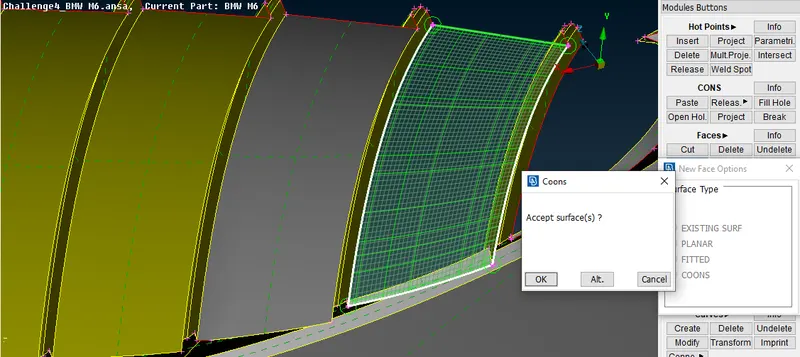
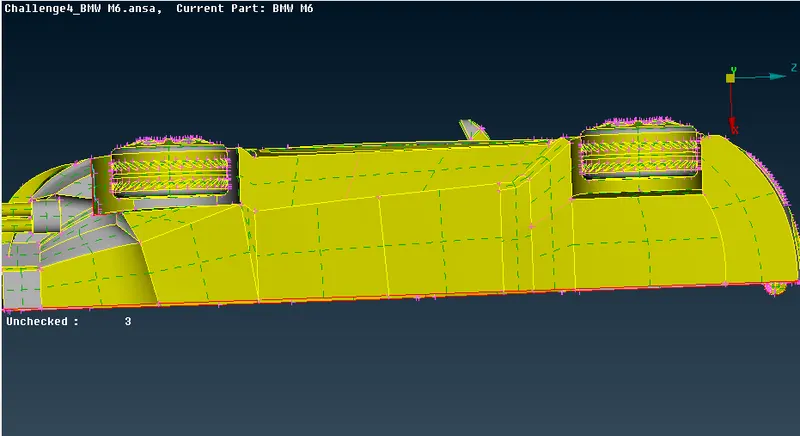
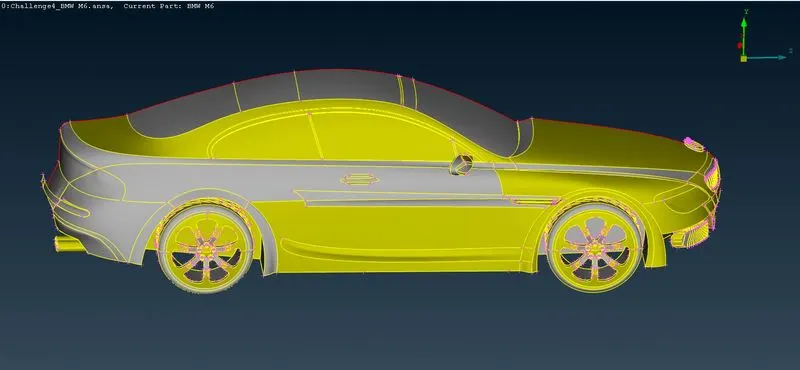
- Deleted unwanted surfaces and solve the errors
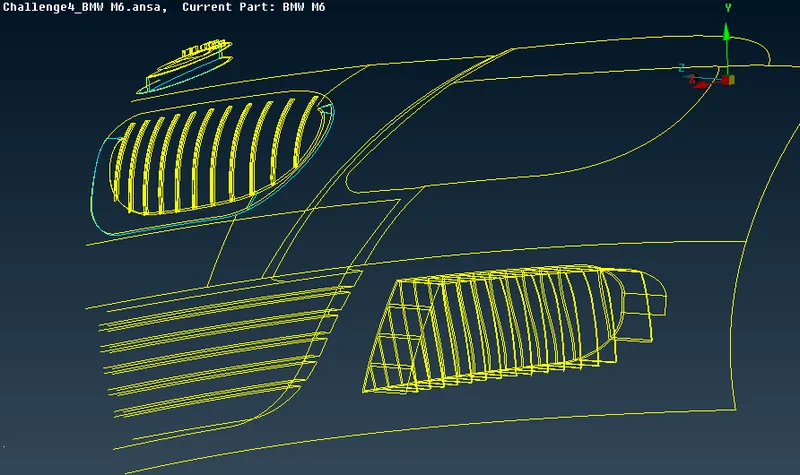
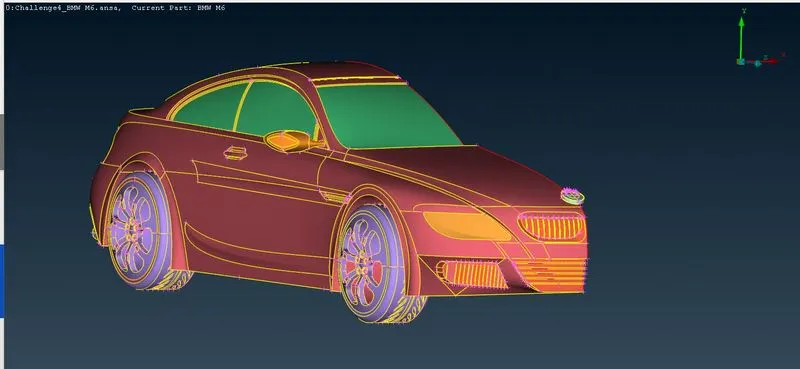
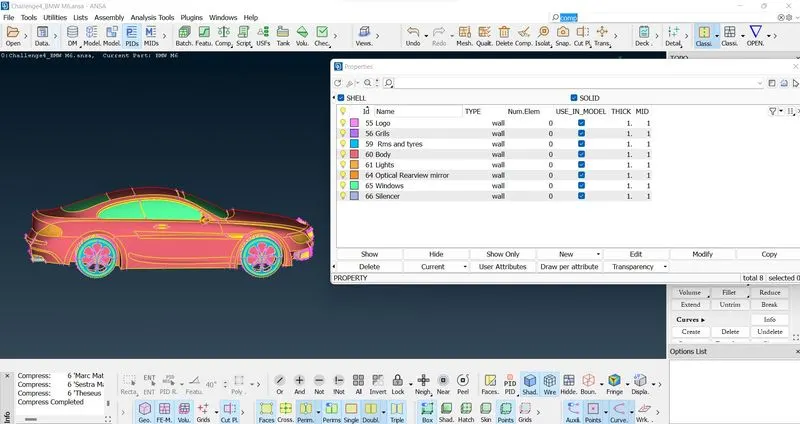
- Assigning pids
- Meshing
- Body
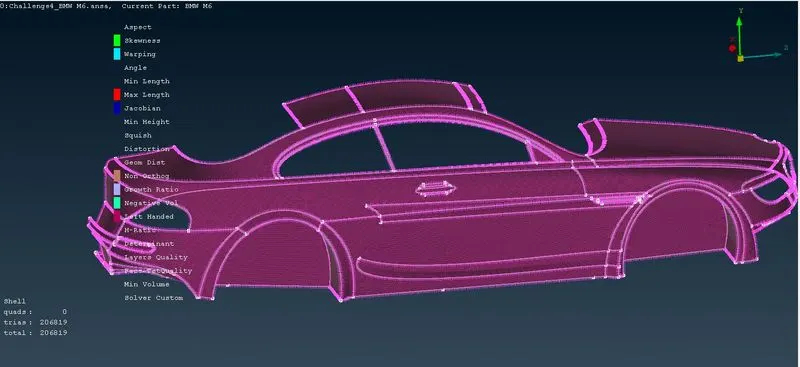
- Grills
- Windows
- Tyres
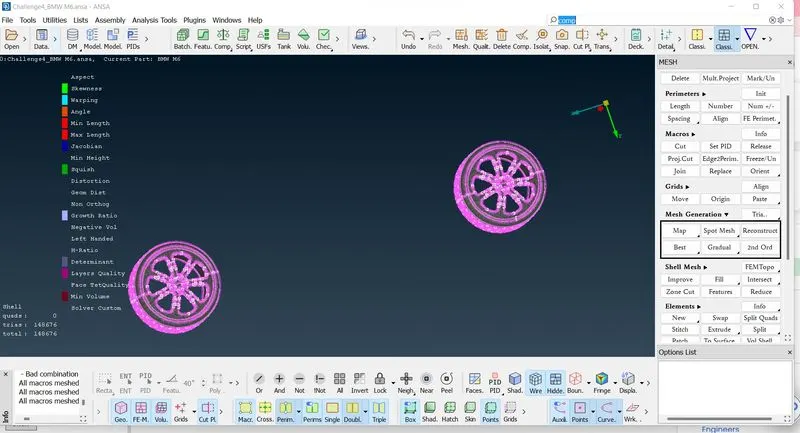
- Silencer
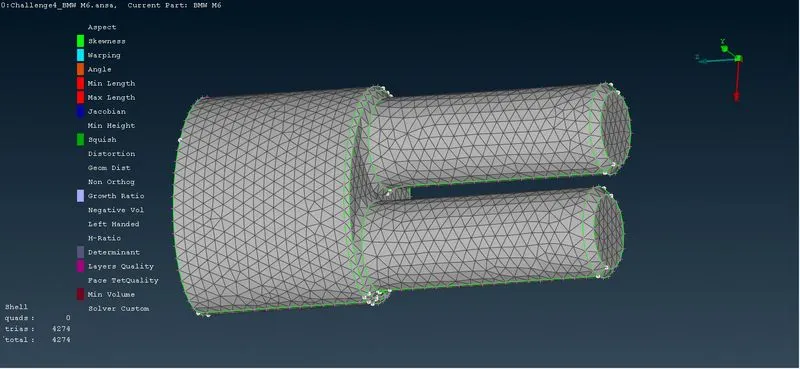
- Mirror
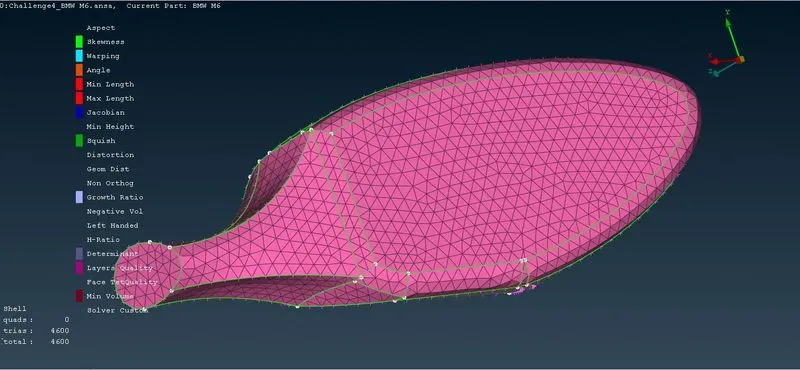
- Lights
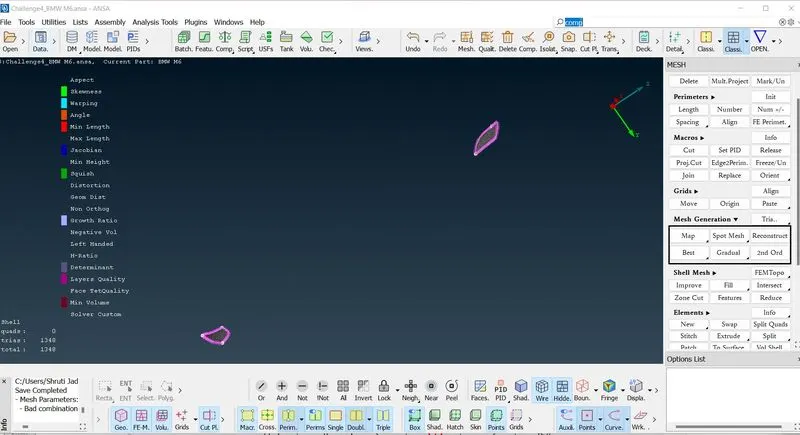
- Logo
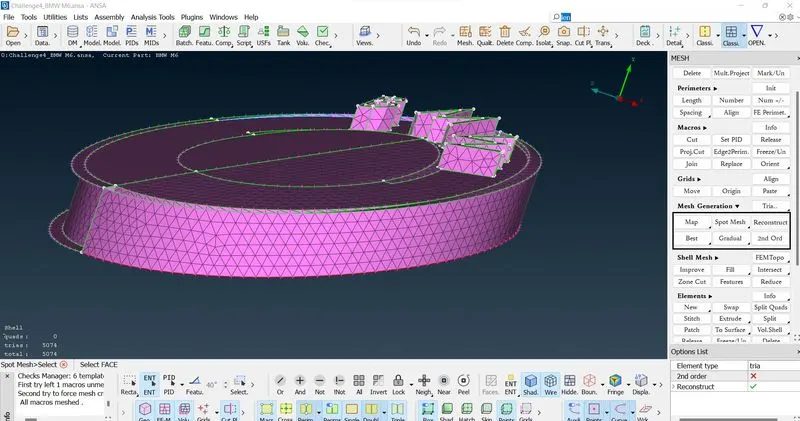
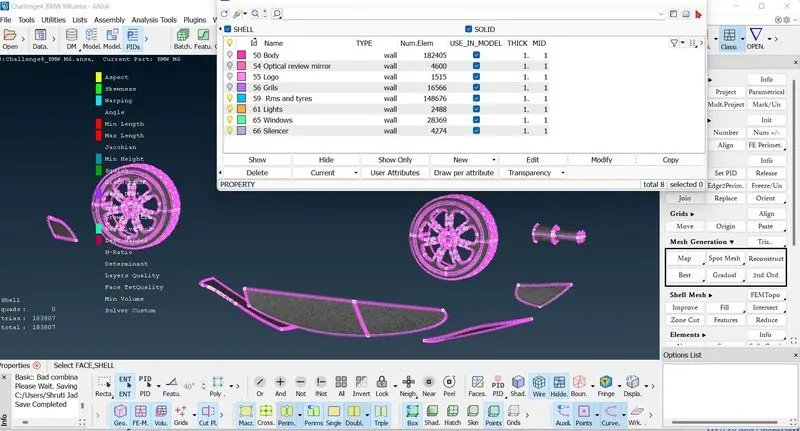
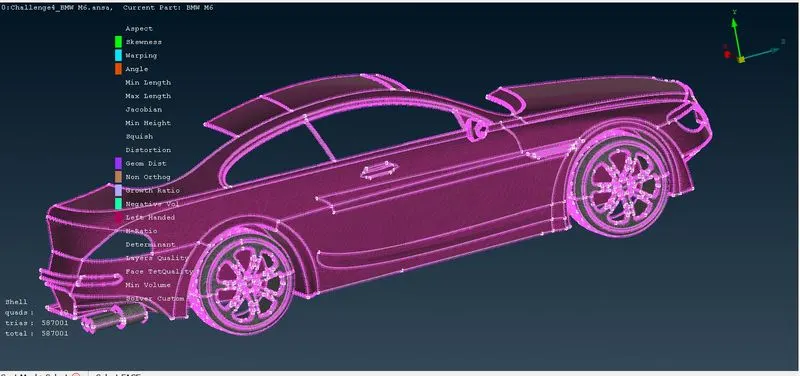
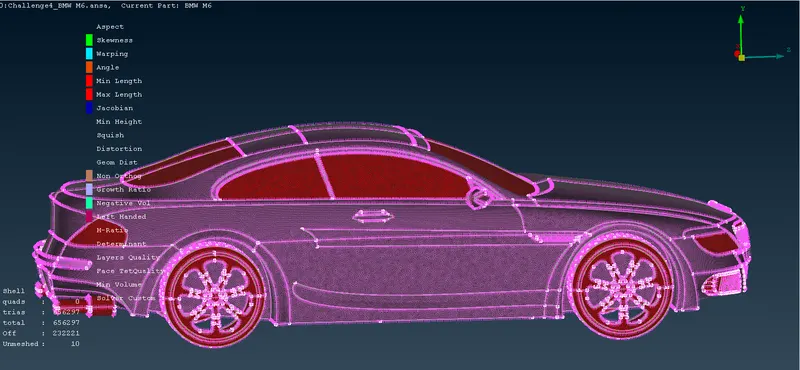
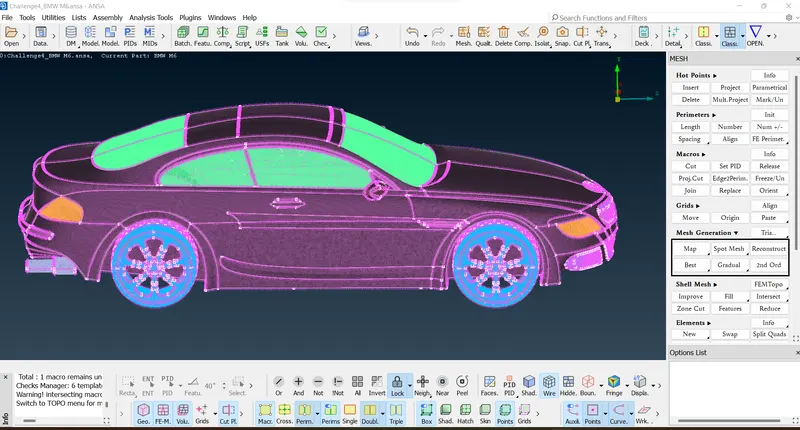
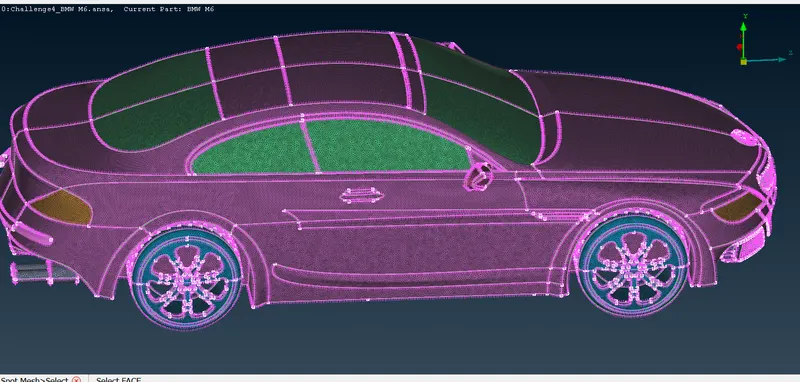
- Results
- Stepwise Explaination
-
Load the ANSA file to the screen and do topo/clean and meshing in later stages.
-
Go to the grid and select the length and enter 1mm under the perimeters to smooth out the sharp curves of the car and give it a soft look.
-
Since the car is symmetrical from the center to any end, we can remove one side of the car and perform the necessary operations on the car and use the symmetry option to make a complete car.
-
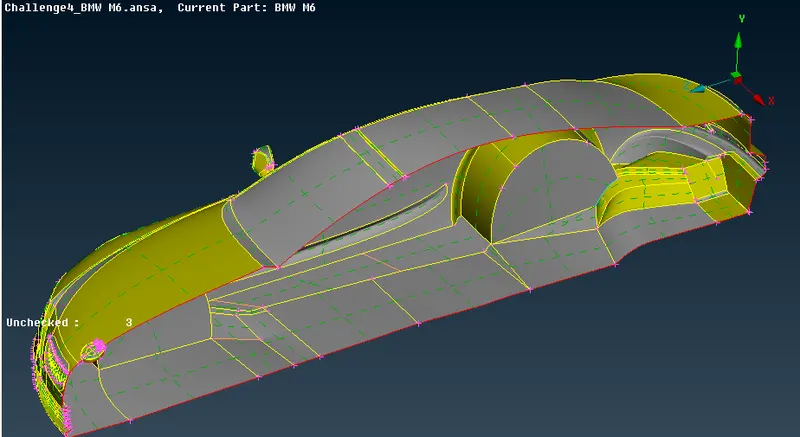
Now we can start cleaning up the topo by removing simple and unnecessary triple disadvantages. First, click on the topo and select in the whole box to identify or combine all unconnected single disadvantages or triple disadvantages so that we can identify the cleanup required accordingly.
-
Start with the area of the front grill and headlights, remove any excess parts so that you have one volume throughout the car.
-
Now to remove single and triple cons and keep one volume to make one volume we need to have double cons everywhere to achieve this we need to do some cutting and re-lining of parts to keep one volume.
-
After making cuts and removing other triple disadvantages using the remove option and other tools, we can now mesh to create surfaces and maintain a single volume.
-
Remove triple minuses or redundant surfaces to remove triple minuses, these double surfaces are not necessary as we need to have one volume.
-
Do the same for the windows, taillights, and roof area where other internal parts are present that are not useful for creating a surface or volume mesh.
-
The car logo is under a separate surface, so use the design disadvantages to create with Perform a topo and identify triple and single disadvantages and remove additional unwanted surface to preserve the common volume.
-
Perform a topo and identify triple and single cons and remove additional unwanted surface to maintain common volume.
-
Use the Intersect option to identify triple negatives in the intersection area and you can remove smaller areas individually.
-
Extending single negatives on an adjacent surface to form triple negatives, thereby eliminating unwanted faces.
-
Delete and recreate surfaces to get a smooth and perfect shape in tight corners. Also cut the lines that are necessary that could cause problems when snapping.
-
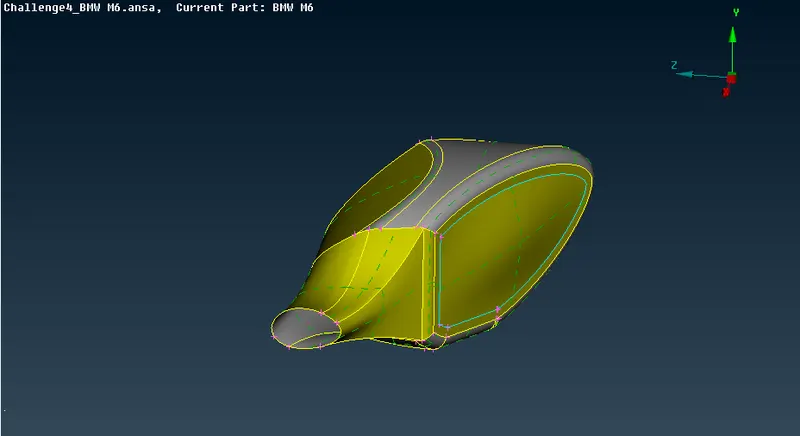
Isolate the mirror and perform a topo cleanup, hide surfaces blocking the triple view of cons.
-
Remove the redundant surfaces to create one volume, also in the car and mirror connection area, make an extension on the car surface and create one volume by removing the redundant surfaces.
-
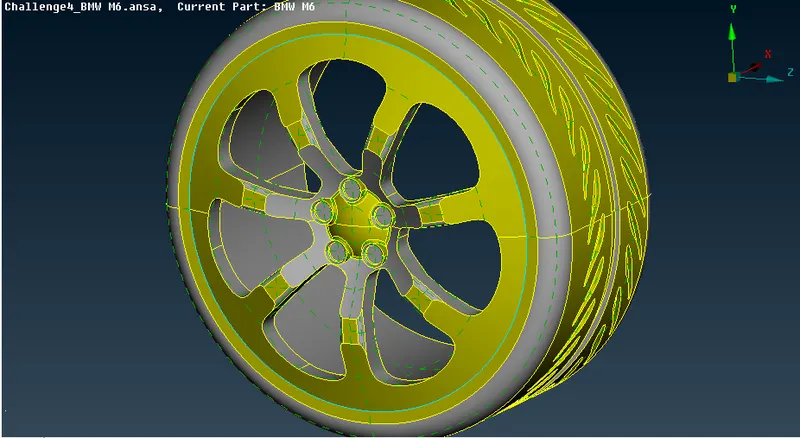
Isolate the wheels to clean up the geometry, correct the triple disadvantages, hide the view-blocking surface, and remove the overlapping surfaces causing the triple disadvantages.
-
After removing smaller faces that are parallel to each other, create larger faces.The base of the car intersects with the tire, so we need to remove the excess surface and also remove the excess design surfaces that cause smaller edges, causing meshing problems.
-
Therefore, we need to clean the entire base and create new surfaces with smooth edges accordingly.
-
After inspection and cleaning for the entire half model car. We need to do checks on the geometry to find small cracks and extra unchecked faces, which is not good for the geometry, so we need to do the checks and clean up the geometry accordingly.
-
Once the geometry is checked and free of errors, we can now assign names to the various components using the PID.
-
After assigning the names, we will now choose the quality criteria method. Select the openFOAM solver next to the volume mesh and select the given quality criteria.
-
Using the measurement tool we can calculate the smallest distance between the negatives or hot spots and accordingly we can assign our minimum and maximum length in the mesh parameters, if we don't we can get a failed mesh.
-
We need to connect the components individually because the given mesh targets are different for each PID region.
-
Assign network parameters and quality parameters for each PID accordingly, assigning the correct minimum and maximum length will reduce network failures and element shutdowns.
-
After creating the mesh, we can choose to re-construct under shell mesh to reduce the off elements. And later, the remaining disabled elements can be edited manually. Final surface mesh of the car model can be ready.
Performing symmetry on a car model:
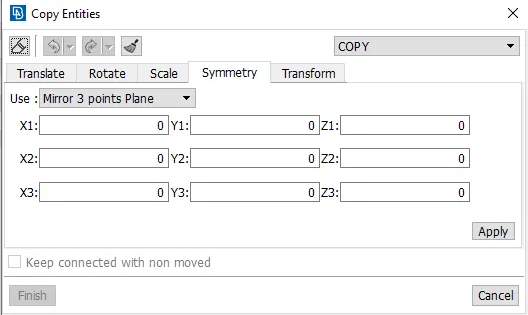
- Perform symmetry under the transform option to create exactly the same opposite car body to create a full body car.
- Use the copy option and select the semi and deselect the logo as we don't need a copy of the logo.
- After selecting the model, with a middle click of the mouse, we get a window, select symmetry and choose mirroring the 3 point plane and choose 3 points on the edge to be done by symmetry.
- After selecting 3 points, click the middle button twice and the symmetry will be done, click the middle button again to confirm the geometry and complete the process.
- There will be several individual disadvantages near the middle part, use paste or other tools to solve the problem.
-
Creating a wind tunnel:
-
First we need to create reference points to create the surfaces of the wind tunnel.
-
Select relative sub points in topo mode, create a point under the car that takes one reference point and enters the correct values.
-
And by properly calculating the dimensions of the wind tunnel, we can create the wind tunnel precisely.
After creating the bottom surface, use the curves to reference the cons, we can remove all hot spots and curves. -
Create all other wind tunnel surfaces using the new surface option.
Wind tunnel surface mesh: -
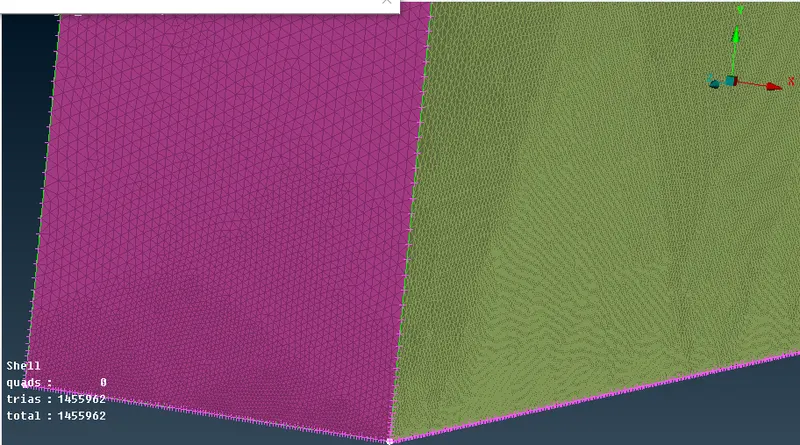
We need to use an area network depending on the length of the network near the car and areas far from it.
Therefore, we have to use different mesh lengths on the lower and upper surfaces of the wind tunnel. -
We need to use the spacing option so that the mesh length ranges from the size of the small mesh length to the larger mesh length.
-
Correspondingly, cross-linking of the surface can be achieved.
Wind tunnel-car volume mesh: -
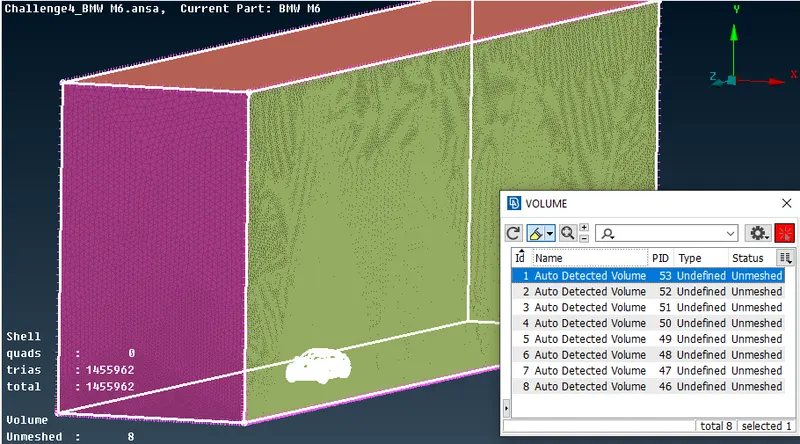
Since we are only interested in the volume between the car model and the wind tunnel, we can delete other car model volumes, which is not necessary.
-
Since volumetric mesh takes 2-3 days to perform, volumetric meshes are not performed as stated in the challenge question.
- Conclusion
- Bmw car is topo cleaned and surface meshing is done with appropriate meshing parameters.
- The different volumes of the car model are created because the shock absorber and tires are not connected to the car body.
- A single volume is created from the car body, so that it can be avoided in one go when creating a volume mesh.
-
Learning outcomes:
-
Learned complete CFD meshing skill from skratch.
-
Performed various topo cleanings using various tools.
-
We understood the need for double negatives and the elimination of unnecessary triple and single negatives.
-
The use of symmetry helps reduce working time and helps achieve accurate results with less work.
-
Create surfaces using reference hot spots using relative points.
-
Surface mesh for different components and their different mesh lengths.
-
Using the spacing option in the surface mesh helps to have different mesh lengths along the surfaces.
-
Using the re-construct option, we reduce the elements to a level where we can edit them manually.
-
Using mesh editing tools such as move, split and smooth options.