Week 4
ABSTRACT:
Checking and clearing the geometical errors, providing with a good mesh flow and also assigning the thickness to the model after meshing.
METHODOLOGY:
- Importing the model.
- Clean up the geometry.
- Extract the midsurface from the geometry.
- Apply the mesh flow.
- Checking for the quality and customising it.
- Apply the thickness
INTRODUCTION:
The bottle cap is used to open and close the bottle.Generally the bottle caps are made up of plastic.Bottles are used to store the fluids in which some are dangerous, some not to ensure the safety bottle caps are used to protect it without being dangerous.
PROCEDURE:
Importing the model
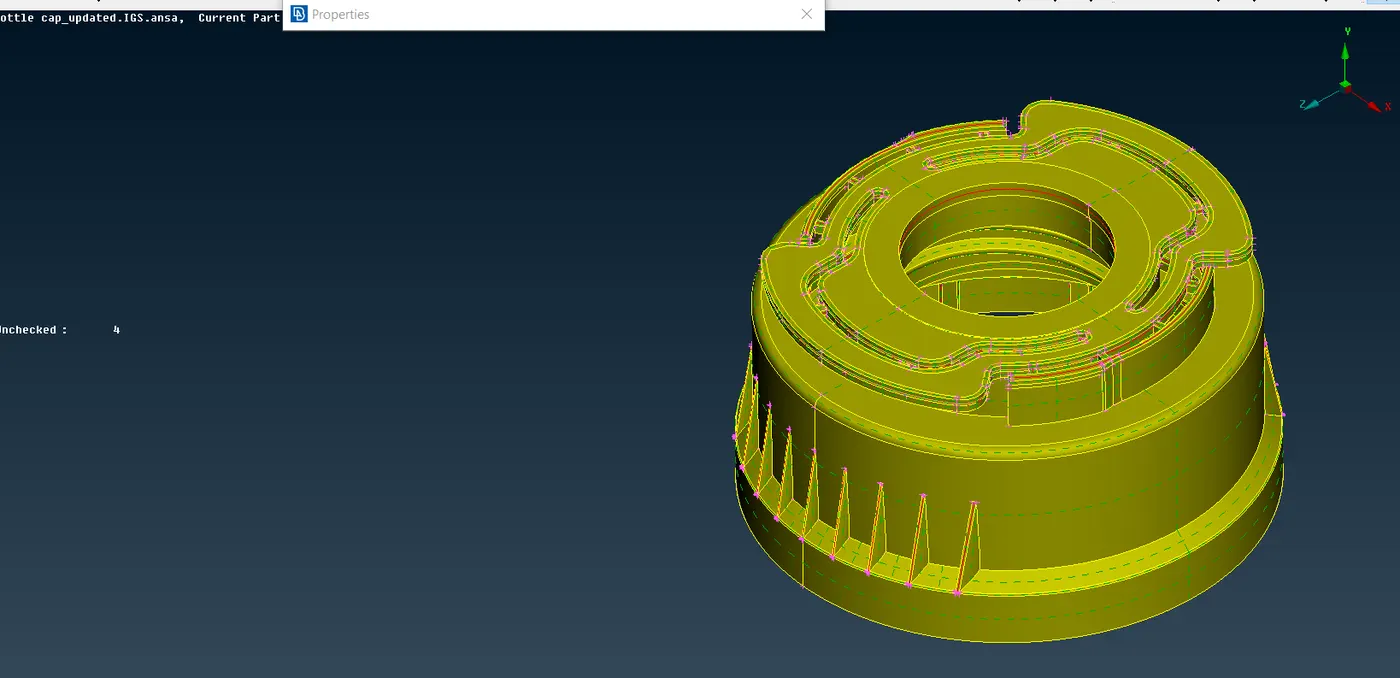
Figure-1 ( model import)
Topology:
- Stiching all the cons and processing to the geometry check up.
- If any errors in geometry check up then the error is checked and verified.
- If geometry is clean without any errors then it is for extracting the midsurface.
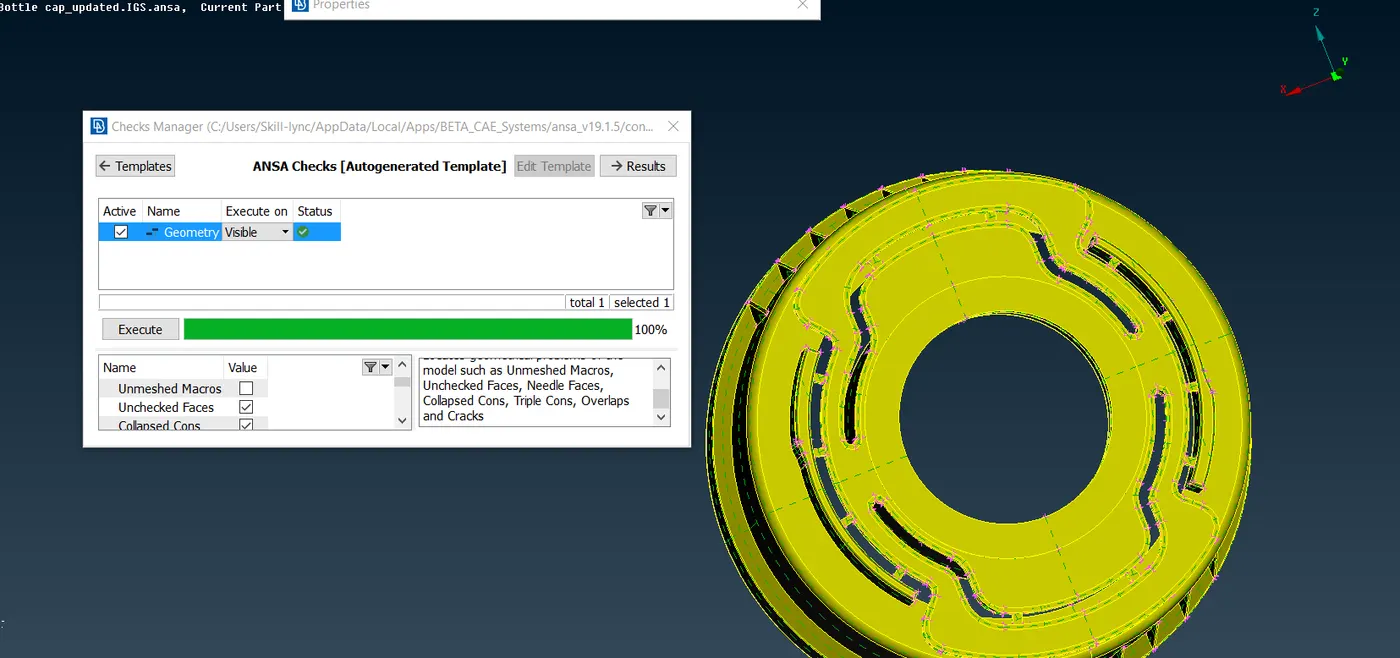
Figure-2 (geometry clean up)
Midsurface:
- Bottle cap is made up of plastic, so it has varying thickness for each and every component.
- For extracting the midsurface we should divide the geometry into parts and extract the midsurface for the parts.
- Once extracting midsurface is done for all the parts we should do topo so it stiches all the midsurface parts together.
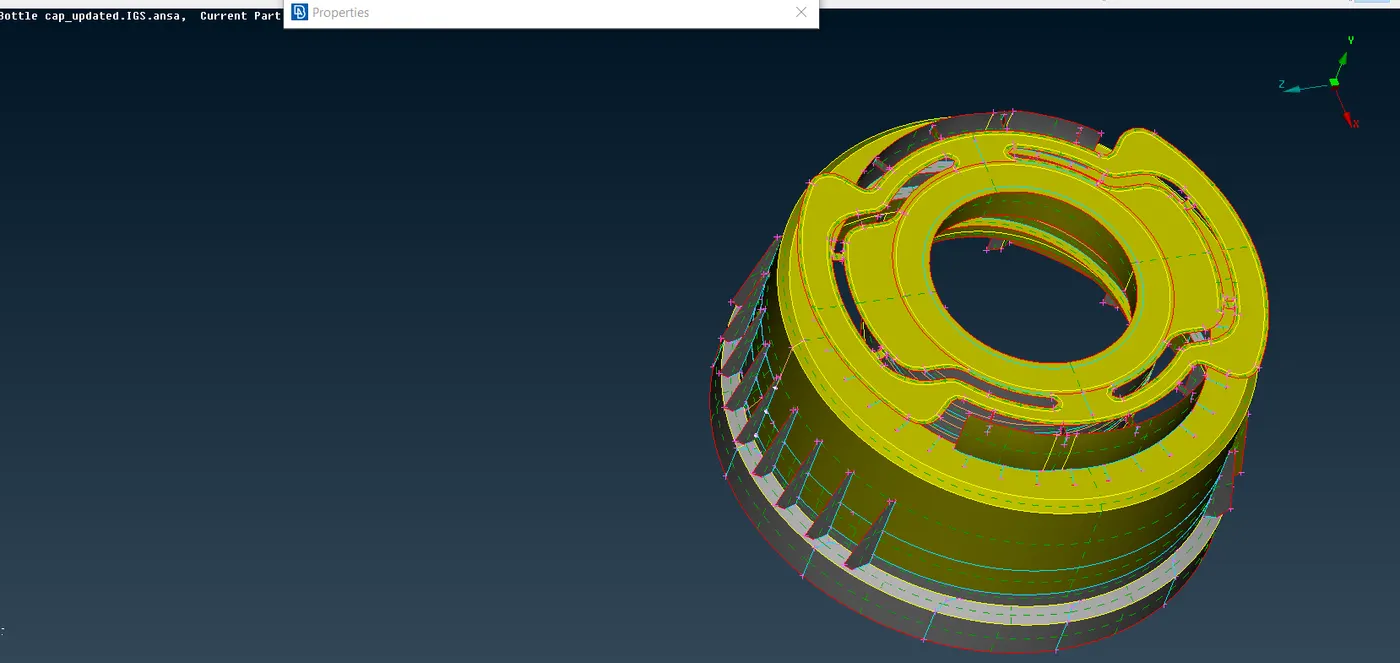
Figure-3 (midsurface)
PID's:
- As material is plastic its has different thickness and we divided the geometry into different parts for midsurface.
- For those different midsurface we should assign PID's(property ID's) like this.
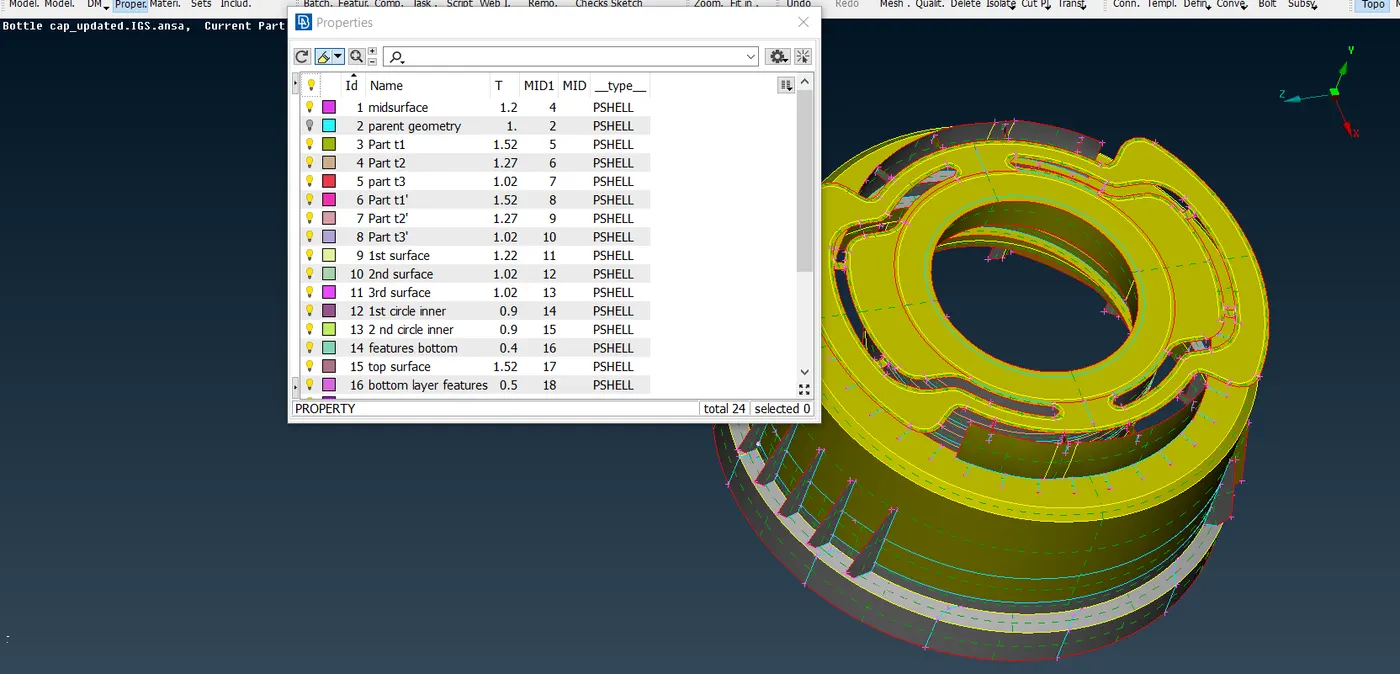
Figure-4 (PID's)
Topology and geometry check up is done once again before meshing
Before meshing, quality is assigned before meshing.
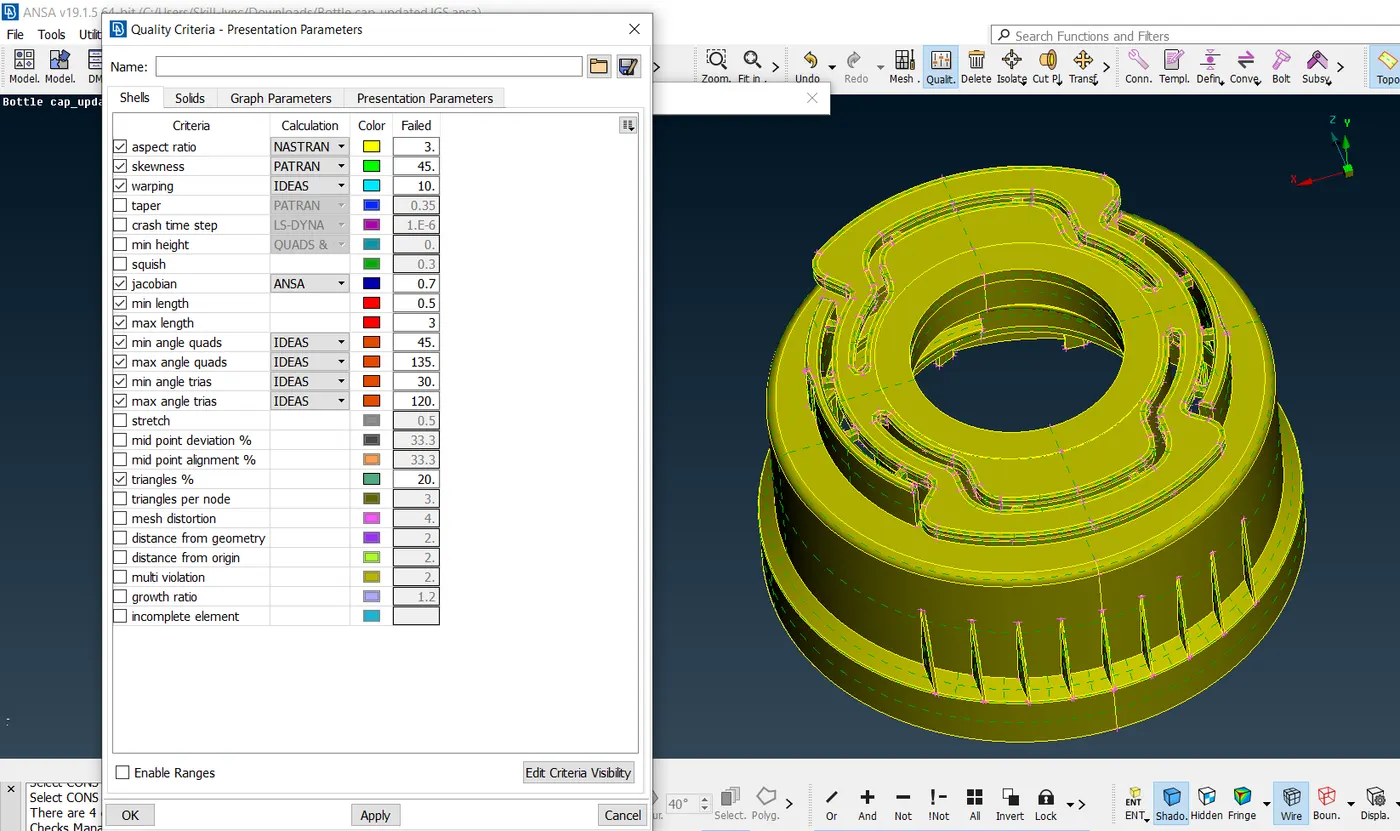
Figure-5 (Quality criteria)
Meshing:
- Best mesh is used for this model as it gives best of all the mesh provided.
- Select all the surfaces and apply best mesh.
- After applying mesh go to the hidden mode and search for off elements if any.
- Make sure that there are no off elements and trais percentage is low as possible.
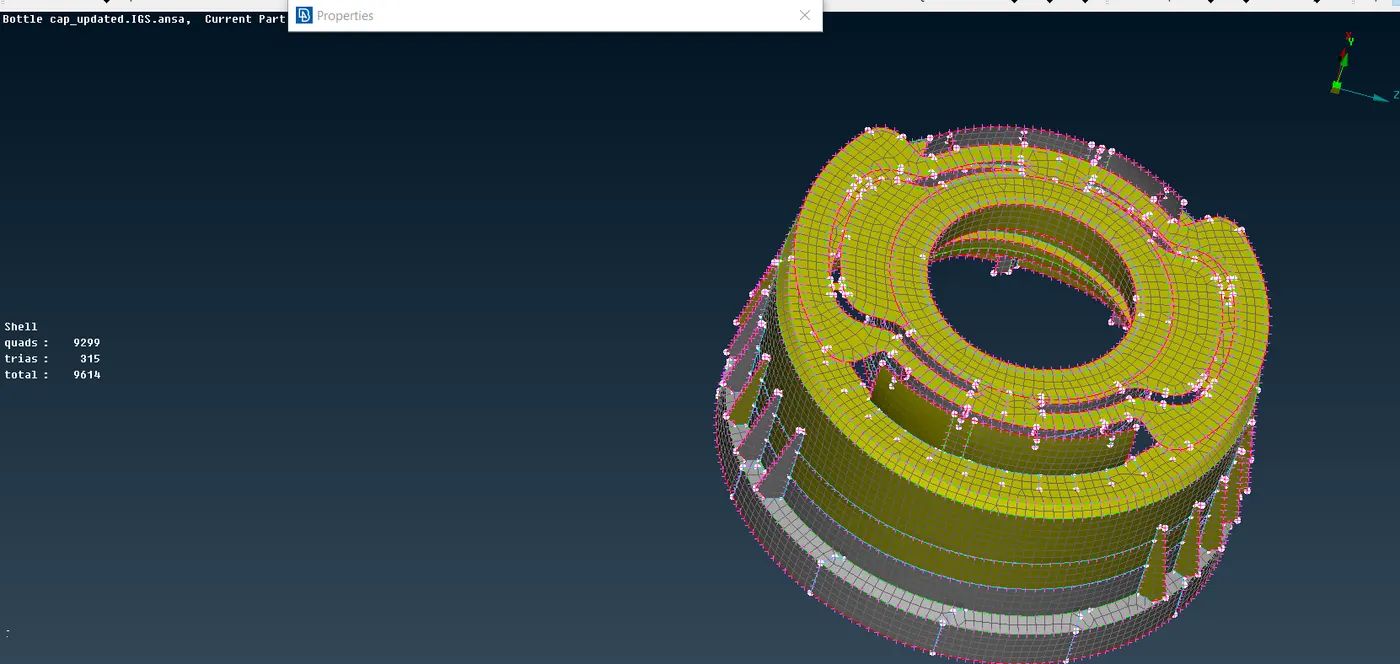
Figure-6 (meshing)
After meshing, click on 'draw shells as solids' so that it converts 2D to 3D and can be checked with parent geometry as reference.
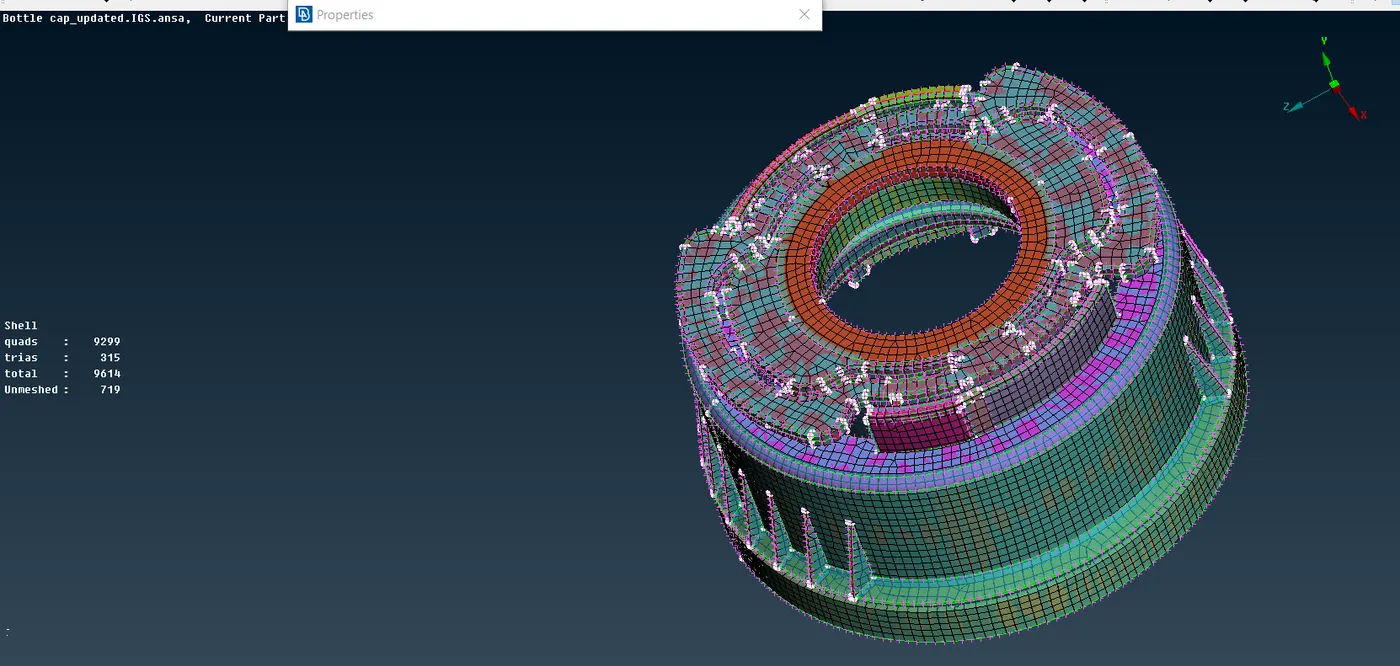
Figure-7
Learning outcome:
- Got a knowledge on plastic material model.
- Learnt how to extract midsurface on different features like spirals.
- Experinced with tools like extend, middle etc.
RESULT:
The elements in this model have passed the quality criteria and all the features aquried with proper mesh flow. The thickness is also assigened to the model. The result is shown like
From this
Figure-8 ( initial model)
To
Figure-9( final outcome)