Week - 4 - 2D meshing for Plastic components
AIM:
To create a mid surface for all the componets after checking the geometrical errors and mesh the mid surface with the proper quality criteria for the plastic model bottle cap.
OBJECTIVES:
- To practice how to create a mid surface.
- To practice how to mesh the componets without quality failures.
- mesh the model with agood mesh flow. PROCEDURE:
- IMPORT CAD GEOMETRY
- to open the cad geometry file>open
- after opening the CAD geometry inspect the geometry very well before start working.
- identified the given bottle cap model is complex and having variying thickness also.
- we have to mesh the parts seperately by the following steps.
- GEOMETRY CLEAN-UP
- perform cons resolution.
- assign perimeter length as 1mm.
- classic>length>perimeter length
- to visualise the model in same colour and details go for orient.
- topo>faces>orient
- check the geometry for the cons
- tools>geometry>execute
- if there are triple cons and double cons relese them into single cons.
- tripple cons>topo>cons>release
- double cons>faces >topo
- MID SURFACE GENERATION
- measure the thickness using measuring tool.
- start from below outer circle of thr component.
- using project project the line and go for ofset.
- extract mid surface
- topo>offset>selact the face using required selecting tool as feature angle or macro area>give the offset value
- extract the mid surface without deleting the new faces.
- using inot or not option or extract midsurface by hiding the parent geometry.
- always keep PIDs seperately
- set pid>new pid
- there are complex ribs using middle multi extract the midsurface .
- then rotate the rib intto 360 degree for other ribs
- transform>copy>rotate
- give created ONG cordinates and steps and degree.
- getting midsurface for round projection from inner circle use middle tool
- curve>middle>select lines and create middle line then project in to face.
- then extract new surface as mid surface
- faces>new>coons
- extract other midsurfaces using offset
- use middle muti for extracting midsurface for parts which have variying thickness.
- give perimeter lenth as 1mm
- classic>length>perimeter length
- give mesh parameter
- target element length as 1mm and minumum length as.5mm.
- give quality criteria.
- give the given values for wapage,aspect ratio,skewness,jacobian,min and max length,triangle percentage
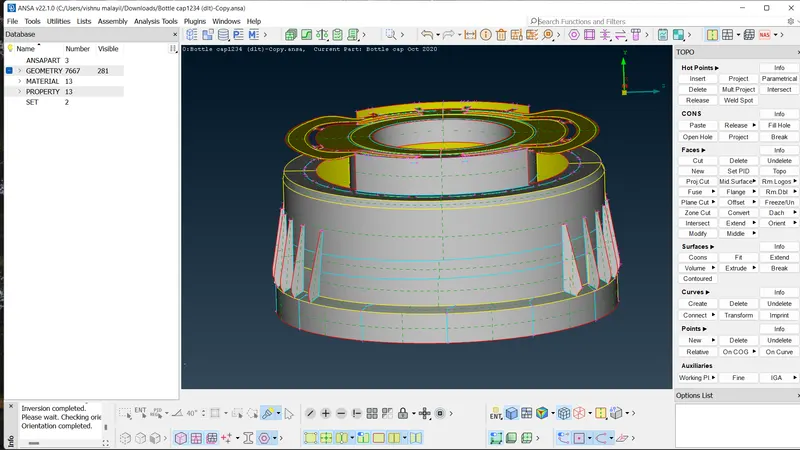
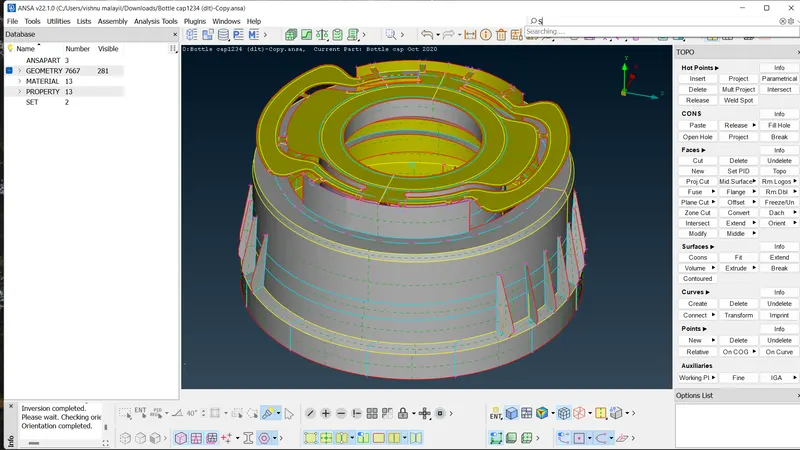
- perform geometry clean-up
- avoid near hotpoints
- topo>hotpoints>delete
- inset hot points if required
- topo>hotpoints>insert
- avoid construction line if any
- topo>faces>cut
- join lines if needed
- topo>faces>join
- delete unwanted hotspots
- topo>hotspot>delete
- SHELL OR SOLID MESHING
- give proper mesh to the elements.
- classic>best and select the fa
- ce for meshing
- use classic>spot mesh if needed.
- if the elements are symmetrical use transform option for easy mesh align.
- give mesh bottom to upside one by one feature.
- mesh every entity.
- ELEMENT QUALITY CHECK
- check the qualities and improve the quality failures if any.
- if there is any error it will be visible as off elements.
- analyse the quality criteria we are given and correct the failures.
- MESH IMPROVEMENT
- improve the mesh to get a good mesh flow.
- reconstruct the mesh for better mesh flow.
- classic>shellmesh>reconstruction and use selection tool as macro area for easy selection of faces.
- classic>shell mesh>smooth for smoothening the mesh flow.
- avoid trias from the edges or feature lines.
- avoid opposite trias.
- always keep minimum number of trias for better mesh flow.
- avoid cloud of traias if any.
- avoid neighbouring trias.
- always keep trias forwarding to same direction for better mesh flow.
- use classic>elements>split for these mesh improvement.
- swap the tria or drag the trias into better position using split command.
- keep a good mesh flow.
- use transform option for meshing the symmetrical elements.
- delete the identical parts of the element,
- transform>copy
- then give mesh to the other identical part and then copy to the symmetrical part.
- always keep clean mesh flow.
RESULT:
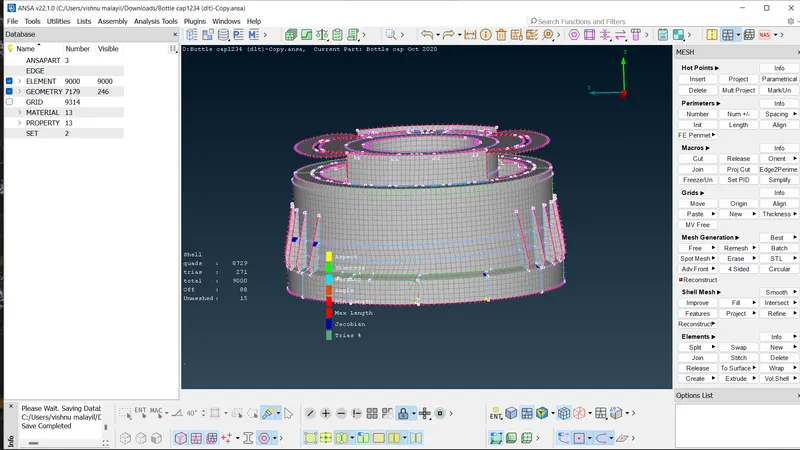
- extracted the mid surface of bottle cap model successfully.
- successfully imported the mesh with given quality criteria.
- completed the bottle cap model with a good mesh flow.