Week 4-1D Element Creation Challenge
AIM:
To mesh the given component with the size of 5 units and to create 1D elements on the following component with the given cross-section and DOF.
PROCEDURE:
STEP 1:
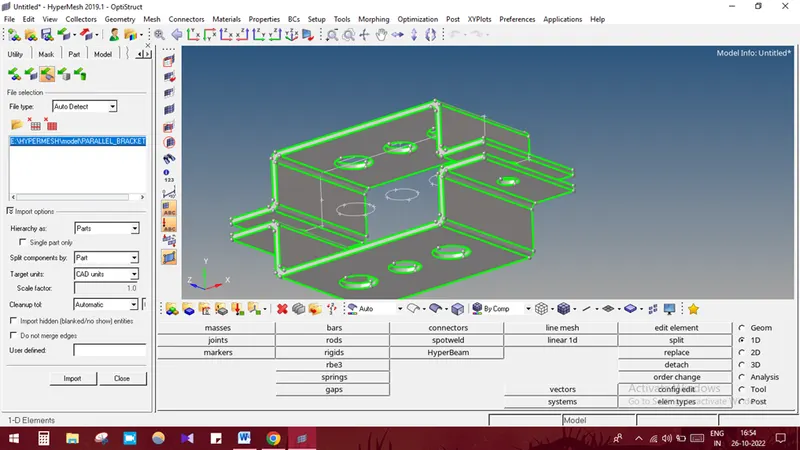
Importing the model by selecting IMPORT-IMPORT GEOMETRY-SELECTING THE MODEL-IMPORT.
STEP 2:
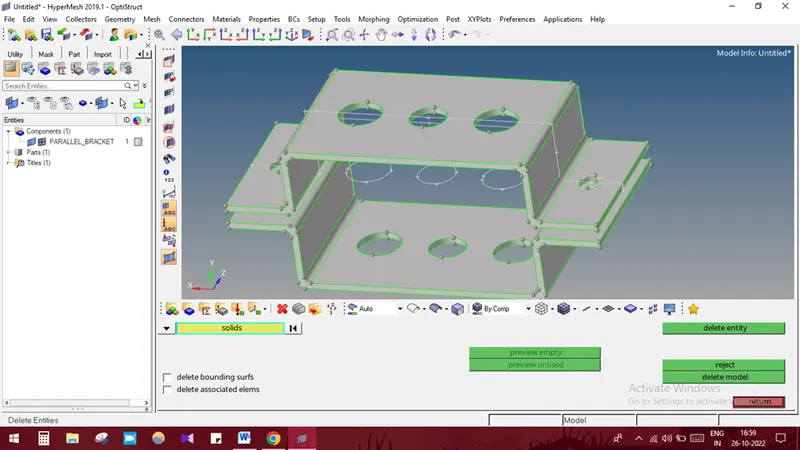
Deleting the solid by selecting DELETE-SOLIDS-DISPLAYED-DELETE ENTITY
STEP 3:
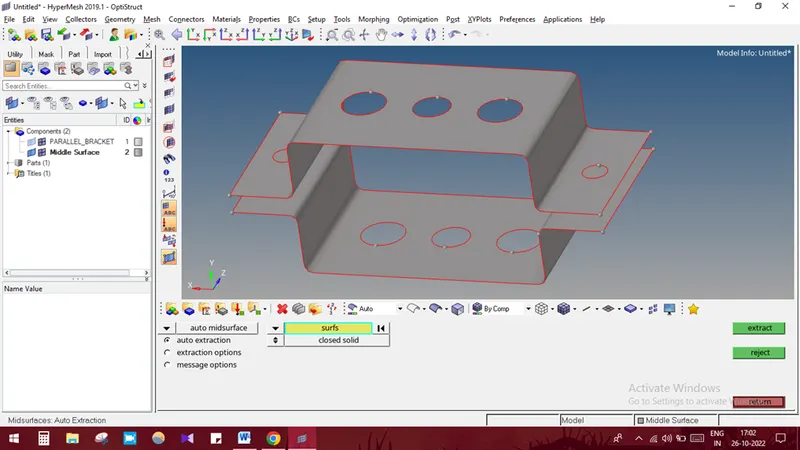
Extracting the mid surface by selecting GEOMETRY-MID SURFACE-SURFACE-DISPLAYED-EXTRACT.
STEP 4:
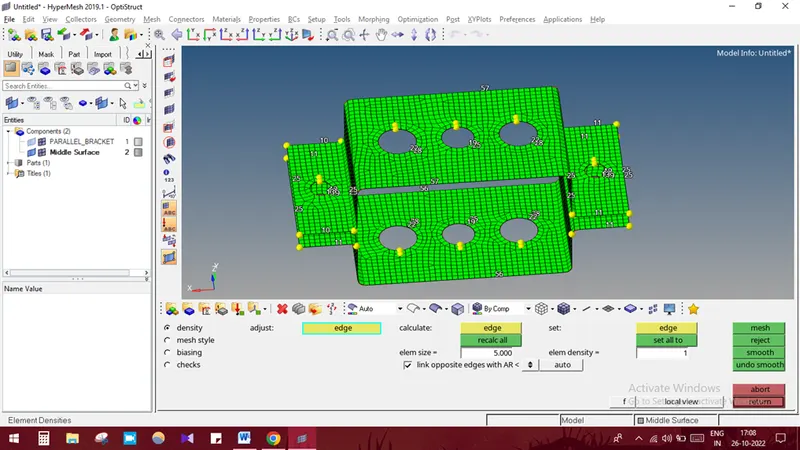
Creating the washer split by selecting GEOMETRY-QUICK EDIT-WASHER SPLIT.
Meshing the component by selecting 2D-AUTO MESH-SURFACE-DISPLAYED-ENTER ELEMENT SIZE-MESH.
STEP 5:
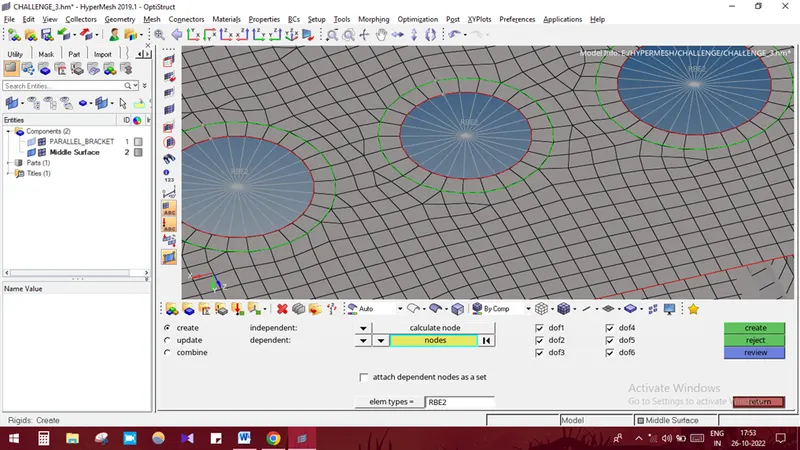
Creating RBE2 by selecting 1D-RIGID-SELECTING THE NODE-CREATE.
STEP 6:
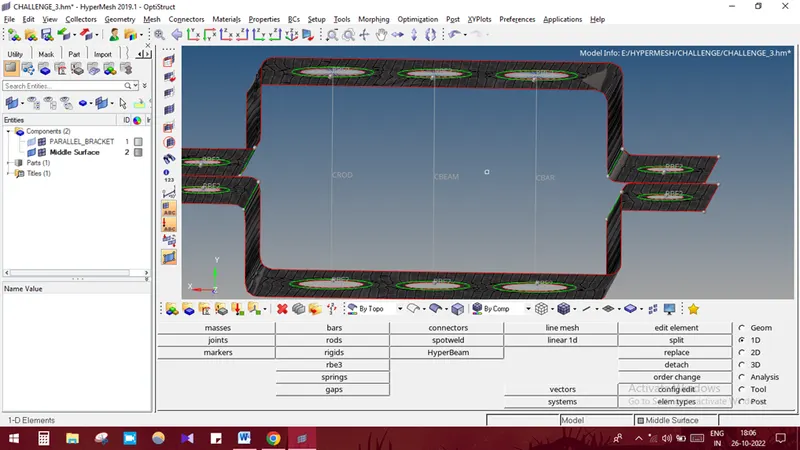
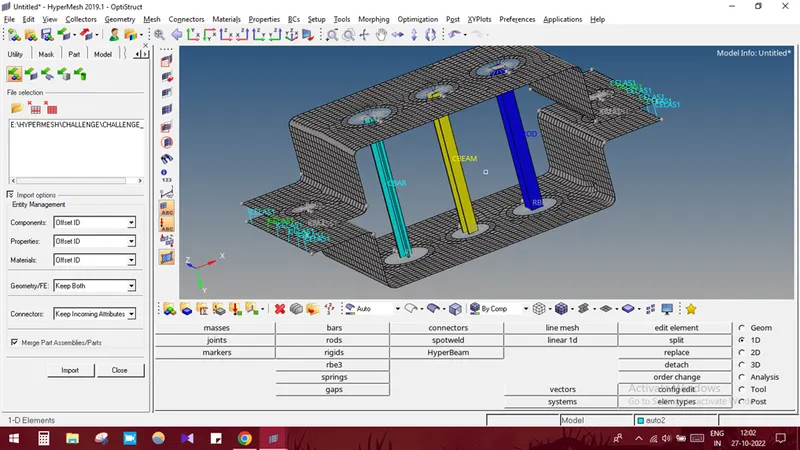
Creating rod element by selecting 1D-ROD-SELECTING TWO NODES-ELEMENT TYPE AS CROD-TAB
Creating bar element by selecting 1D-BAR-SELECT THE 2 NODE-CHOOSE N1 AND N2-ELEMENT TYPE AS CBAR-TAB
Creating beam element by selecting 1D-BAR-SELECT TWO NODE-ELEMENT TYPE AS CBEAM-CHOOSE N1 AND N2-TAB
Creating spring element by selecting 1D-SPRING-SELECTING THE NODE-CREATE
STEP 7:
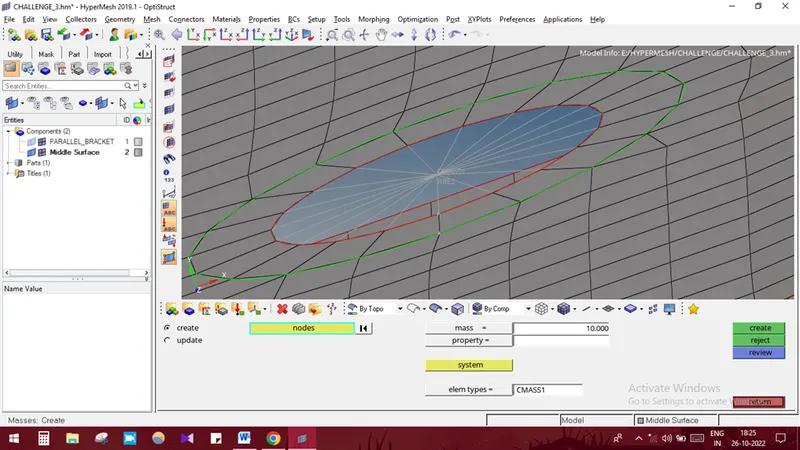
Applying mass by selecting 1D-MASSES-SELECT THE NODE-ELEMENT TYPE AS C1MASS-ENTER MAGNITUDE-CREATE.
STEP 8:
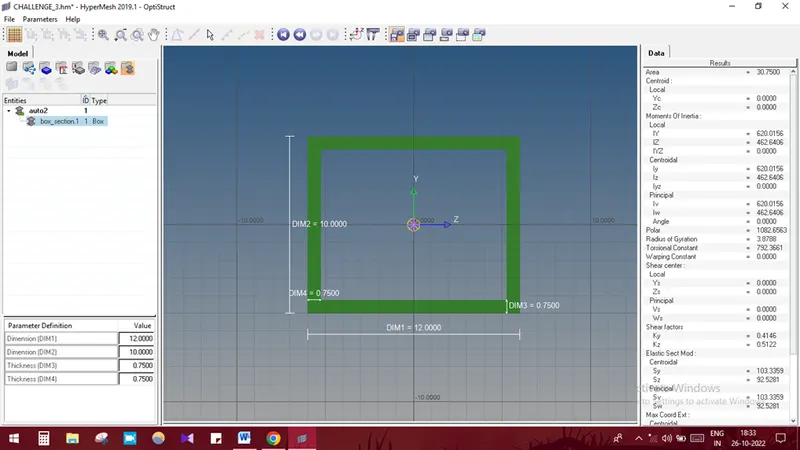
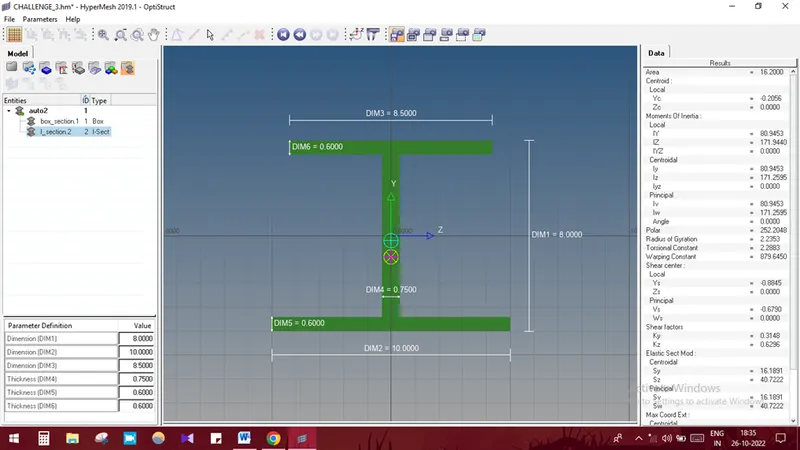
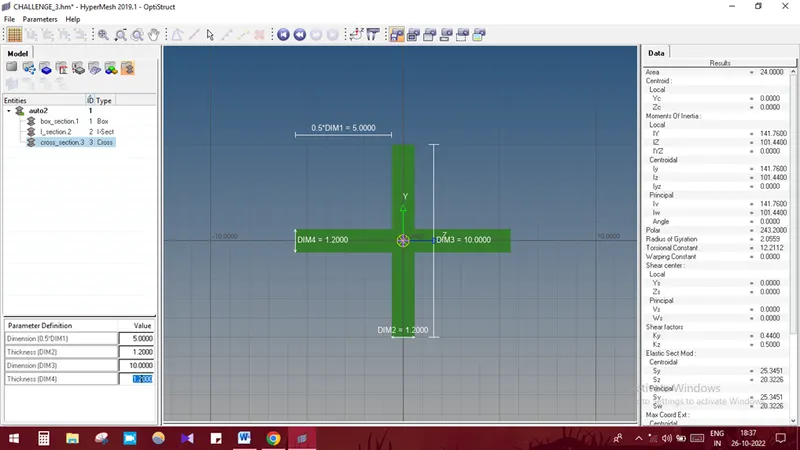
Assigning 3D element by selecting 1D-HYPERBEAM-STANDARD SECTION-CREATE
In the new tab required cross sections can be created as per the mentioned dimensions.
STEP 9:
Creating property for bar, beam and rod and assigning to each property to the element
.STEP 10:
Updating rod, bar and beam with the generated 3D dimensions by creating a new component in model browser.
Moving the element to created component list by selecting TOOLS-ORGANISE-SELECTING THE ELEMENT-MOVE.
Then assigning the property of the element by selecting right click on the component title-ASSIGN-SELECTING THE PROPERTY-OK.
LEARNING OUTCOMES:
From the given model I have learned about how to do meshing and create 1D elements.
CONCLUSIONS:
Thus the given model was meshed and 1D elements were created according to the mentioned dimensions.