Mid surface extraction of bottle cap and its meshing as per given element quality criteria in ANSA
AIM -To check for the geometrical errors, eliminate them and then extract mid surface of bottle cap using suitable method. Also to mesh the model using given element quality criteria ensuring a proper mesh flow.
PROCEDURE
1) In mesh deck – assign perimeter and macros length as 1
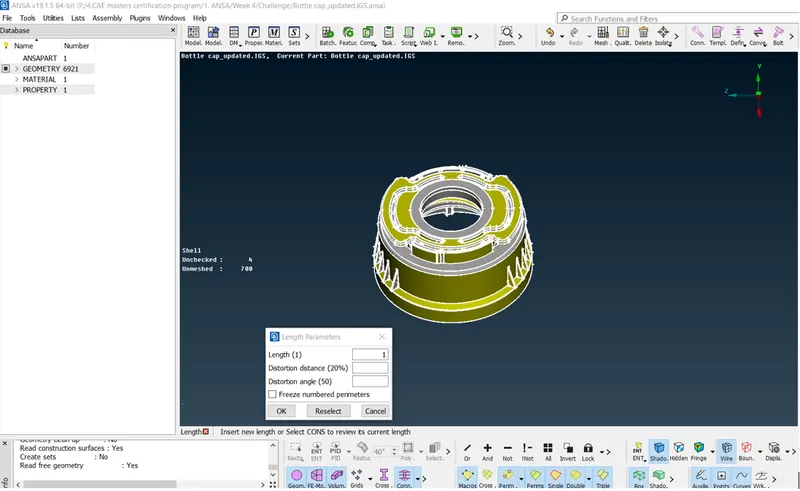
2. In Topo deck run topo command to ensure stitching of all the faces
3. Check orientation –
Before –
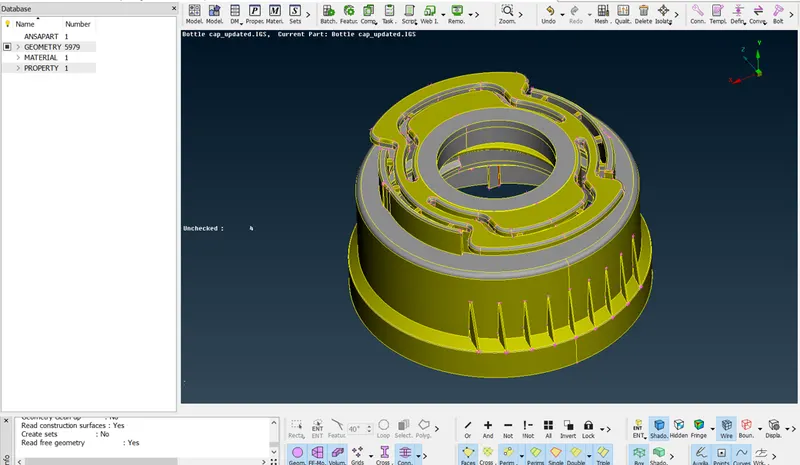
After -
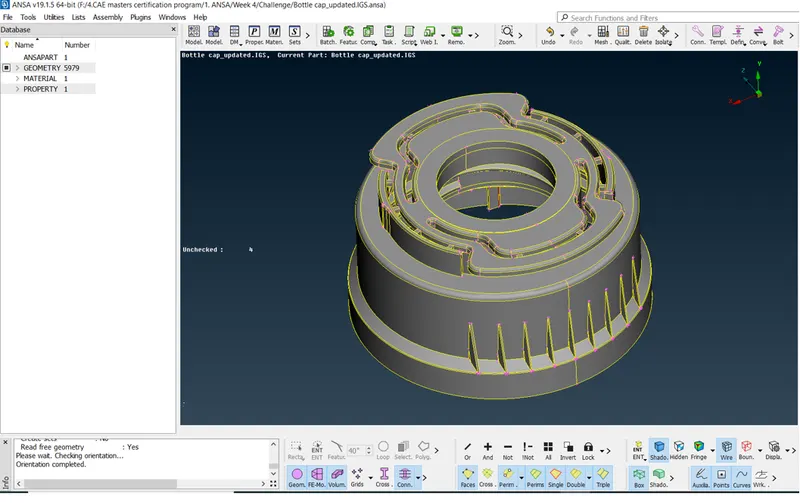
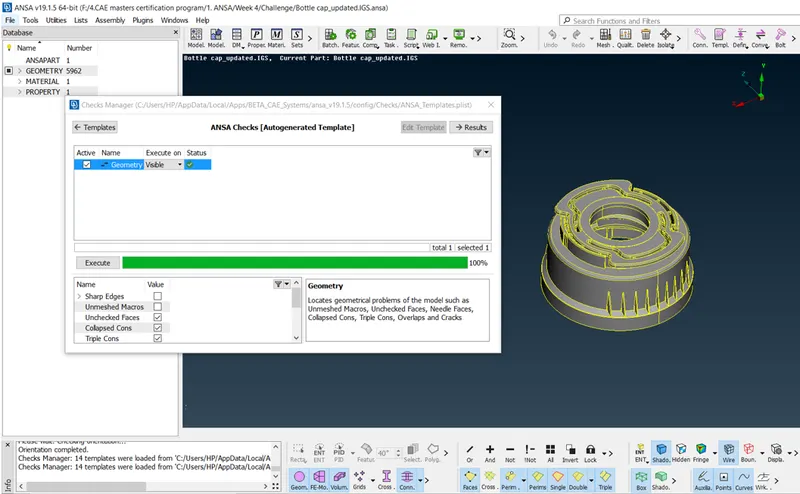
4. Run check geometry –
Before –
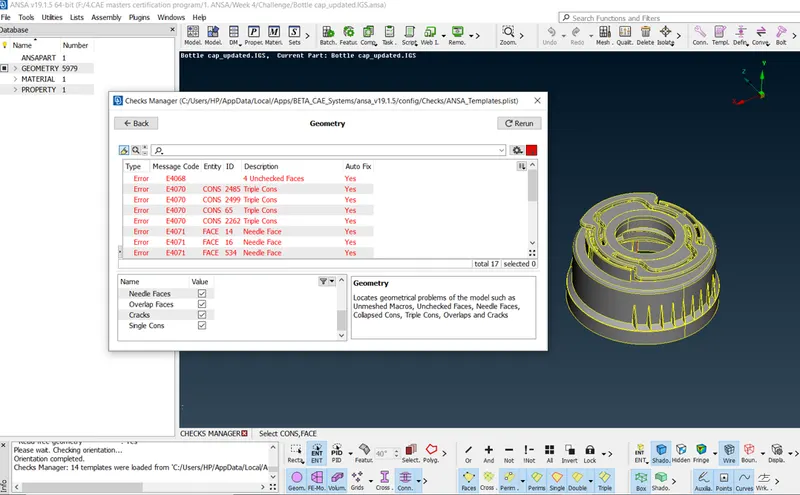
After – (Run auto fix command to remove all the geometrical errors)
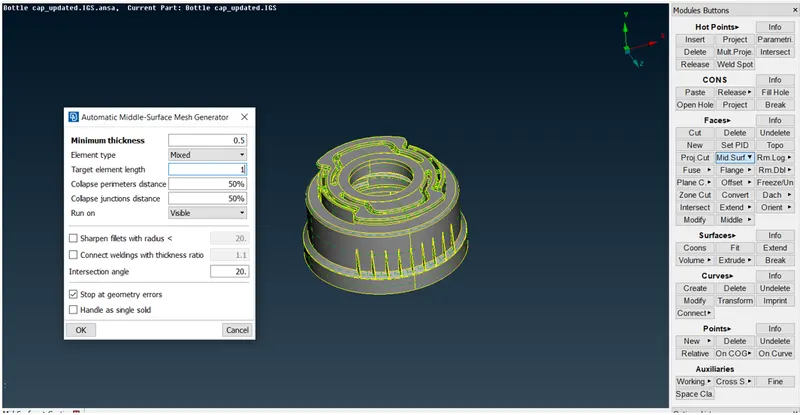
5. First we will go for an auto mid to get an idea on the mid surface.
To run auto mid go to TOPO deck and run faces -> Mid surf. -> casting command. In this command enter minimum thickness as 0.5 and target element length as 1.
The FE Model generated by ANSA using auto mid option is as shown below –
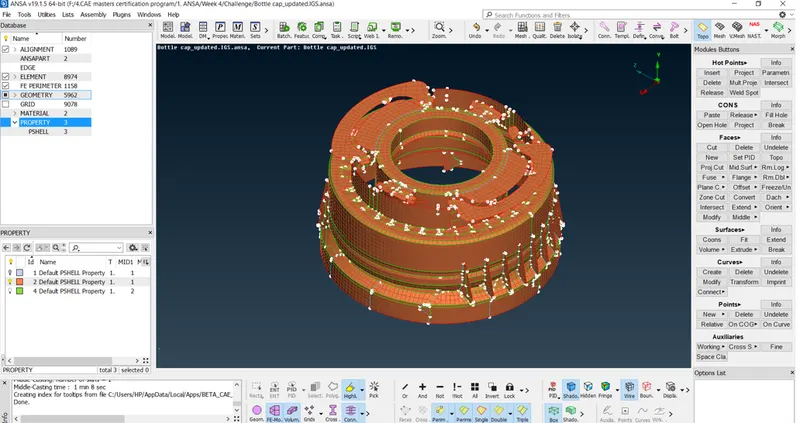
After studying this model it was found that it could not capture some key features and also there we allignment issues. Hence we save this for future reference and proceed for manual mid surfacing.
6. Manual mid surface
a) We will use offset faces command for simple features of the geomtry that are having uniform thickness and also retain the original faces –
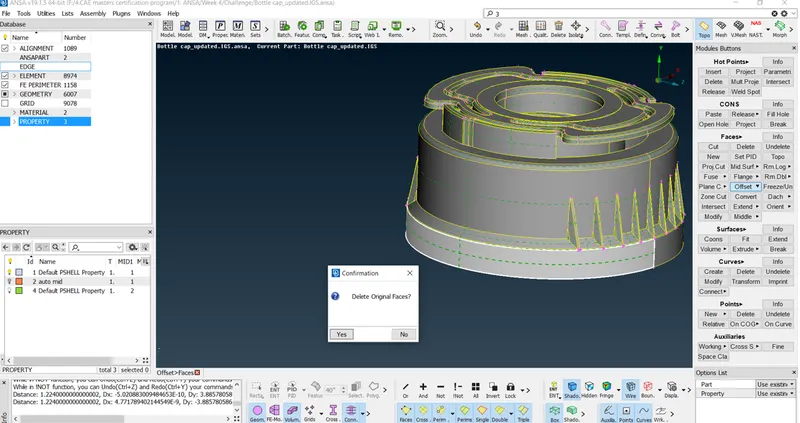
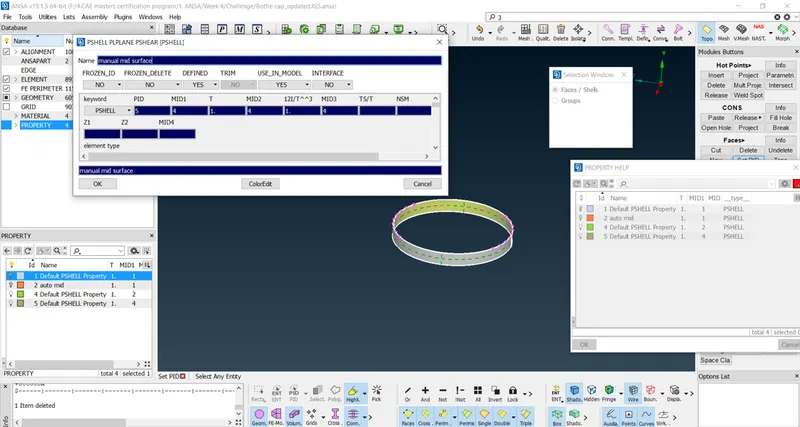
We will assign the mid face as a separate PID – ‘manual mid surface’ with thickness of 1mm and a separate color as shown below –
Now we will delete all the unnecssary hot points –
Before –
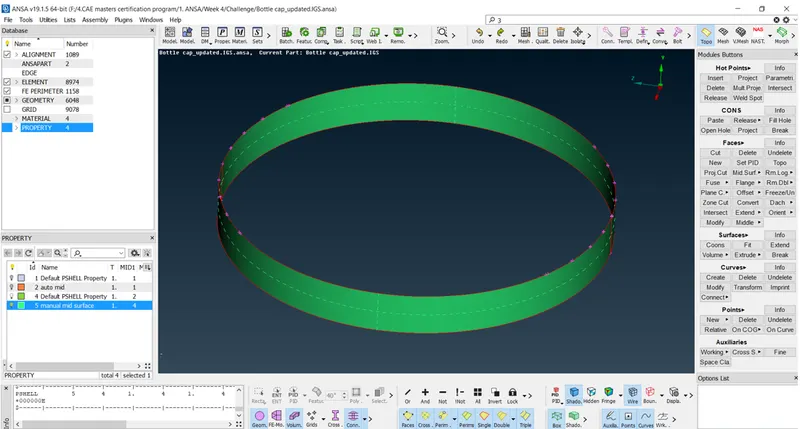
After –
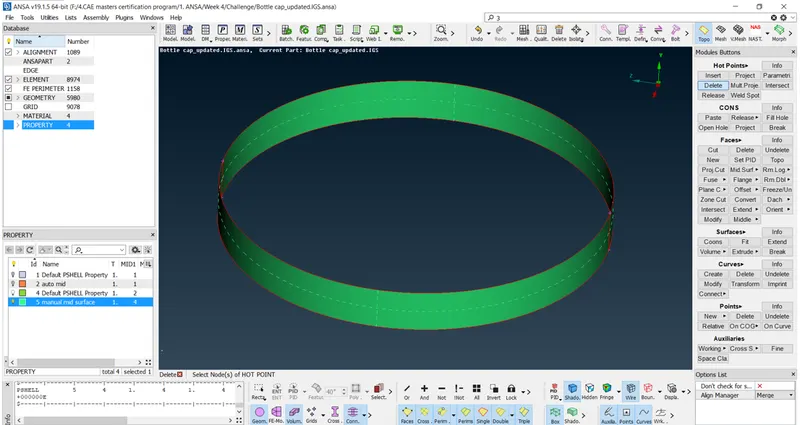
Now henceforth we will give this PID to all the mid surfaces that will be extracted
b) We will use middle multi command to extract mid of this feature as shown below –
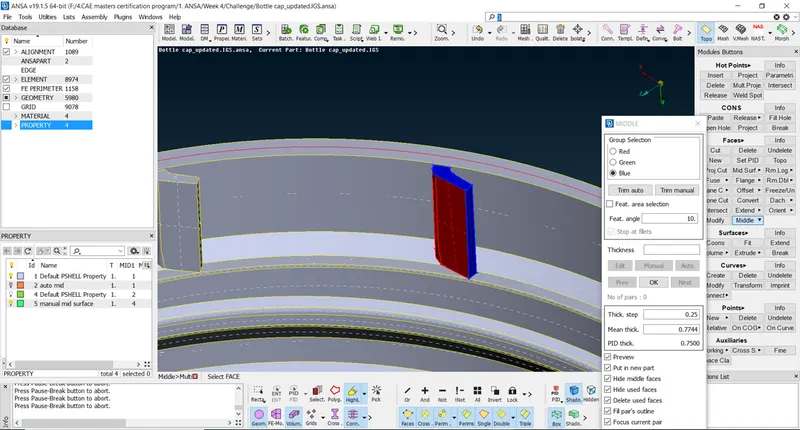
This command is used here because we are extracting mid from multiple faces at a time.
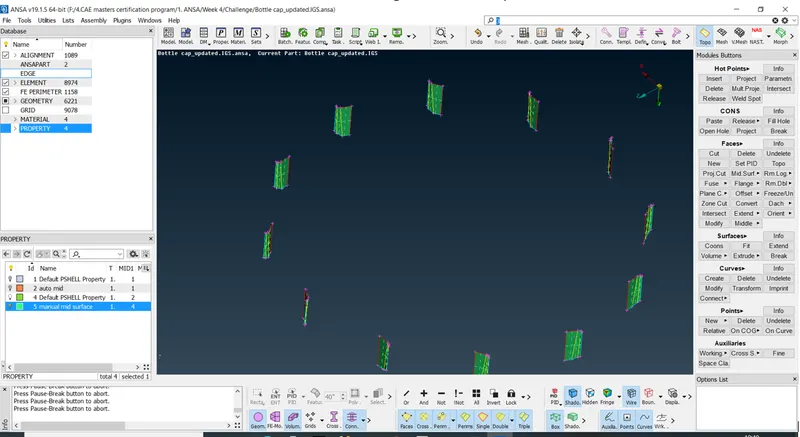
c) The thickness as shown below is uniform. Hence we can use offset option.
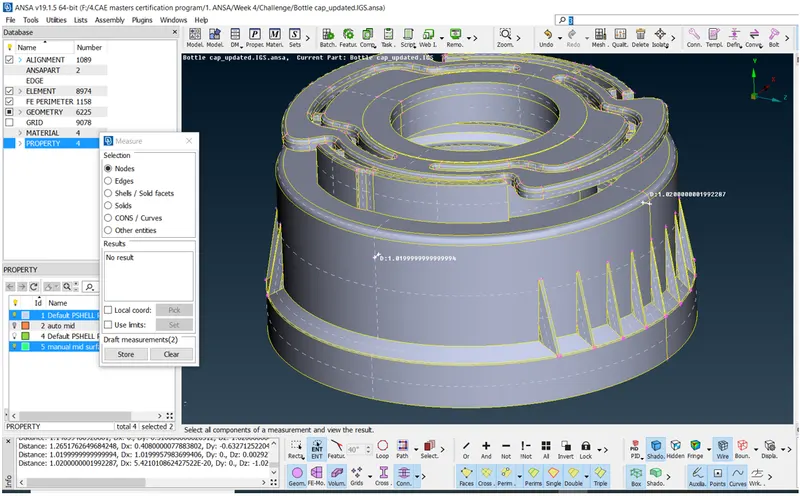
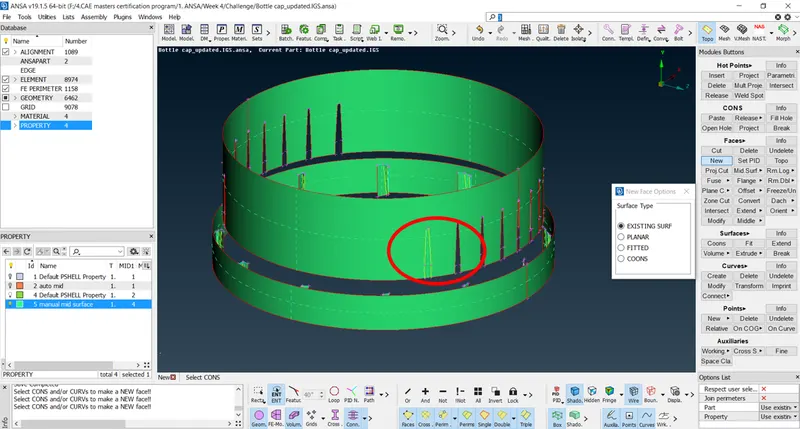
Now we will create new faces to fill the gaps using faces -> new -> existing surf option
d) Use faces-> middle-> single to extract mid surface for the ribs as shown below –
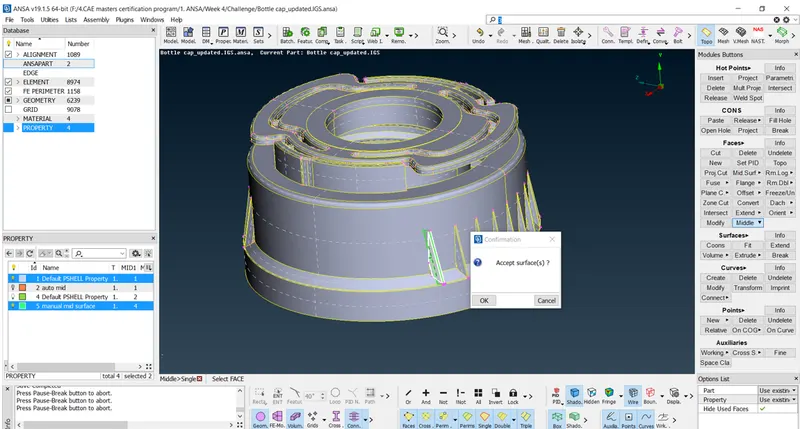
The extracted mid surface of the ribs is as shown below –
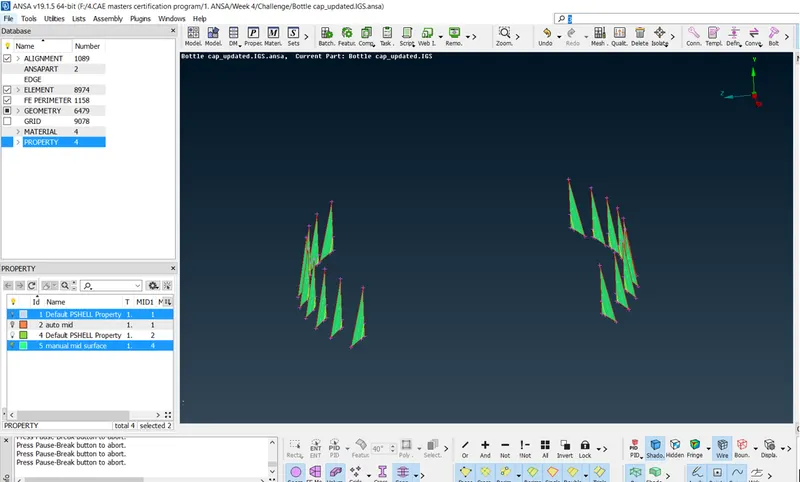
e) Mid surface for the thread feature –
Use Middle option to create curve in the middle of two cons as shown below –
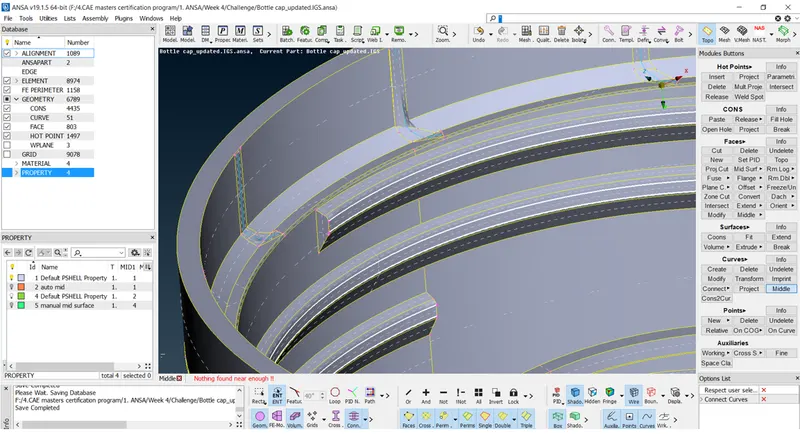
Use auxillary-> fine command to smoothen the curve
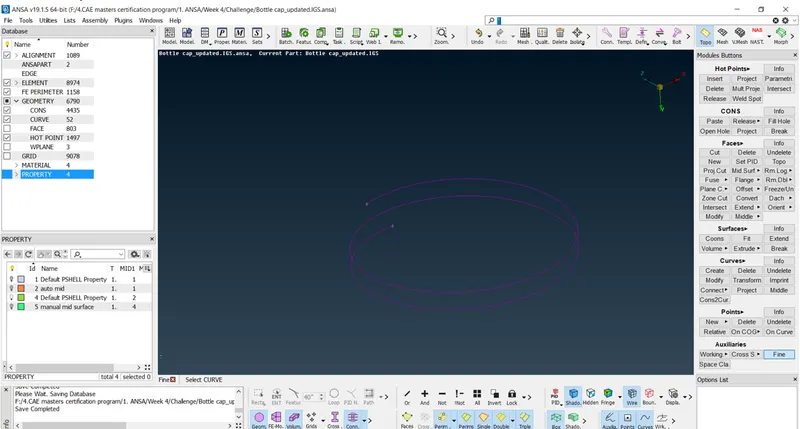
Now project the curve on the mid surface as shown below –
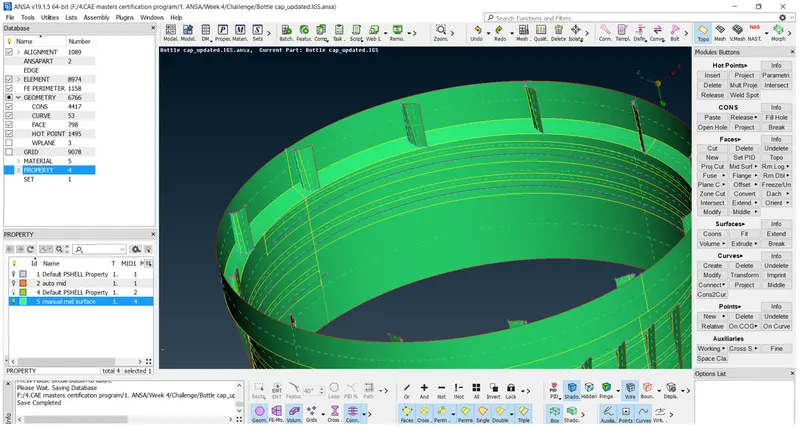
Now create new face between the curve and the projected con –
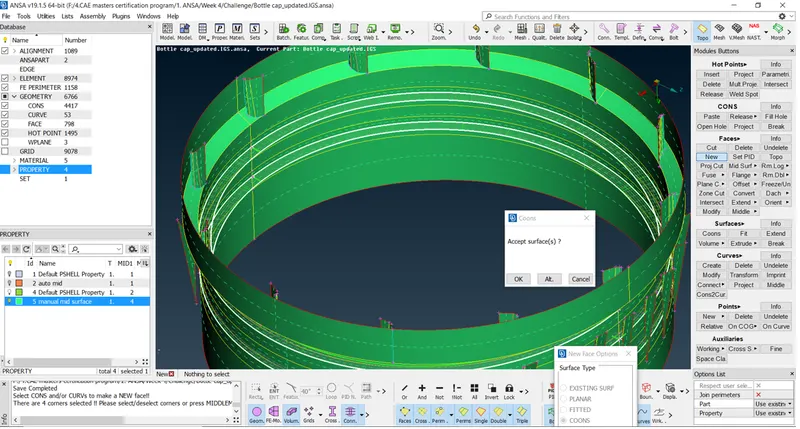
f) Mid surface at top side of the bottle cap –
We will use middle-> single command to extract mid surfaces of top portion of bottle cap as shown below –
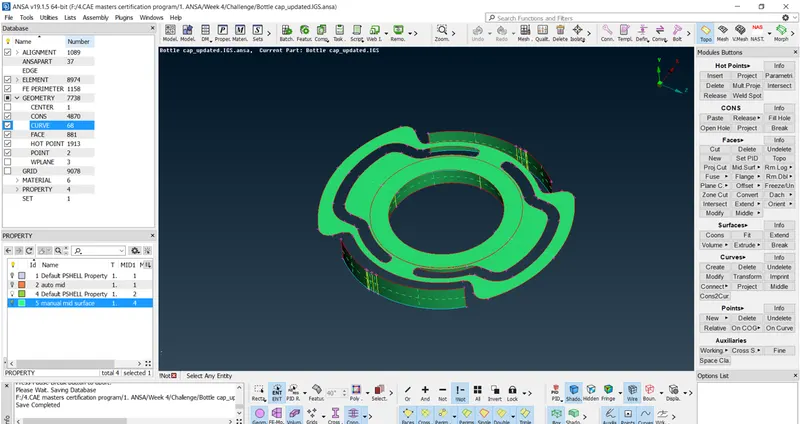
g) Mid surface of teeth –
First we will isolate one teeth alongwith the base mid surface as shown below –
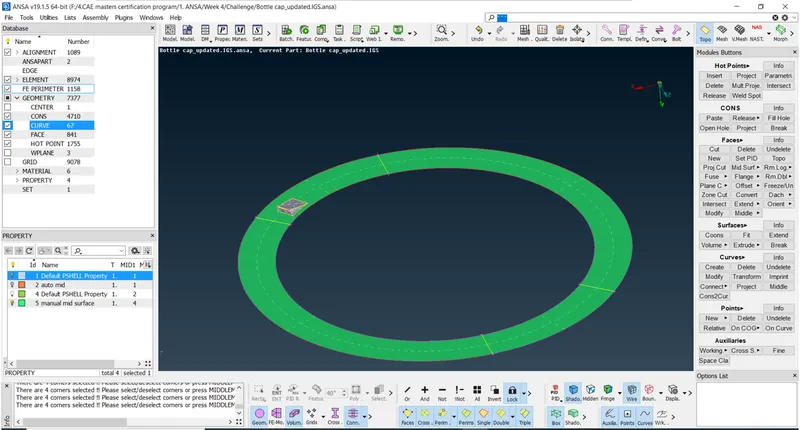
Now a middle curve is created at the front face of the tooth as shown below –
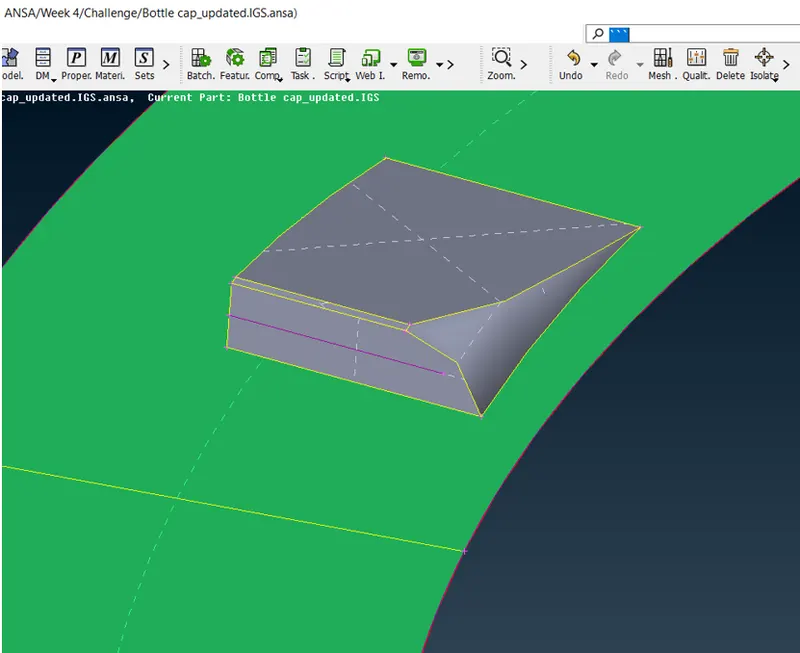
Cons at the rear end of the teeth is projected on the base surface –
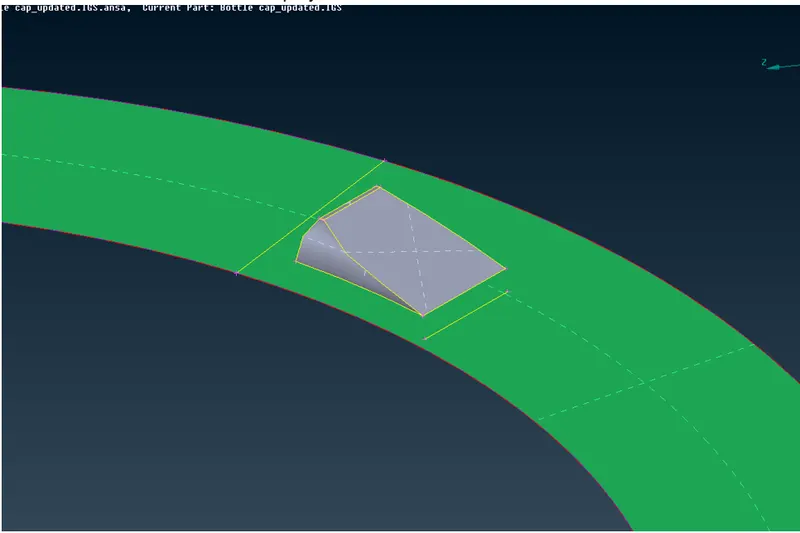
Using both these cons a new face is created which will act as a mid surface of the tooth
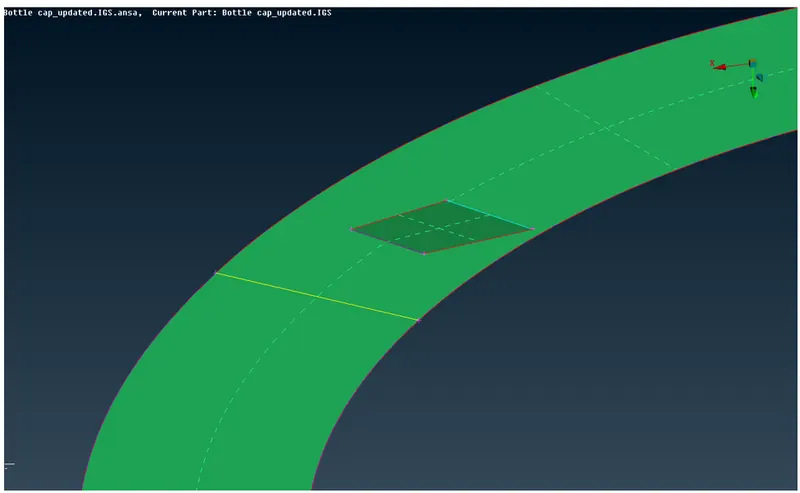
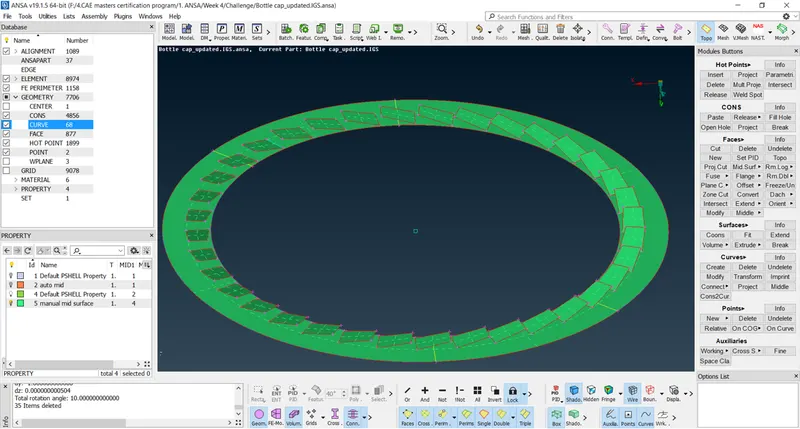
Now using transform-> rotate option copy the mid surface of the tooth over the entire base mid face as shown below –
h) There are 4 trapezoidal features whose middle needs to be extracted on the base mid surface as shown below –
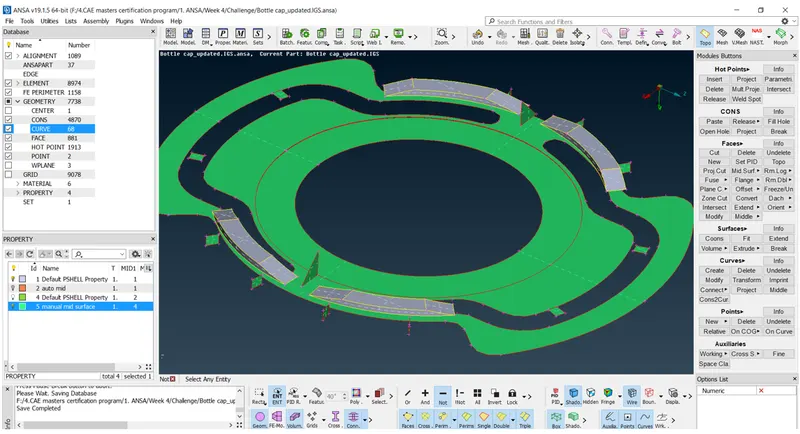
First we will project the selected cons to the base mid surface
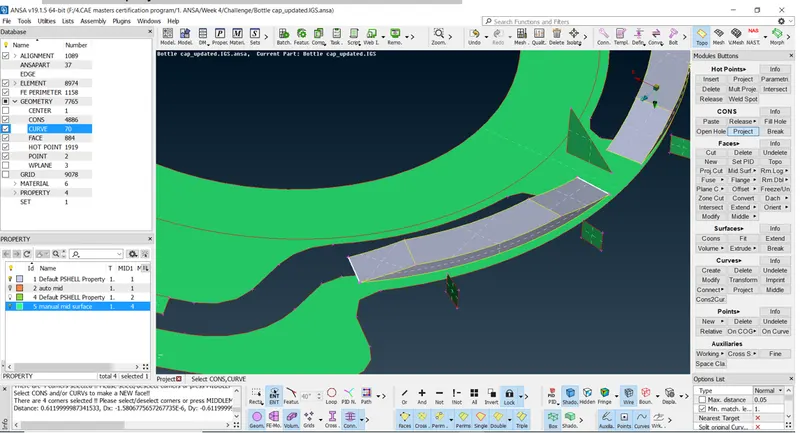
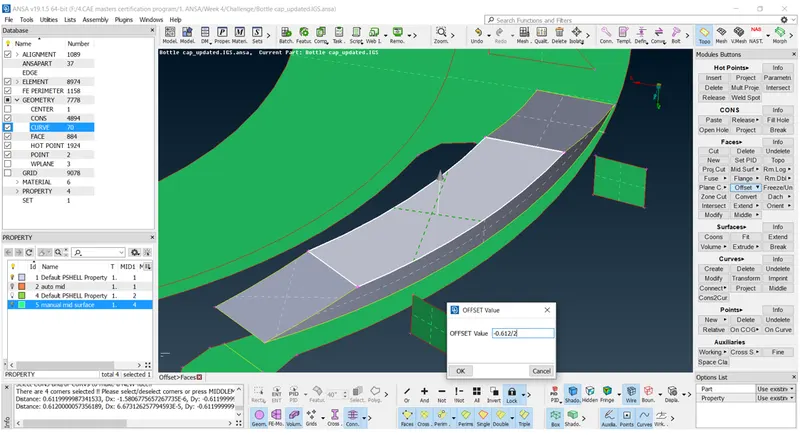
Now we will offset the face shown in the image at the middle of top and bottom face of the feature
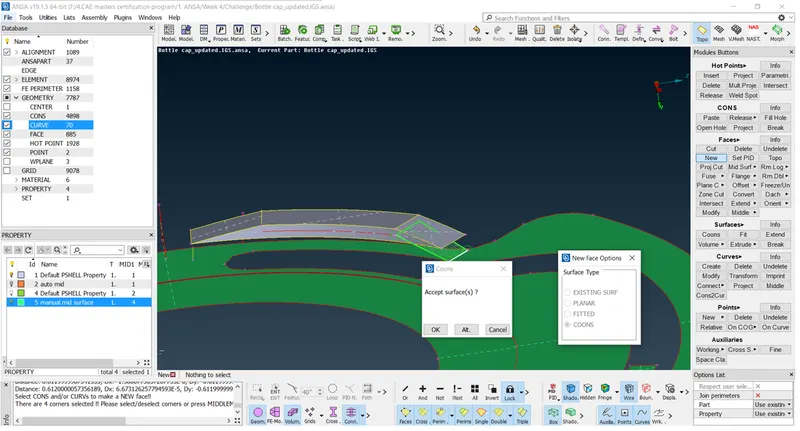
We will now create new face as shown below –
The extracted mid for the feature is as shown below –
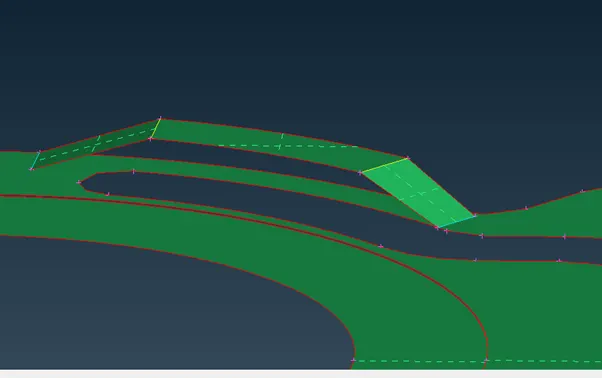
We will follow the above steps for other 3 trapezoidal features as well.
i) Joining of all the features with the main base mid surface of the bottle cap using extend and intersect commands –
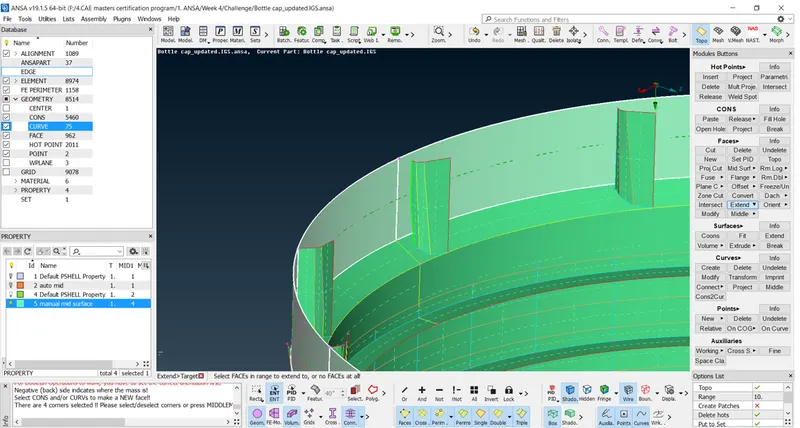
i) extend the outer ribs to the bottle cap
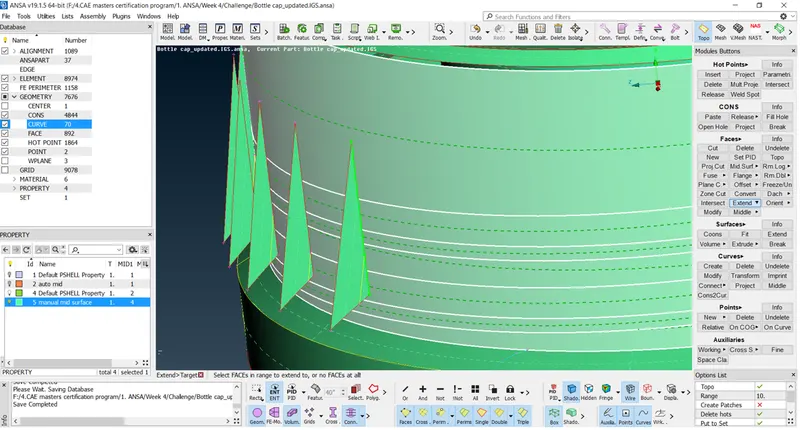
ii) Extend the inner ribs to the bottle face as shown below –
iii) connect the face shown here with the adjoining faces –
before –
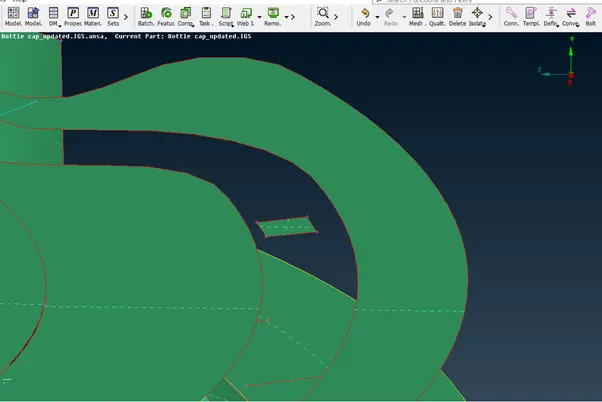
After -
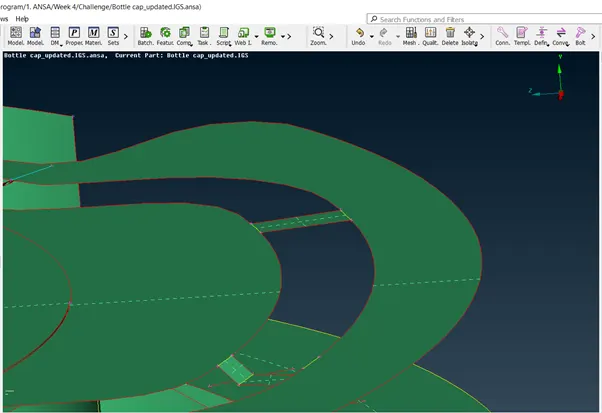
iv) connect the face shown here with the adjoining faces –
Before -
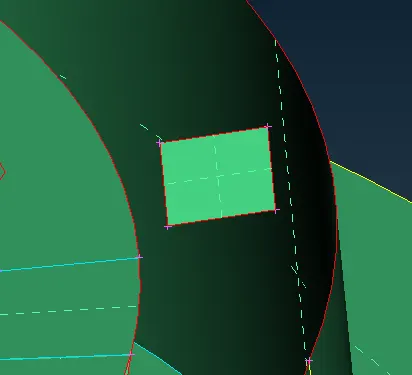
After –
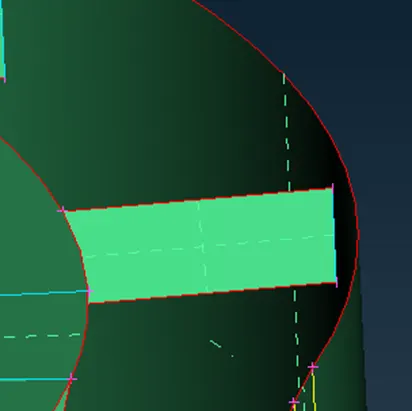
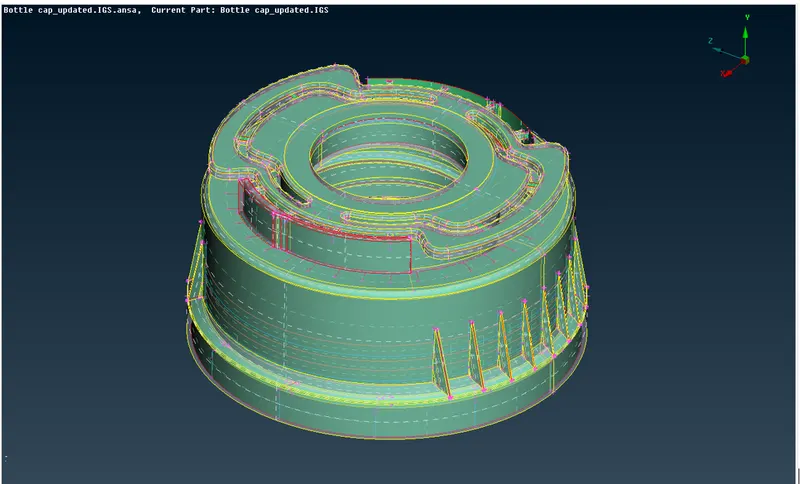
j) With this the mid surface extraction for bottle cap is done and we will check it with actual geometry to ensure that all the key features have been included in the mid surface.
7. Meshing of bottle cap
a) set the hot point spacing of 1mm on perimeter and macros.
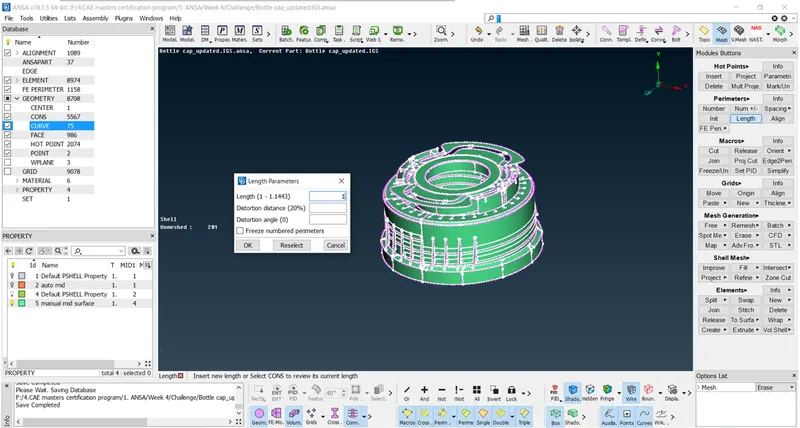
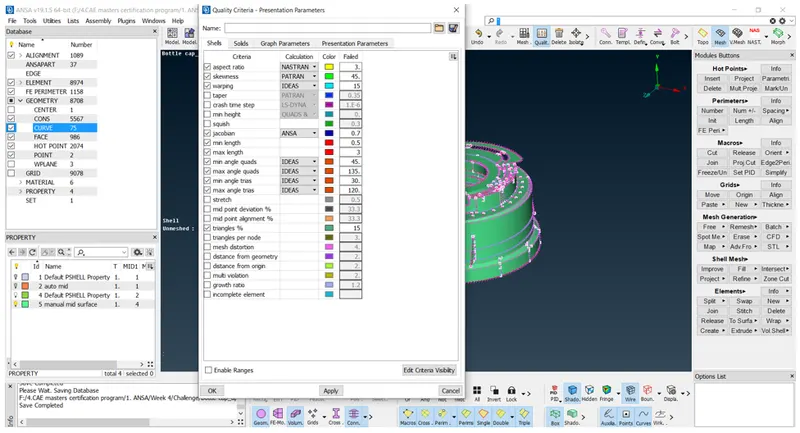
b) Set the quality criterion as per given problem statement –
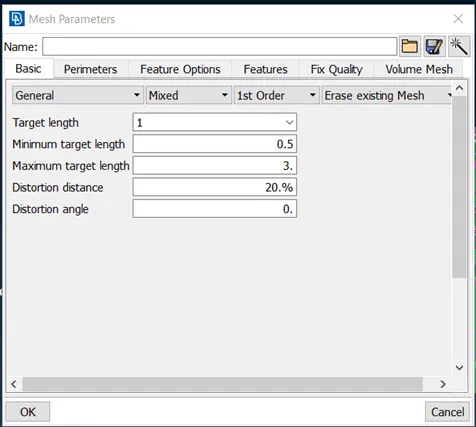
c) set the mesh parameters as shown below –
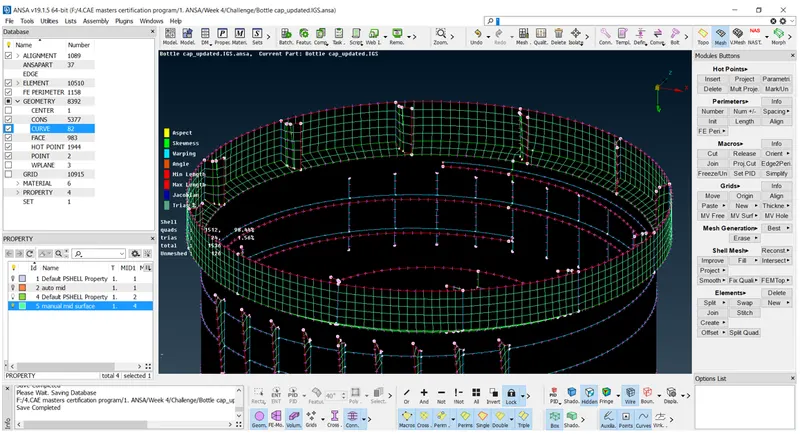
d) We will first mesh the features on the inner side of bottle cap using ‘best’ mesh command
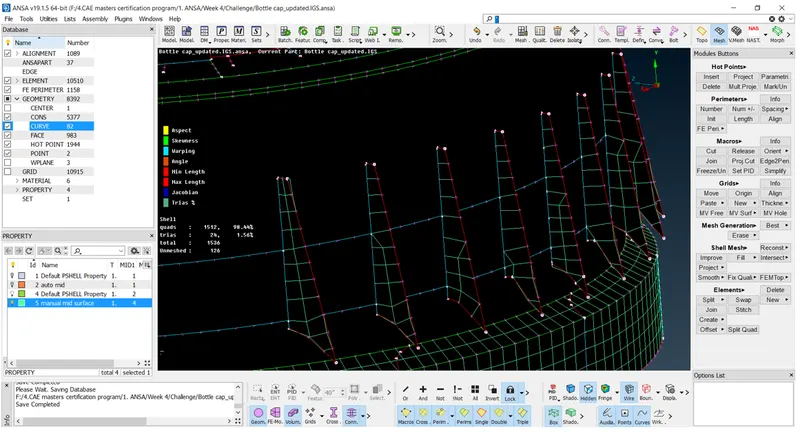
e) meshing of outer ribs –
f) we will isolate the top face and do its meshing separately
Before –
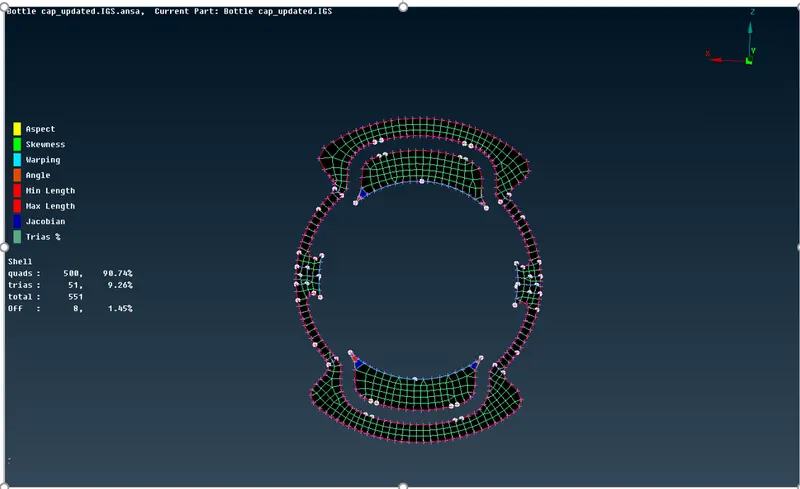
We will remove opposite trias and improve quality using split, swap and paste command
After –
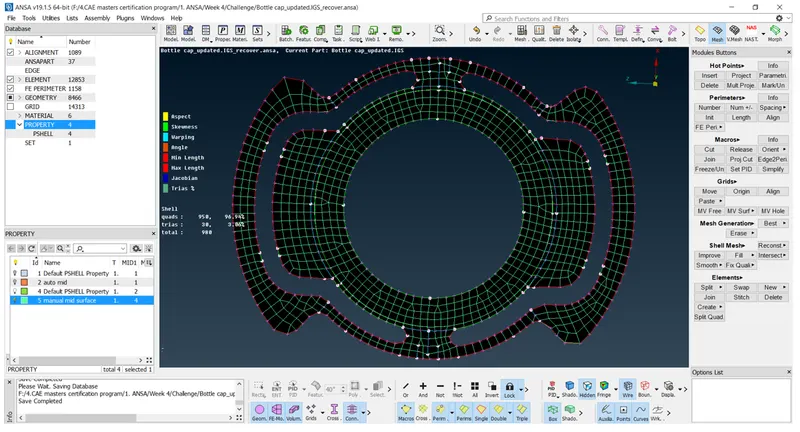
g) Then we will isolate larger faces and mesh them as shown below –
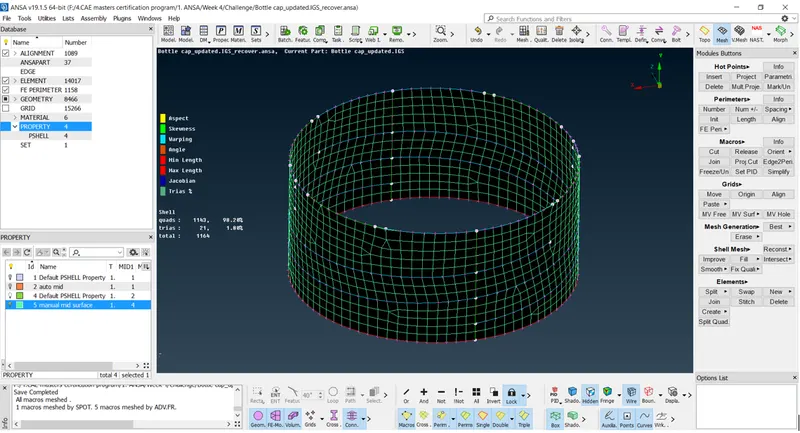
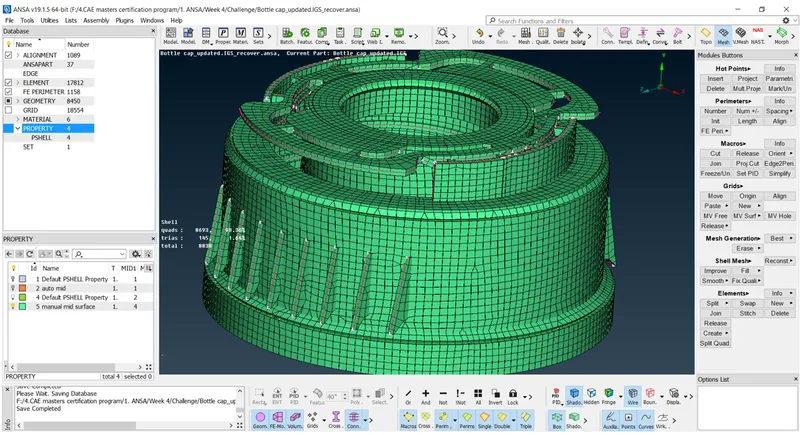
h) Final meshed bottle cap is as shown below –
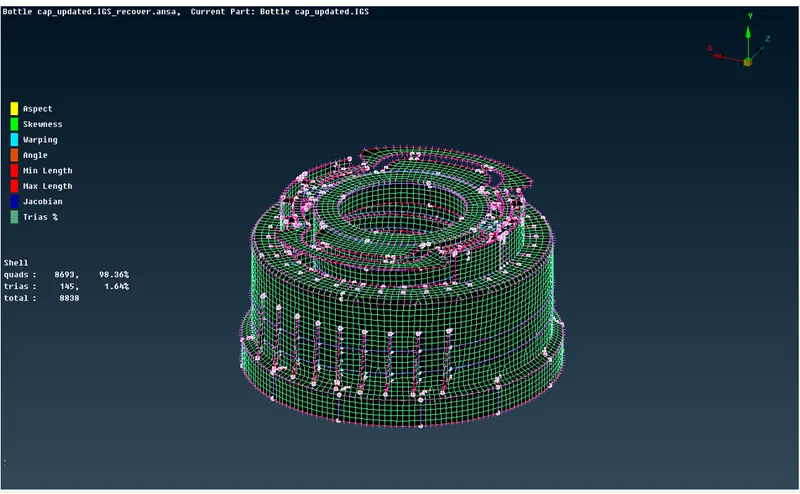
8. Assign thickness to the mid surface
Thickness is assigned to the FEM by checking the box of ‘draw shell as solid’ in quality criteria command
LEARNING OUTCOMES –
1)There are many methods to extract mid surface manually. Each method has its own merits and demerits. We should select that method which gives best result for given geometry.
2)auto mid method of mid surface extraction doesn’t give accurate results but it can be used as a reference for manual mid surface extraction.
3) manual mid surface extraction method should be preferred over auto mid generation for more accuracy.
CONCLUSION –
1) Final mesh model contains 98.36 % quads and 1.64% trias.
2) All the elements in the model cleared the mentioned quality criteria and the features in the model have been captured properly with good mesh flow.
3) There are no rotating quads and opposite trias in the model.
4) There are no OFF elements in the model.