Week 3 - 2D meshing of Hood Model
Challenge: 2D meshing of Hood model
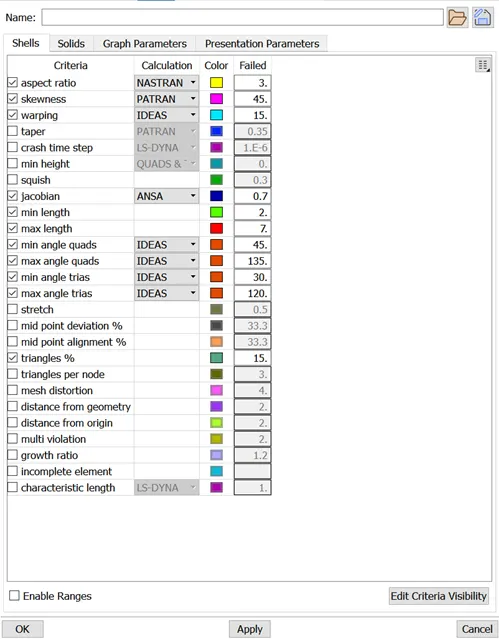
Objective: The main objective of this challenge is to perform 2D meshing of given Hood model using ANSA by executing geometry clean-up, Mid surface extraction and then 2D shell meshing of the Hood model component with the following quality criteria,
|
S. No |
Quality Criteria |
Value |
|
1 |
Target/Average length |
5 |
|
2 |
Minimum Length |
2 |
|
3 |
Maximum Length |
7 |
|
4 |
Aspect |
3 |
|
5 |
Warpage |
15 |
|
6 |
Skewness |
45 |
|
7 |
Jacobian |
0.7 |
|
8 |
Minimum Quad Angle |
45 |
|
9 |
Maximum Quad Angle |
135 |
|
10 |
Minimum Tria Angle |
30 |
|
11 |
Maximum Tria Angle |
120 |
|
10 |
Tria Percentage |
15 |
Methodology:
1) Geometry Clean-up
- First, the Hood model is imported into ANSA
- Set the Perimeter > Length & Macros to 1mm
- Given TOPO for the entire hood and checked visually for any geometrical errors
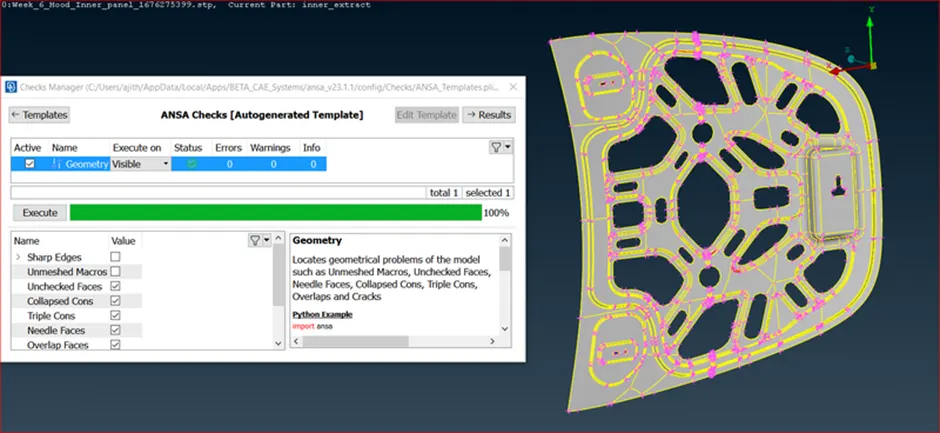
- Using tool Checks > Geometry to show errors like Triple CONS, cracked faces, needle faces and then tried to fix using Auto Fix function.
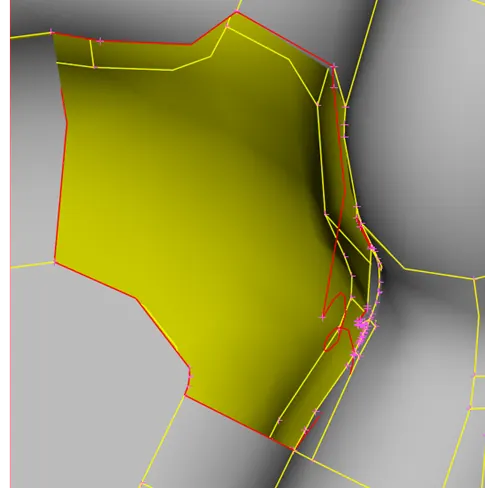
- Identified cracked faces like below and deleted extra hot points to create single cons and generated new faces over there using Faces > New > Fitted/COONS > Click
- Most of the errors are fixed automatically by right clicking on the error and then “Fix”.
- Next, changed the orientation of the model is modified by using comment Faces>Orient and ensured that all the faces are oriented successfully.
- Again, Executed Geometry check with Zero error.
Mid-Surface extraction:
The next strep is to extract the mid surface of the hood model,
Initially I measured the thickness of the component using the tool Utilities > Measure and found that the thickness is uniform across the component as 0.75mm. Then using the tool Faces > Mid-surface > Skin created mid surface as below.
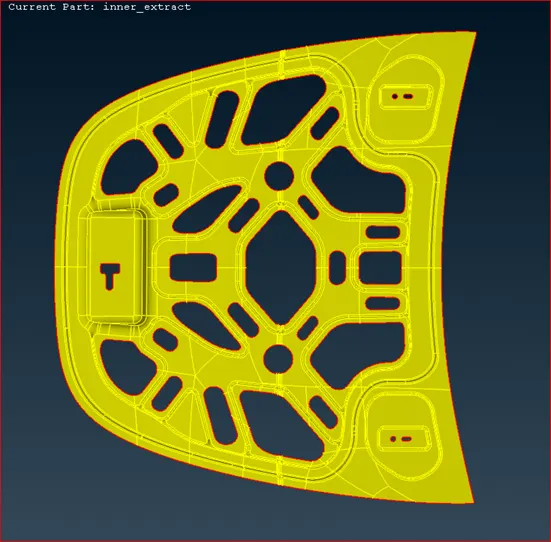
* Now, the property is assigned to the extracted mid surface by going to Faces > Set PID with 0.75 thickness
*Done topology for all once to check the surface by changing single cons to double and double cons to triple as below, i.e. Outer surface changed to Red and inner surface changed to Yellow
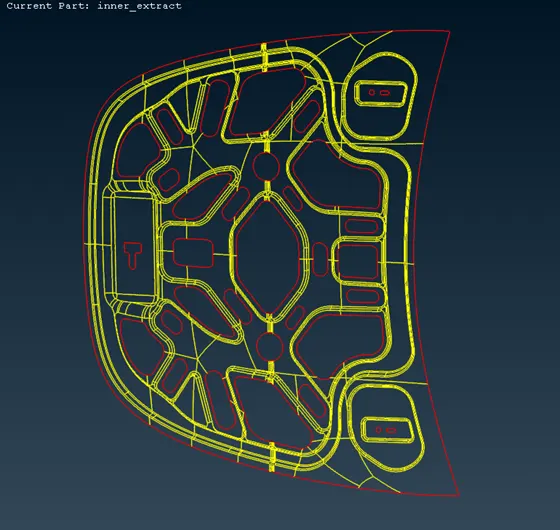
*Again, executed check geometry of the mid surfaces and achieved positive result of geometry check with zero error.
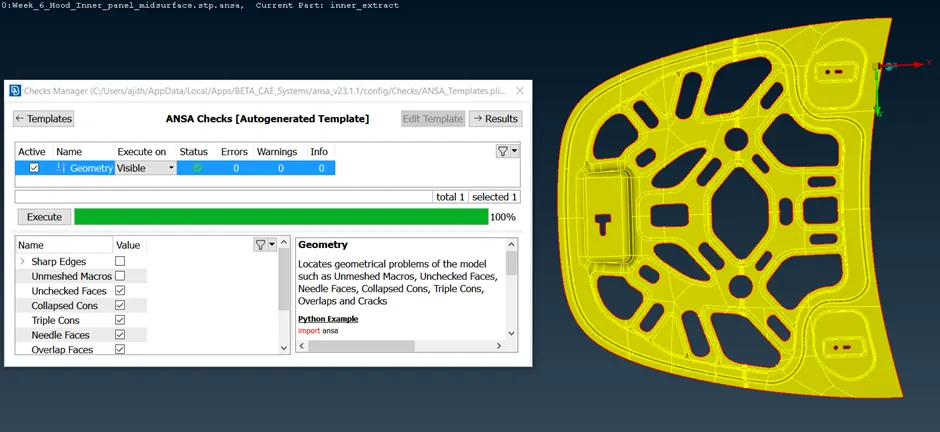
MESHING:
To make sure element length of 5mm throughout the model and to maintain the consistent of element length, changed the target length to 5mm in Utilities > Mesh Parameters and changed all other basic settings before meshing.
Followed best practices as follows:
1) changing odd number of elements to even number using Perimeter > Number > select > change to even numbers
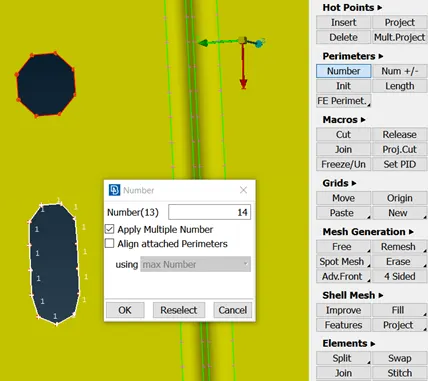
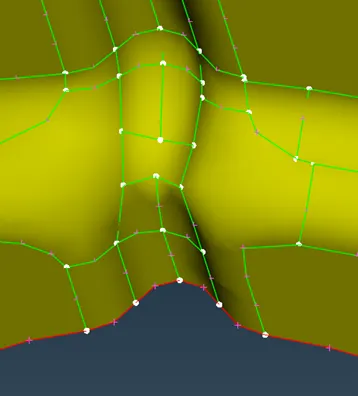
2) Cutting unwanted joints and captured peak of the features for better result in meshing
Once the model geometry setup is done, as per given quality parameters, entered the parameter by clicking “F11” and then applied given quality parameters as below and in presentation parameters, modified details on demand effect and enabled element percentage and then Apply > Ok
Next call on Mesh Parameters where all the basic setup for mesh has been done and saved
*Using element offset, copied mesh elements and made offset into “Zero” and made the two sets of nodes visible using the option Grid > paste > auto > visible
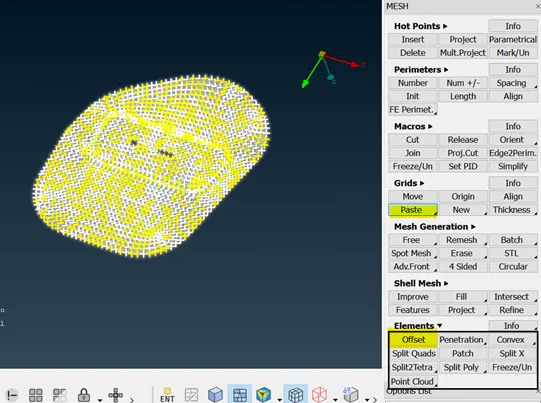
*Later turned off the geometry to make visible like above.
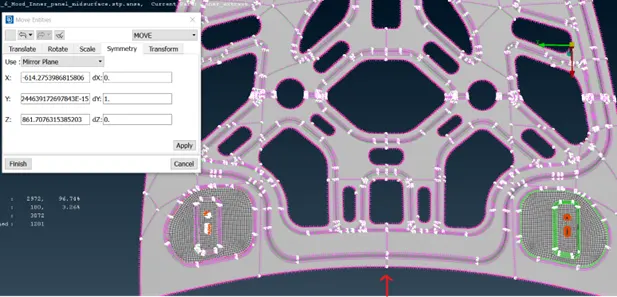
*Used comment Transform > Move, selected the offset element that need to be moved and by using symmetry option shifted to the opposite feature as below.
Using the option Best mesh, I meshed the remaining part of the hood
Also, to avoid any Trias pointed towards the radius like below, I reconstructed the mesh elements using the option Shell mesh > Reconstruct
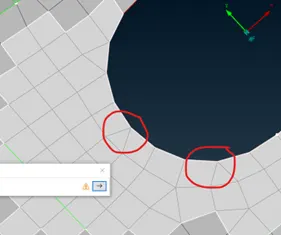
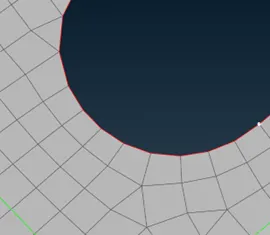
And finally, the hood model is completely meshed as below
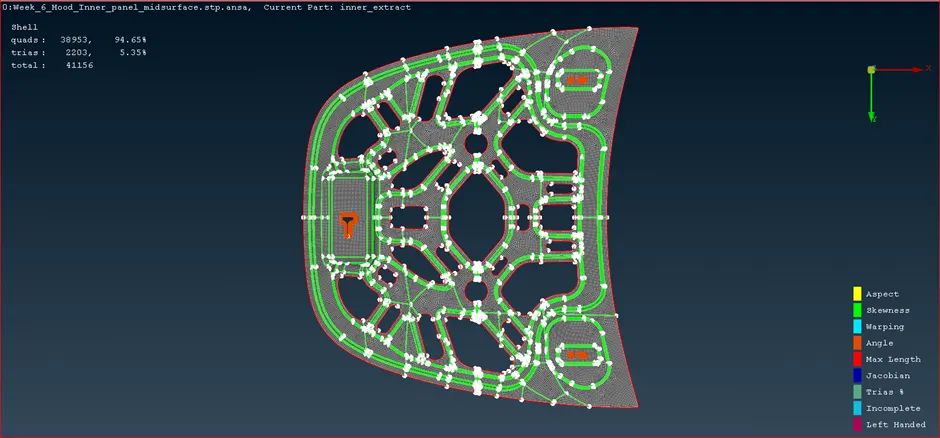
https://drive.google.com/file/d/1YP0e5h39aB1acXYV1a2Zk7XYKvK52JPj/view?usp=drive_link