Week 12:Project 2-Meshing of Rear Wheel Holder challenge
Objective:
To create a error free model, generate proper 2D mesh using Hypermesh.
Description:
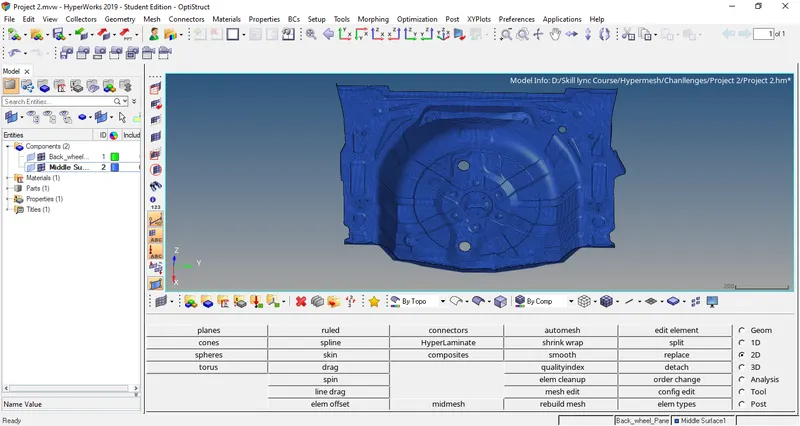
The following is the model which we need to mesh.
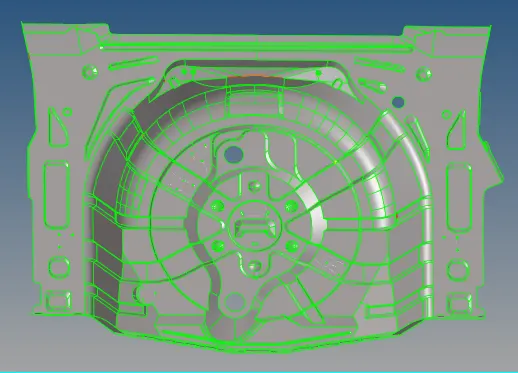
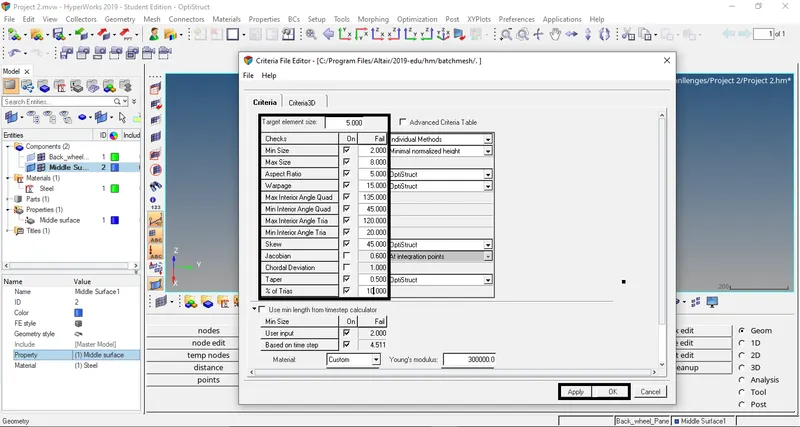
The following are the mesh element size and Quality parameters need taken in to consideration for meshing the Geometry.
- Target/Average length = 5
- Minimum Length = 2
- Maximum Length = 8
- Aspect = 5
- Warpage = 15
- Skewness = 45
- Taper = 0.5
- Minimum Quad Angle = 45
- Maximum Quad Angle = 135
- Minimum Tria Angle = 30
- Maximum Tria Angle = 120
- Tria Percentage = 10
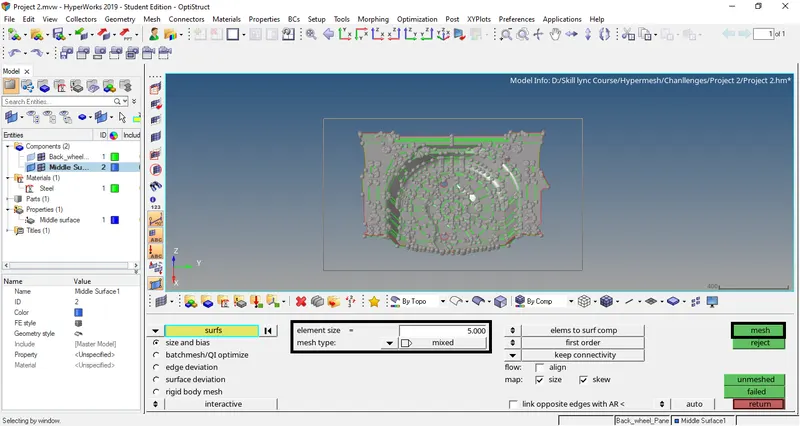
And the ELEMENT TYPE is MIXED.
Procedure:
A: Clearing the errors in Model:
1. Now we can see there are few surfaces missing. First we will clear those areas.
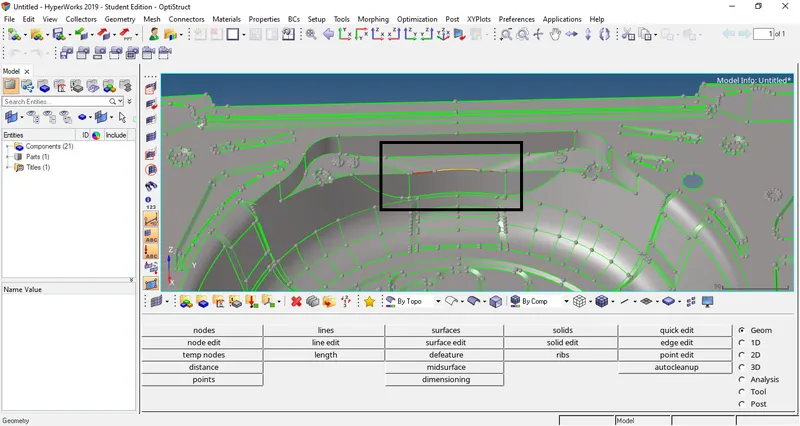
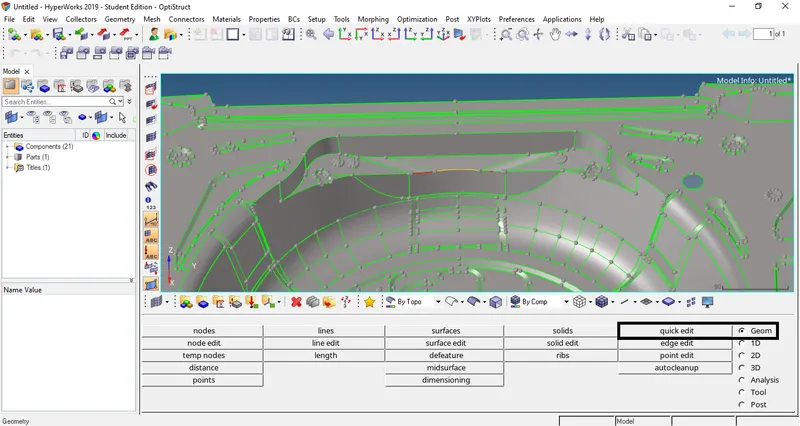
2. Now go to Quick edit option under Geometry.
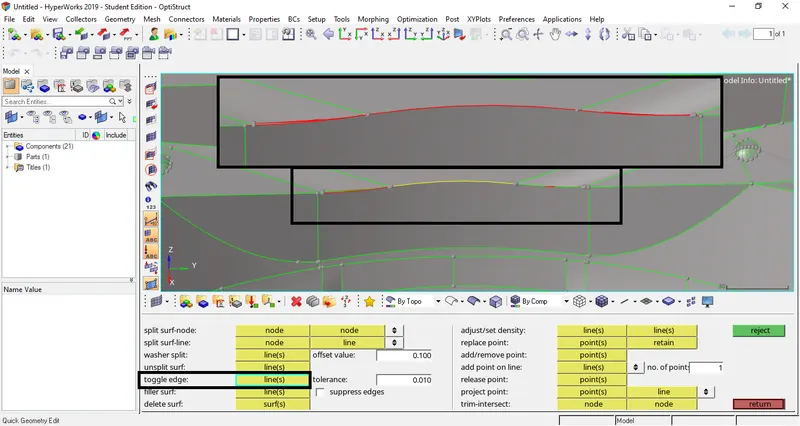
3. Now toggle the yellow color line by select Toggle edges option. Select the line by left mouse button. Now we can see line color is changed to red.
4. Now go to mask option and select the surface as shown and press mask.
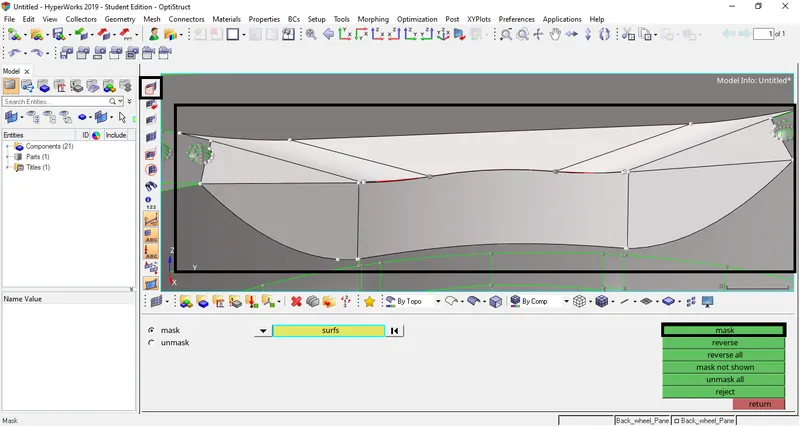
5. Now we can see there are unwanted surfaces.
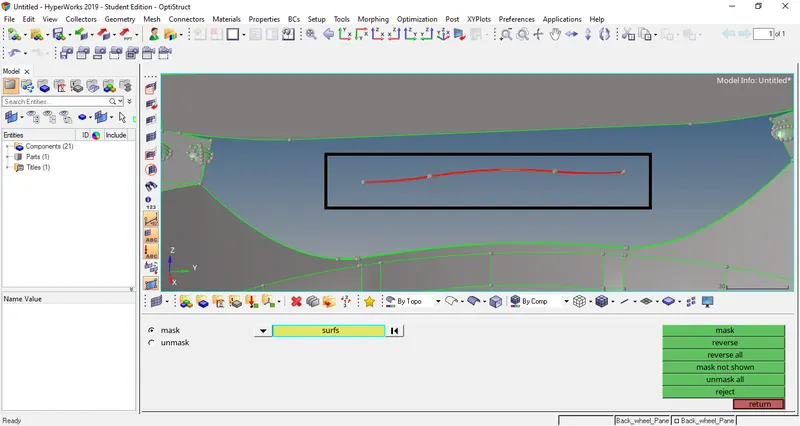
6. Now go to delete option and delete the unwanted surface. Select the surface and press delete entity.
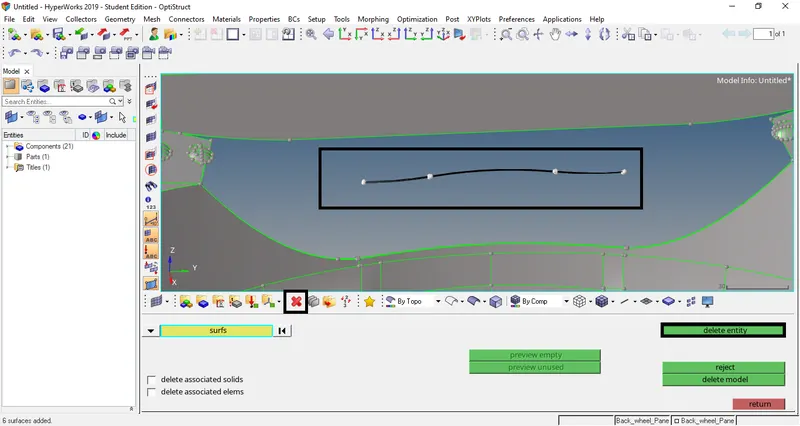
7. Now we can see the unwanted surface is deleted.
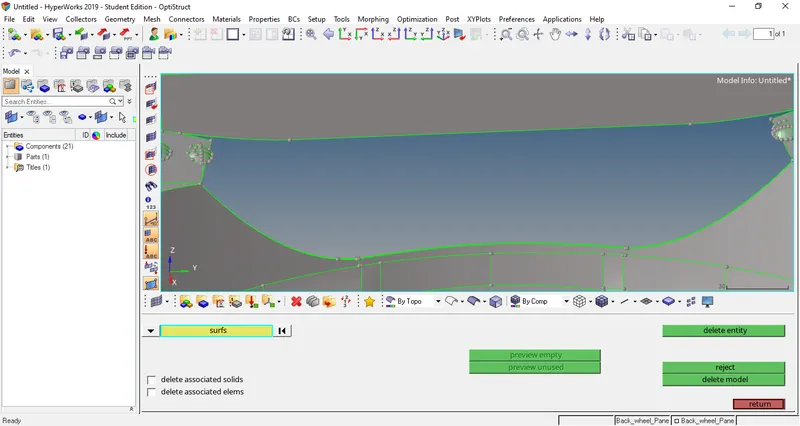
8. Select Toggle edges option. Select the line by left mouse button. Now we can see line color is changed to green.Now we can see the geometry is clean.
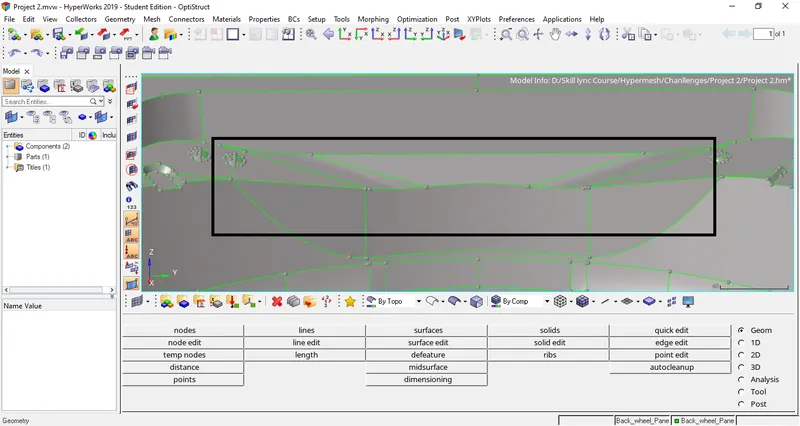
9. Follow step 3 to 8 for other areas there are errors.
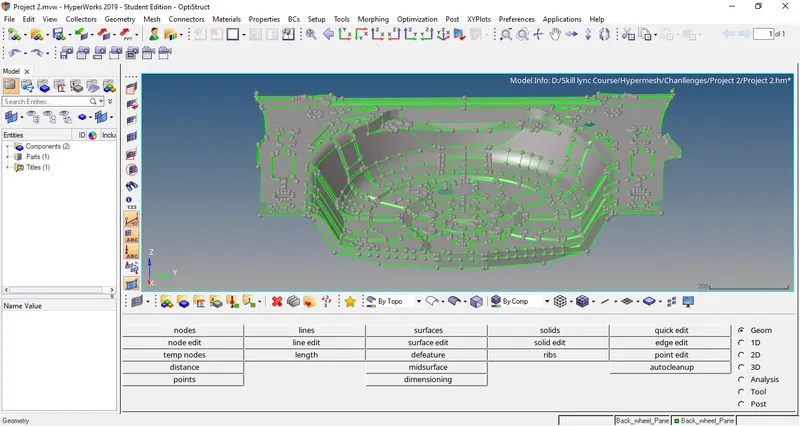
B: Extracting mid surface:
10. Go to midsurface option under Geometry.
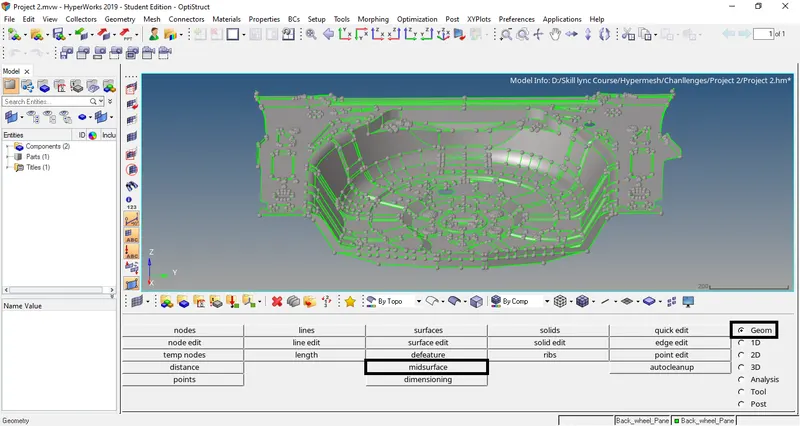
11. In extraction option select skin offset.
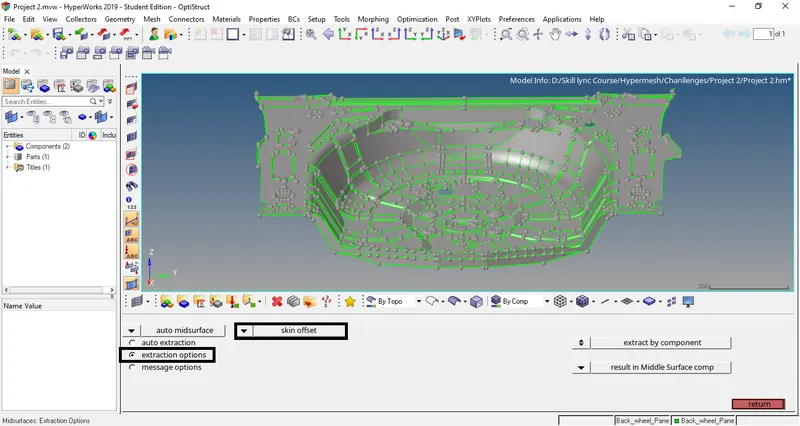
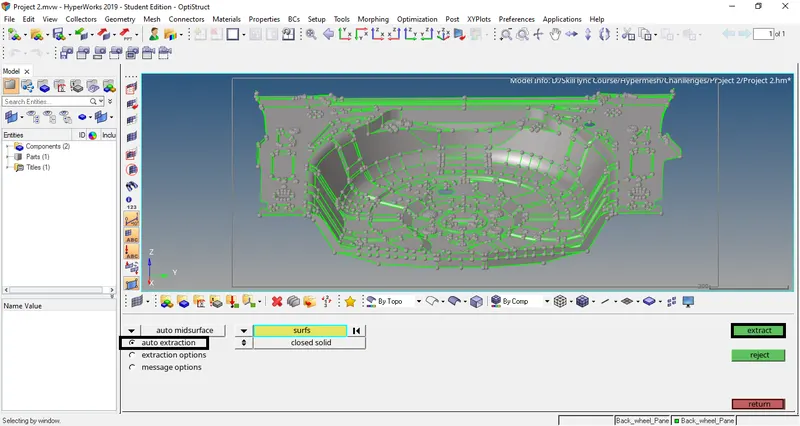
12. Now go to autoextaction option and select the entire model and press extract.
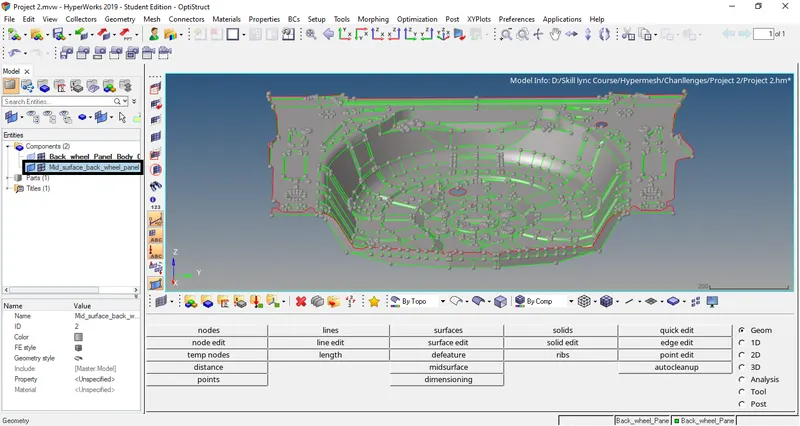
13. Now we can see the mid surface. Also seperate model part is created. Name it as Mid_surface_Back_wheel_panel.
C: Creating Material and Property card:
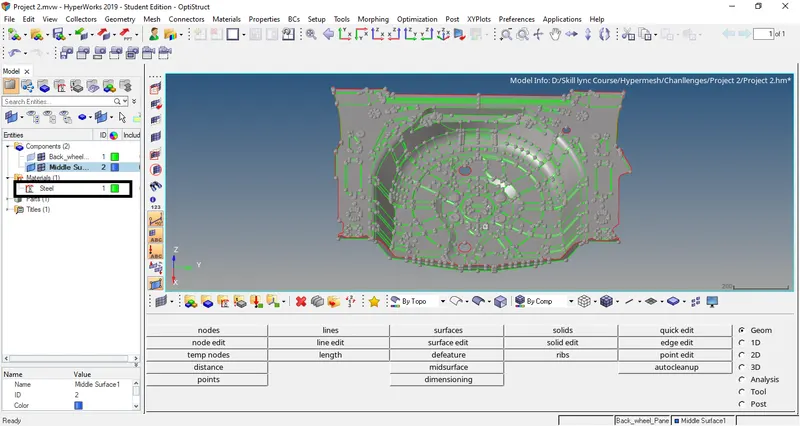
14. Right click on the entitie module and select create and select Material. Now we can see Material ID is created. Named it as Steel.
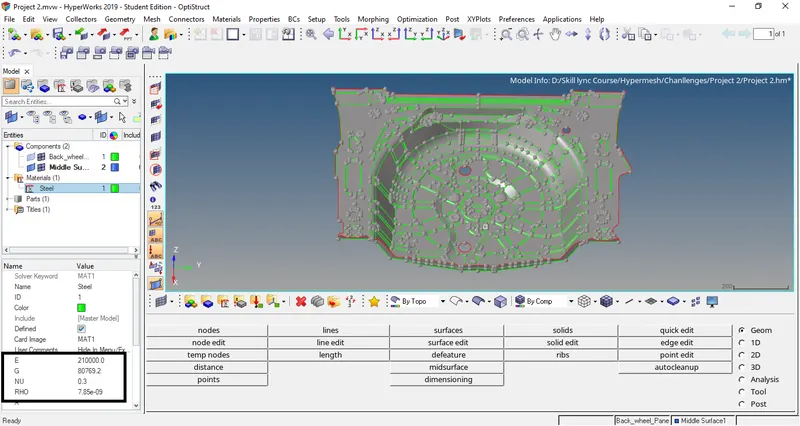
15. Now we will define other parameters in the Material ID which will defined in the Material defination tab which is below. Select Card image as MAT1 and also define E ( Young's Modulus ), G ( Shear modulus ), NU ( Poisson's ratio ) and RHO ( Mass density ).
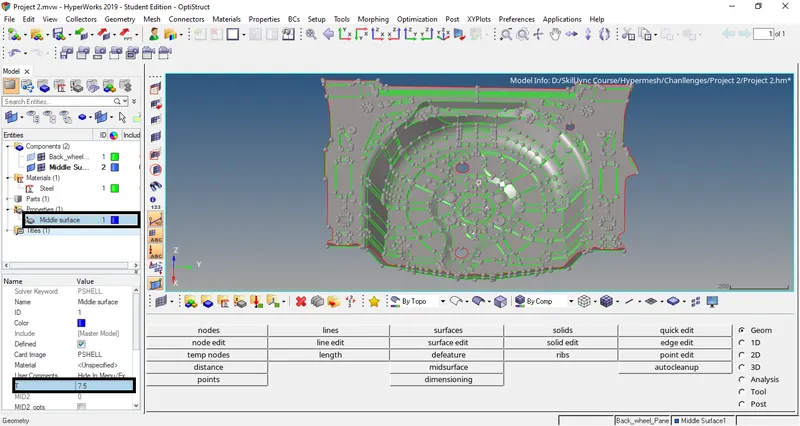
16. Now we will create the Property ID. Right click on the entitie module and select create and select Property. Name the Property as Middle_surface. Assign the Material as Steel & Thickness as 7.5.
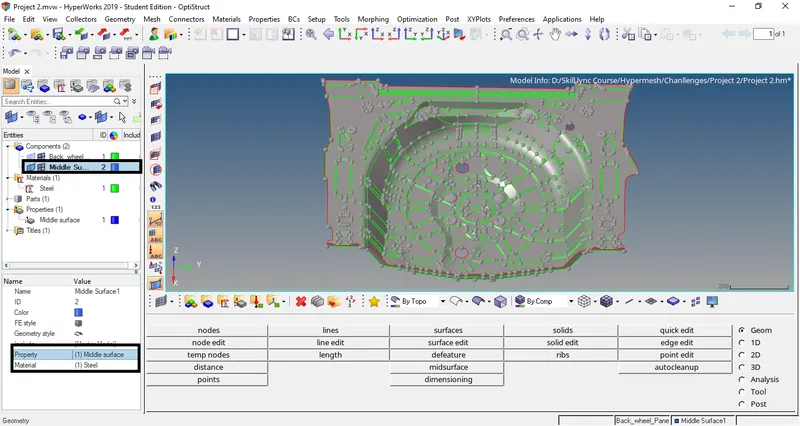
17. Now we will assign to the component. Select Middle_surface and in the Defination tab assign Property as Middle_surface and Material as Steel.
D: Generating Mesh:
18. Now we will assign the mesh quality parameters. Go to Preference option under select Criteria file settings. Now enter the mesh quality parameters as given and press Apply and OK.
19. Now go to Automesh option under 2D. Now select element size as 5 and mesh type as Mixed. Select the surface and press mesh.
20. Now we can see the part is meshed.
E: Cleaning the Mesh quality errors:
Method 1: Remeshing method:
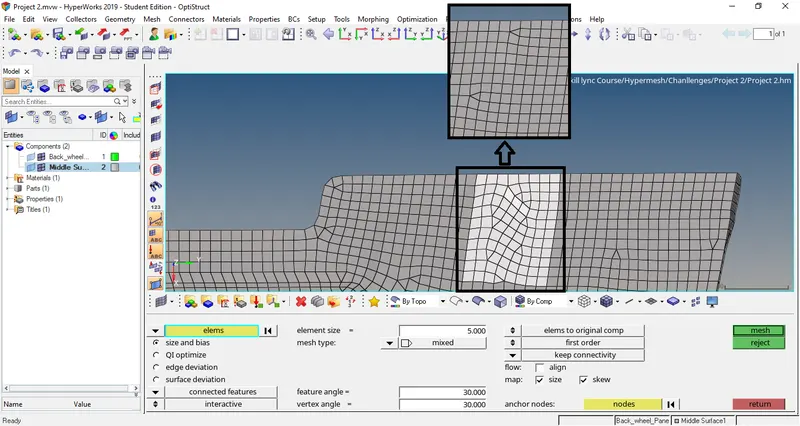
21. Check the areas of the errors and go back to the Automesh option and select the elements.
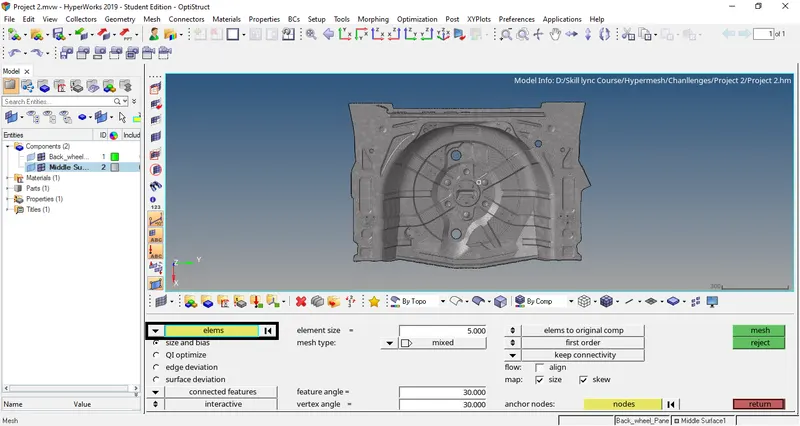
22. Now select the elements where there is quality errors and press mesh. Now we can see the area is re-meshed.
Method 2: Using element cleaning up tools:
23. Now using element clean up option available we will clear the quality failed elements. Now select element optimize and select the elements which are failing. Now we can see the error is rectified.
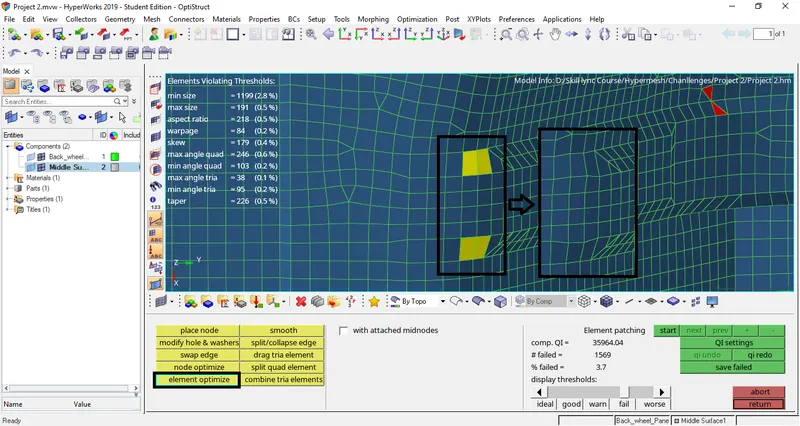
24. Using method 1 and 2 eliminate the errors.
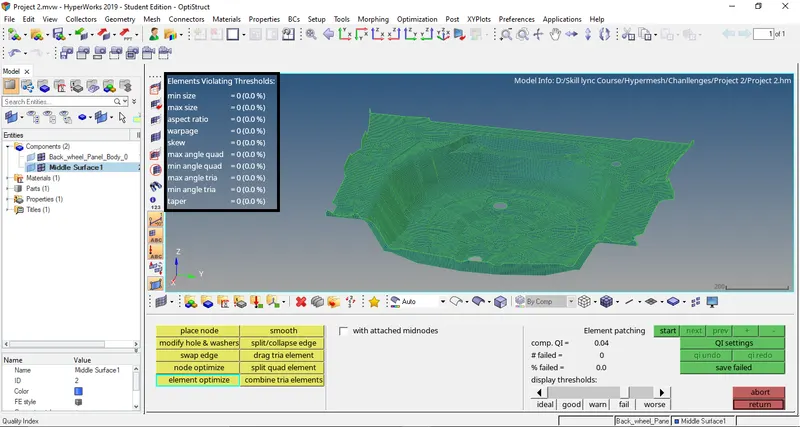
F:Conclusion:
Completed the mid surfacing, meshing, clearing the mesh quality errors & converted in 2D element representation.
J: Learning Outcome:
1. Learnt how to toggle and create new lines by spliting the surface and creating the proper mesh flow by toggling between the Quad and mixed elements.
2. Learnt how to join the elements using nodes.