Week 1 Challenge
Q1. Summarize the user interface in TSD with the for the following items: -
- Project Workspace – How to access and usage
- Scene Content – Demonstrate the use of scene content
- Create two scene views
- Loading drop list- How to access
- Properties windows – how to access and usage
ANS 1)
- A) Project Workspace : The project work space area is the central control are of our drawing. It is a clear white space used for drawing our structure. We can add different levels, sub models and sub structures. We can access the project work space by opening the Tekla structural designer software, and the clicking on new option to activate the options and start the drawing.
- B) Scene Content : With the help of scene content option we can manage the control level of the information to be displayed in each scene view. We can do this by switching items on/off in the scene content dialog.
- C) We can create a two scene views in tekls structural designer software. The function helps us in displaying some content and members in differnt part for easy analysis and evaluation. It can display the entire structure , sub structure, or individual members separetely in 3D and some of the other remaining parts in 2D.
- D) The loading drop list is located at the bottom of the window, and has a downward arrow. With the help of the arrow buttons we can navigate accross the options. It has many functions, such as we can select or specify a specific loadcase and we can also add loads.
- E) Properties window is located at the left side of the window, which is enclosed in a rectangular box. We have many sub options like structure, loading, groups, status, connections and wind. We can see the commands and change the properties accordingly to our requirement.
---------------------------------------------------------------------------------------------------------------------------------------------------------------
Q2. Create a new file in TSD and set up the settings for a steel building to have member grade FE410 and concrete grade of M30 as per IS codes. The covers for the members to be as per the following input: -
|
MEMBERS |
IN CONTACT WITH GROUND |
ABOVE GROUND |
|
Column |
50mm |
40mm |
|
Slab |
30mm |
25mm |
|
Pile cap |
75mm |
|
|
Foundation |
50mm |
ANS 2)
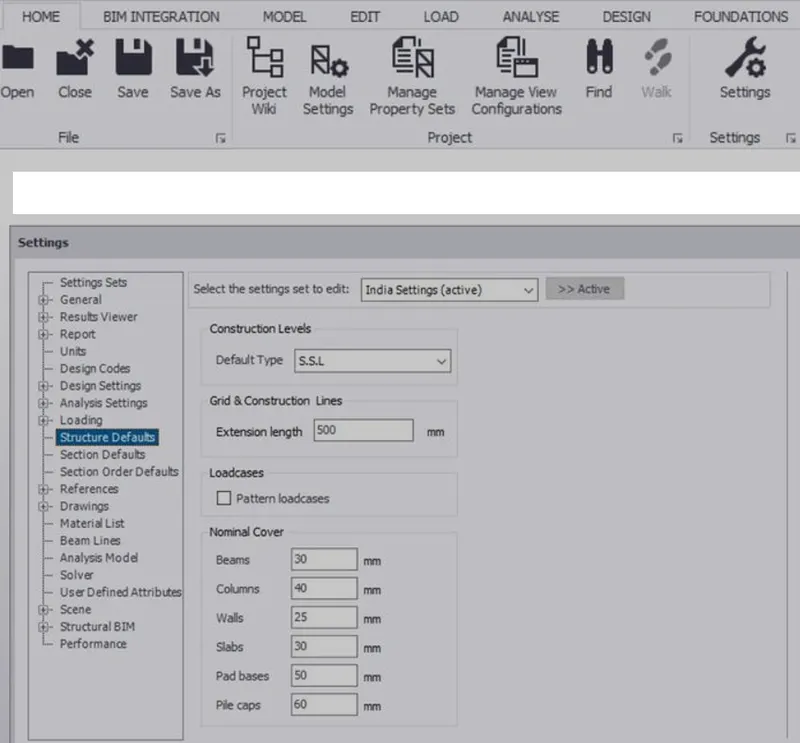
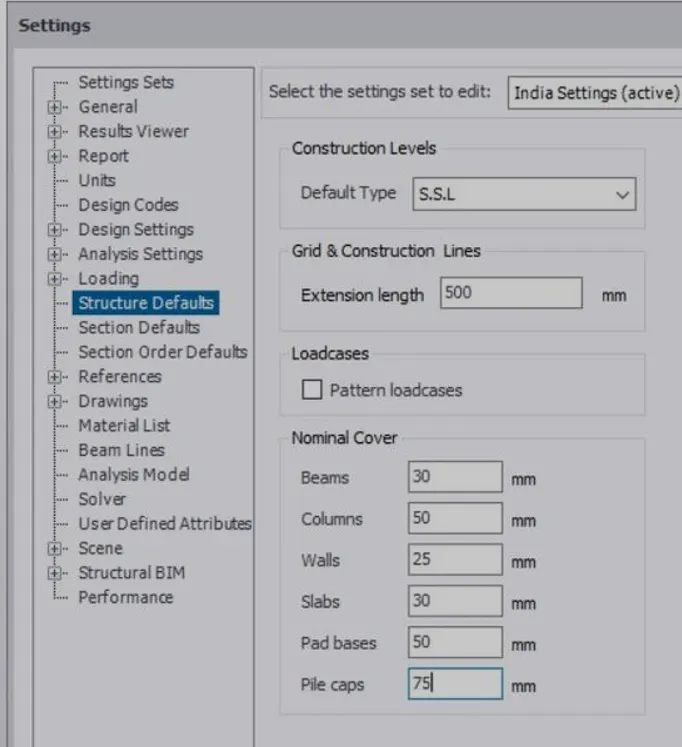
AIM : Create a new file in TSD and set up the settings for a steel building to have member grade FE410 and concrete grade of M30 as per IS codes. The covers for the members to be as per the following input:
TOOLS USED :
- File
- Settings
- Structure defaults
- manage property sets
PROCEDURE :
- Open a new file.
- Under file menu select settings.
- Settings dialog box appears.
- In that select structure defaults and set all the values accordingly to our requirements.
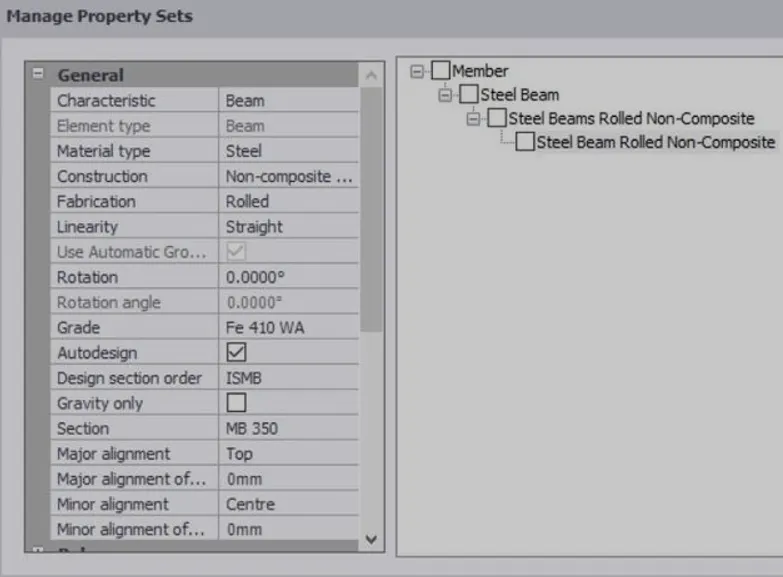
- Next under file menu select manage property sets.
- manage property sets dialog box appears.
- In that select new ---> members ---> steel beam.
RESULT :
Thus with the above steps a new TSD file is createdand we can set the settings required.
-------------------------------------------------------------------------------------------------------------------------------------------------------------------------
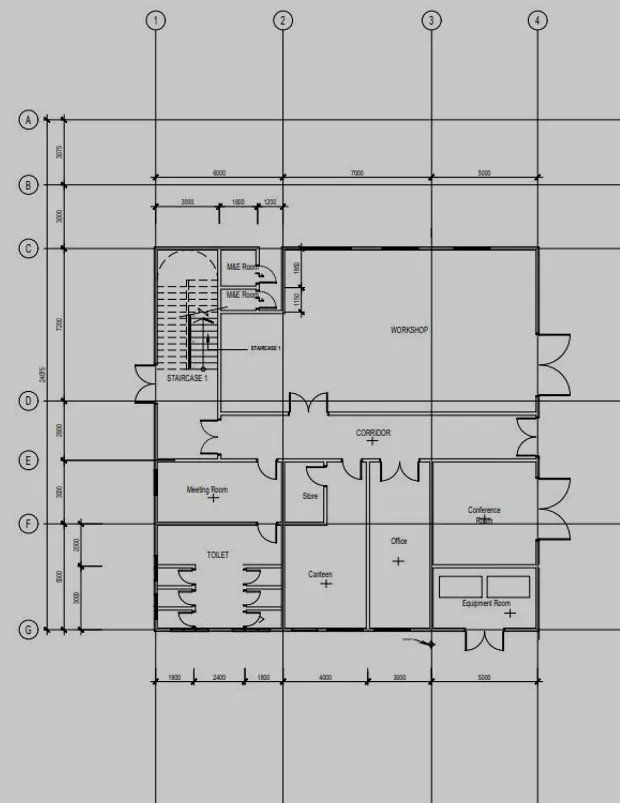
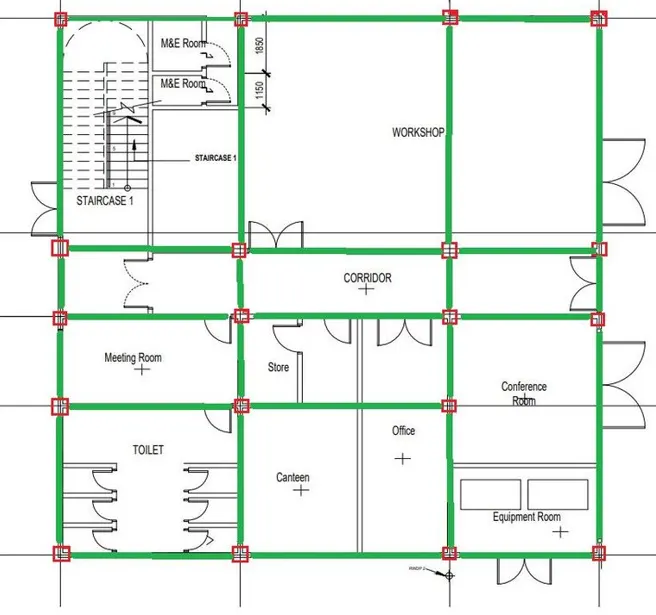
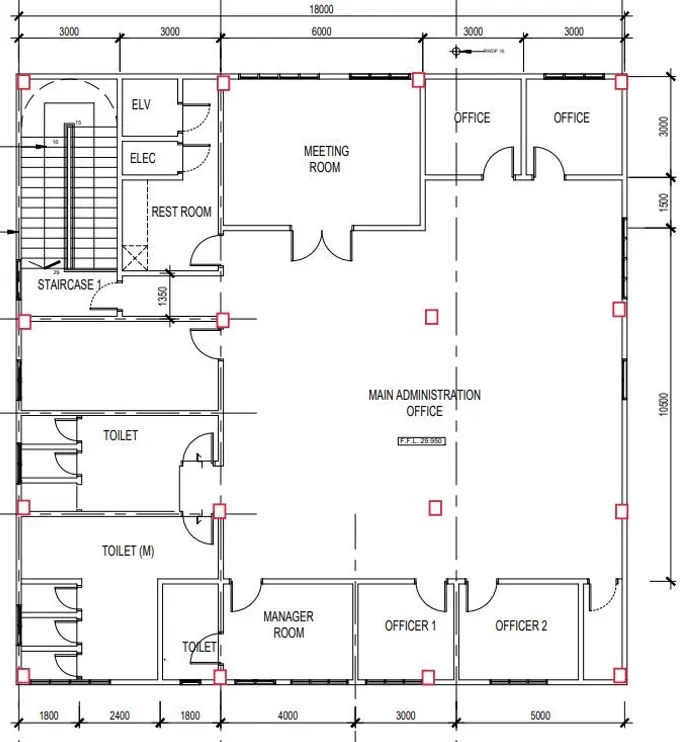
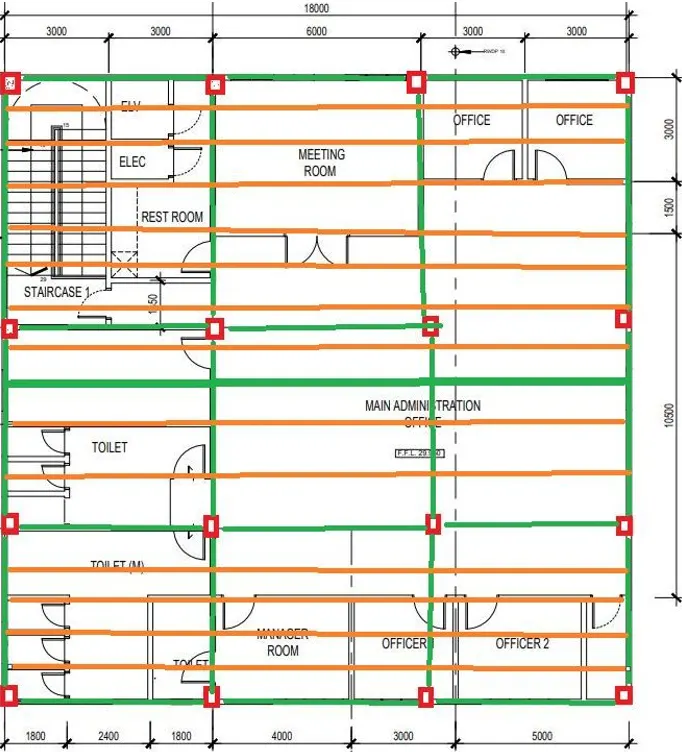
Q3. With reference to the input drawing as per Attachment 1, 1.1, and 1.2 and study the steel building plan and summarize your understanding of the plan. Based on your study assume and explain the location of columns and beam and develop a hand sketch for each plan
ANS 3)
ATTACHMENT 1 : PLACEMENT OF COLUMNS AND BEAMS (columns in red colour and beams in green colour)
ATTACHMENT 1.1 : PLACEMENT OF COLUMNS AND BEAMS (columns in red colour and beams in green colour)
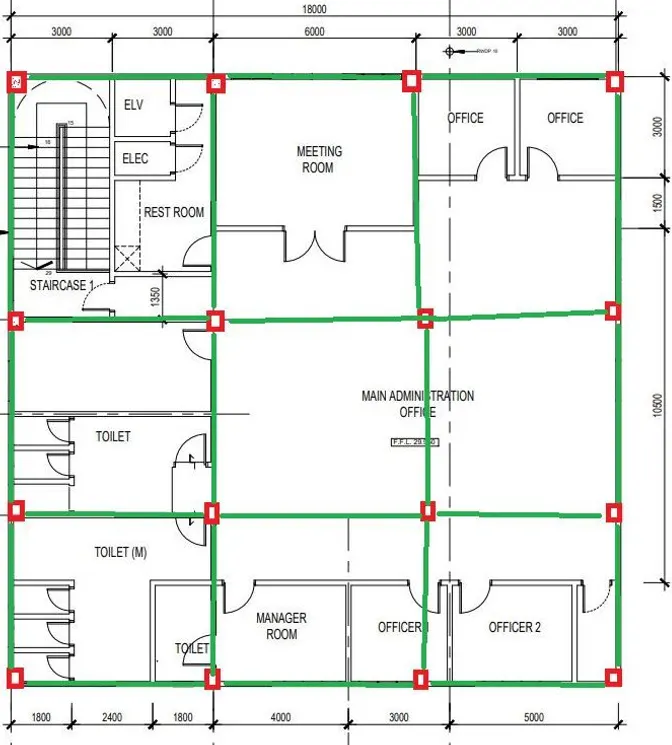
ATTACHMENT 1.2 : PLACEMENT OF COLUMNS AND BEAMS (columns in red colour and beams in green colour)
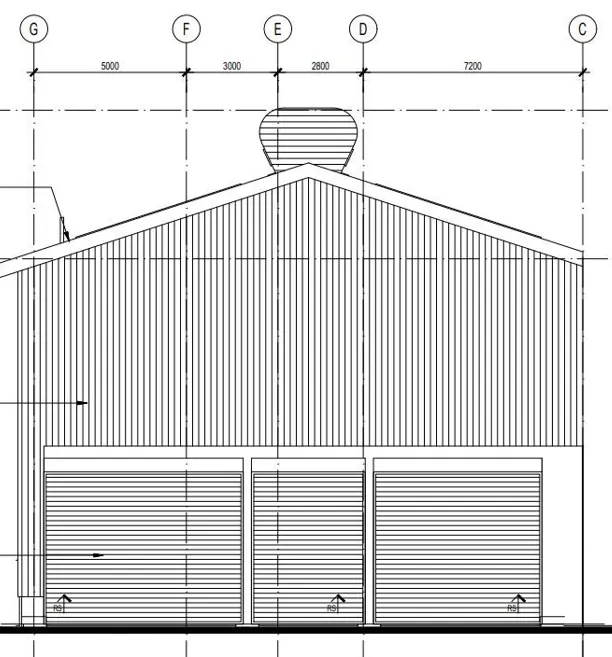
----------------------------------------------------------------------------------------------------------------------------------------------------------------------------------------------
Q4. Model grid lines and construction levels as per Attachment 1. 1.1 and 1.2. All dimensions are in mm
- The base level to be 500mm below ground level.
ANS 4)
AIM : Model grid lines and construction levels as per Attachment 1. 1.1 and 1.2. All dimensions are in mm.
TOOLS USED :
- Levels
- model.
- file
- grid line
- parallel(quick)
PROCEDURE :
- First open a new file.
- Select levels option under structure tool.
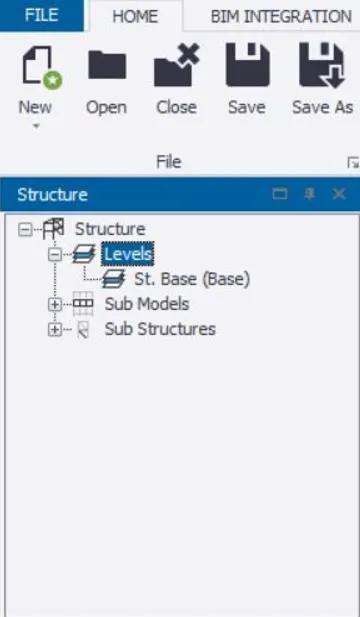
- Then levels dialog box appears.
- Give specific name to each and every level and specify the height for each level.
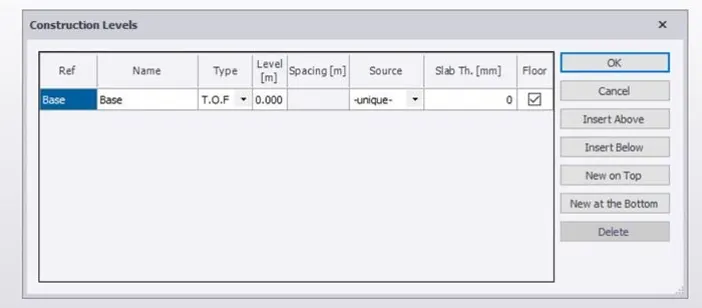
- Then click on ok.
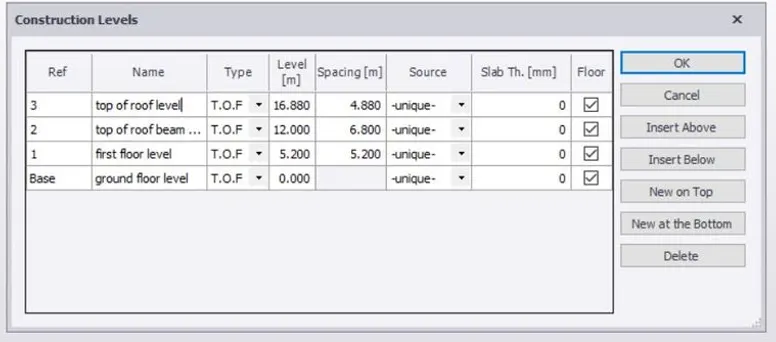
- The particular levels are assigned and created with the particular heights mentioned.
- Click on model tab and select grid option.
- Click on any place on the workspace and draw a grid line.
- With the same option continue to draw all the horizontal and vertical grid lines.
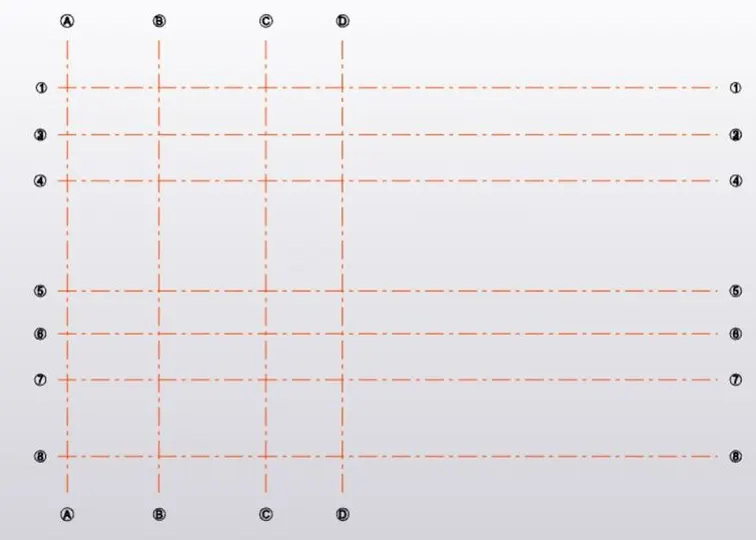
RESULT : With the above following steps we can create the construction levels along with model grid lines.