Usage of Navigation tool , Timeliner and Clash Detection test using Naviswork
Usage of Navigation tool , Timeliner and Clash Detection test using Naviswork
Q1) Use the Architecture/ Structure Project file developed by you in Week 6 to 8. Export the Revit architecture and structure model to Navisworks Cache file following the export settings discussed in class
AIM: Export the Revit architecture and structure model to Navisworks Cache file
Introduction: naviswork help you to detect clash by clash detactive test and resovle it, also help to overview
Procedure:
step 1) open revit software
then open project of week 7 for export to naviswork
step 2) then click on file menu
and go on export option
then select NWC option from export to export revit file to architecturer
step 3) and then save the file on path
our file is ready to export from revit to navisworks
Result: naviswork file export successfully done from revit file
Q2) Use Navigate Tool to walk around the model and walk through the rooms created and record your moving as animation in your Navisworks file
AIM: walk through the rooms created and record your moving as animation in your Navisworks file
Introduction: walk through is helpful for imagination and for better brief understanding to know whole details
Procedure:
step 1) open naviswork software i have 2023 version
step 2) then open the file we exported on ast question from revit
from file tab
and serch the file which we save
after selection of nws file press on open button
step 3) go to walk option
click on viewpoint option from ribbon
then click on walk option from navigate section
and adjust our view from zoom in and zoom out
step 4) recored our navigate file
drop down save view point option
and click on record option
and walk through building just by using cursor
we can control pause on and stop video from here
step 5) after stoping recording our video is save automatically
we can see video from saved viewpoint
Result: our walk through record video saved successfully from viewpoint
Q3) Use Navigate tool to use Realism feature to walk through the model and record your moving as animation in Navisworks file
AIM: use Realism feature to walk through the model and record your moving as animation in Navisworks file
Introduction: realism option for real person view simulation
Procedure:
step 1) open naviswork software i have 2023 version
step 2) then open the file we exported on ast question from revit
from file tab
and serch the file which we save
after selection of nws file press on open button
Step 3) go to realism option from vievpoint navigation
and by using cursor move the third person arround the building
also use pan and zoom for view setup
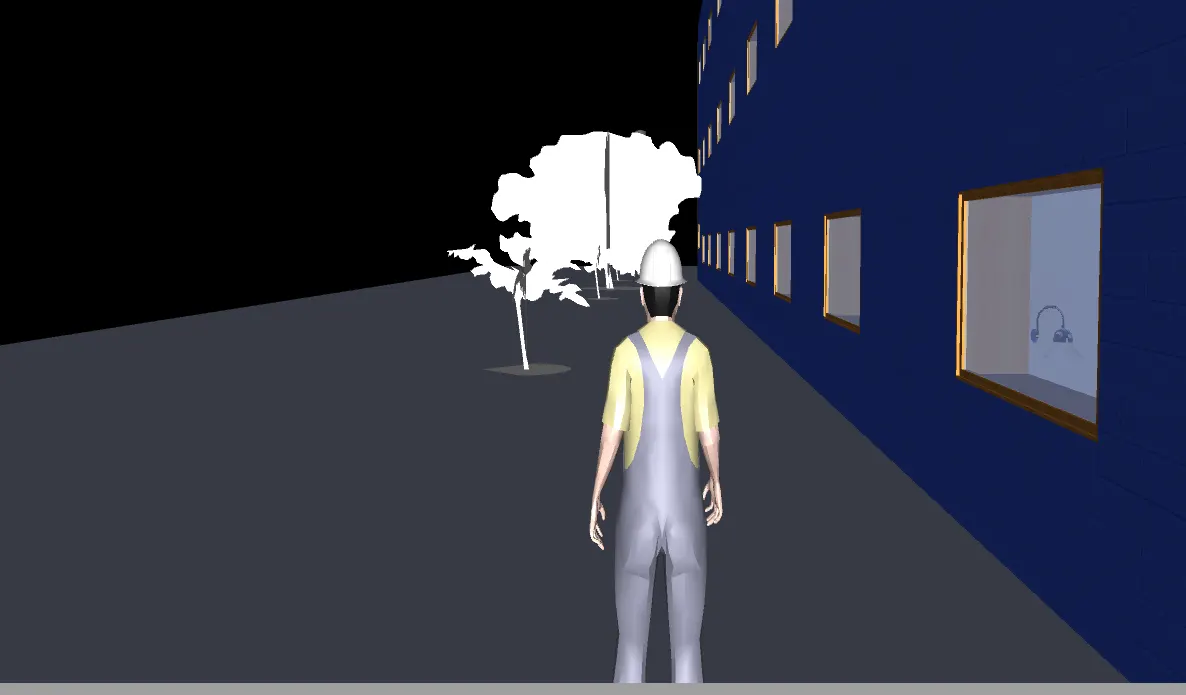
step 4) recored our navigate file
drop down save view point option
and click on record option
and walk through building just by using cursor
we can control pause on and stop video from here
step 5) after stoping recording our video is save automatically
we can see video from saved viewpoint
Result: our walk through record video saved successfully from viewpoint of realism move through building
Q4) Embed both architecture and structure *.nwc file to your Navisworks file. Create a clash detection test between the two models
a. Run the Clash Detection Test
b. Study the clashes between the two models
c. List which of the clashes could be approved
d. List which of the clashes could be neglected ( will be taken care later)
e. List which of the clashes can be resolved
f. Save the results after color coding the clashes to the Navisworks file
g. In case of resolution annotate the clash and save the view to defined views in Navisworks
AIM: Create a clash detection test between the two models
Introduction: clash detaction test is to find out any clast between structure and accordingle resolve it
Procedure:
step 1) export structural and architectural file from revit
open revit software
then open project of week 7 for export to naviswork
then click on file menu
and go on export option
then select NWC option from export to export revit file to architecturer
and then save the file on path
our file is ready to export from revit to navisworks
step 2) append both architectural and structural file by adding
step 3) then go for clash detactive test
click on clash detactive test available in home tab
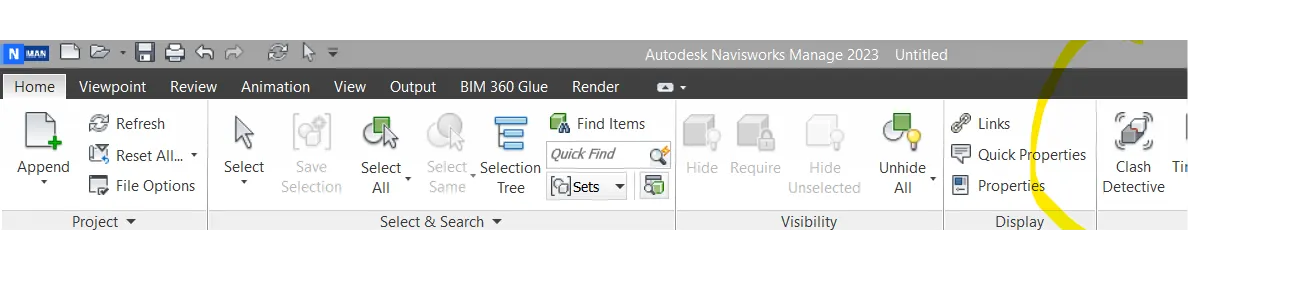
then dialog box will apear
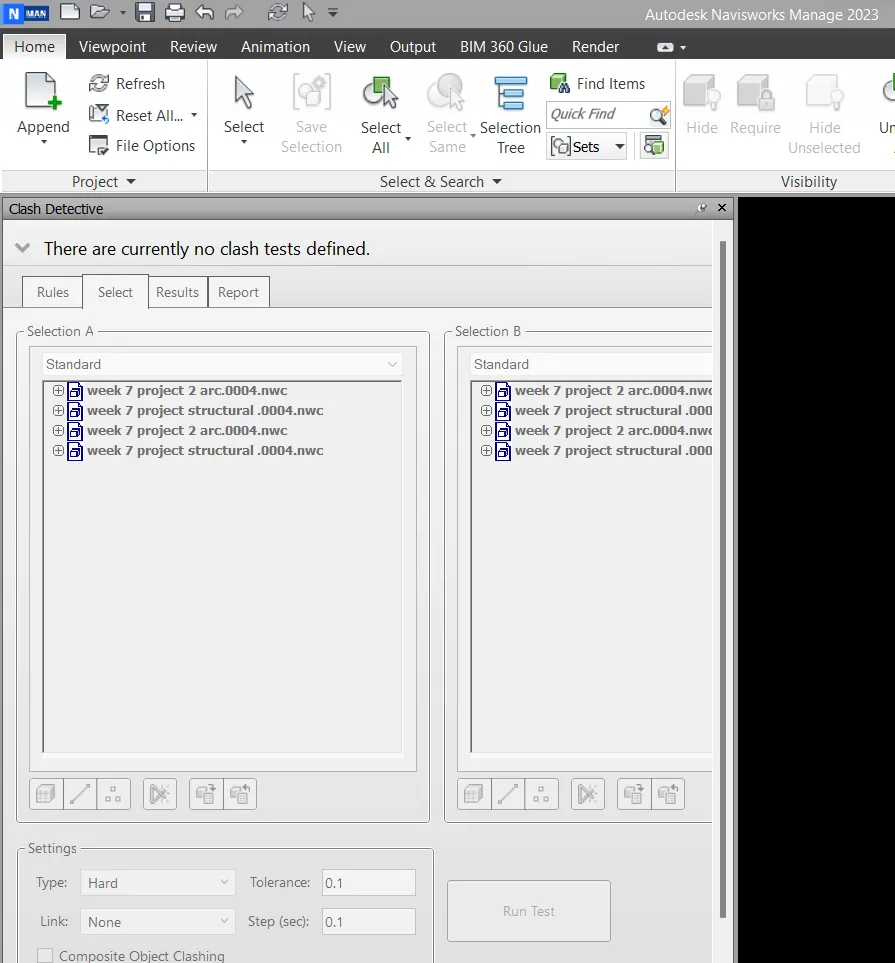
step 4) then click the add test option
and rename the test name as demo test
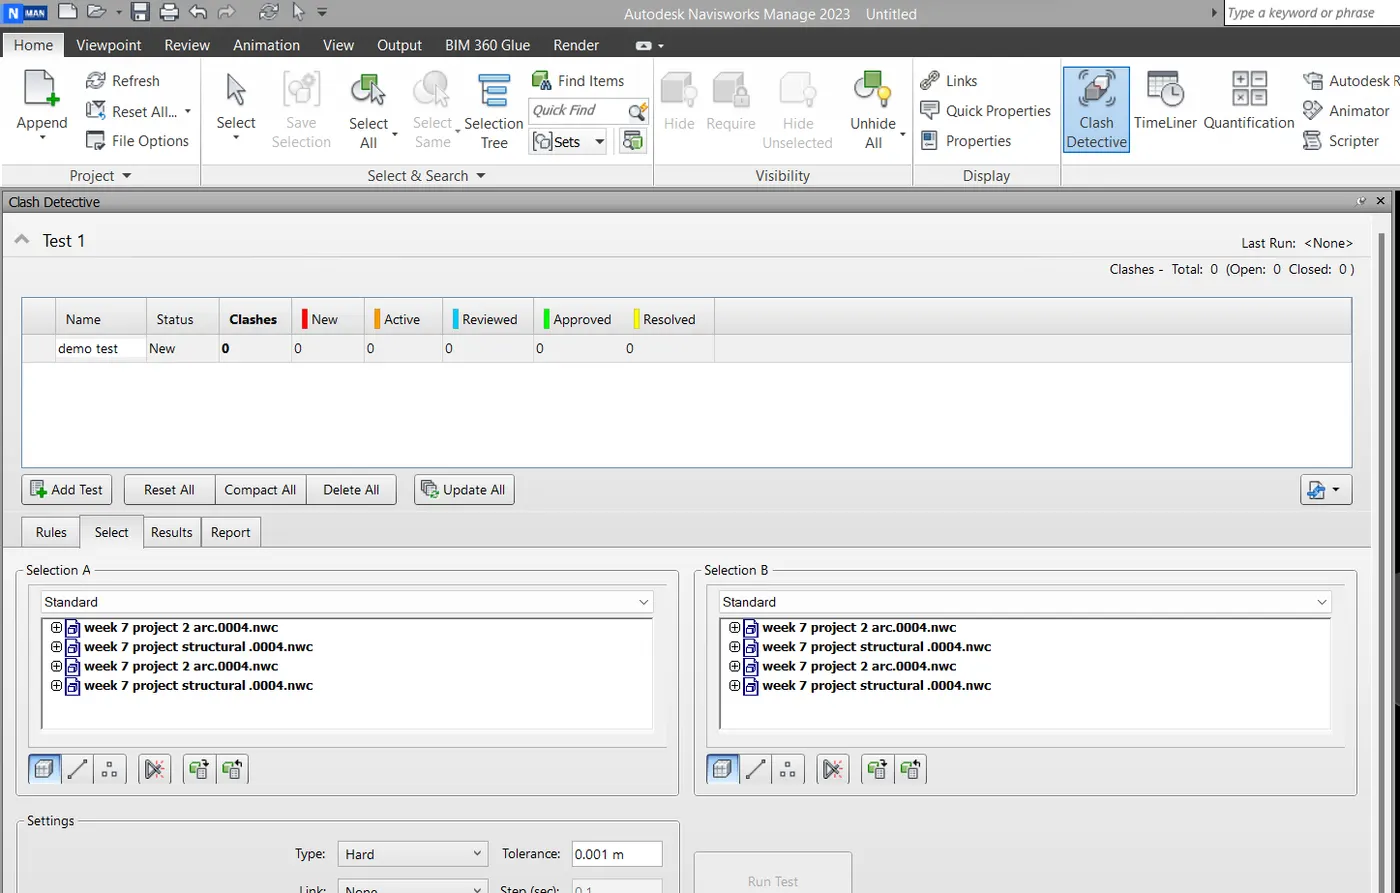
then select architecture from section A and structural from section B because we conduct test between arc and stru.
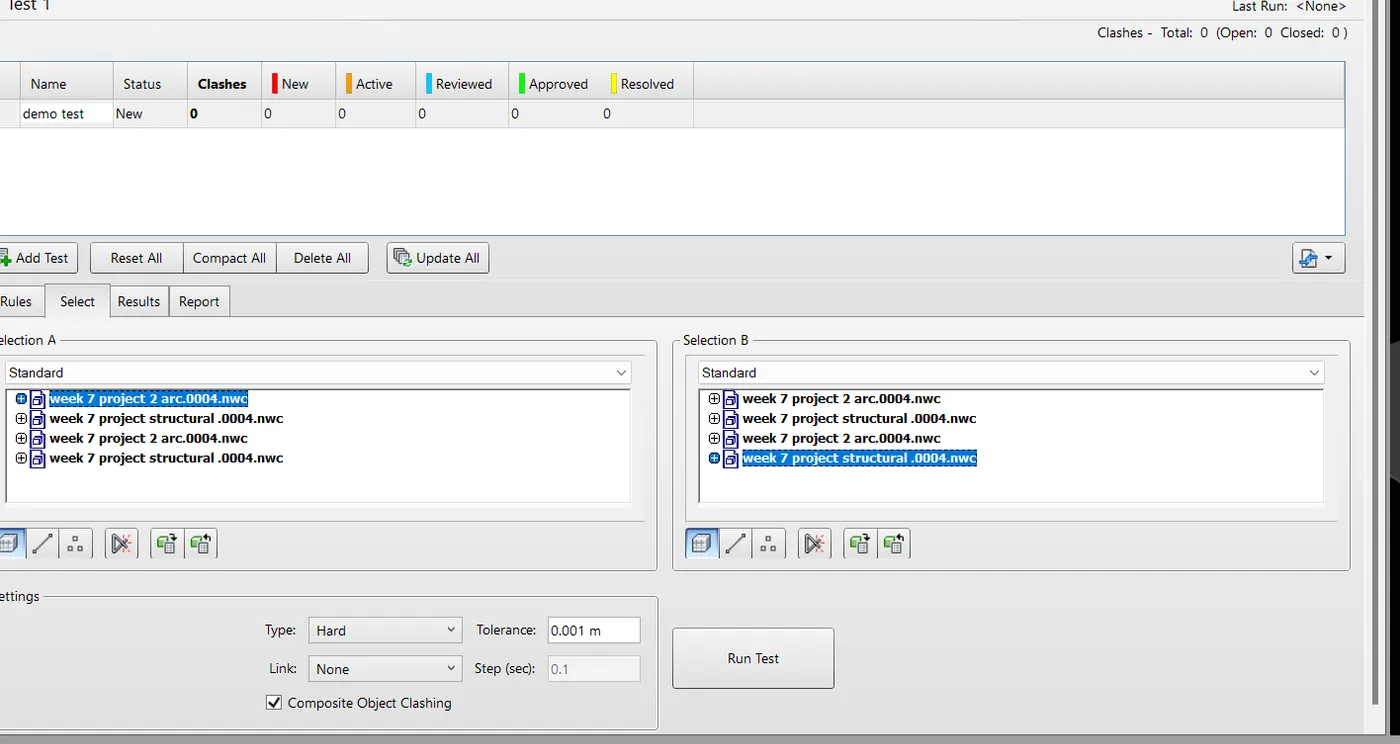
and selcet surface option and click on run test option
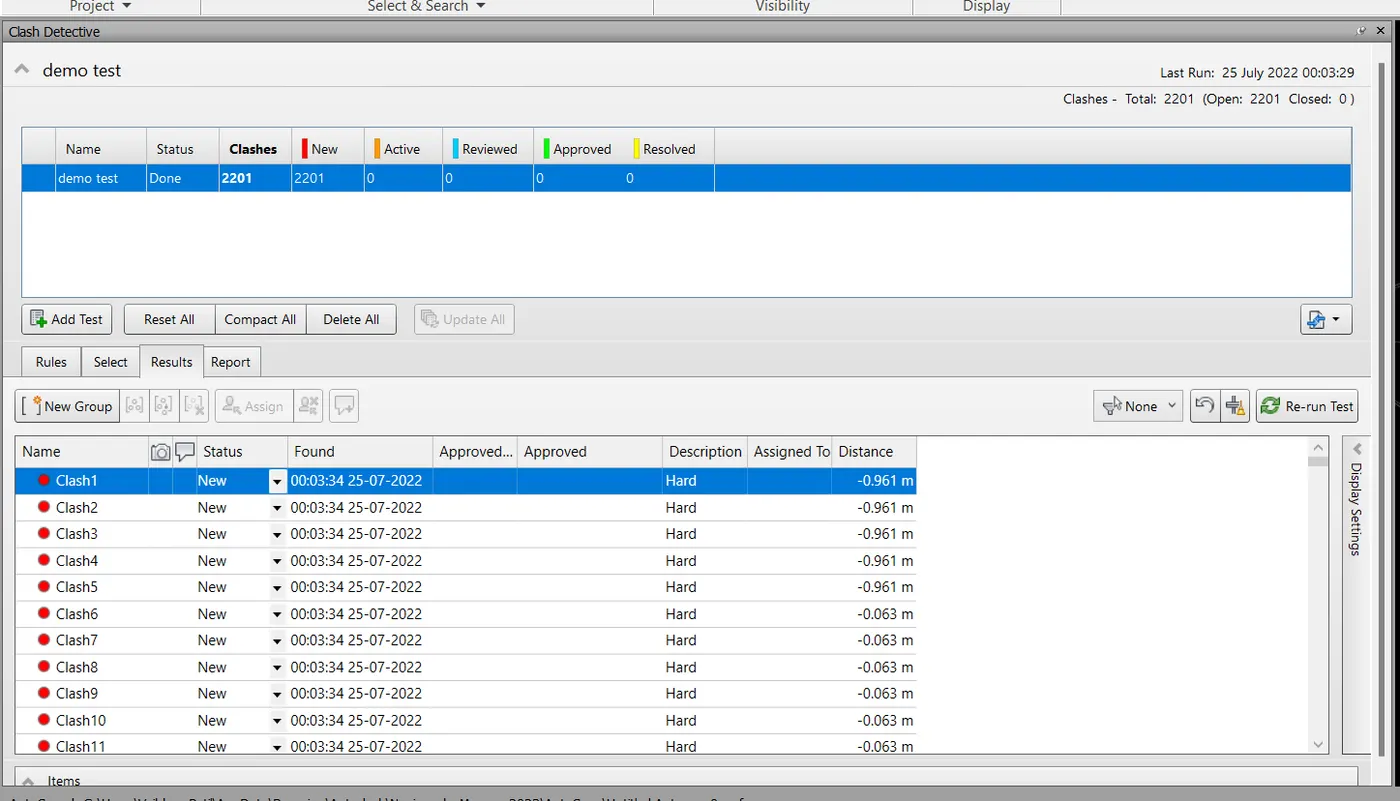
our clashesh will see on screen
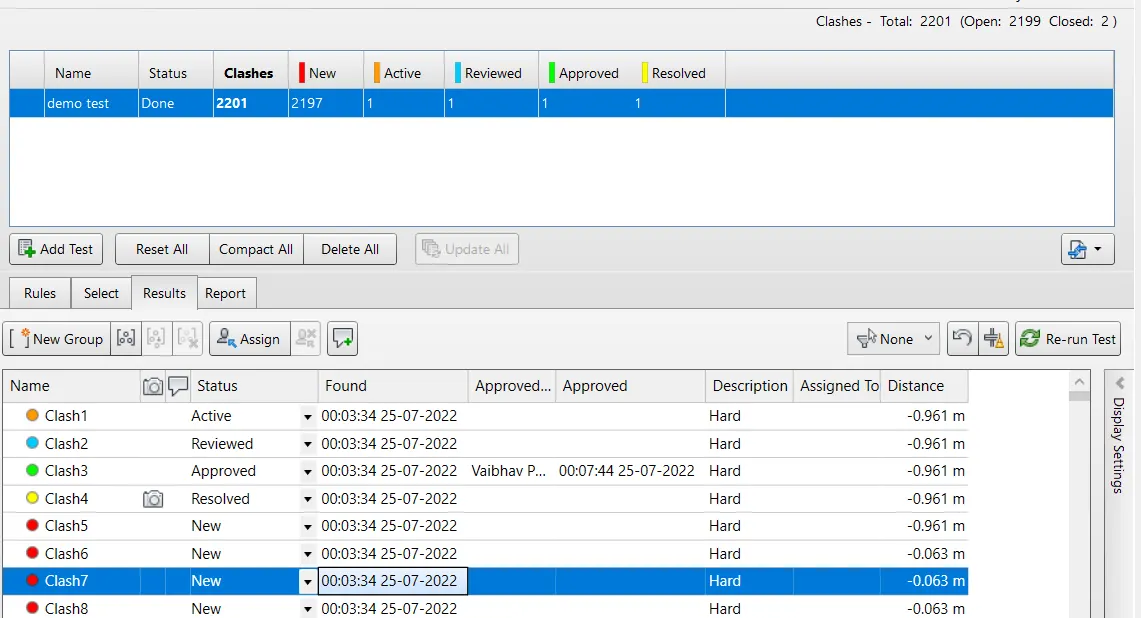
step 5) then change status like active, approved,resolved and reviewed accordingly
Result: clash detactive test done successfully using navisworks 2023
Q5) Using the Timeliner feature in Navisworks prepare a schedule for the project developed in week 6 to 8 by adding reasonable assumptions for task start date and end date and simulate the task completion as a visual simulation. Record it and save the timeline simulation to Navisworks file
AIM: Using the Timeliner feature in Navisworks prepare a schedule for the project
Introduction: timeliner gives us simulation of tast accordingly date and time, also helps us to know progress of work
Procedure:
step 1) export structural and architectural file from revit
open revit software
then open project of week 7 for export to naviswork
then click on file menu
and go on export option
then select NWC option from export to export revit file to architecturer
and then save the file on path
our file is ready to export from revit to navisworks
step 2) append both architectural and structural file by adding
step 3) timeliner
click on timeliner option from home tab
then it shows timeliner tool
step 5) before add task option, enable the selction
so go to selection tree option from selection in home tab
n just select curtain wall from ground gloor
then go for add task optionn
step 6) fill the task bar with proper date time
and attatch same
similarly add all task
with start date and end date with attactch
step 7) video will see on simulate tab
we can also save on local desk
thats vdeo co tain actuall day by day progrss of building
Result: task schedule prepared successfull by using timeliner