Usage of Collaborate tool in REVIT
- Question no.1
- Ans -
- Aim - Set the base point of the project using manage tab and project shared coordinates for the project.
- Commands used - Collaborate, Architectural, Grids, Manage.
- Introduction - With this template you will have a completely setup projects with families designed to give you a unique, clean and simple look that puts your design in view. By eliminating extra clutter from your views you can concentrate on making important design decisions without any distractions. To aid in keeping this timeless and elegant look throughout the project you will have view templates that will allow you to instantly sync up the graphical appearance.
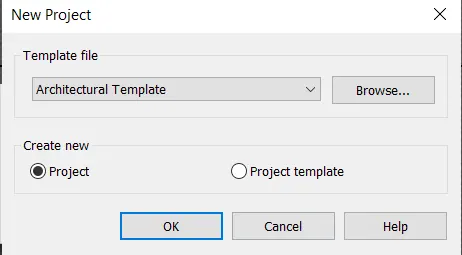
- One of the most common struggles that arise when it’s time to create a new Revit project is whether to use an architectural or a construction template. Between these two, the main difference we will find is the types of families that are loaded in each one, especially regarding walls. We will find completely different types of walls going from one template to the other.
- But not only that: opening any elevation, we can observe that the architectural template has two levels, while the construction one has a few more. Another very noticeable difference, one that makes the reason why the templates are called with such names as “construction” or “architectural” very evident, is about phases since we can find many more phases in the construction template. We can conclude that the architectural template is aimed more at projecting, while the construction template is aimed at following the construction process in a deeper way.
- Process -
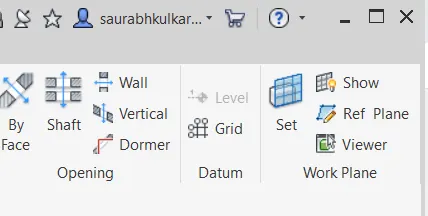
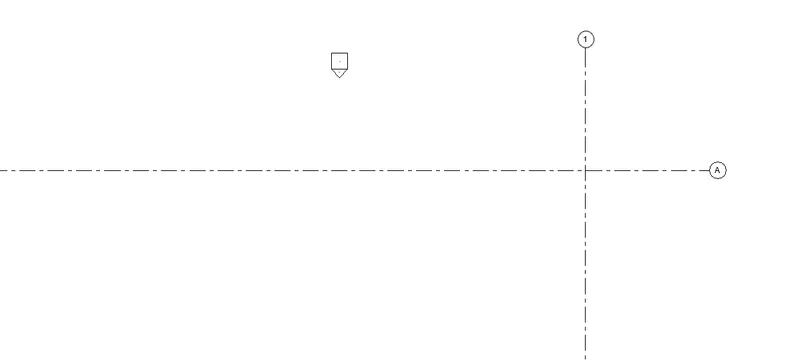
- Select the architectural tab and select grids and draw the grids.
- Rename the grids.
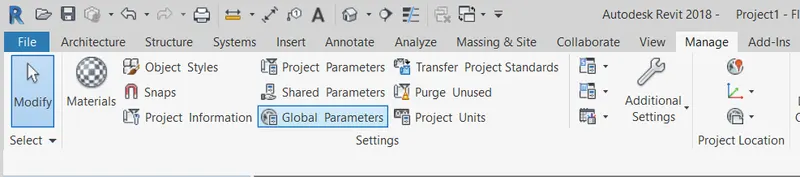
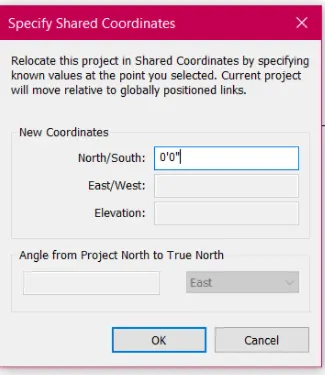
- Select the manage tab and select specify coordinates at point and select one grid and specify as 0'0".
- Select the specify coordinate at a point and select another grid and specify 0'0".
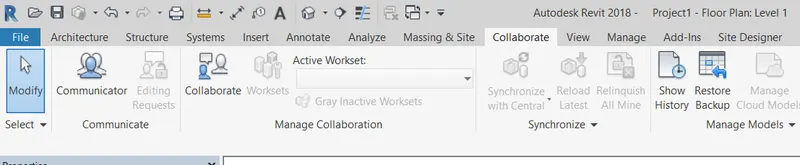
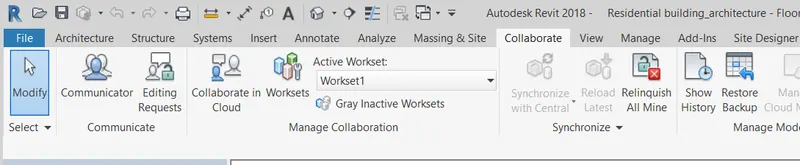
- Select the collaborate tab and collaborate drawing.
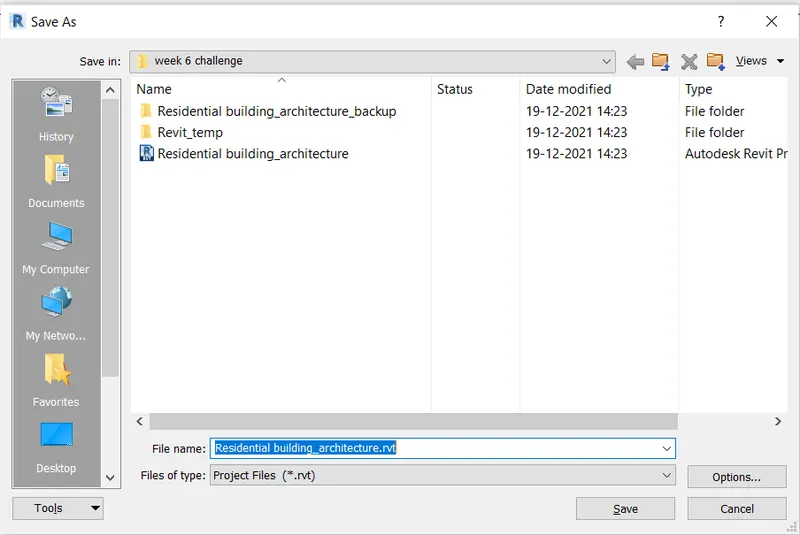
- Select save and save it as residential building_Arch.
- Question no.2
- Ans -
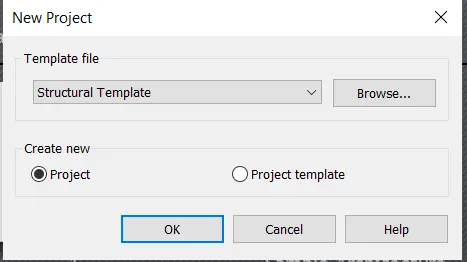
- Aim - Create a structural template and using manage tab select the parameters same as architectural template.
- Commods used - structural, grid, manage, specify coordinate at point, collaborate.
- Introduction - When you use a structural template as the starting point for a new model, the view properties and ranges are modified to work with structural components. Although you can work with structural components in projects based on non-structural templates, you must modify view ranges to display the structural components in the view. This is because structural components, such as beams and columns, are placed on the level below the view you are working in. Therefore, they fall below the bottom cut plane of the view range and do not display. The structural template has been modified specifically to take this into account.
- Structural Template used to design a building or to design the building’s elements, think as you need to design the structure of something (building) like floor, wall etc. Finally, looking at the Structural template, we can see how, in the same way as before, its tab is much more advanced: it’s the Structural tab. In it, we will find pre-configured families, which are not present in other templates. We can also point out that the Project Navigator only allows us to see structural plans and that, like in the case described earlier, the project field has been set up as “Structural”.
- With all this, it is noticeable how each one of the project templates has a very specific use, tailored to its respective Revit subject area. In general, the differences between one and the others are the amount of information that it gives us and what is it focused on, such as levels, families, phases, etc. All of this has the sole objective of making work easier and spending less time starting and configuring each new project.
- Process -
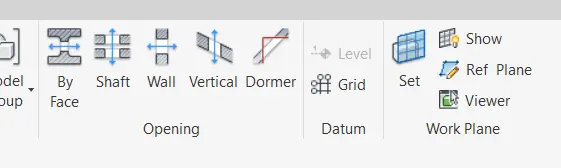
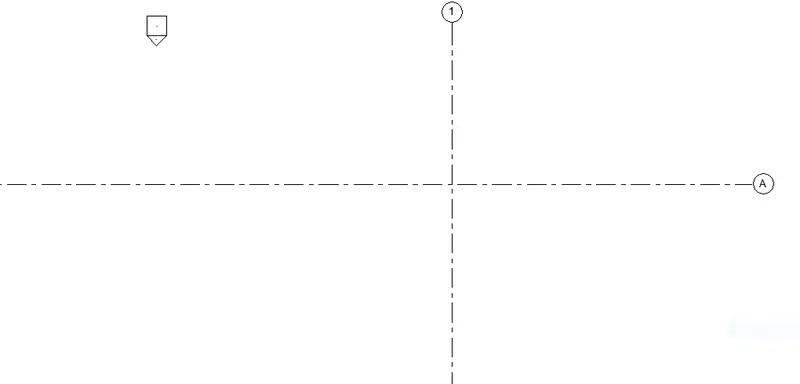
- Select structural tab and select grid.
- Draw the grids.
- Rename the grids.
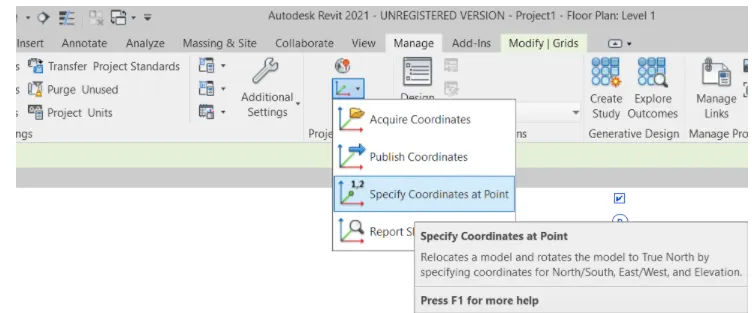
- Select the manage tab and select specify coordinate at a point and give the value as 0'0" for both grids.
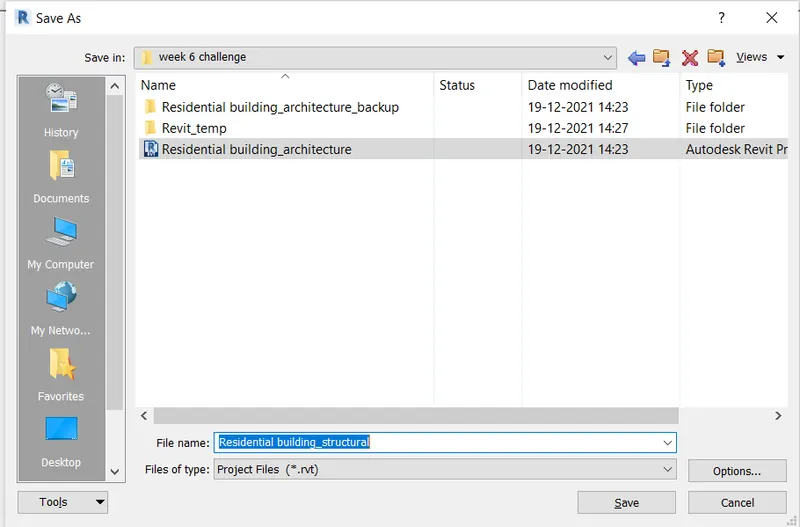
- Save file with appropriate name.

- Question no.3
- Ans -
- Aim - To collaborate the drawing.
- Introduction - Collaboration for Revit cloud service connects building project teams with centralized access to BIM project data in the cloud. With no need for costly IT setup, Collaboration for Revit is a turnkey solution that allows project stakeholders from multiple companies or sites to concurrently author a model using the BIM process. Project teams stay better connected and more informed on project progress in real-time using the Communicator chat tool within models. With Revit and Autodesk BIM 360 Team integration, access to information is extended to the entire project team, allowing even non-Revit users to view, search, and socially interact on models almost anytime, anywhere via web browser or mobile device.
- When collaboration needs to occur among users who are not in the same geographic location, use Revit Server or Revit Cloud Worksharing. Revit Server connects offices who share a network but are not in the same geographic location. Revit Cloud Worksharing is a cloud-based service that allows any Revit users inside or outside a network to collaborate on a Revit model.
- Commands used - Collaborate.
- Process -
- Open the architecture file template in revit.
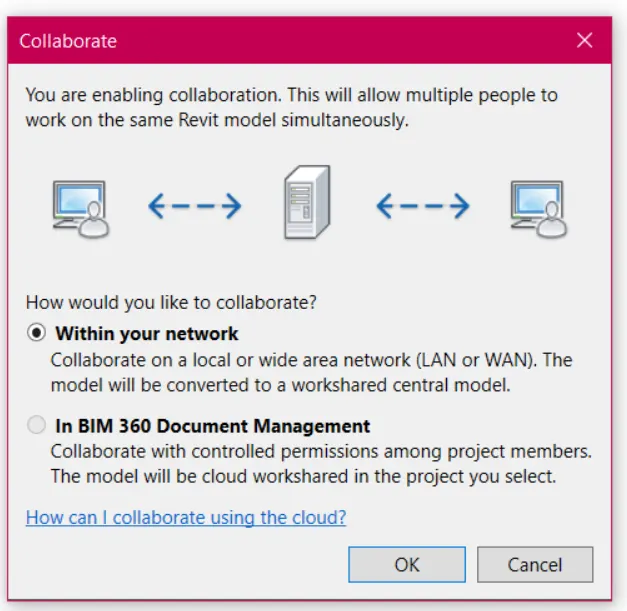
- Select the collaborate tab and select collaborate.
- Option will appear as how will be collaborate architecture file.
- Select the option within the network and press ok.
- Question no.4
- Ans -
- Aim - Create longitudinal and transverse pattern.
- Introduction - Use the Grid tool to place column grid lines in the building design. You can then add columns along the column grid lines. Grid lines are finite planes. You can drag their extents in elevation views so that they do not intersect level lines. This allows you to determine whether grid lines appear in each new plan view that you create for a project. Grids can be straight lines, arcs or multi-segmented. You can hide grid lines after you add them.
- Grids are conceptually different between Advance Steel and Revit. In Revit, grids are vertical planes while in Advance Steel are lines (most commonly horizontal and vertical), but they can have any position in space. In Revit, grids have a unique label within the model, while Advance Steel allows duplicate labels. Revit treats each grid axis individually, Advance Steel allows you to model both individual axes and sequences of grid axes. Grid axes added in Revit will not be included in any grid sequence when transferred or synchronized in Advance Steel. Revit will export grid sequences only if they were imported from Advance Steel this way.
- Commands - Architectural, Grids
- Process -
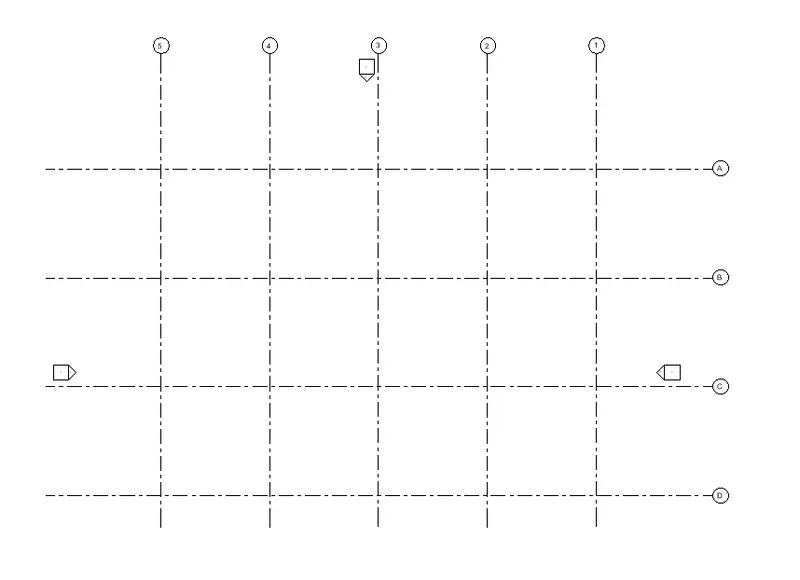
- Open the architecture template file revit.
- Select the architectural tab and select grid.
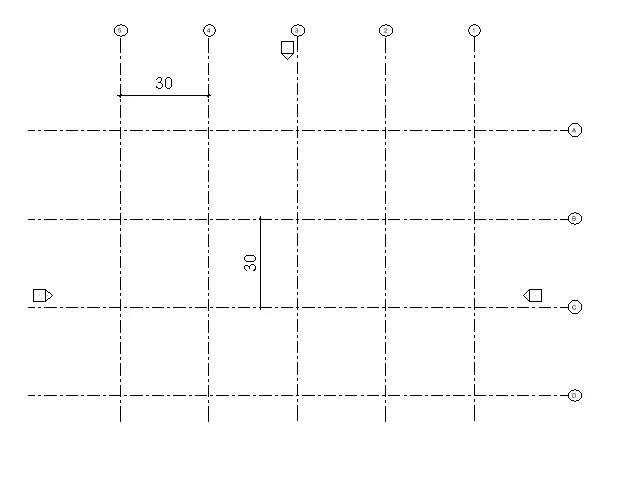
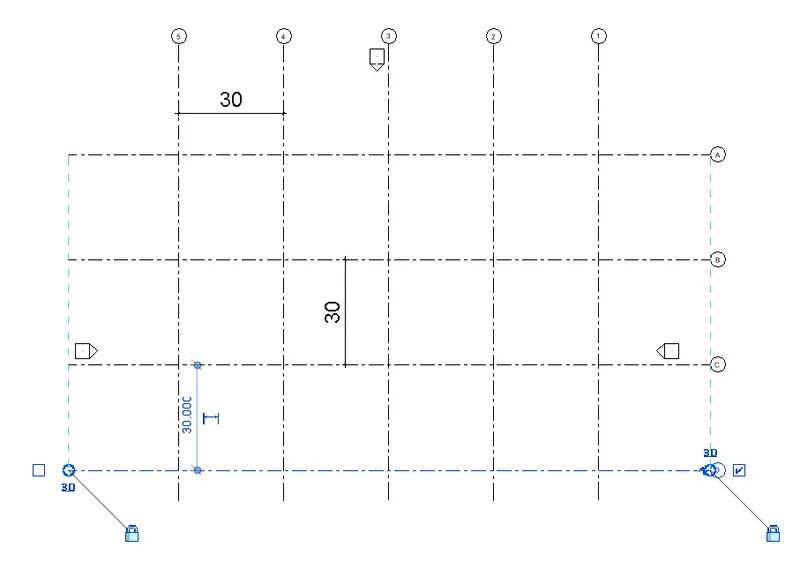
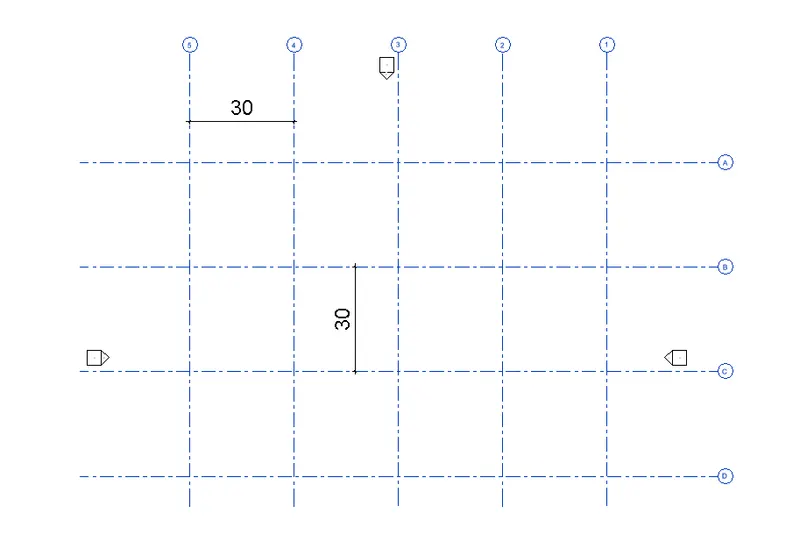
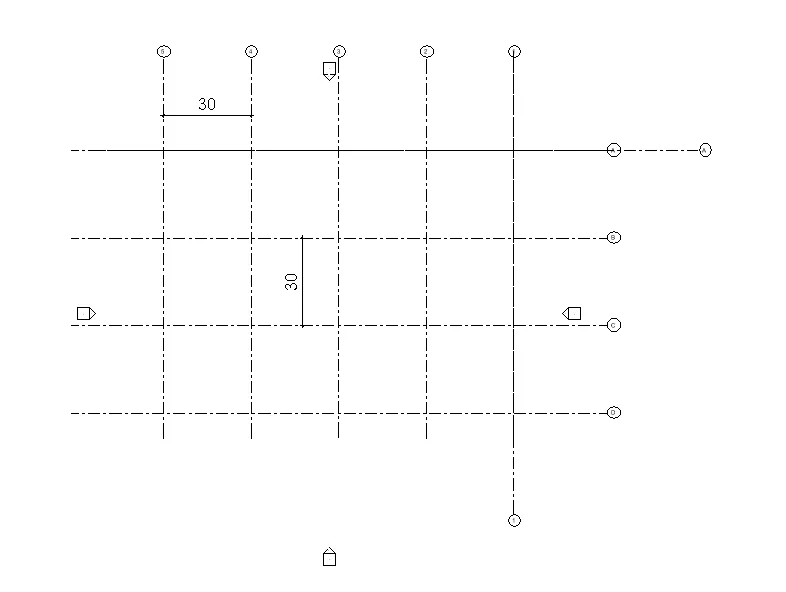
- Draw grids in equal distance by 30'.
- Draw the grid and select the grid and select the distance and click and make it as 30'.
- With the same process draw transeverse and longitudinal grids and save the file.
- Rename the grids as per standards.

- Question no.5
- Ans -
- Aim - Synchronize the changes from local copy to central file of architectural.
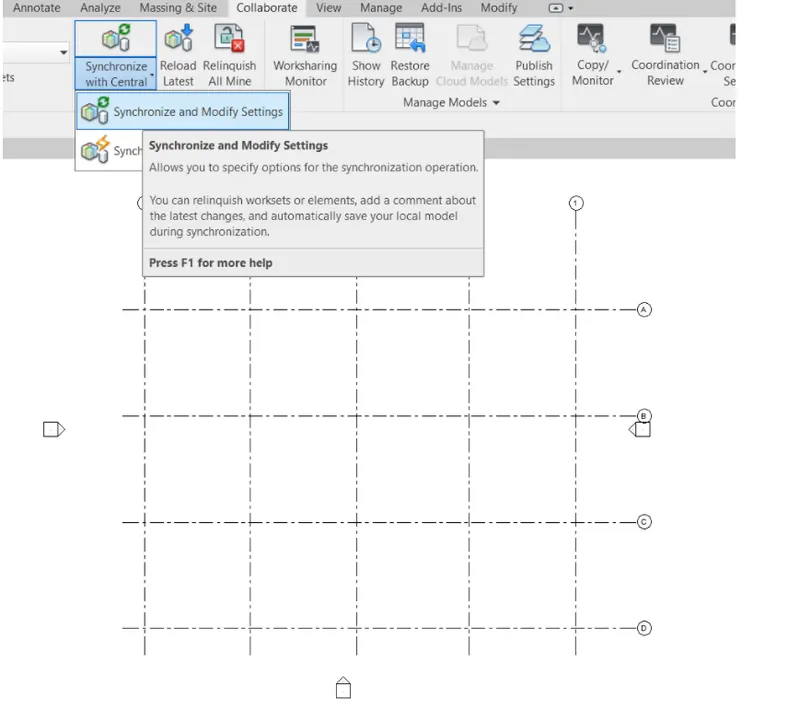
- Introduction - When working on a workshared project, use the Synchronize with Central tool to save your local changes to the central model. To Synchronize with Central: Click Collaborate tabSynchronize panelSynchronize with Central drop-down
 (Synchronize Now). If you want to modify the Synchronize with Central settings before you synchronize with central: Click Collaborate tabSynchronize panel Synchronize with Central drop-down
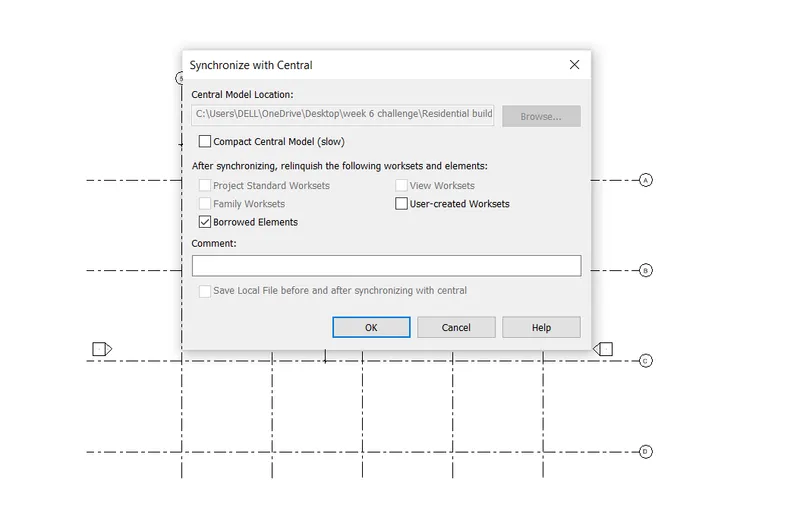
 (Synchronize and Modify Settings). The Synchronize with Central dialog displays.
 - In the Synchronize with Central dialog, verify the location of the central model. If necessary, click Browse to specify a different path for the central model. Specify the new path in the Central File Location dialog, and click OK. Select Compact Central Model to reduce file size when saving. Under After synchronizing, relinquish the following worksets and elements, select from the following options: To make your changed worksets and elements available to other users, select the appropriate check boxes. To synchronize the changes to central but keep the worksets and elements editable, clear the appropriate check boxes.
- If desired, enter a comment that is saved to the central model. You can see all comments using the Show History tool. See view work shared file history. Verify that Save local file before and after synchronizing with central is selected to ensure your local file remains synchronized with central.
- Click OK. When you use Revit Cloud Worksharing, the Status bar provides information about the progress of the synchronize with central process. See status bar. You should avoid syncing at the same time as other users since this may cause the synchronize process to take longer. If you do sync at the same time as another user and are working on the same model elements, you may need to resolve conflicts before your sync will complete. If Sync with Central fails to complete, see toubleshooting:revit cloud worksharing. Your changes are saved to the central model and any changes from other team members are copied to your local model.
- Commands used - Manage, synchronize tab.
- Process - Open the file in revit.
- Select collaborate tab.
- Select synchronize tab.
- Click ok.
- The drawing with will synced with central file.

- Question no.6
- Ans -
- Aim - Collaborate structural model as central file.
- Introduction - Collaboration for Revit cloud service connects building project teams with centralized access to BIM project data in the cloud. With no need for costly IT setup, Collaboration for Revit is a turnkey solution that allows project stakeholders from multiple companies or sites to concurrently author a model using the BIM process. Project teams stay better connected and more informed on project progress in real-time using the Communicator chat tool within models. With Revit and Autodesk BIM 360 Team integration, access to information is extended to the entire project team, allowing even non-Revit users to view, search, and socially interact on models almost anytime, anywhere via web browser or mobile device.
- When collaboration needs to occur among users who are not in the same geographic location, use Revit Server or Revit Cloud Worksharing. Revit Server connects offices who share a network but are not in the same geographic location. Revit Cloud Worksharing is a cloud-based service that allows any Revit users inside or outside a network to collaborate on a Revit model.
- Commands used - Collaborate.
- Process -
- Open the strauctural template file in the revit.
- Select collaborate tab and select collaborate.
- Select collaborate within your network and save it as saving for first time it will make central file.

- Question no.7
- Ans -
- Aim - Using collaborate tab, select grids and levels from architectural model and copy it to structural model using copy monitor.
- Introduction - You can copy elements from a linked model to the current model, and monitor the elements for changes. Use the following procedure to copy grids, columns, walls, and floors (including related openings and inserts) for monitoring. To copy levels for monitoring, see copy levels for monitoring. To copy MEP fixtures, see copying MEP fixtures.
- Performance: Use Copy/Monitor to monitor changes to the smallest number of elements required to coordinate efforts across teams. Overuse of Copy/Monitor without thoughtful planning can result in performance degradation.
- File names: After you link a model to the current project and establish relationships between elements for monitoring, do not change file names for the linked model or the current project. If you do, the monitoring relationships cannot be maintained.
- Grids: Do not associate grids with a scope box until after you have copied the grids from a linked model to the host project. You cannot view scope boxes that are defined in a linked model.
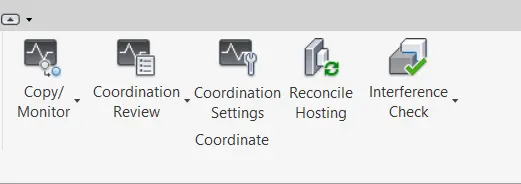
- The Collaborate tab contains the Coordinate panel and there are several tools that help in the collaboration between different disciplinary models.
-
Copy/Monitor is used primarily to copy information from one model to another. This can for example be used by a structural designer at the beginning of their project to transfer all levels, grids and walls from an Architecture model to Structural model. Coordination Review is used to see if changes have been made to objects monitored using Monitor.
-
Commands used - Collaborate, copy monitor, select link, copy.
- Process -
- Open the architectural tab and select collaborate tab select copy monitor and select link so my structural drawing is linked.
- Select grids the grids and levels and select multiple and select copy.
- Select finish command.
- Open the structural template file and grids and columns will be found in structural template.

- Question no.8
- Ans -
- Aim - Create construction template save it as central model and link both architectural and structural files.
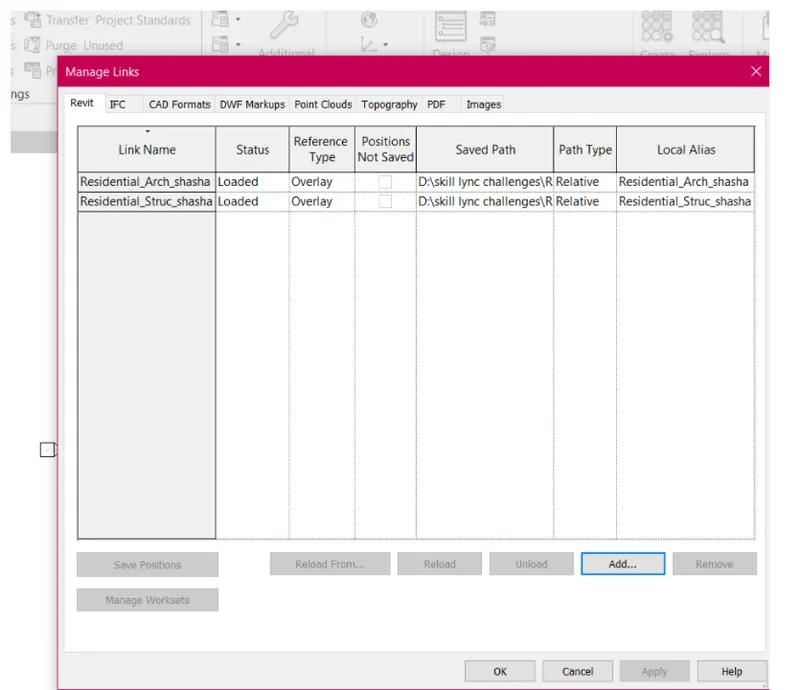
- Introduction - In this we can create new construction template with name as combine. By using manage tab we can link both the architectural and structural files. Models are linked is indicate that we create new file to construct structural model such as columns, beams, foundation, floor etc. Manage tab is used to link both files in revit.
- Commands used - Manage, manage links.
- Process -
- Open the new file and save it as construction template.
- Select collaborate tab and collaborate the file as central file.
- Select the manage tab and select manage link.
- Select both architectural and structural template press ok.
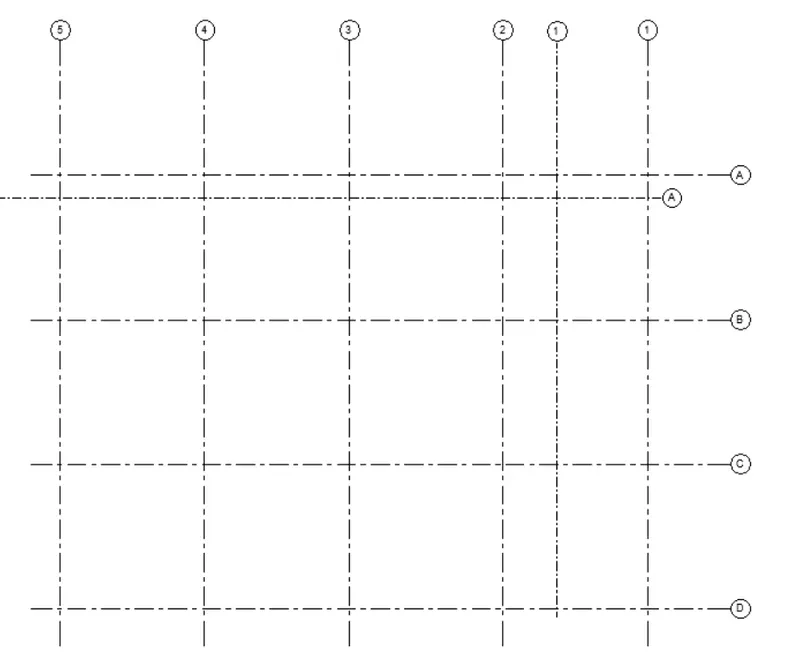
- Both file opened combine one.
- Question no.9
- Ans -
- Aim - Insert grid from structural template to architectural template and check wheather it is coinciding with each other.
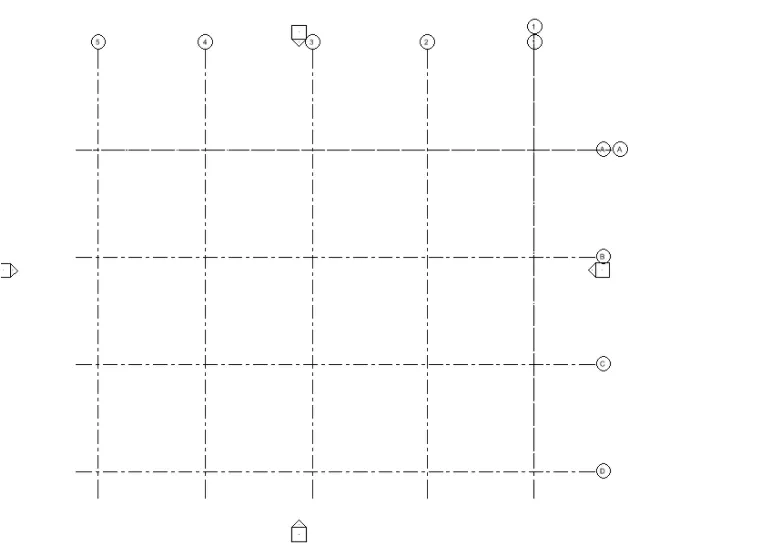
- Introduction - Here we we check the architectural and structural grids are matching in combine files. Both template grids are matching and join it as one template. If the source file of the link in your project has changed, Revit automatically updates the link when you open the project. To update links without closing the current project, you can unload and reload the links. To access tools for link management, click Manage tab Manage Project panel (Manage Links).
- If the source file of the link in your project has changed, Revit automatically updates the link when you open the project. To update links without closing the current project, you can unload and reload the links. To access tools for link management, click Manage tabManage Project panel
 (Manage Links).
 - Commands used - Manage, manage links, acquire cooordinates, position, relocate position.
- Process -
- Open the architecture template and select manage tab.
- In the manage tab select manage links and select structural template drawing.
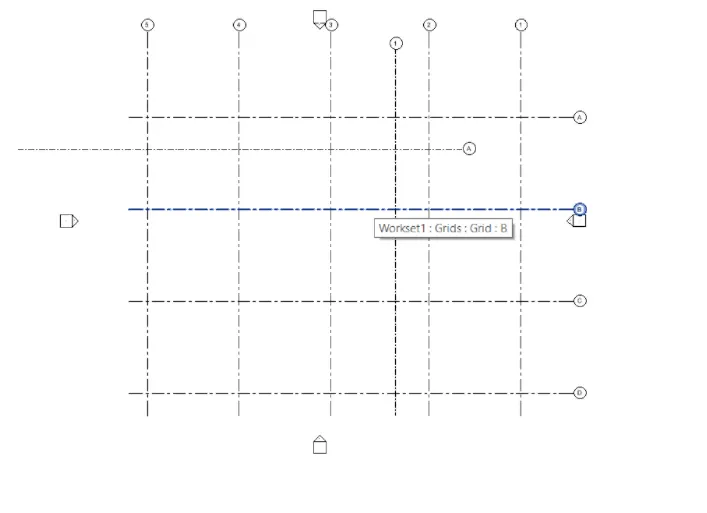
- Both grids will appear in the architecture template and its coinciding.
- Select architecture grid and select acquire coordinates and Select the architecture template grid.
- Select the position icon and click relocate position and select the intersection point of the grids.
- The grids will be positioned.
- Question no.10
- Ans -
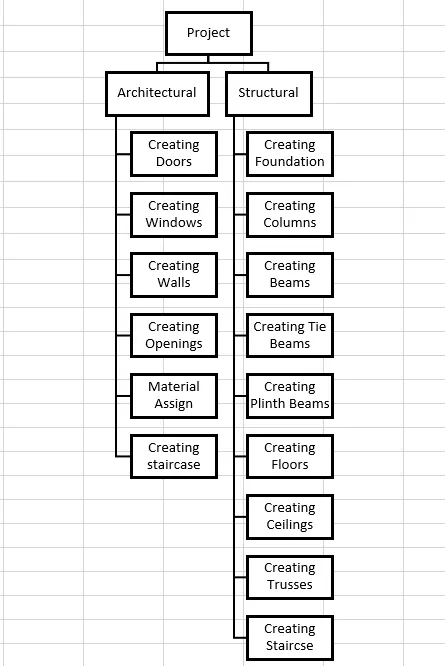
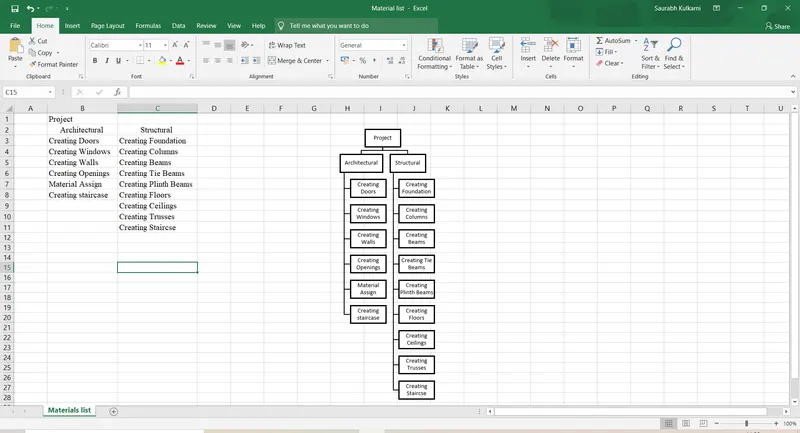
- Aim - To list a flow chart of a project tree set up in terms of Construction model, Architecture & Structure model.
- Introduction - Here we can create the tree set chart of models used in revit. The architecture and structure model mostly used for drawing.Project managers use a flow chart to offer a clear picture of process and to find ways to improve project efficiency. A flow chart displays graphically the project’s objective and seeks to more logically order the activities therein. But, a flow chart can also help with monitoring progress and even status reporting.
- A project management flow chart can outline whatever you want to outline. You can have one for the initiation process, which would start with the initiation and flow to the project charter.
- Process -
- Open excel file of material list.
- Draw the chart of project of constructuction model, architecture and structure model.
- Save it as appropriate name.