Usage of Collaborate tool in REVIT
AIM: To understand the usage of Collaborate tool in REVIT
INTRODUCTION
Revit provides several different ways to collaborate with team members who are also using the software.
We can link multiple Revit models together, allowing team members to work in context.
Through worksharing, users on the same local area network (LAN) can work together in the same Revit model.
When collaboration needs to occur among users who are not in the same geographic location, use Revit Server or Revit Cloud Worksharing.
Revit Server connects offices who share a network but are not in the same geographic location.
Revit Cloud Worksharing is a cloud-based service that allows any Revit users inside or outside a network to collaborate on a Revit model.
When there is a need to combine multiple models and files in a single project, shared coordinates can be used to establish the position of the files in relation to each other.
To establish a common coordinateposition and then share that position between files, Acquire coordinates tool can be used.
Task 1:
To open an architectural template and using the Manage tab set project base point and project shared coordinates for the project.
PROCEDURE
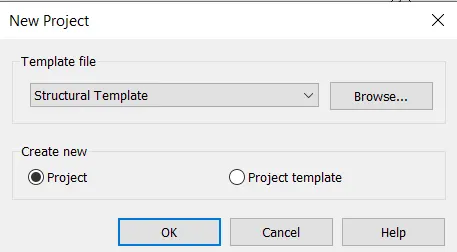
Click on the New options in the Models section and select the Structural template from the new project dialogue box and click OK.
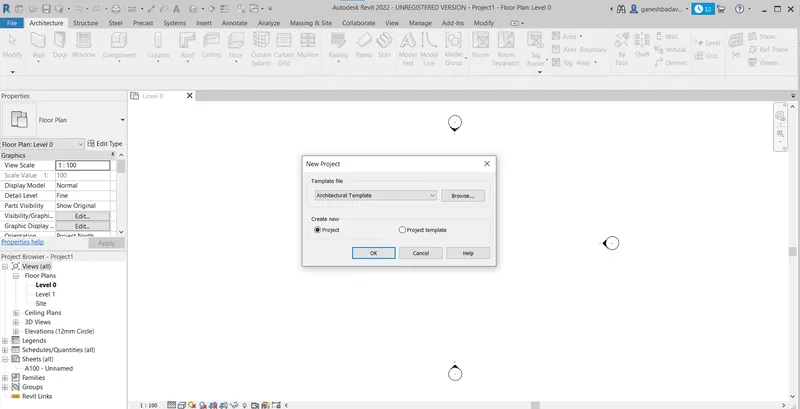
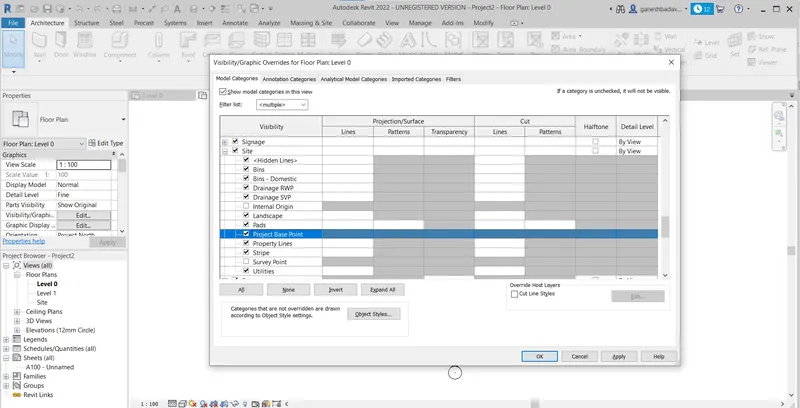
Type VG to open the Visibility option settings.
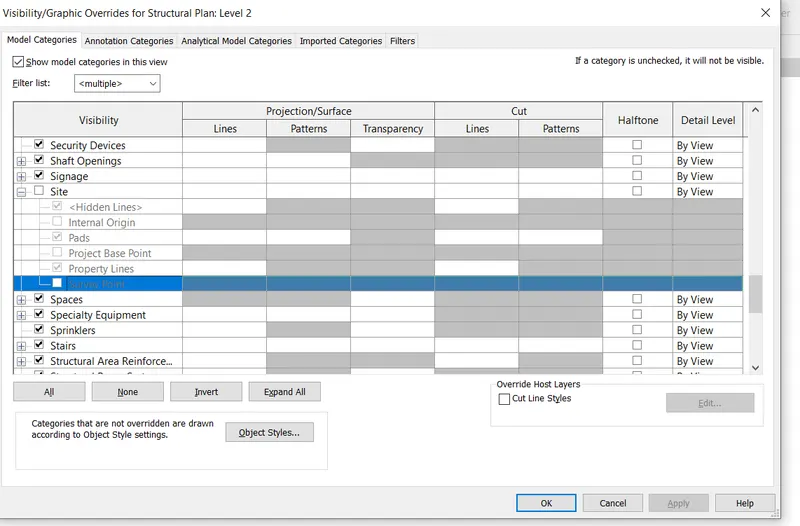
Activate the site check box open by clicking on it and enable the base point and survey point option by clicking the check box.
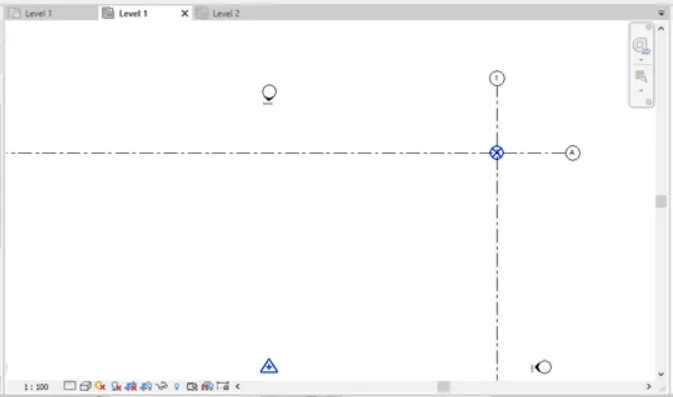
After getting the exact point using the grid option in datum tab under the architectural tab draw the outermost base grids as shown.
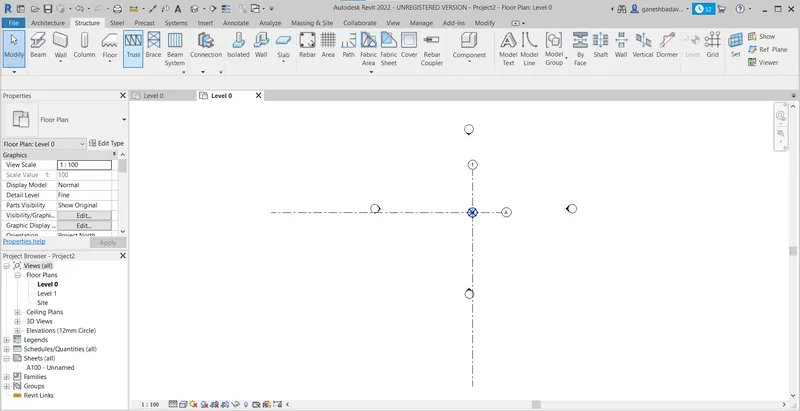
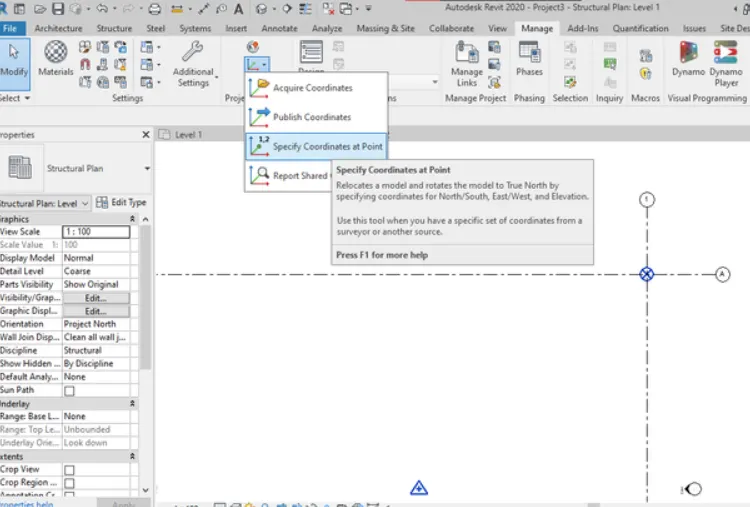
Now in the manage menu under the project location tab click on the Specify coordinates at Point.
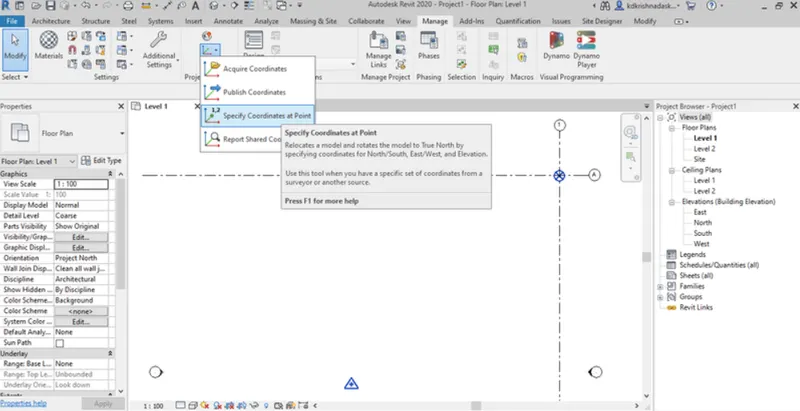
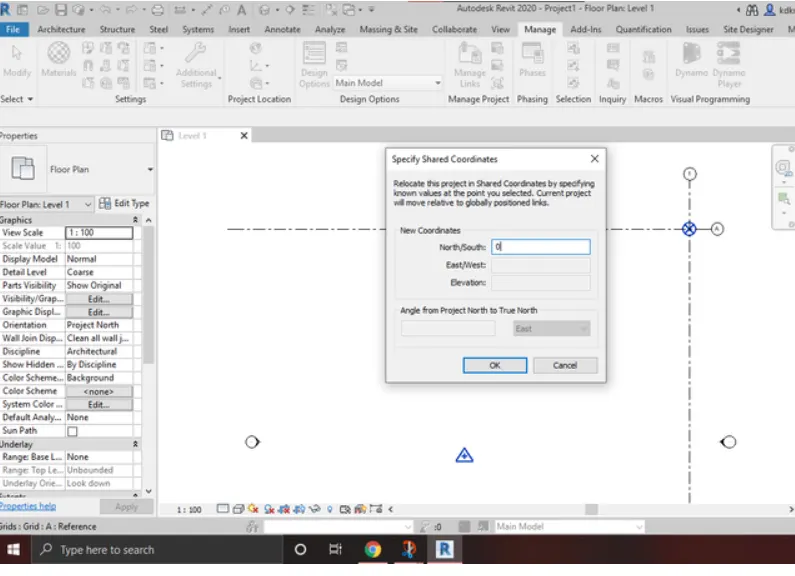
Click on one base line grid drawn to open the specify shared Coordinates dialogue box and change the North/South coordinate to 0 and click Ok
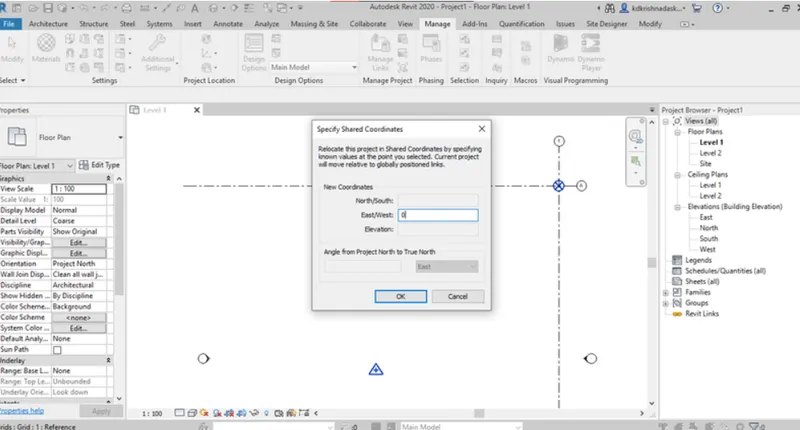
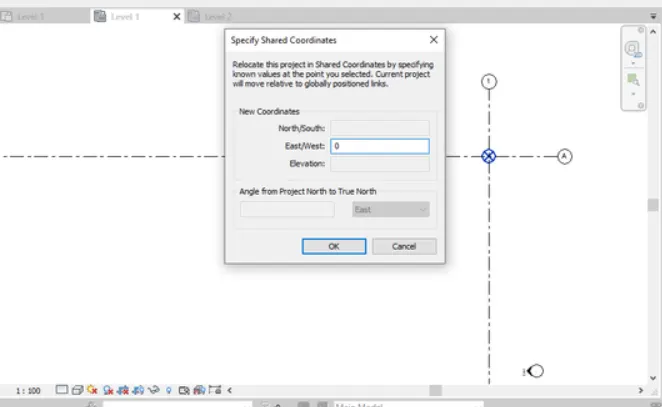
Click on the next base line grid drawn to open the specify shared Coordinates dialogue box and change the East/West coordinate to 0 and click Ok.
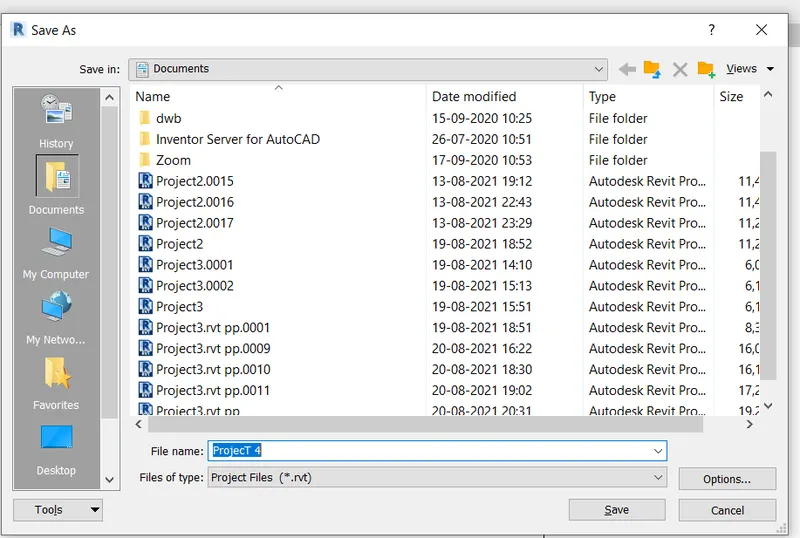
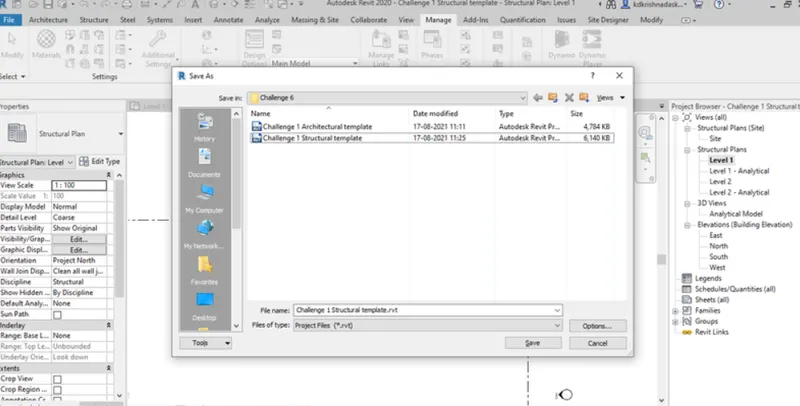
Finally save the file to a desired folder and was named as Challenge 1 architectural template.
Task 2:
To open another new file but with a structural template. Using the manage tab set project parameters the same as the architectural model. Copy the parameters from the architectural model to the structural template or enter the parameters manually into the structural model
PROCEDURE
Open the Revit application.
Click on the New options in the Models section and select the Structural template from the new project dialogue box and click OK.
Type VG to open the Visibility option settings.
Activate the site check box open by clicking on it and enable the base point and survey point option by clicking the check box.
After getting the exact point using the grid option in datum tab under the architectural tab draw the outermost base grids as shown.
Now in the manage menu under the project location tab click on the Specify coordinates at Point.
Click on one base line grid drawn to open the specify shared Coordinates dialogue box and change the North/South coordinate to 0 and click Ok
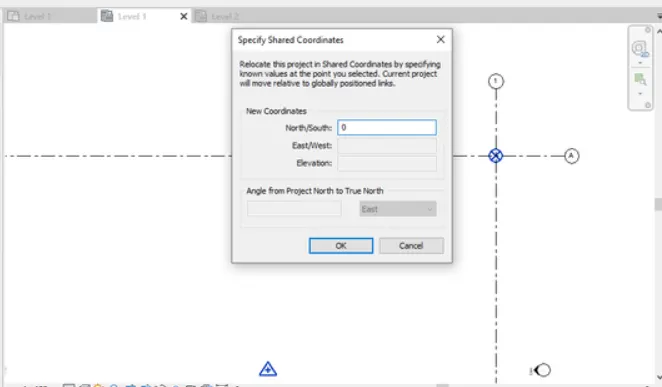
Click on one next base line grid drawn to open the specify shared Coordinates dialogue box and change the East/West coordinate to 0 and click Ok.
Finally save the file to a desired folder and was named as Challenge 1 Structural template.
Task 3
To Re-open the architectural model and to use the tools under the Collaborate tab make the architectural model a central model.
PROCEDURE
Firstly open the architectural model.
Go to collaborate tab in ribbon and click on the collaborate icon.

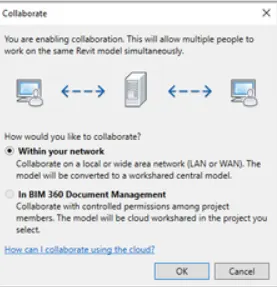
The collaborate dialogue box will appear and select within your network and click ok.
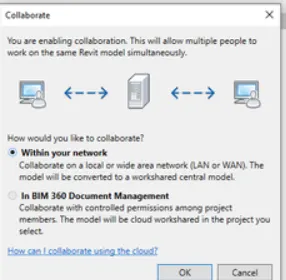
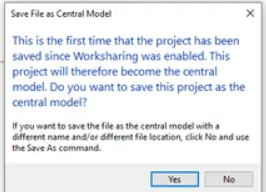
Now save the file and save it as a central model by clicking yes in the dialogue box that appeared.
Task 4:
To create the Grids Longitudinal and Transverse pattern for the project similar to the task done in Week 2
PROCEDURE
Go to architectural tab of the ribbon.
Select grids in
Select grids in the datum panel.
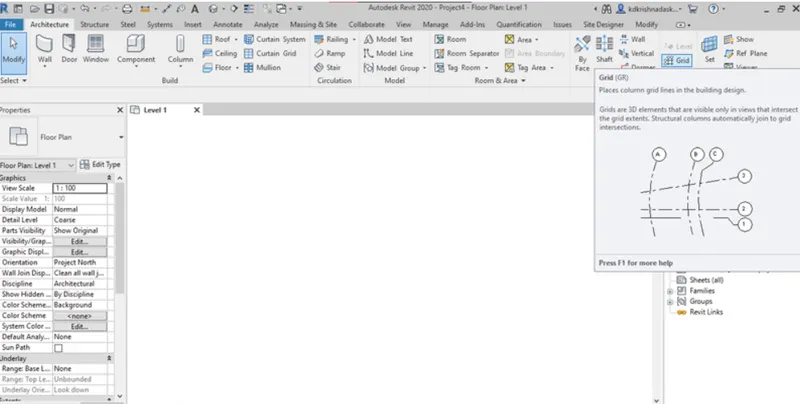
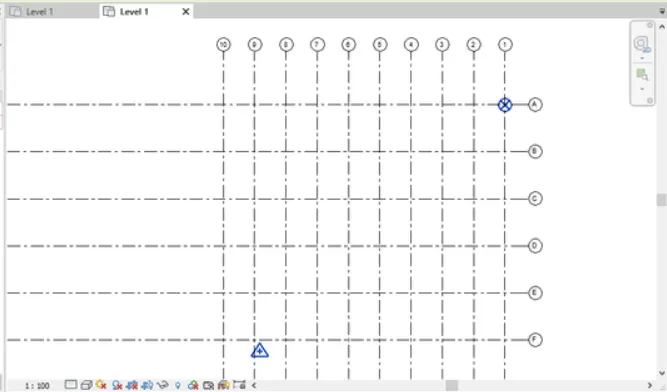
Then draw the longitudinal and transverse grids and name it accordingly. (i.e, for longitudinal grids: 1-10 starting from right side; similarly for transverse grids: A-B starting from top).
Task 5
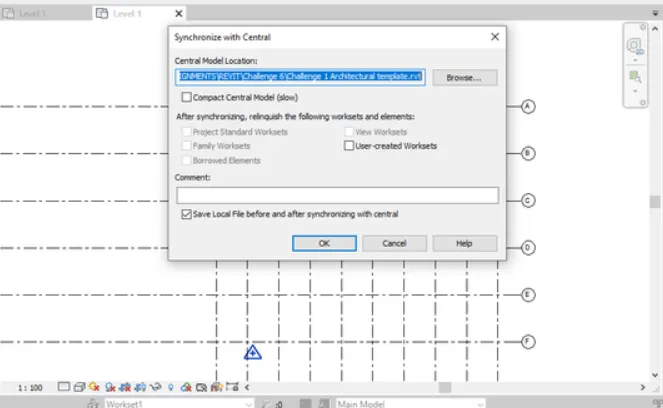
Synchronize the changes from the local copy to the central file of the architectural model.
PROCEDURE
Go to collaborate tab in the ribbon.
Choose synchronize with central option in the synchronize panel.
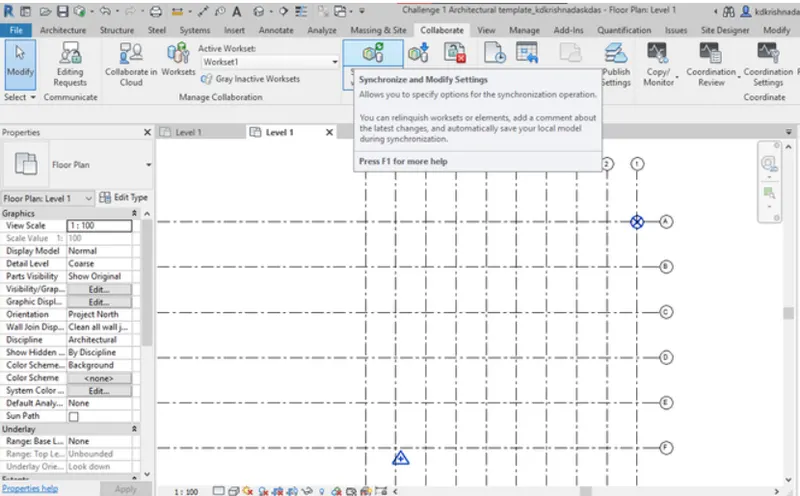
Then select synchronize and modify techniques and then click ok.
Task 6:
Open the structural model and use the collaborate tools to save the model as a central file.
PROCEDURE:
Open the structural model.
Go to collaborate panel and select collaborate option.
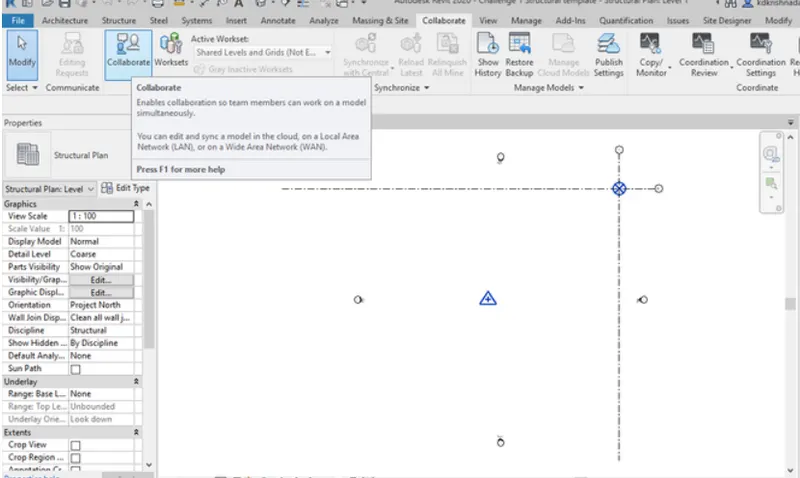
The collaborate dialogue box will appear
7) Under the Collaborate tab, select the grids and levels from the architectural model, and using Copy Monitor try to copy the grids to the structural model. See what happens when the copy monitored grid is moved around in the structural model

Task 8
To create another new file with a construction template, save the new file as a central model. This file will include both architectural and structural model. Under the manage tab, Click manage links to link both architectural and structural files. Save the file and close all the files.
Procedure:
Open the revit application
Go to new tab and open a construction template.
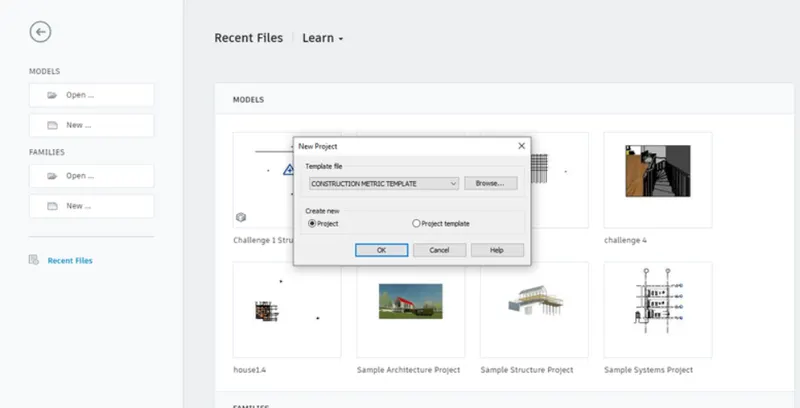
Now go to collaborate tab click on collaborate option
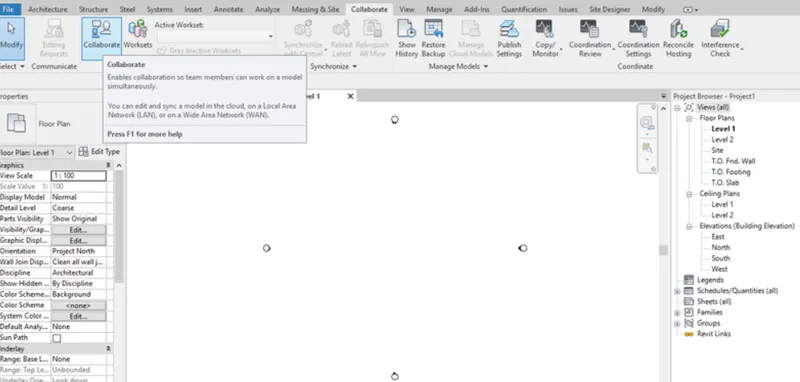
We have to save the model before collabricating, save it into a folder with a desired name
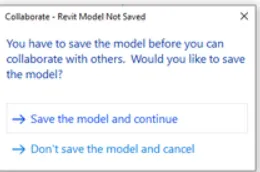
The collaborate dialogue box will appear and select within your network and click ok.
In the manage tab select add link and add both architectural and structural file and then click ok.
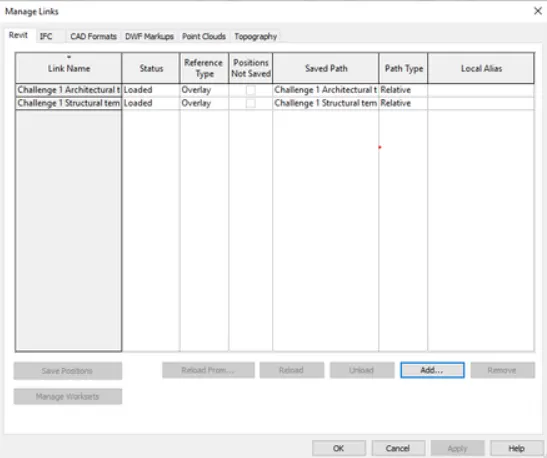
Presently this link is just added, this can be checked by going to visibility graphics.
Now, we have to copy this elements to the structural template.
For this, go to collaborate tab of the ribbon and go to copy/monitor, choose select link option.
Now select the link in the screen click copy and then check multiple.
Select the elements and click finish.
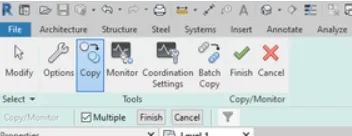
Now both the architectural and structural template have been linked to the new combined model.
Task 9:
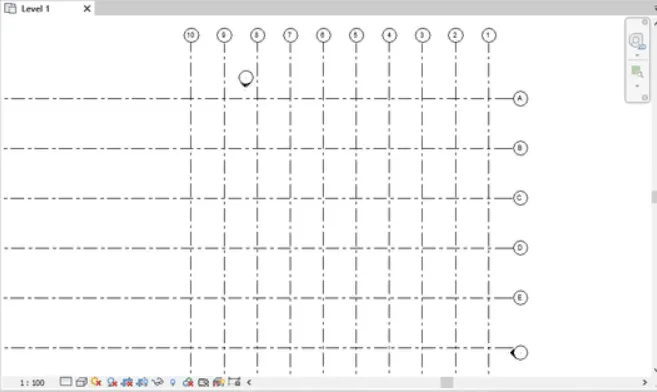
Are the grids from structural and architectural model matching in the construction template created? If yes the model is set up for project 2.
From the below image its clearly understood that both the files have been completly linked to the new construction template created.
Task 10:
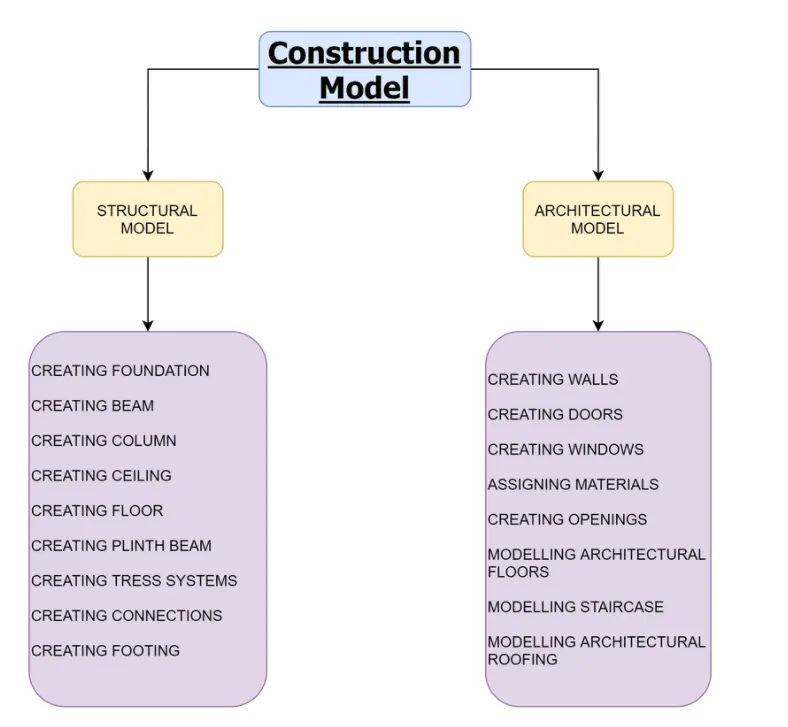
List a flow chart of a project tree set up in terms of Construction model, Architecture & Structure model, in this exercise and understand how many people can work on the same project using Revit simultaneously
Construction model is combination of both architectural model anad structural model.
Flow chart is given as follows:.