Usage of Collaborate tool in REVIT
1) Open an architectural template. Using the Manage tab set project base point and project shared coordinates for the project
Aim:
Using the Manage tab set project base point and project shared coordinates for the project in architectural template
Procedure:
I. Go to menu bar
II. Click on file option
III. And click on new and in pop up select the architectural template
IV.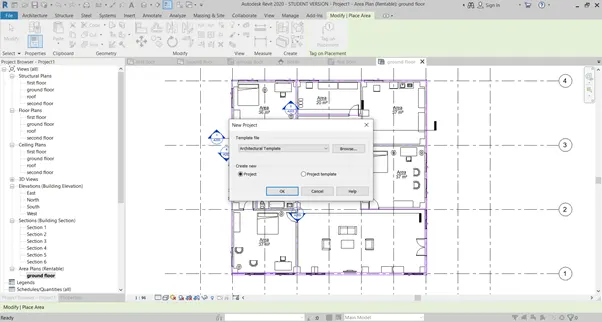
V. Ok
VI. Next again click on file and save as the w6 arch
VII. Close
VIII. Now click on file and then open
IX. Ans by browsing open the w6 arch file
X. In the menu bar
XI. Select the grid
XII. And draw the one horizontal grid naming A at top
XIII. And draw the vertical grid naming 1 at extreme right
XIV. Then go to manage command bar in menu bar
XV. Here select the project coordinates and select the specify coordinates
XVI.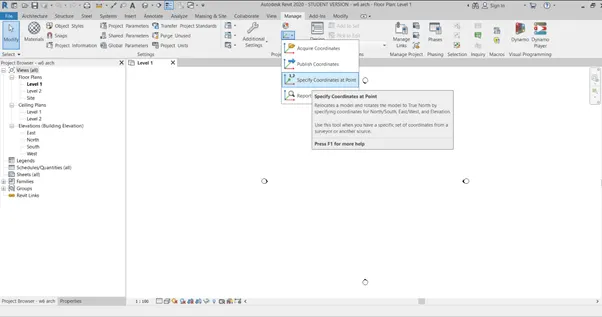
XVII. Click on the horizontal line
XVIII. In the popup enter the value of the 0 as the coordinate
XIX. Similarly do the same to the vertical line
Result:
base point and project shared coordinates for the project were done
2) Open another new file but with a structural template. Using the manage tab set project parameters the same as the architectural model. Copy the parameters from the architectural model to the structural template or enter the parameters manually into the structural model
Aim:
Using the Manage tab set project base point and project shared coordinates for the project in structural template
Procedure:
I. Go to menu bar
II. Click on file option
III. And click on new and in pop up select the structural template
IV.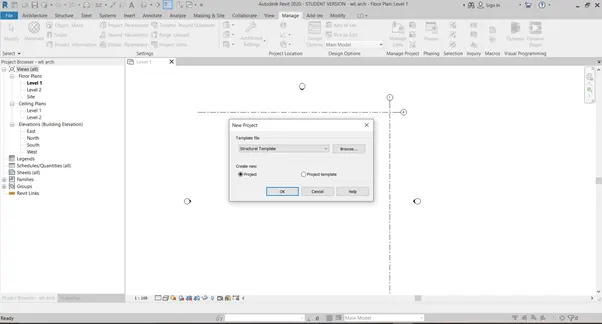
V. Ok
VI. Next again click on file and save as the w6 struc
VII. Close
VIII. Now click on file and then open
IX. Ans by browsing open the w6 struc file
X. In the menu bar
XI. Select the grid
XII. And draw the one horizontal grid naming A at top
XIII. And draw the vertical grid naming 1 at extreme right
XIV. Then go to manage command bar in menu bar
XV. Here select the project coordinates and select the specify coordinates
XVI. XVI.
XVII. Click on the horizontal line
XVIII. In the popup enter the value of the 0 as the coordinate
XIX. Similarly do the same to the vertical line
XX. There by same parameters was set
Result:
the parameters from the architectural model to the structural template were made
3) Re-open the architectural model. Using the tools under the Collaborate tab make the architectural model a central model (enabling simultaneous working on the model)
Aim:
Using the tools under the Collaborate tab make the architectural model a central model
Procedure:
I. Now click on file and then open
II. And by browsing open the w6 arch file
III. In the menu bar
IV. Select the collaborate command
V.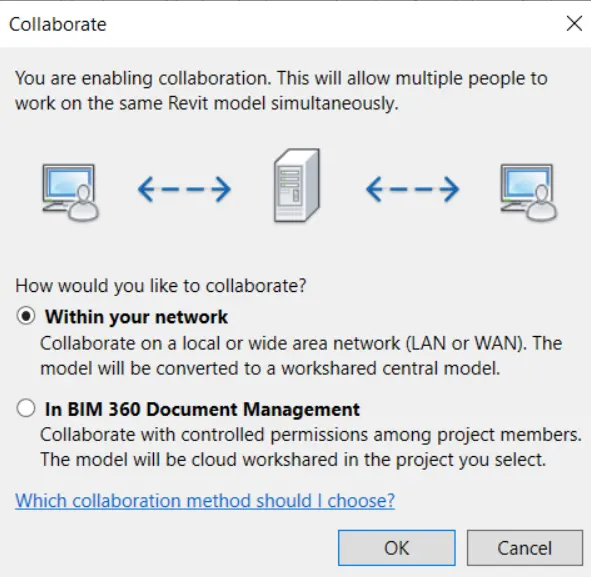
VI. And select within the network
VII. And click ok
VIII. Next save the file
IX. Then close the file
X. Here there will be a pop up as shown below
XI.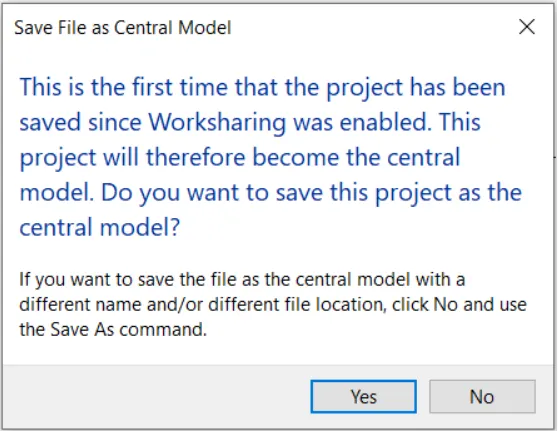
XII. Select yes
Result:
Architectural model was made the central model
4) Create the Grids Longitudinal and Transverse pattern for the project similar to the task done in Week 2
Aim:
Creating the Grids Longitudinal and Transverse pattern for the project similar to the task done in Week 2
Procedure:
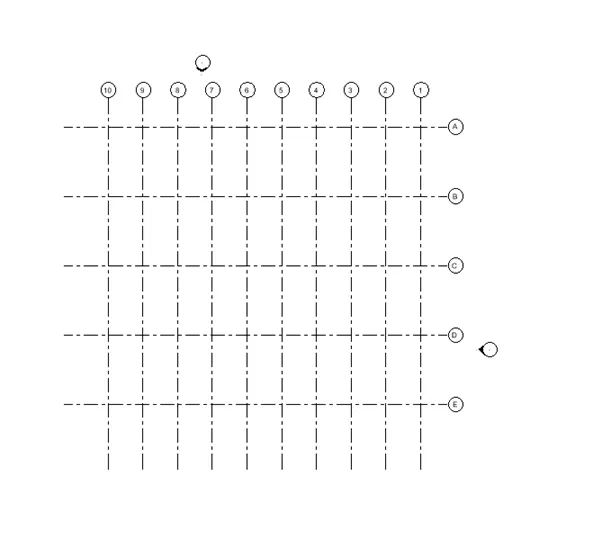
I. Grids Transverse Grids A, B, C, D, E @ 10’ spacing
II. Longitudinal Grids from 1 to 10 @ 20’ spacing
III. Open w6 arch file and
IV. In the project browser click on the floor plan view
V. Then click on the architecture tab and select the grid option
VI. Now select the line command and draw the traverse and the longitudinal lines
VII. In the traverse line attribute type, A
VIII. Similarly in longitudinal line attribute type, 1
IX. Now select the pick line command
X. And specify the offset as the 10’
XI. And click on the transvers grids for 5 times
XII. Next specify the offset as the 20’
XIII. And offset the longitudinal grids for the 10 times
Result:
Grids were created
5) Synchronize the changes from the local copy to the central file of the architectural model.
Aim:
Synchronize the changes from the local copy to the central file of the architectural model
I. Now click on file and then open
II. And by browsing open the w6 arch file
III. In the menu bar
IV. Select the collaborate command
V. And select the option of synchronise with the central as shown in the figure below
VI.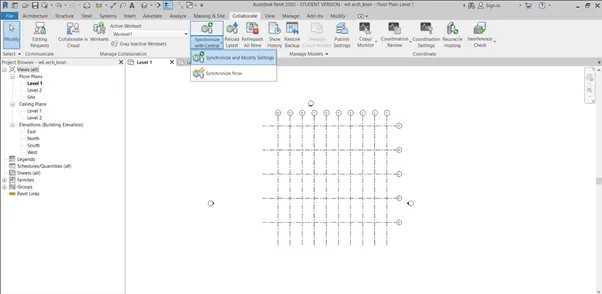
VII. In the pop tab displaying the location of central file click ok
Result:
Synchronization of the local copy to central file was done.
6) Open the structural model and use the collaborate tools to save the model as a central file.
Aim:
in the structural model and use the collaborate tools to save the model as a central file
procedure:
I. Now click on file and then open
II. And by browsing open the w6 struc file
III. In the menu bar
IV. Select the collaborate command
V.
VI. And select within the network
VII. And click ok
VIII. Next save the file
IX. Then close the file
X. Here there will be a pop up as shown below
XI.
XII. Select yes
Result:
structural model was made the central model
7) Under the Collaborate tab, select the grids and levels from the architectural model, and using Copy Monitor try to copy the grids to the structural model. See what happens when the copy monitored grid is moved around in the structural model
Aim:
using Copy Monitor try to copy the grids to the structural model
procedure:
I. click on file and then open
II. And by browsing open the w6 sarch file
III. In the menu bar select the collaborate option
IV. Go to copy or monitor and select the current project
V.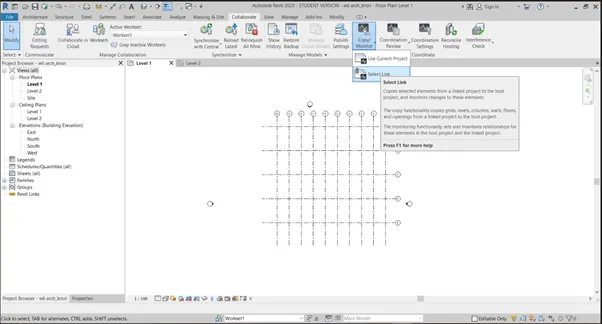
VI. And click on copy
VII.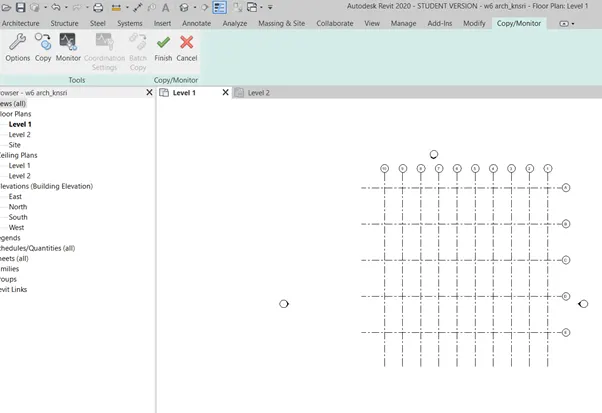
VIII. click on file and then open
IX. And by browsing open the w6 struc file
X. In the menu bar select the collaborate option
XI.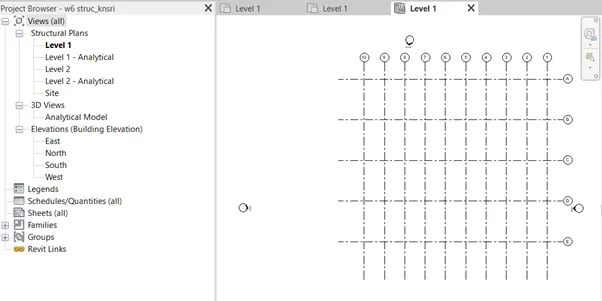
Result:
using Copy Monitor copied the grids to the structural model
8) Create another new file with a construction template. Save the new file as a central model. This file will include both architectural and structural model. Under the manage tab, Click manage links to link both architectural and structural files. Save the file and close all the files.
aim:
Construction file with the collaboration of the structural and architectural file
procedure:
I. Go to menu bar
II. Click on file option
III. And click on new and in pop up select the construction template
IV. Ok
V. In menu bar go to collaborate and click on collaboration
VI. And go to manage and select on manage links
VII. In Revit select the w6 arch and w6 struc file as shown in the figure below
VIII.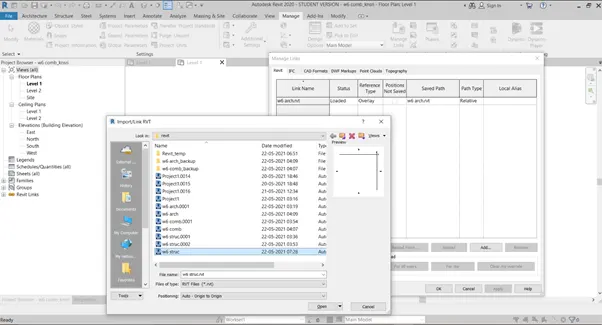
IX. And click ok
X. If the grids are not aligned
XI. In manage command bar select the coordinates option and select the acquire coordinates option
XII. then click on position > relocate the project in the manage command bar
XIII. then snap the intersections
XIV.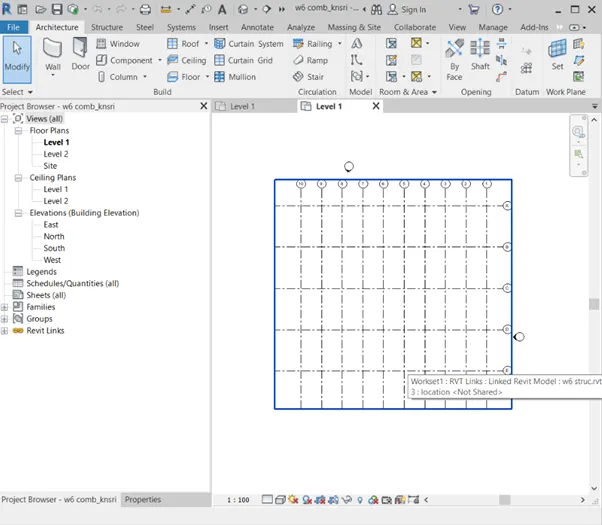
Result:
Construction file with the collaboration of the structural and architectural file was created.
9) Are the grids from structural and architectural model matching in the construction template created? If yes the model is set up for project 2. If not work on the shared parameters and linking options under Manage links
( Hint: origin to origin, by shared coordinates or by project base point to base point ) to link the models in an appropriate manner
ans:
the grids from structural and architectural model are matching in the construction template and model has been set up for the project 2.
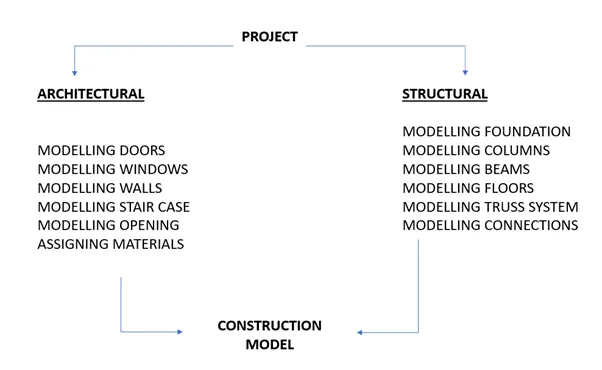
10) List a flow chart of a project tree set up in terms of Construction model, Architecture & Structure model, in this exercise and understand how many people can work on the same project using Revit simultaneously