Usage of Collaborate tool in REVIT
1. Open an architectural template. Using the Manage tab set project base point and project shared coordinates for the project
Aim:
To opening a architectural tempelate and setup a basepoint and project shared coordinates for the project
Tools Used:
Tempelate
Manage
Project parameter
Shared coordinates
Procedure:
Step-1:
1. Open Revit Application
2. Select New and choose Architectural tempelate
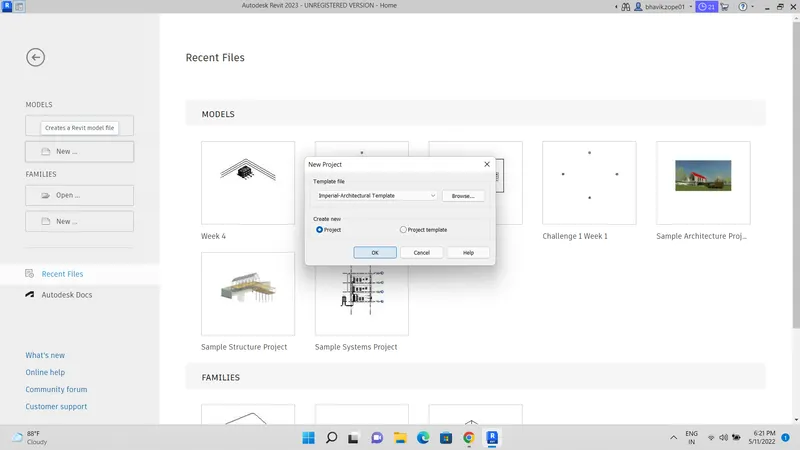
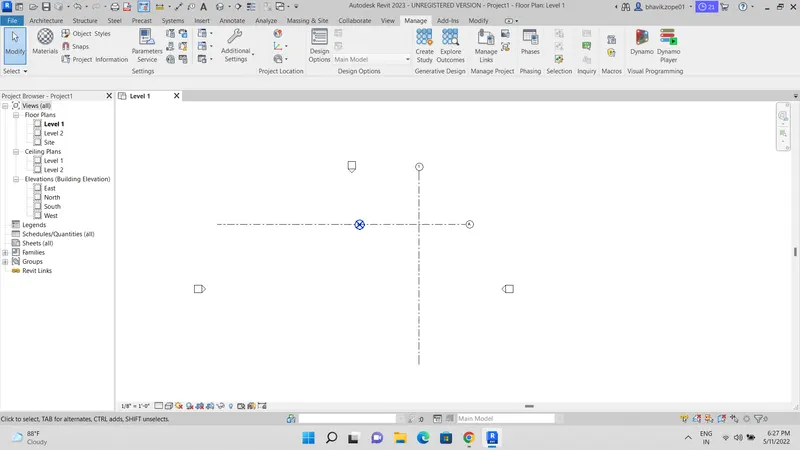
3. Go to architectural tab > grids and draw the grids and rename the vertical grid as 1 and horizontal as A.
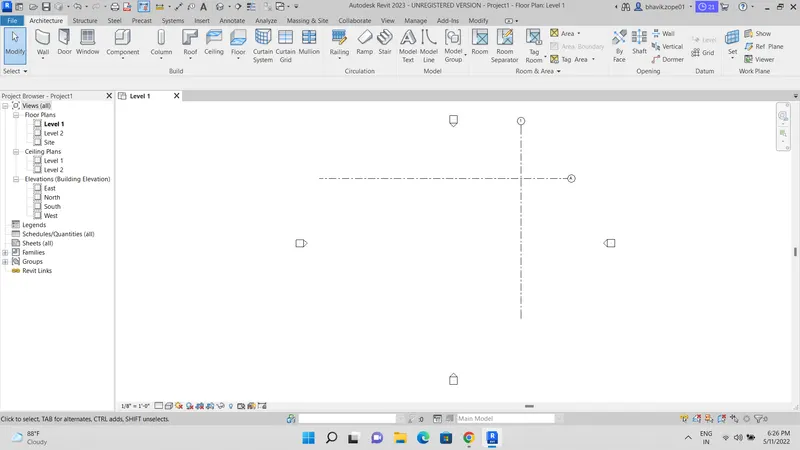
Step-2:
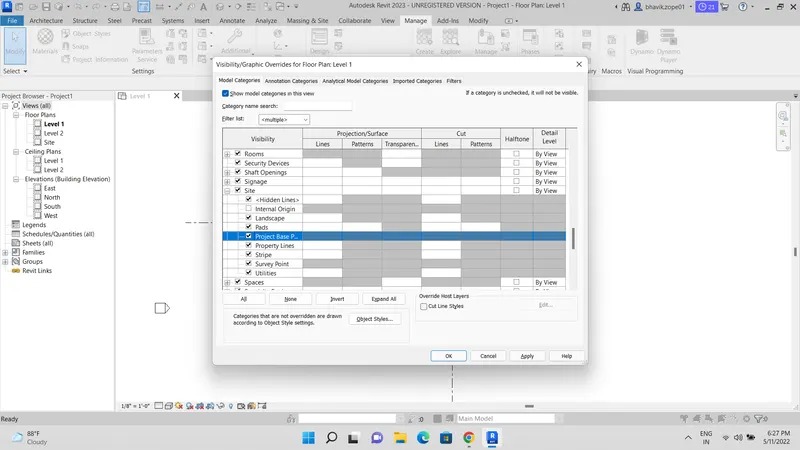
1. Type the command VG (Visibility Graphic)
2. Enlarge Site option
3. Check the project base point and survey point
4. Click ok and close the dialogue box
Step-3:
1. Click the project base point under the manage tab
2. Place the base point at suitable place
Step-4:
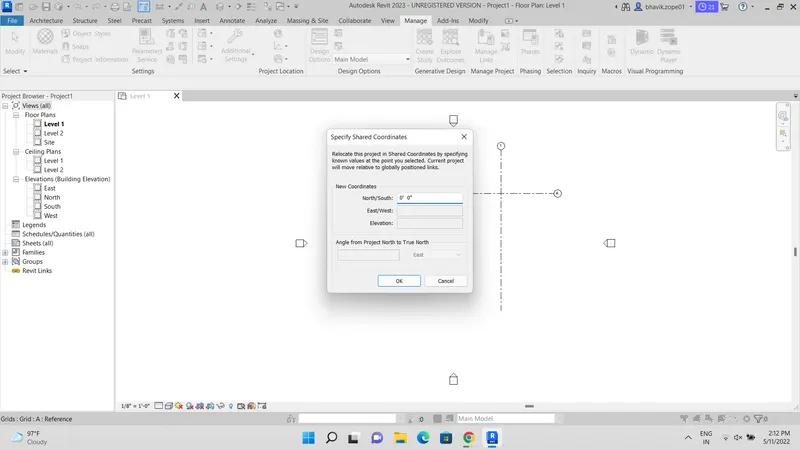
1. Click Shared coordinat tool under manage tab
2. Choose specify coordinate at point option
3. Place it according to the drawing
Step-5:
1. Change the coordinate point after selecting the grid lines
2. Click ok
Step-6:
1. After creating the base point and shared coordinates click save as
2. Choose the destintion folder and rename it
3. Click Save
RESULT:
The project base points and project shared coordinates for the architectural template is created successfully by using the Manage tab.
2. Open another new file but with a structural template. Using the manage tab set project parameters the same as the architectural model. Copy the parameters from the architectural model to the structural template or enter the parameters manually into the structural model.
AIM:To create a structural template and set the project parameters the same as architectural model by using the manage tab.
TOOLSUSED:
New
Structural
Manage
saveas
PROCEDURE:
Step-1:
1. Open Revit Application
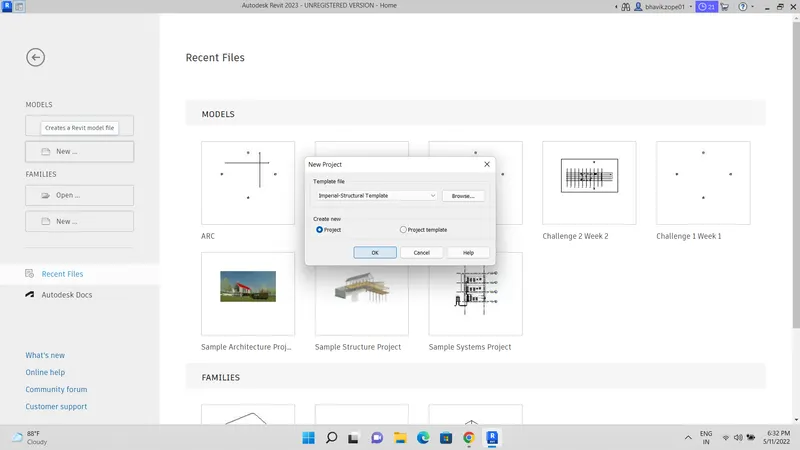
2. Select New and choose Structural tempelate.
Step-2:
1. Type the command VG (Visibility Graphic)
2. Enlarge Site option
3. Check the project base point and survey point
4. Click ok and close the dialogue box
Step-3:
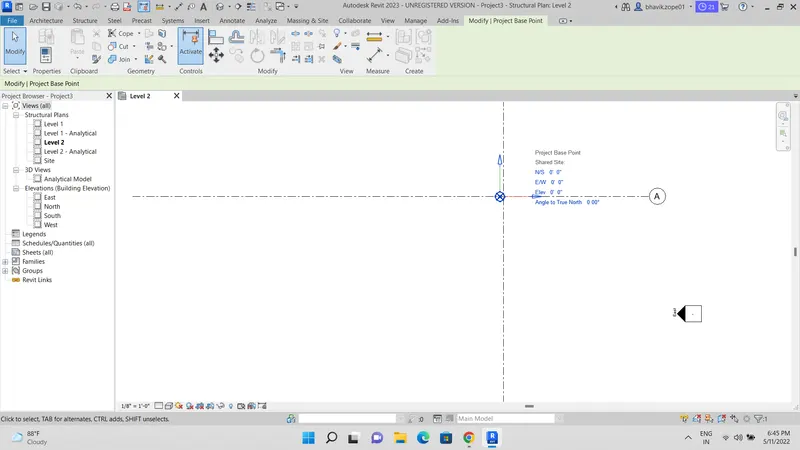
1. Click the project base point under the manage tab
2. Place the base point at suitable place
Step-4:
1. Click Shared coordinat tool under manage tab
2. Choose specify coordinate at point option
3. Place it according to the drawing
Step-5:
1. Change the coordinate point after selecting the grid lines
2. Click ok
Step-6:
1. After creating the base point and shared coordinates click save as
2. Choose the destintion folder and rename it
3. Click Save
RESULT:
the structural template with the same parameters as that of architectural template by using the manage tab is created and saved successfully.
3. Re-open the architectural model. Using the tools under the Collaborate tab make the architectural model a central model ( enabling simultaneous working on the model )
AIM:To Re-open the architectural model and using the tools under the collobrate tab make the architectural model as the central model.
TOOLS UESD:
file
open
collobrate
save
PROCEDURE:
STEP-1:select the file and open the previously created architectural file.
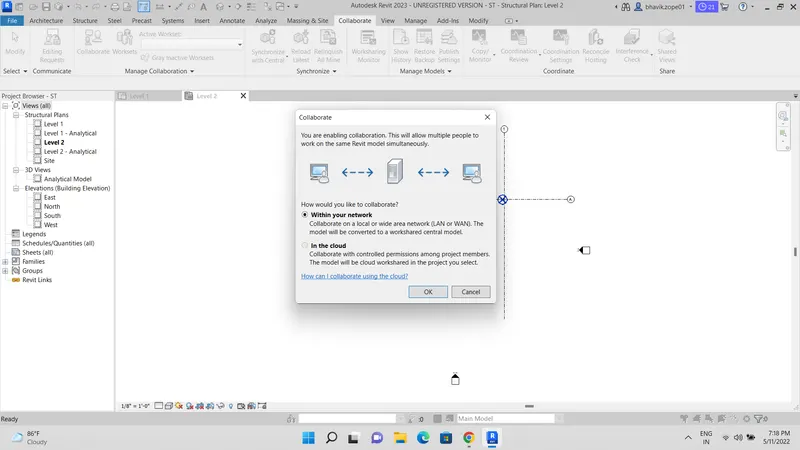
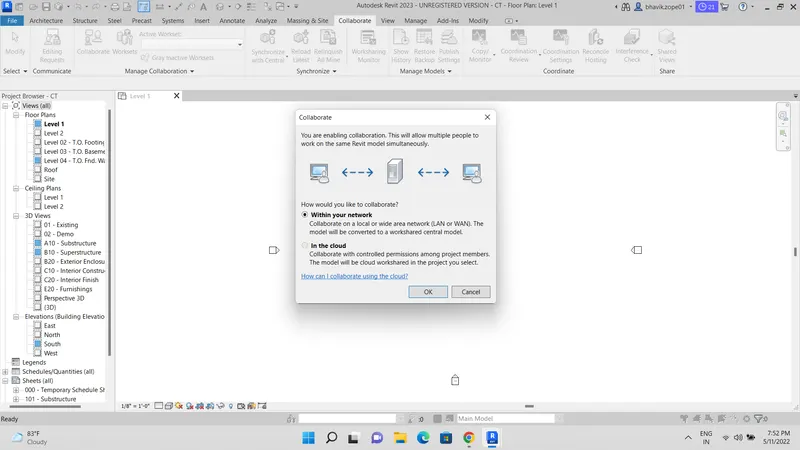
STEP-2:select the collabrate and click on the collabrate a collobrate dialogue box appears select the within your network, and click ok.
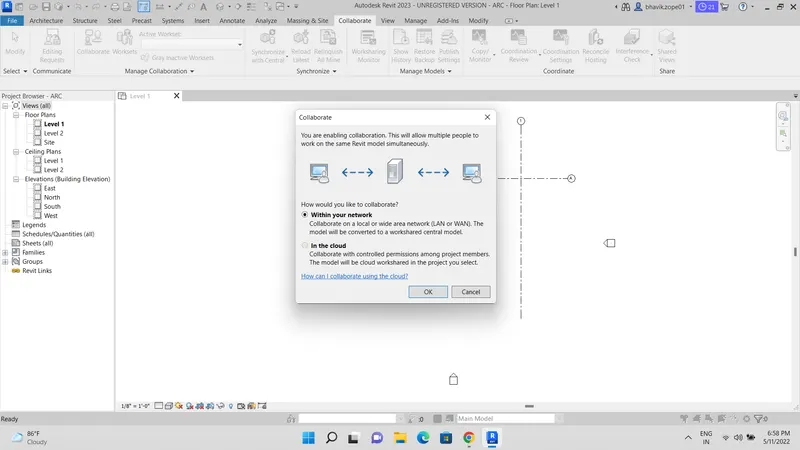
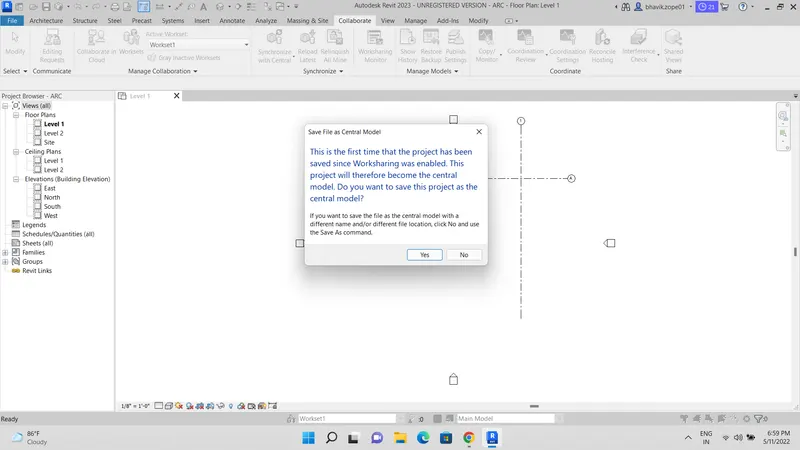
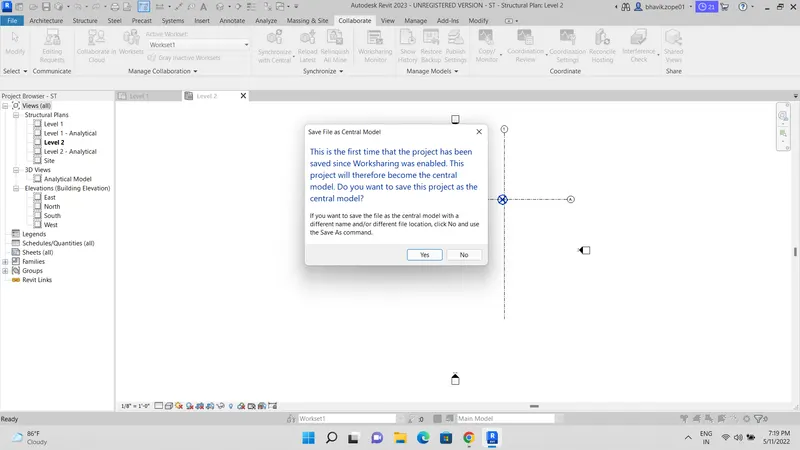
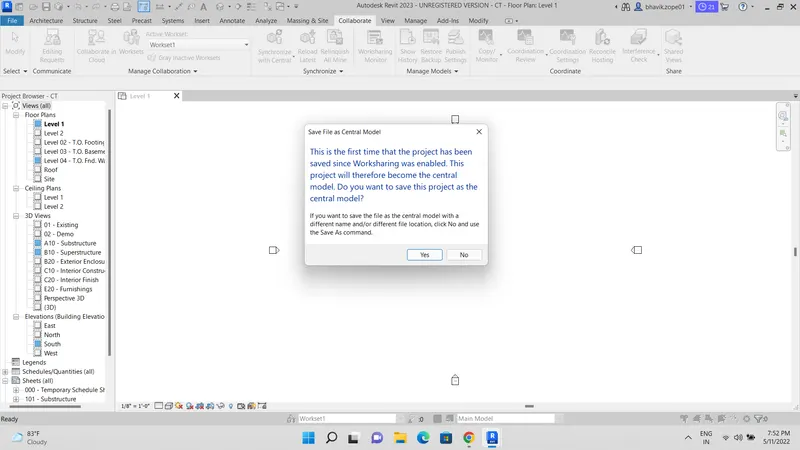
STEP-3: Click Save it will Ask to make a Central Model file, Click yes.
RESULT :
the Arhitectural model is maked as central model by using the collobrate tab succesfully.
4) Create the Grids Longitudinal and Transverse pattern for the project similar to the task done in Week 2.
AIM:To create the Longitudinal and Transverse pattern for the project .
TOOLSUSED:
Open
Architectural
Grids
save
aligned
PROCEDURE:
STEP-1:Select the Architectural file which is created before.
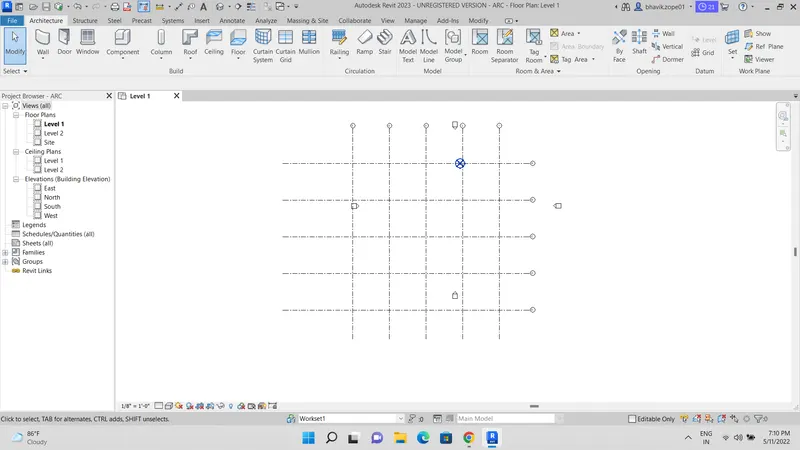
STEP-2:Select the Architectural tab and click on grids and draw the Longitudinal and transverse patterns at an offset of 30'
RESULT:
The longitudinal and traverse girds are drawn successfully by using the girds option .
5) Synchronize the changes from the local copy to the central file of the architectural model.
AIM:To Synchronizing the changes from the local copy to the central file of the Architectural model.
TOOLS USED :
- Collobrate
- Synchronize
PROCEDURE:
STEP-1:Select the collobrate tool under collobrate tab
StEP-2:select the within your network option and click ok
STEP-3:Click the Synchronize with central tool under manage tab
STEP-4:click the save .
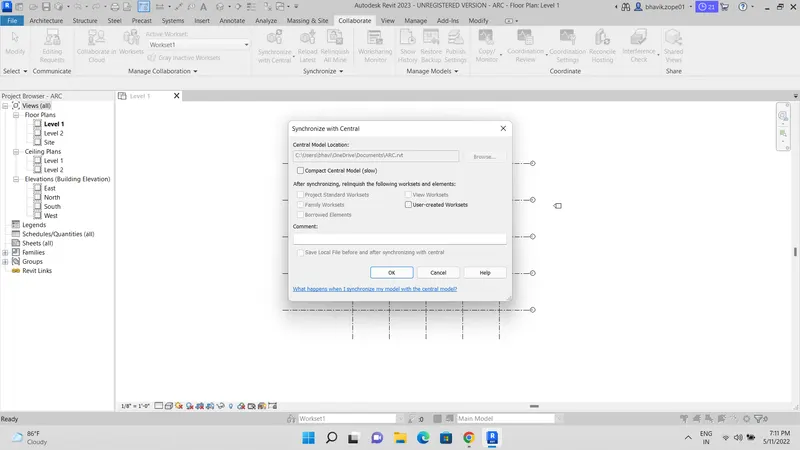
RESULT:
The synchronizing is changes from local copy to the central file is done successfully.
6) Open the structural model and using the collaborate tools to save the model as a central file.
AIM:
To open the structural model and using the collaborate tool save the model as central file
TOOLSUSED:
- Open
- Collobrate
- synchronize
PROCEDURE:
STEP-1:Open the structural model which is already created .
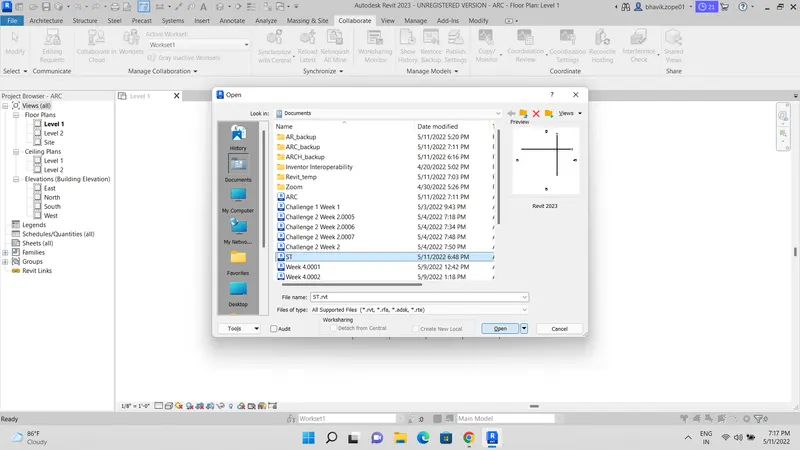
STEP-2:select the collobrate tab and click the collobrate.
STEP-3:select the within your network .click ok.
STEP-3:Click on save and save the file as central file.Click yes.
RESULT:
The structural model is successfully saved as central file y using the collobrate tab.
7) Under the Collaborate tab, select the grids and levels from the architectural model, and using Copy Monitor try to copy the grids to the structural model. See what happens when the copy monitored grid is moved around in the structural model.
AIM:
To copy the Grids and levls from the Architectural model to structural model by using the copy monitor tool.
TOOLSUSED:
- Manage tab
- collobrate
- copy monitor
- manage links
PROCEDURE:
STEP-1:open the Architectural file which we have created earlier.
STEP-2:Add the structural model to the current model usimg the manage link option .
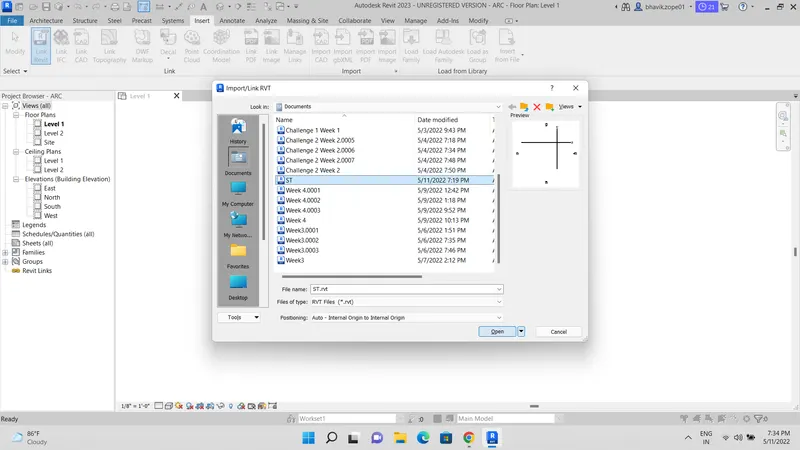
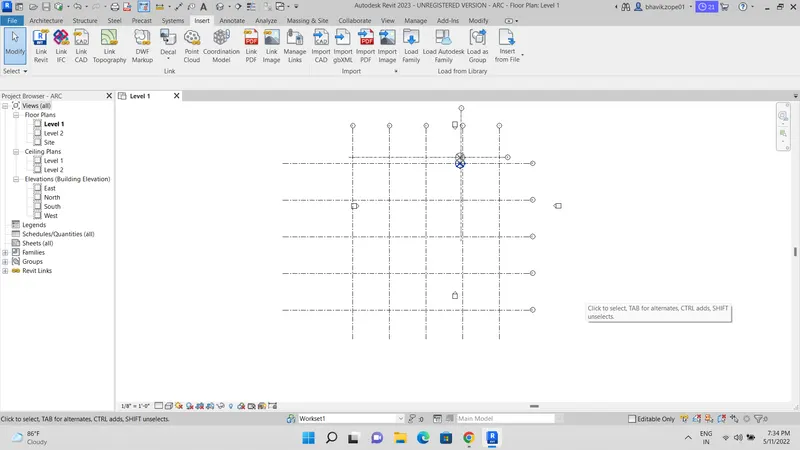
STEP-3:Select the copy monitor in the collobrate tab and click the select link.
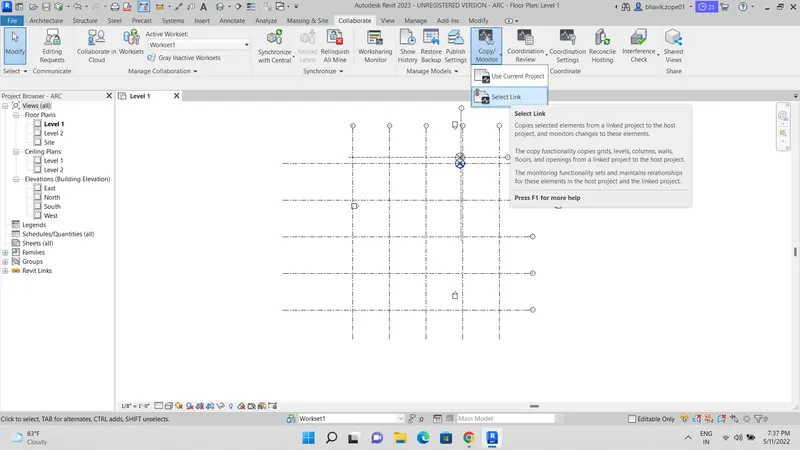
STEP-4:select the copy option so that we can copy all objects in a single click.
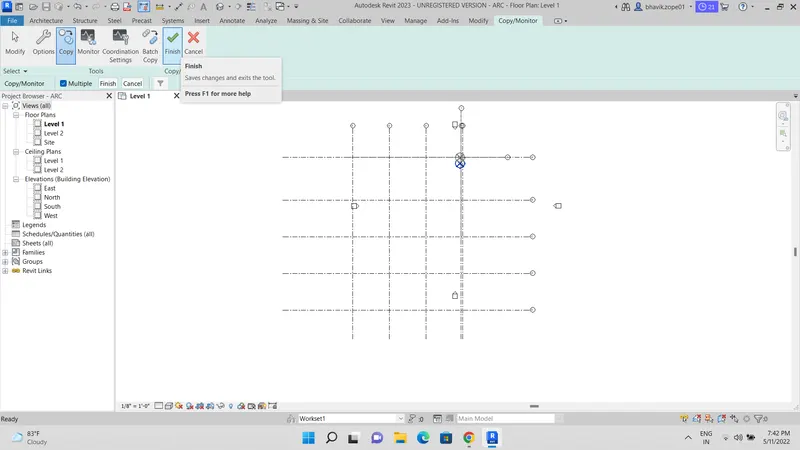
STEP-5:select the object which we need to copy and click on finish.
RESULT:
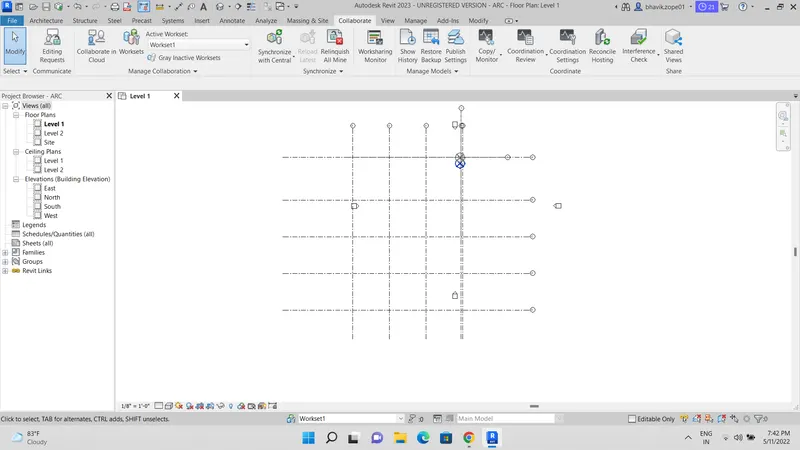
The objects in the Architectural model are successfully copied to the structural model.
8) Create another new file with a construction template. Save the new file as a central model. This file will include both architectural and structural model. Under the manage tab, Click manage links to link both architectural and structural files. Save the file and close all the file
AIM:
To create a new file with a construction template and linking both the architectural and strutural model by using the manage links and saving the file and closing .
TOOLSUSED:
- New
- save
- close
- managetab
- manage links
- collobrate
PROCEDURE:
STEP-1:open the revit click new and construction template
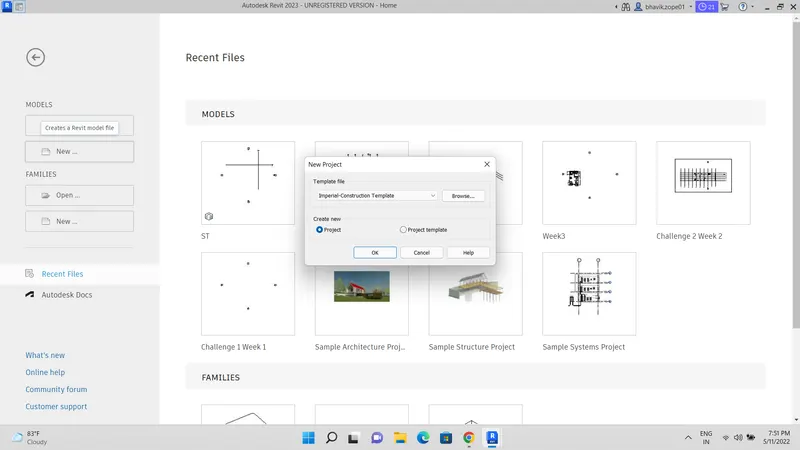
STEP-2:select the collobrate under the collobrate tab
STEP-3:select the within your network.click ok
STEP-4:click save and click yes
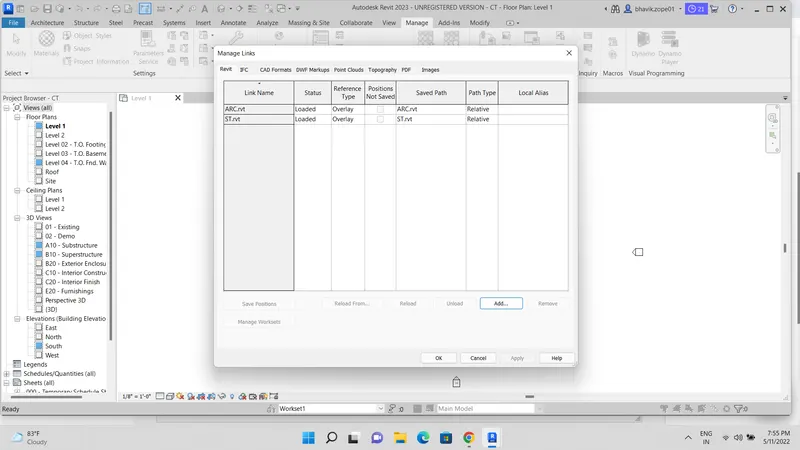
STEP-5:go to manage tab and click the manage links and add the structural and architectural models which we created earlier AND CLICK OK.
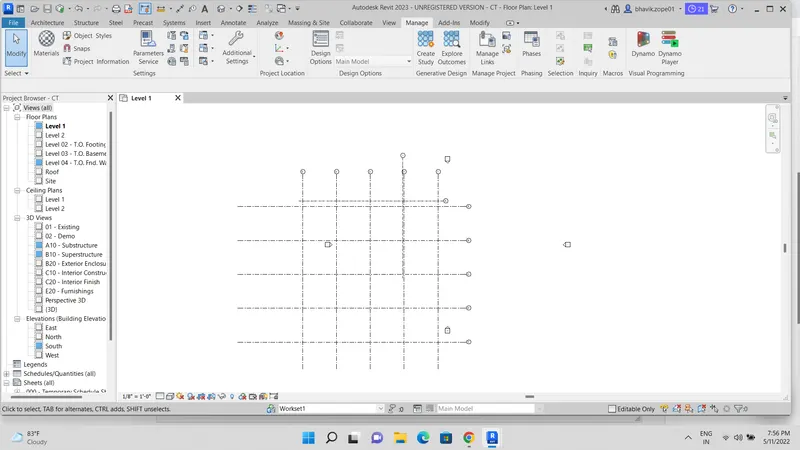
STEP-6:Save the file .and close
RESULT:
The both the architectural and structural modles are now linked to the central model file.
9) Are the grids from structural and architectural model matching in the construction template created? If yes the model is set up for project 2. If not work on the shared parameters and linking options under Manage links
( Hint: origin to origin, by shared coordinates or by project base point to base point ) to link the models in an appropriate manner
AIM:
To check wheather the structural and architectural model grids are matching in the construction template .
yes,both the structural and architectural model grids are matching in the construction template.
if not ,
1)open the model and click the relocate position in the position menu in the manage tab
2)now select the base coordinates of the both files .
RESULT:
Now the coordinates are successfully coincided
10) List a flow chart of a project tree set up in terms of Construction model, Architecture & Structure model, in this exercise and understand how many people can work on the same project using Revit simultaneously.
ANS:
- ARCHITECTURAL
- creating doors
- creating windows
- Material assign
- Creating staircase
- Design development
2.STRUCTURAL
- Foundation
- columns
- slabs
- floor
- roof
- staircase
- Beams
3. Construction model
- Site access
- quality control
- health and safety
Multiple people can work on the same project by worksharing with use of central model