Tool Test 1
Tool Test 1
AIM: MID SURFACING AND MESHING OF SWITCH PANEL AND SHEET
OBJECTIVES:
- Open model in ANSA and perform topology and assign proper orientation to the geometry.
- Perform geometry clean-up and create mid-surfacing of all the parts.
- Defeature all the connections of mid surfaces to generate proper mesh flow.
- Assign expected quality criteria in order to maintain mesh quality. Also provide average length of mesh elements with minimum and maximum length.
- Generate mesh using best and batch mesh command and reconstruct it to reduce number of tria elements. Then smooth it using smooth button.
- Give proper thickness to each mid-surface in element property section.
- check mesh if there any elements not fitting under our quality criteria and correct it using split and join element button.
- Finally, clear all the joins from the geometry by keeping same element structure and release all the element from geometry.
- Convert shell mesh to 2d solid mesh.
PROCEDURE:
Model 1 / Switch Panel Component
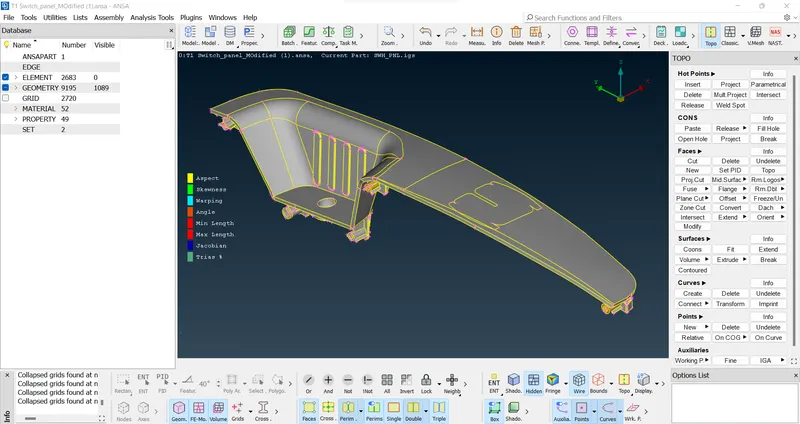
- Geometry clean-up-
In 1st model geometry is already oriented and faces already attached therefor there is no need to perform any topological and orientation operation in this case. we will directly check the part for geometry clean-up.
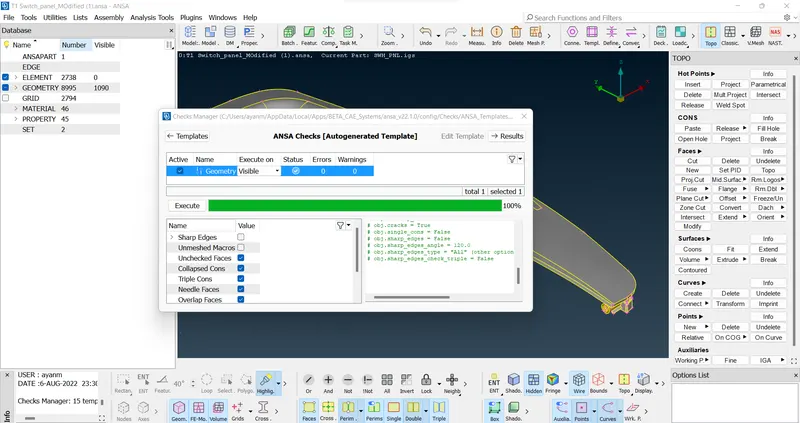
- Manual Mid-surfacing
Now, we can extract mid surface from faces of the geometry one by one according to different thickness of individual section we will assign thickness to its property. In order to extract surface, we can use manually we can use various method like offset, middle (single or multi) from faces option, we can also create middle curve by using middle button in curve section and then after create surface using those curves.
Even after extracting mid-surface job is not fully done because we have to join all the surface to each other in a bid to maintain connectivity between all the faces. To do that we will use ‘New’ button from the faces to create new faces, extend option to extend the faces up to next face, curves to create new faces.
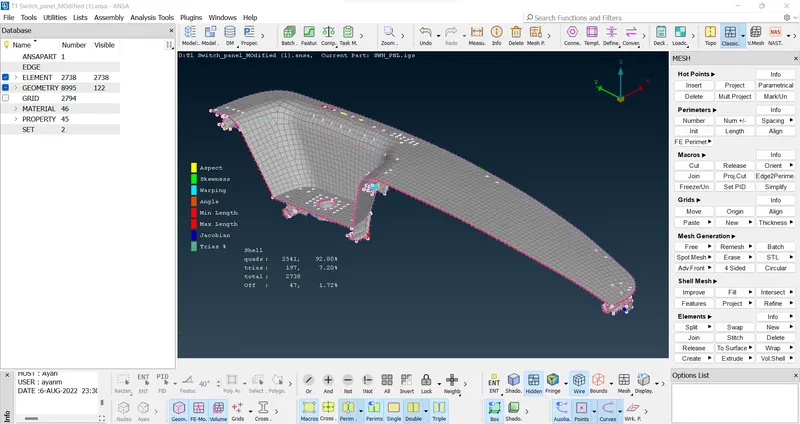
In below figure, mid-surfaces are generated using middle option from faces command and then shaped it by removing joints and curve option the extended to the next surface for attachment with next surface using extend command. Same features are present in geometry on other side so this type of symmetrical part we can use transformation feature to save time.
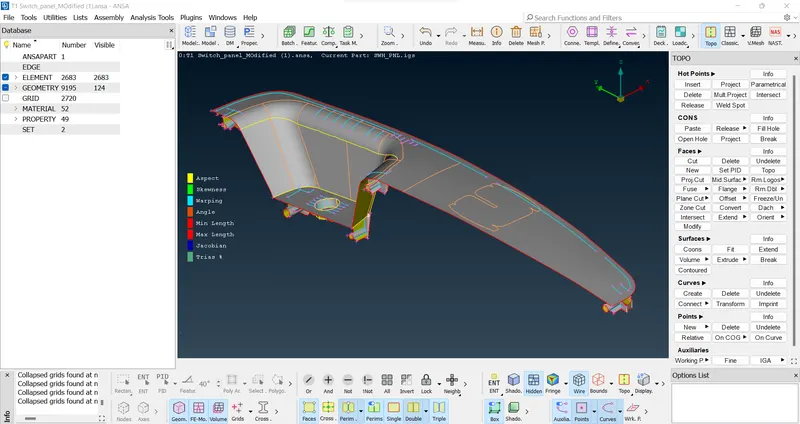
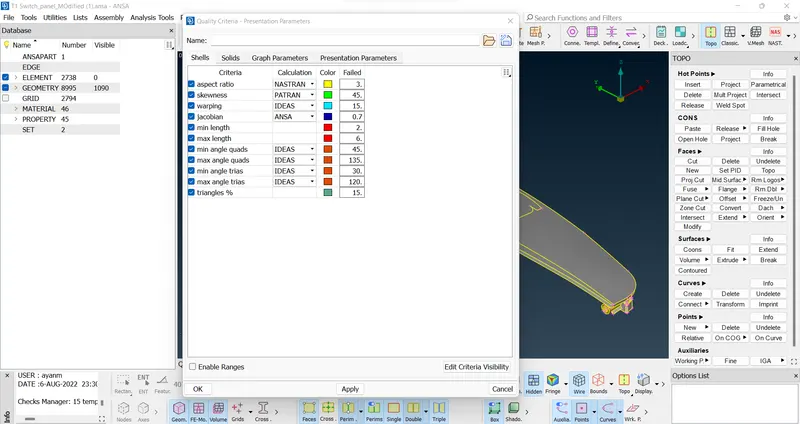
- Quality criteria
Till this point so far, we have extracted all the mid surfaces and out next step is to defeature such part that can disturb our quality criteria or ruin or mesh flow and then we will set our mesh quality.
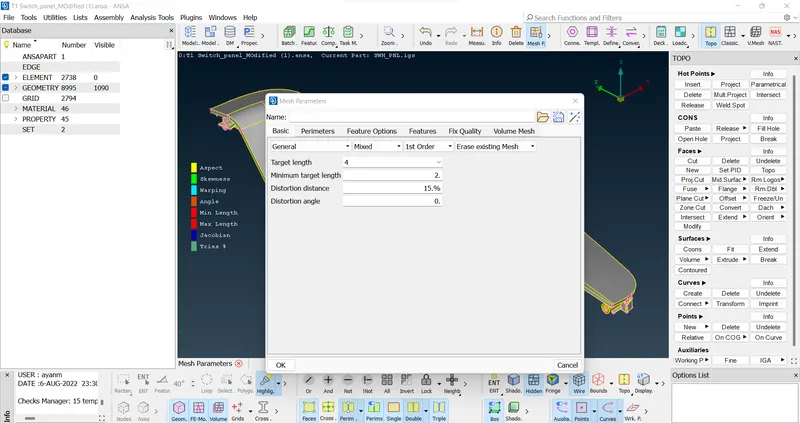
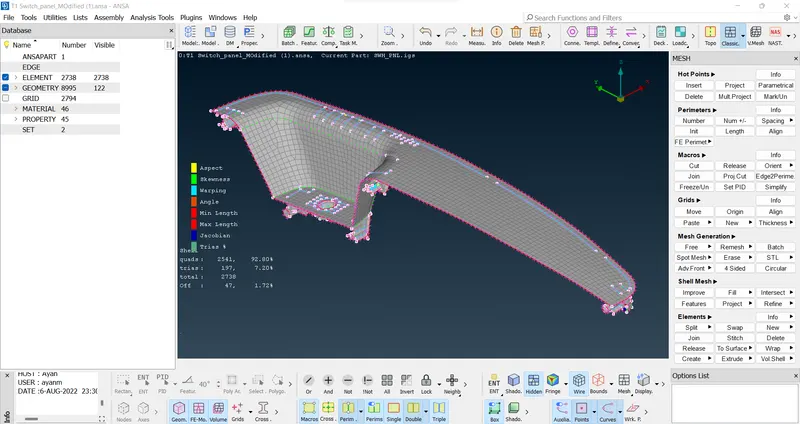
- Meshing
Now we can mesh our extracted surfaces using best and batch mesh button, in a bid to rearrange and remove tria elements we will use reconstruct button and select the button that we have to rearrange. Latter we are going to smooth it. We are going to follow above procedure one by one for each surface.
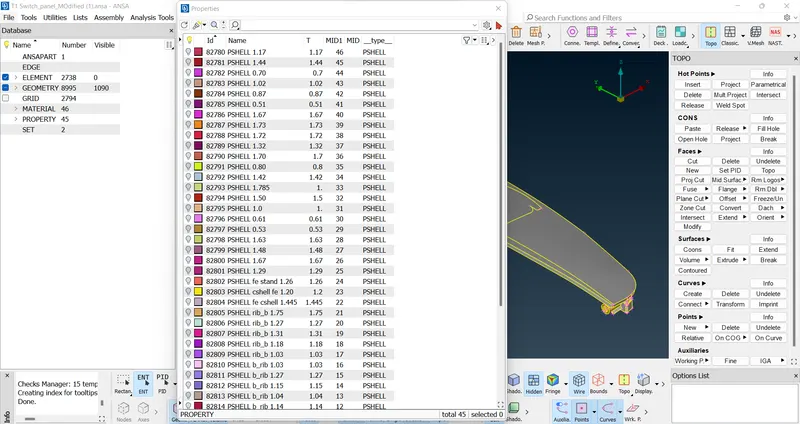
- Assigning Thickness
After meshing, delete all the joins that created for mesh flow by keeping the mesh structure as it is and then extract the element form the geometry by using release option. And final task is to assign thickness to each surface in their property section by measuring the thickness of individual section using measure tool in ANSA.
- shell as solid
For thickness visualization we can convert shell mesh to solid with the help of thickness we had assign in property id of each surface. Go to Quality > Presentation parameter > Draw shell as solid and click apply.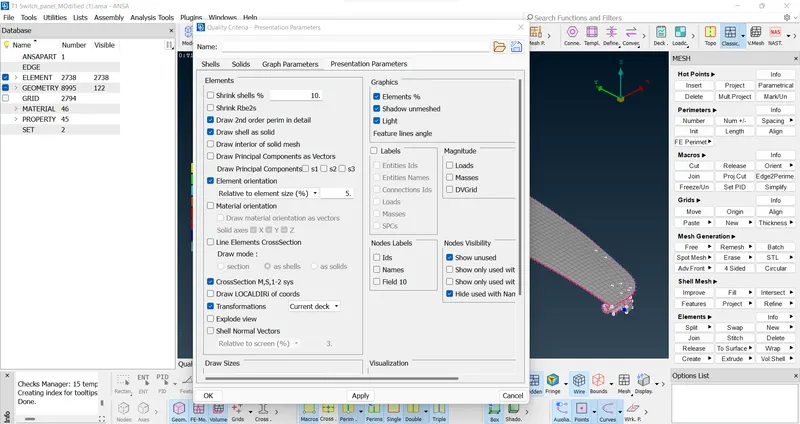
Model 2 / Sheet Component
Follow the same process….
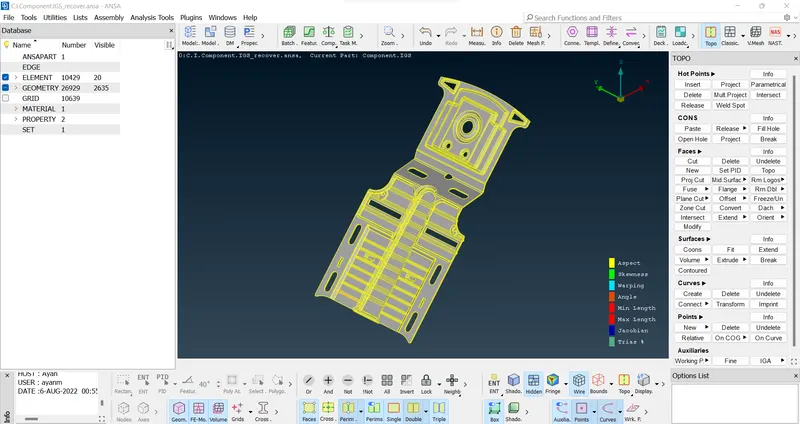
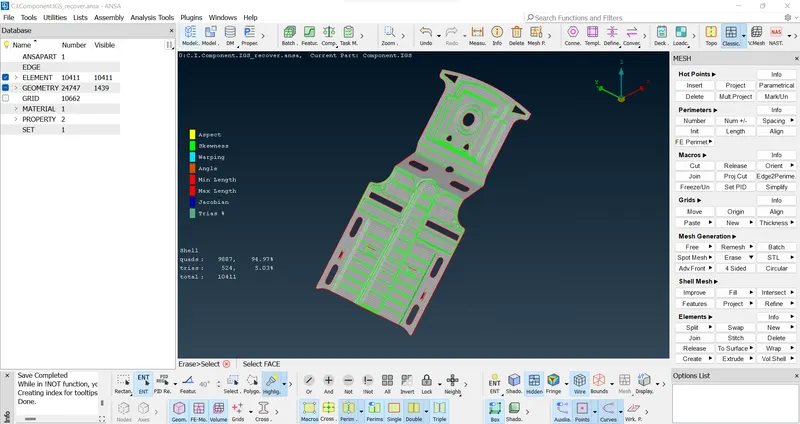
Now for the second model, Let’s start with importing the geometry in ANSA using open button in file menu and perform topology to join all the faces as the file is in the igs format and faces are not connected to each other.
Orientation
After topology, we can see some part of the geometry is of yellow colour and some are grey this mean geometry is not properly oriented so by using orient button in topo option we can orient it properly.
Geometry clean-up
Next, part is to preform geometry clean-up to remove unwanted surface, cons from geometry for smooth transition of mesh from each face.
Mid surface extracting
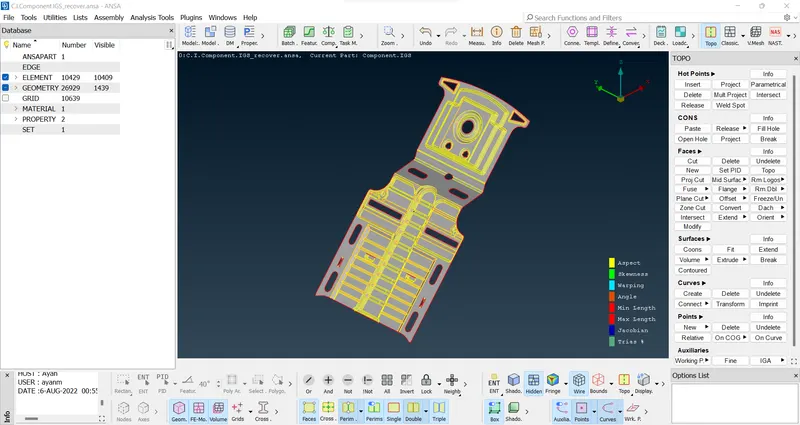
Using Feature area option we can offset the whole geometry by adjusting the angle. After selecting feature angle select the geometry and give offset value.
Quality criteria
Do same as model1
Till this point so far, we have extracted all the mid surfaces and out next step is to defeature such part that can disturb our quality criteria or ruin or mesh flow and then we will set our mesh quality.
Meshing
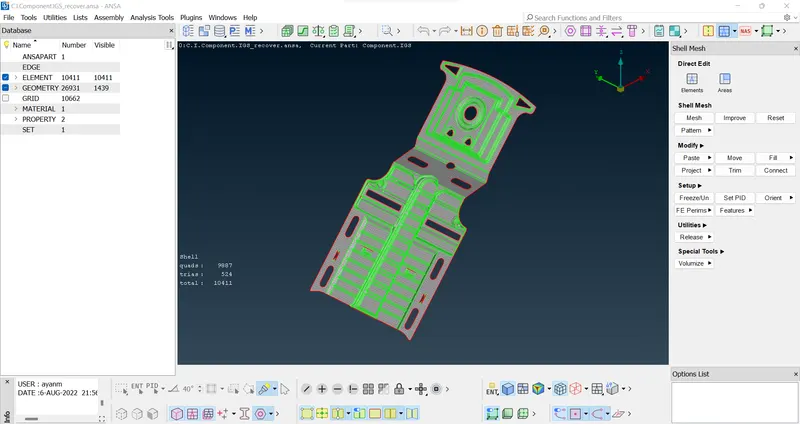
After defeaturing and use cut and uncut few lines (avoiding features lines) use best, spot meshing,
And after meshing use improve option for fix off elements.
shell as solid
For thickness visualization we can convert shell mesh to solid with the help of thickness we had assign in property id of each surface. Go to Quality > Presentation parameter > Draw shell as solid and click apply.
Learning Outcomes:
- Able to do topological clean-up with no errors.
- Assigned separate PIDs for different surfaces.
- Able to generate mid surface for complex geometry with varying thicknesses.
- Aware of all the quality criteria and quality parameters during mesh generation.
- Understood about mesh generation and implemented mesh generation for complex geometry.
- Learned how to improve mesh flow and remove trias to achieve better mesh flow.
- Understood all the concepts regarding mid surface generation in Ansa.
Conclusion:
Understood the various way to extract the mid-surface and edit the geometry form topo panel in ANSA.
Learned to assign different thickness to the various surface in 2d geometry section.
learned to simplify model by considering minimum element size to avoid mesh failure.
The majority of elements must be kept near to target length.
Time management while working on the model.
After finish Meshing enable shell as solid.
In model 1 there are few off elements because of triple cons, and model 2 no off elements are there.
FINAL MODELS LINK:
https://drive.google.com/file/d/1vGmVsuyWt-jc2Uf2LAHfzC3dpDUWOlvV/view?usp=sharing
https://drive.google.com/file/d/1dmYTgROxc0NUny05LMuRh0rWTd1OXkQs/view?usp=sharing
Time for Model 1 - 5 hours (approx.)
Time for Model 2 - 4 hours 20 minutes (approx.)