Structural Modelling using Etabs 2018
Introduction :-
Etabs :-
- ETABS is one of the most powerful software tools for structural analysis.
- 3D modeling, visualization, and automatic code-based learning are some of the unique features of this software.
- ETABS also supports several analytical models like response spectrum analysis, time-history analysis, and line direct integration time-history analysis.
Advantages :-
- Built-in drawing utilities: To aid the engineers in modeling, ETABS comes with a built-in feature for drawing and drafting. Some other packages also have this feature, but the quality is much better in ETABS.
- Extensive reports: ETABS generates detailed and comprehensive reports for every project or task you perform, be it calculation of stresses, deformation or failure analysis, and design summary.
- Design of concrete and steel frames: Among all the materials available to build structures, concrete and steel are by far utilized the most in terms of volume. ETABS has specialized modules that deal with concrete and steel frames to optimize your calculations and offer capacity checks for frame elements.
Aim :-
- To model and analyze G+7 residential plan from given architectural drawings using Etabs 2018.
- To Run a modal response spectrum analysis and check analysis results of the etabs model.
Procedure :-
- Open the ETabs software.
- Click the file menu and choose to create a new model option.
- After choosing a new model a dialogue box will appear as Model Initialization.
- Choose the built-in settings option and select the display units and codes.
- New dialogue box will appear named New Model Quick Templates.
- Select Custom Grid spacing and custom story data.
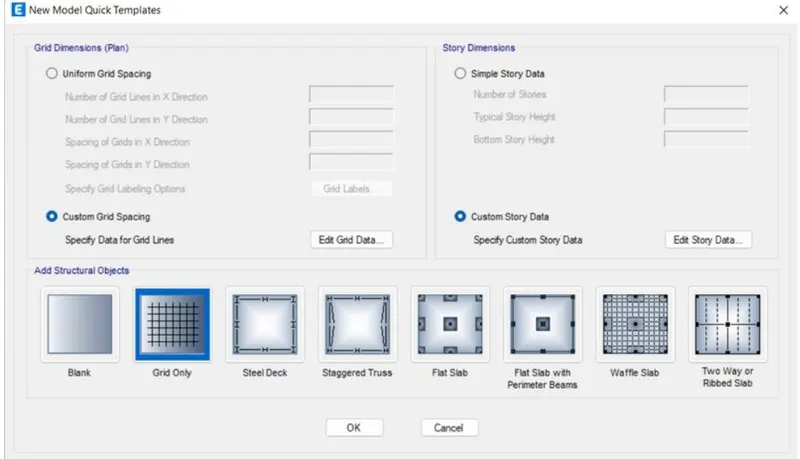
- After models initialization, select grid and storey inputs from new model quick templates dialogue box.
- In the dialogue box choose grid spacing and custom story data which is used to provide the input specified above.
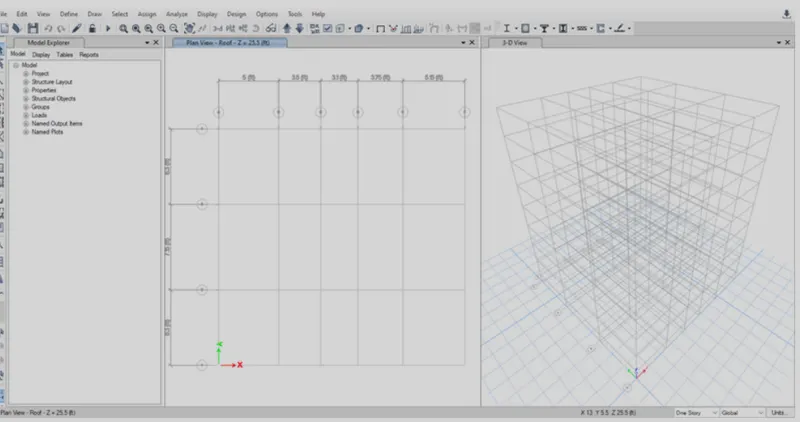
- Now edit stories by using the user-defined story input, 26 stories are incorporated (plinth at 1.5m and 25 story with 3m height each).
- Storey 1 has been labelled as a master storey and all above levels are labelled similar to that.
- So, 7 storeys are successfully added in the peoject.
-
- Now select Section Properties under Define Tab.
- Select Frame Sections.
- Select Add new properties in Frame Properties.
- Create a new Property as a beam and input values as 250X450.
- Select Modify/Show Rebar in Reinforcement option.
- Select M3 Design only (Beam).
- Select Reabar as HYSD415.
- Next we add the shear walls in required location in the residential building.
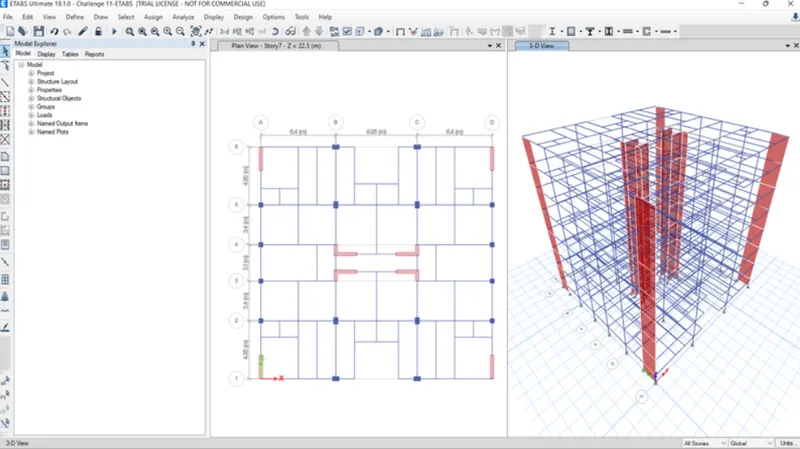
- Next we need to add the slab using quick draw floor/wall option
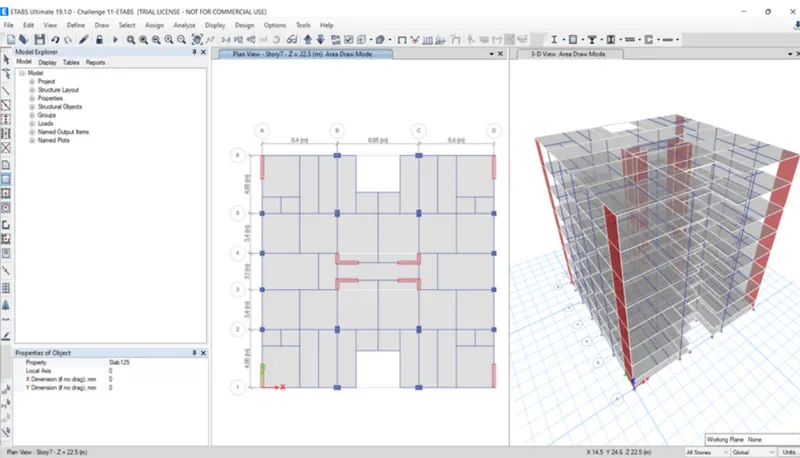
- Now we go to the base plan and select all base joints.
- Next we select the Restraints from joint option, as shown below.
- Now we need to select the fixed joint and click on apply and then click on close button, as shown below.
- Now we should add Dead load, live load, Brickwall load, and earthquake load, as shown below.
-
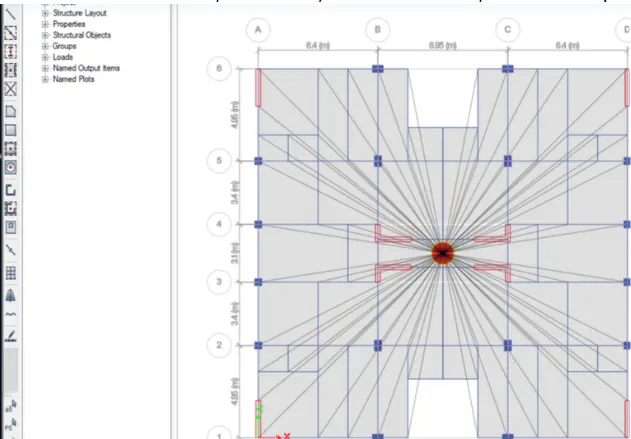
- After selecting the modifyshow spectrum option the new tab will be visible. In that we give the Function name as 15 FUNCTION and remaining details will be set by the software itself we don't need to change any of the details in that response spectrum function tab as shown below.
- Next, from the display option we select the show tables option, as shown below.
- Here we have to check that EQ should be closer to the RS. to get the closer to each other we should calculate that [(EQ/RS) * Scale factor of Response spectrum.]
- After we enter these values for response spectrum as scale factors at X and Y directions in load case data, then the EQ is closer to the RS from the base reaction table, as shown below
- Next, from the display option we select the show tables option, as shown below.
- After selecting the show tables option the new tab will be visible. . Now we select the Modal Participating Mass Ratios and click on the ok button, as shown below.
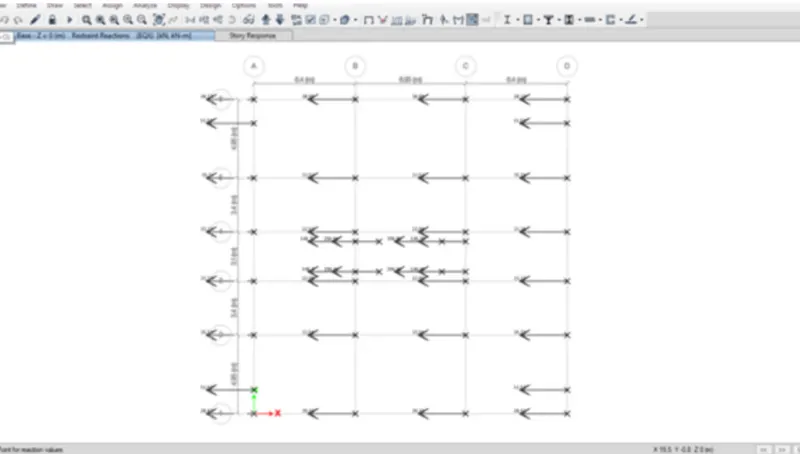
- Now the base shear reactions will appear, as shown below.
- When we divide the base shear taken up by the shear wall divided by the total base shear of building will get the % of the shea forces taken up by the shear wall
- And if that is less than 80%, then the more shear walls we need to add to the structure
RESULT:
Hence, the G+7 building has been modeled with all the required conditions as per Residential building and has been analysied succesfully using ETABS.