Project 2
To read temperature, humidity, and light intensity data using Raspberry Pi and send it to thingspeak.com, you will need to connect a DHT11 sensor for temperature and humidity, an LDR for light intensity, and a Wi-Fi module for internet connectivity. Also create a ThingSpeak account. Then, create a new channel by clicking on "New Channel" and filling in the required fields.Here we need three fields 1.Temperature 2.Humidity and 3.Light Intensity .Note down the Write API Key for the channel.
Use the write API key to send data from raspberry pi zero w to thingspeak.com
Here are the steps:
Connect the DHT11 sensor to the Raspberry Pi GPIO pins as follows:
VCC to 3.3V
DATA of DHT11 to GPIO 4
GND to GND
DATA of LDR to a GPIO 18.
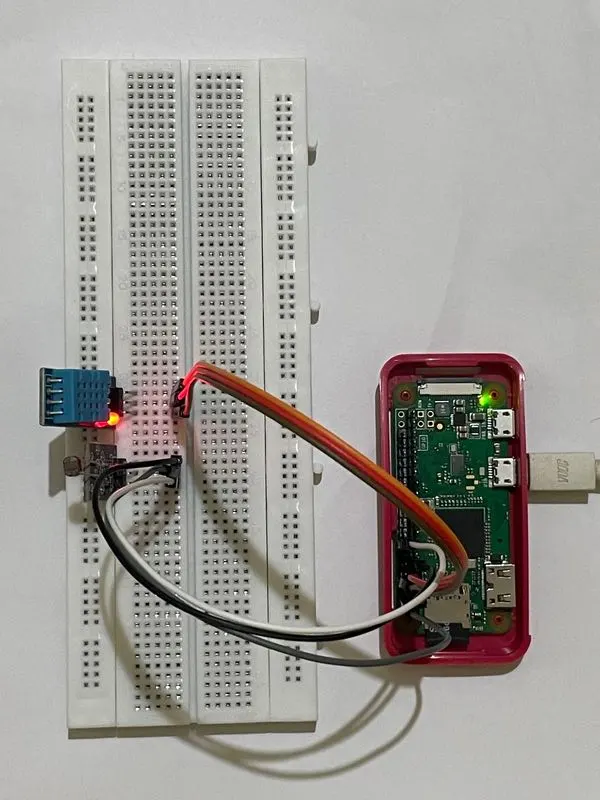
Connect the Wi-Fi module to the Raspberry Pi and configure it to connect to your Wi-Fi network.
Install the Adafruit DHT library for Python by running the following command in the terminal:
sudo pip install Adafruit_DHT
Install the requests library for Python by running the following command in the terminal:
sudo pip install requests
Write a Python script to read the temperature, humidity, and light intensity values and send them to the Thingspeak API
import RPi.GPIO as GPIO
import Adafruit_DHT
import time
import requests
GPIO.setmode(GPIO.BCM)
GPIO.setup(18, GPIO.IN)
DHT_SENSOR = Adafruit_DHT.DHT11
DHT_PIN = 4
API_KEY = '8CRLQW950GEF6N10'
def get_temperature_humidity():
humidity, temperature = Adafruit_DHT.read(DHT_SENSOR, DHT_PIN)
if humidity is not None and temperature is not None:
return temperature, humidity
else:
return None, None
def get_light_intensity():
value = GPIO.input(18)
if value == GPIO.HIGH:
return 0
else:
return 1
while True:
temperature, humidity = get_temperature_humidity()
light_intensity = get_light_intensity()
if temperature is not None and humidity is not None:
print("Temperature: ", temperature)
print("Humidity: ", humidity)
print("Light intensity: ", light_intensity)
# Send data to Thingspeak
url = 'https://api.thingspeak.com/update.json'
data = {'api_key': API_KEY, 'field1': temperature, 'field2': humidity, 'field3': light_intensity}
response = requests.post(url, data=data)
print("Response: ", response.text)
time.sleep(15)
In this code, the get_temperature_humidity() function reads the temperature and humidity values from the DHT11 sensor and returns them. The get_light_intensity() function reads the voltage on GPIO pin 18 and returns a value of 0 or 1 depending on whether the LDR is exposed to light or not. The while loop continuously reads the temperature, humidity, and light intensity values, sends them to the Thingspeak API using an HTTP POST request, and prints the server response to the console. The time.sleep(15) function call waits for 15 seconds before reading and sending the next set of sensor data.
Now run the program.
As the program is runned the data of temperature, humdity and light intesity will be sent to the thingspeak channel.
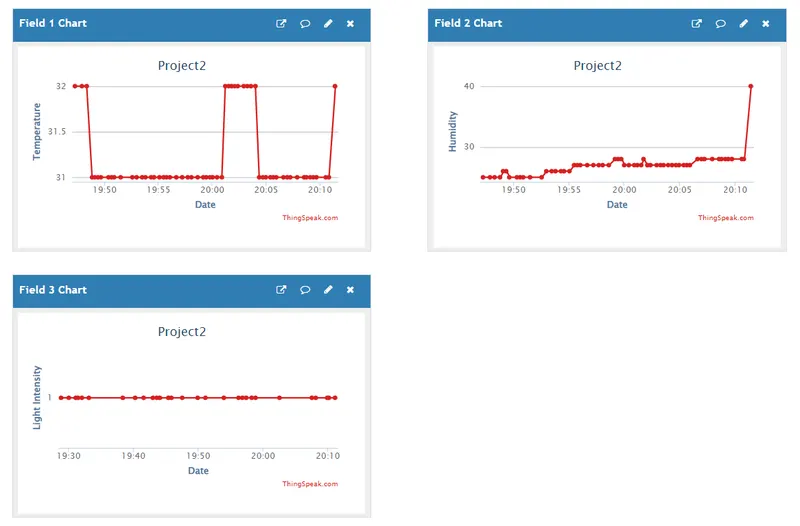
Now the data has been sent to cloud. You can use 'Add Visualisation' to see the changes that happen in the three fields as shown in the figure.
Now for creating an app to see the weather data using API's of thingspeak.com:
Here we use the read api key to read the data from thingspeak.com.
Go to Thunkable.com and sign up for an account.
Create a new project and choose a blank screen as the starting point.
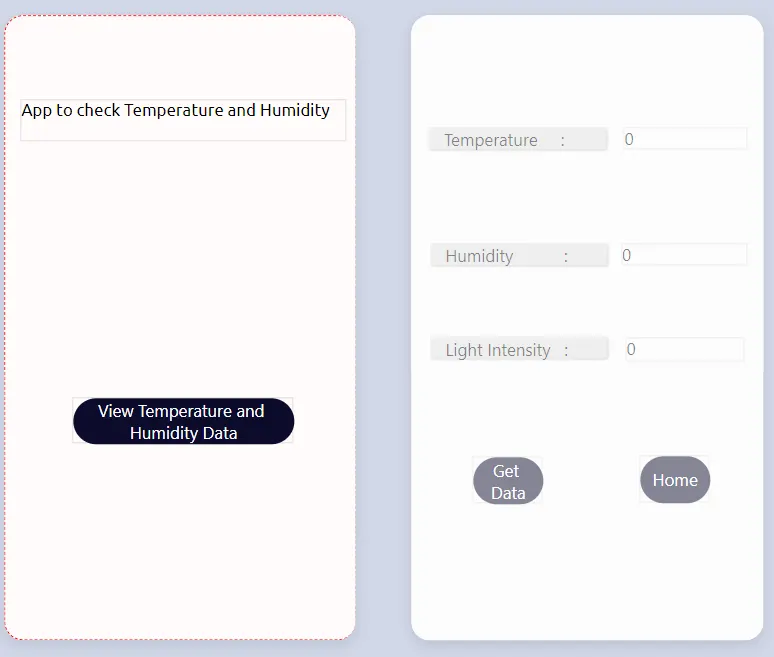
Create two screens .First screen is just to go to the next screen and in the second screen you add a button by which clicking it you get the data.
Add labels to the screen to display the sensor data. For example, you can add labels for temperature, humidity, and light intensity.
Click on the blocks tab to start programming the app.
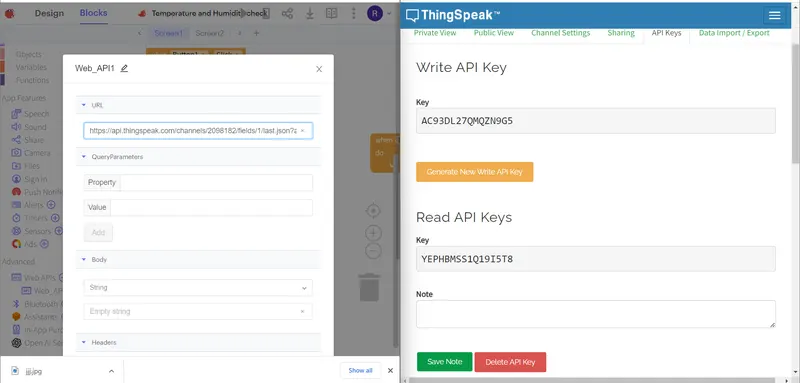
Add a "get web API" block from the Web component section.
Set the URL of the API to retrieve the data from the ThingSpeak channel.
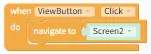
The above picture is the block section of first screen.
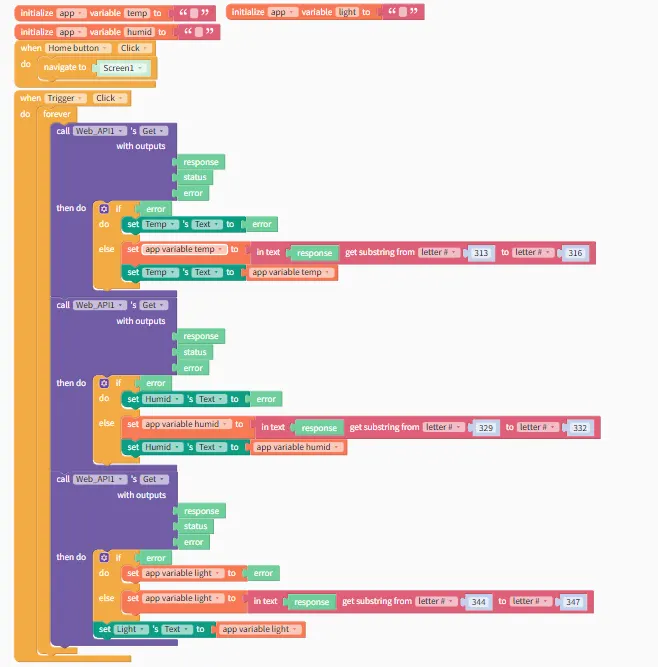
The above picture is the block section of second screen.
Test the app by clicking on the "Test" button and then clicking on the refresh button in the app. You should see the sensor data displayed in the labels.
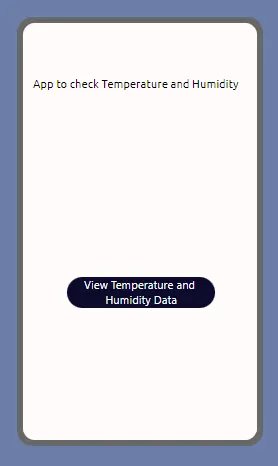
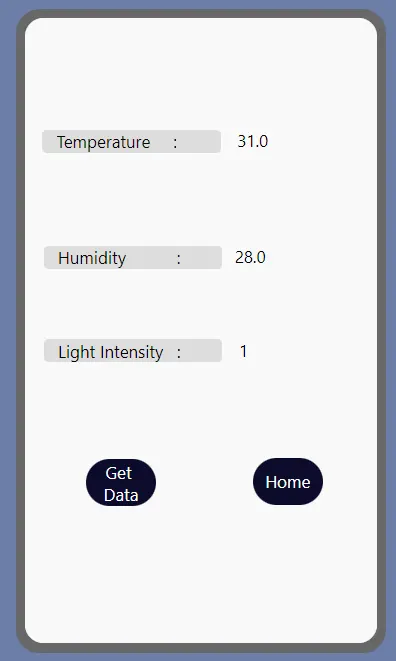
Now you can see the sensor data as seen in the above picture.