Project 11
Project title: Perform 2D Object Detection with TensorFlow's object detection API
Objective: To perform the training on a dataset with one of the object detection models of Tensorflow API and evaluate the performance of the model.
In order to perform the training on a custom dataset using object detection models of Tensorflow API, we need to go through the following steps.
1. First we have to install Tensorflow Object Detection API.
2. Prepare the dataset
3. Configure training
4. Train the model
5. Evaluate the model
6. Export the trained model
7. Test the model
To execute the above step I have followed Tensorflow 2.0 Object Detection API tutorial. To read click here TensorFlow 2.0 Object Detection API tutorial
Step 1:Installing TensorFlow's Object Detection API
- Open the anaconda prompt and Create a new virtual environment using the following command as shown below:
- Type the following command:

- The above command will create a virtual environment with the name tensorflow
- now activate the newly created environment, and you will see the environment name in the bracket at the beginning.

- Now install the tensorflow package in the above environment with the following command.

- this will install the TensorFlow package in the above-activated environment.
- To run Tensorflow on the GPU platform, the machine should have a CUDA-capable GPU(a GPU made by NVIDIA).
- We can check whether a computer has a CUDA-capable GPU in the Windows Device manager as follows.
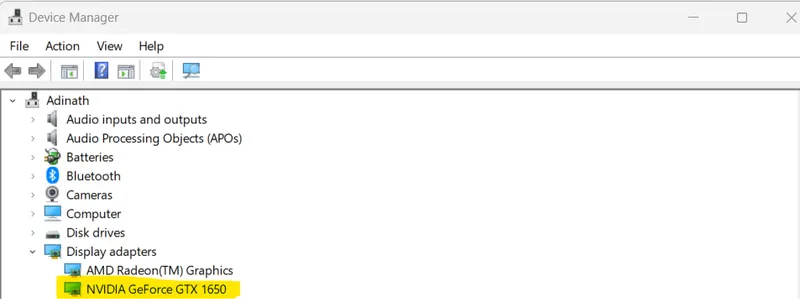
- If the computer has an NVIDIA card that is listed in http://developer.nvidia.com/cuda-gpus that GPU is CUDA capable.
- As we can see above I have an NVIDIA GeForce GTX 1650 card which is CUDA Capable GPU.
- Next, we have to install the latest version of the CUDA Toolkit and cuDNN for our OS(windows).
- Follow the installation instruction given in this document CUDA Installation Guide for Microsoft Windows
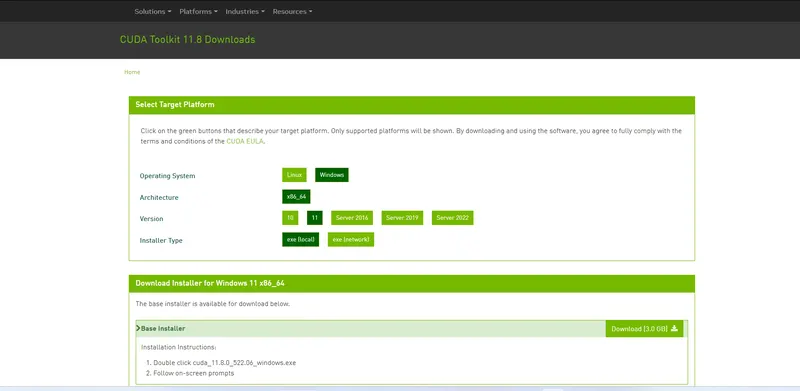
- Download the latest version of the CUDA Toolkit for OS at http://developer.nvidia.com/cuda-downloads
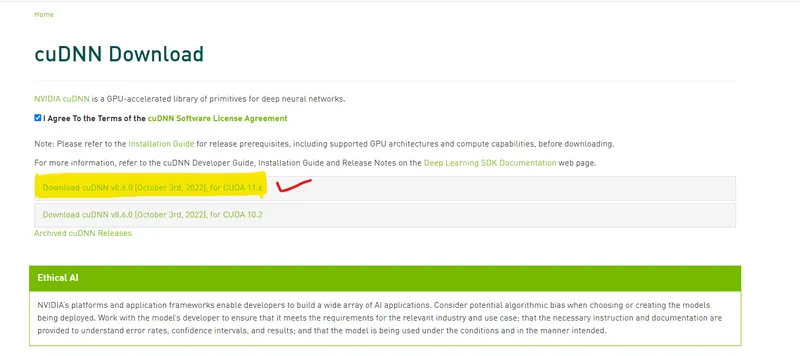
- Download the compatible latest version of the cuDNN library at https://developer.nvidia.com/rdp/cudnn-download
- Follow the instruction given in the install cuDNN section in Tensorflows 2.0 Object detection tutorial.
- Verify installation by using the following command


- Till we have completed the prerequisites that are required to start working with the TensorFlow Object Detection API.
- Next, It's time to install TensorFlow Object Detection API.
TensorFlow Object Detection API Installation
- First I created a folder under this path (C:\Users\adina\OneDrive\Desktop\Computer vision\TensorFlow) and named it TensorFlow.
- Download Tensorflow Model Garden as a zip.
- To download the TensorFlow Model Garden go to the link TensorFlow Model repo and then click on the Code button and download ZIP.
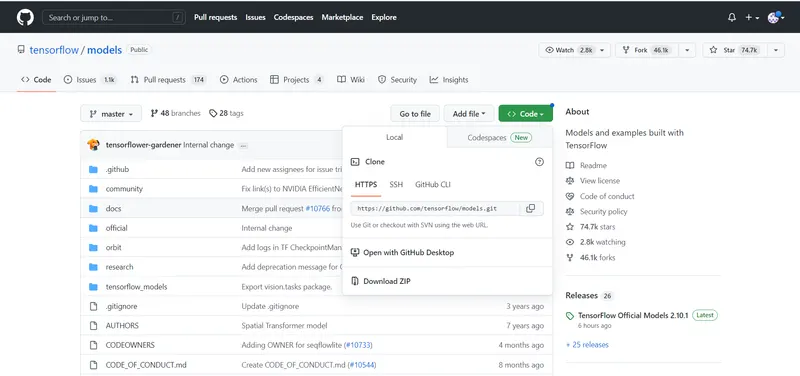
- Now extract the downloaded ZIP inside the TensorFlow folder and change the name model-master to model.
- Inside the model, will see the four subfolders as shown below.
-
TensorFlow/
└─ models/
   ├─ community/
   ├─ official/
   ├─ orbit/
   ├─ research/
- Protobuf installation/compilation
- The Tensorflow Object Detection API uses Protobufs to configure model and training parameters. Before the framework can be used, the Protobuf libraries must be downloaded and compiled.
- I downloaded the protoc-3.12.3-win64.zip file for 64-bit windows from https://github.com/protocolbuffers/protobuf/releases/tag/v3.12.3
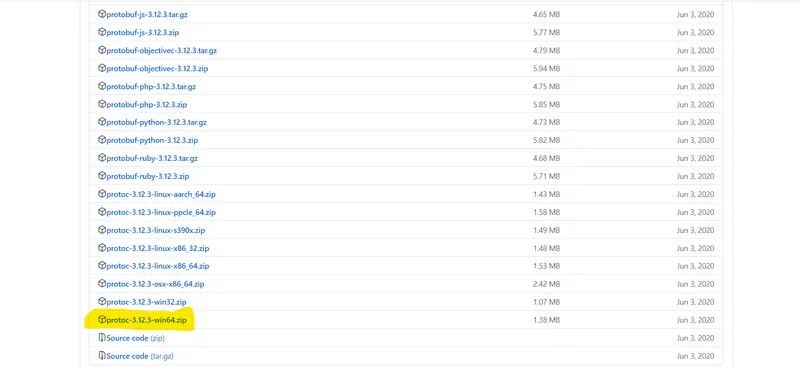
- Extract the downloaded zip file at this location C:\Program Files\Google Protobuf

- Add this C:\Program Files\Google Protobuf\bin to your
Pathenvironment variable as shown below 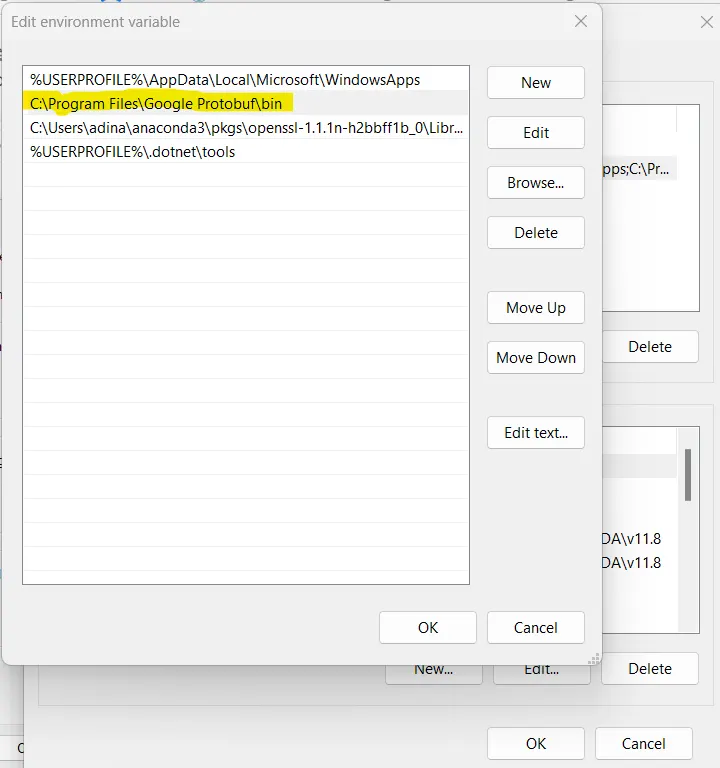
- Now change the directory into
TensorFlow/models/research/directory - and run the following command:protoc object_detection/protos/*.proto --python_out=.
- As shown below:

- COCO API Installation
- As of TensorFlow 2.x, the pycocotools package is listed as a Dependency of the Object detection API
- Ideally, this package should get installed when installing Object Detection API in the upcoming section, but due to various reasons installation may fail so it is recommended that install this package beforehand.
- To install pycocotools use the following command:
- pip install cython

- pip install git+https://github.com/philferriere/cocoapi.git#subdirectory=PythonAPI

- Install object detection API
- Copy the setup.py file to the research folder by using the following command:
- copy object_detection\packages\tf2\setup.py

- then use this command: python -m pip install

- This will install the Dependencies of the object detection API listed in the setup.py file
- let's test our installation run the following command: python object_detection/builders/model_builder_tf2_test.py

- If everything was installed correctly, you should see something like:
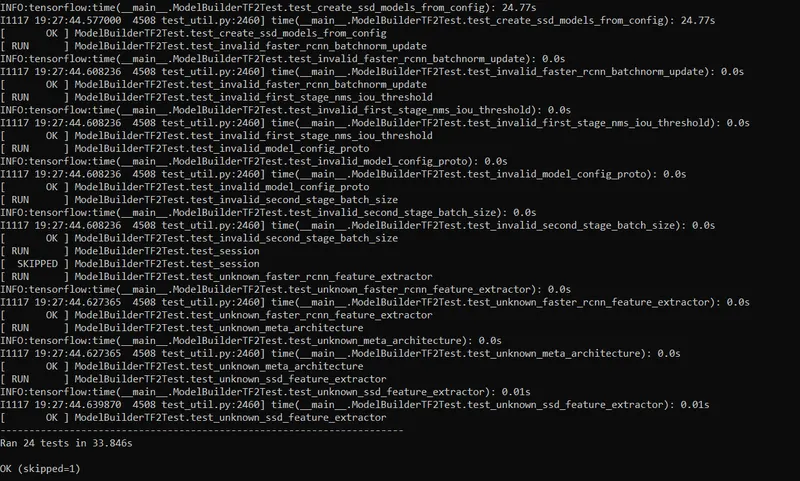
- Congratulation! we have successfully installed Object Detection API and completed the first step.
Step 2:Data preparation
- Create a new folder under the TensorFlow folder and call it workspace.
- Under workspace create another folder named training_demo
-
TensorFlow/
├─ models/
│  ├─ community/
│  ├─ official/
│  ├─ orbit/
│  ├─ research/
│  └─ ...
└─ workspace/
   └─ training_demo/
- The training_demo folder shall be our training folder, which will contain all files related to our model training.
- The typical structure for training folders is shown below.
-
training_demo/
├─ annotations/
├─ exported-models/
├─ images/
│  ├─ test/
│  └─ train/
├─ models/
├─ pre-trained-models/
- annotation: This folder is used to store the label_map.pbtxt and TensorFlow test.record, train.record files.
- exported_models: This is used to store the exported versions of custom-trained models.
- images/train: this folder contains the copy of images and their respective .xml files which are used to train the model
- Similarly images/test: this folder contains images and their respective .xml files which are used to test our custom-trained model
- models: This folder will contain a sub-folder for each training job. Each subfolder will contain the training pipeline configuration file
*.config, as well as all files generated during the training and evaluation of our model. - pre-trained-models: This folder will contain the downloaded pre-trained models, which shall be used as a starting checkpoint for our training jobs.
- Data collection
- For training the custom object detector, I have created a small image dataset by extracting frames from a video file which is downloaded from Kaggle
- Frames are extracted from the video using the following script.
-
#Extracting frames from video import cv2 videopath ='./traffic_video.avi' print('videopath',videopath) video = cv2.VideoCapture(videopath) count = 0 while True: ret,frame = video.read() name = './img/image' + str(count) + '.jpg' print ('Creating...' + name) cv2.imwrite(name,frame) count += 1 video.release() cv2.destroyAllWindows() 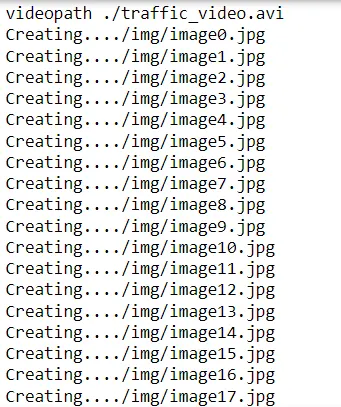
- After collecting the image dataset move 90% of images to the training_demo/images/train folder and the remaining 10% to the training_demo/images/test folder.
- Annotate dataset:
- Annotation of images is done by using labelImg software.
- To install labelImg I followed the instruction given in the install labelImg section and completed the installation. see the folder structure
- To Download the labelImg package go to this repo https://github.com/heartexlabs/labelImg
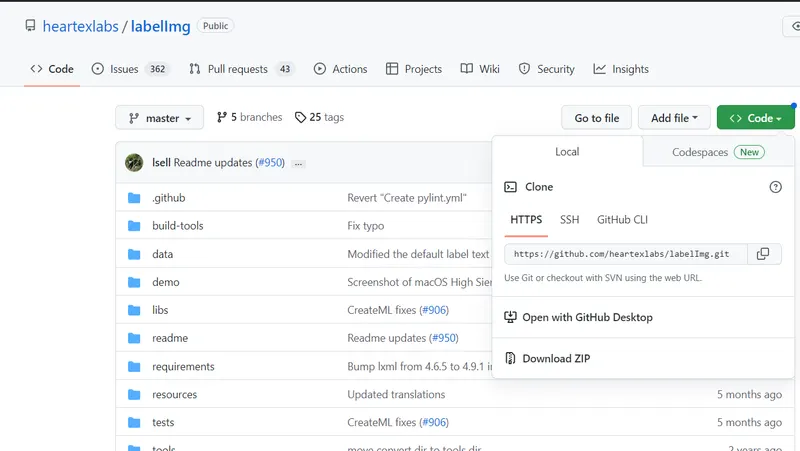
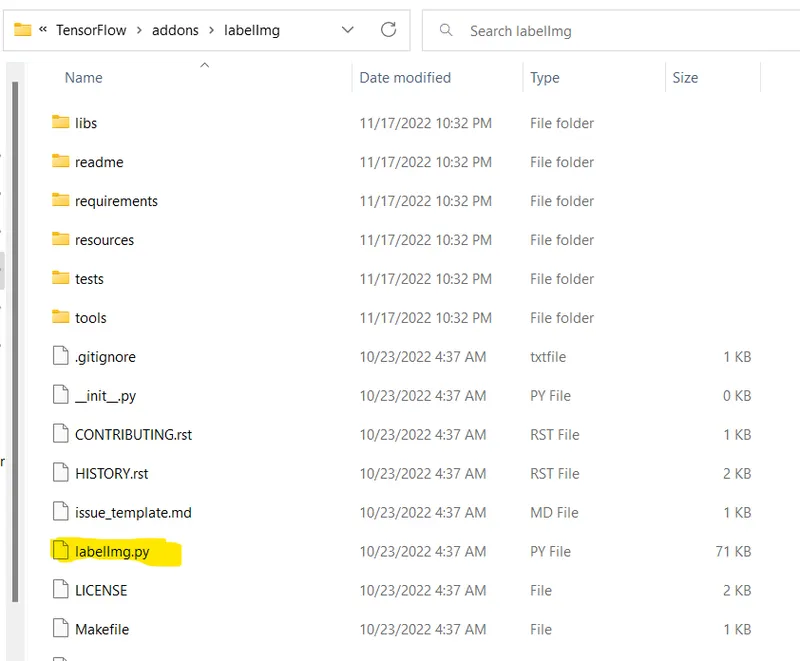
- Now download the zip folder and extract it inside the addons and change the name from labelImg-master to labelImg.
- see the folder structure
-
TensorFlow/
├─ addons
│  └─ labelImg/
└─ models/
   ├─ community/
   ├─ official/
   ├─ orbit/
   ├─ research/
   └─ ...
- Inside the labelImg folder, we can see the following
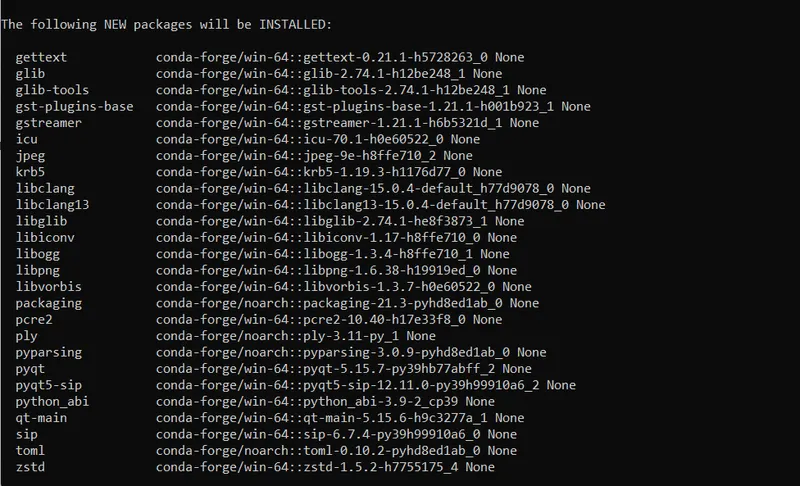
- Install dependencies and compile the packages using the following command
- conda install pyqt=5
- pyrcc5 -o libs/resources.py resources.qrc

- This will install the following packages
- Annotate images
- After collecting the dataset and installing labelimg, the next step is to annotate both train and test images.
- change the directory to the labeImg folder and run the following command, it will open the labelImg Application as shown below

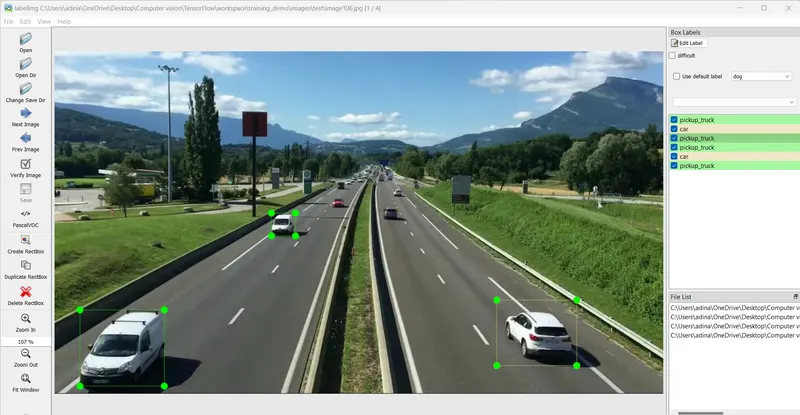
- once open, In order to annotate images go to open dir and select the image folder and start creating bounding boxes around the object and give labels to them as shown below.
- once we annotate all the images a set of new
*.xmlfiles, one for each image, should be generated inside yourtraining_demo/imagesfolder as shown below 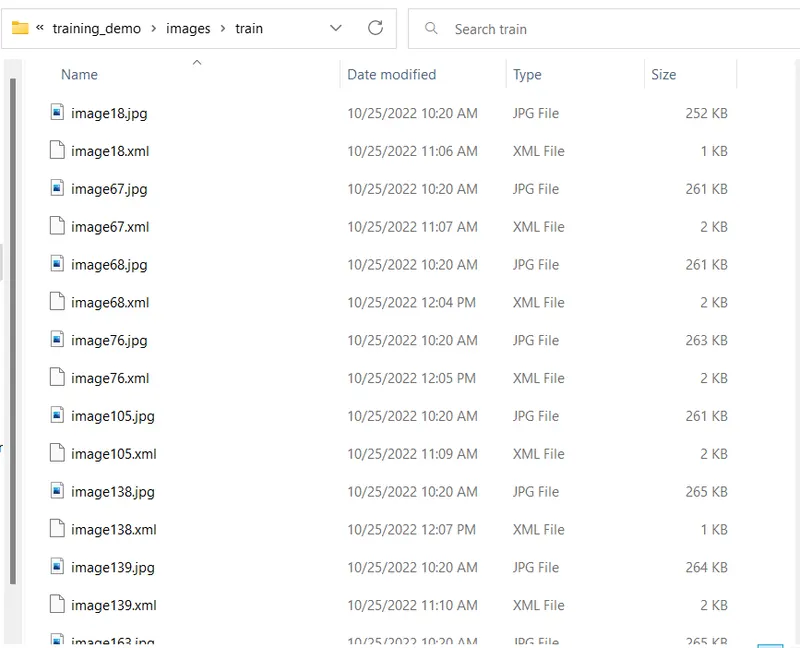
- Create a label map
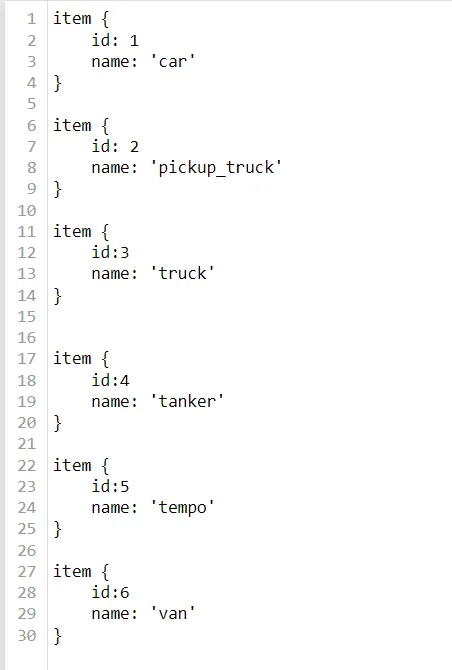
- TensorFlow requires a label map, which namely maps each of the used labels to an integer value. This label_map is used both by the training and detection processes.
- Label map files have the extension
.pbtxtand should be placed inside thetraining_demo/annotationsfolder. - I have created label_map for my custom classes as shown below
- Create TensorFlow records
- Now that we have generated our annotations and split our dataset into the desired training and testing subsets, it is time to convert our annotations into the so-called
TFRecordformat. - We need TFRecord format for our input data so we have to convert *.xml to *.record.
- To do this transformation I have downloaded generate_tfrecord.py and saved it inside the folder Tensorflow/workspace/training_demo
- see the folder structure
-
TensorFlow/
├─ addons/ (Optional)
│  └─ labelImg/
├─ models/
│  ├─ community/
│  ├─ official/
│  ├─ orbit/
│  ├─ research/
│  └─ ...
├─ scripts/
│  └─ preprocessing/
└─ workspace/
   └─ training_demo/
- now change the directory into workspace/training_demo and run the following command
- train record:python generate_tfrecord.py -x ./images/train -l ./annotations/label_map.pbtxt -o ./annotations/train.record

- test record:python generate_tfrecord.py -x ./images/test -l ./annotations/label_map.pbtxt -o ./annotations/test.record

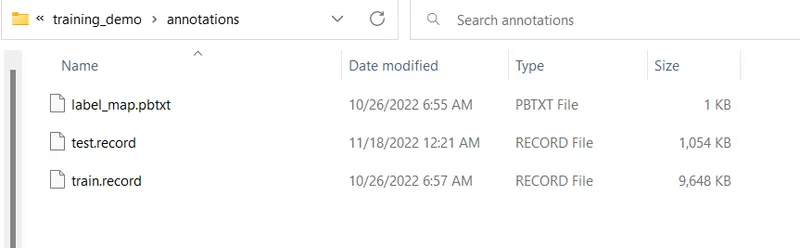
- After executing the above commands, you should have a train.record and test.record file inside the annotations folder.
Step 3: Model selection & configure training
- In this, we will not be creating training jobs from scratch, but rather we will reuse one of the pre-trained models available in TensorFlow 2 Object Detection Model Zoo
- See The List of pre-trained models available in Model Zoo
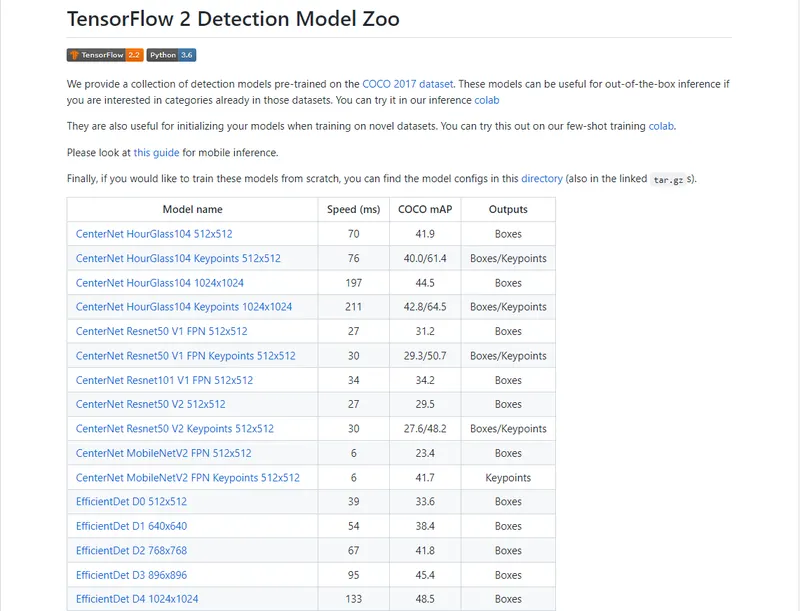
- In This, we will be using the SSD ResNet50 V1 FPN 640x640 pre-trained model.
- To Download the model, go to the TensorFlow 2 Object Detection Model Zoo and Choose the model that you are going to work with it.
- Next, Click on the selected model e.g SSD ResNet50 V1 FPN 640x640 it will initiate downloading the file in *.tar.gz format.
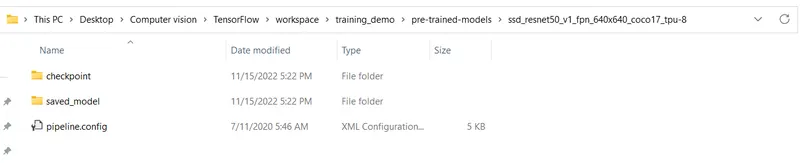
- Extract *.tar.gz downloaded file into this training_demo/pre-trained-models directory.awe can see directory struture
-
training_demo/
├─ ...
├─ pre-trained-models/
│  └─ ssd_resnet50_v1_fpn_640x640_coco17_tpu-8/
│     ├─ checkpoint/
│     ├─ saved_model/
│     └─ pipeline.config
└─ ...
- Configuring the training pipeline
- We have downloaded and extracted the pre-trained model. Now we want to configure it.
- Let's understand why we want to configure the model. There are multiple reasons :
- 1. When Your problem domain and dataset are different from the one that was used to train the original model
- 2. The objects you try to detect might be completely different from what a pre-trained model was supposed to detect.
- 3. You have a different number of object classes to detect.
- In order to configure model,let’s create a directory for our training job. Under the training_demo/models create new directory named my_ssd_resnet50_v1_fpn and copy the pipeline.config from training_demo/pre-trained-models/ssd_resnet50_v1_fpn_640x640_coco17_tpu-8/pipeline.config file to newly created directory.as shown below.
-
training_demo/
├─ ...
├─ models/
│  └─ my_ssd_resnet50_v1_fpn/
│     └─ pipeline.config
└─ ...
- Now open the file pipeline.config file from training_demo/models/my_ssd_resnet50_v1_fpn using text editor or any IDE.when file is opened it looks something like.
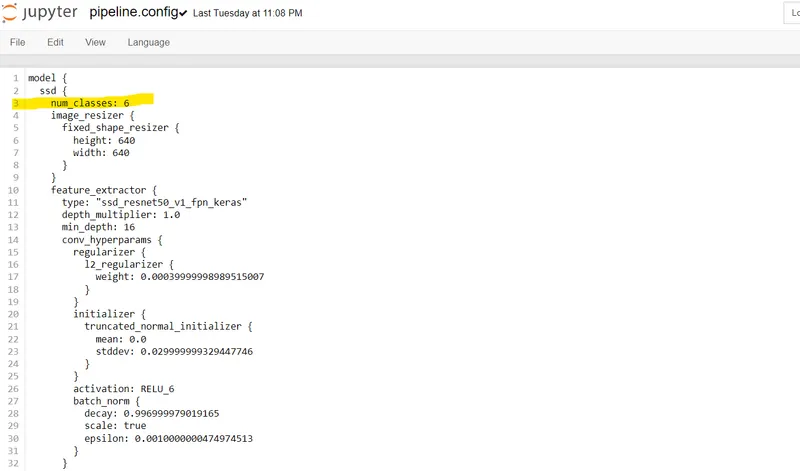
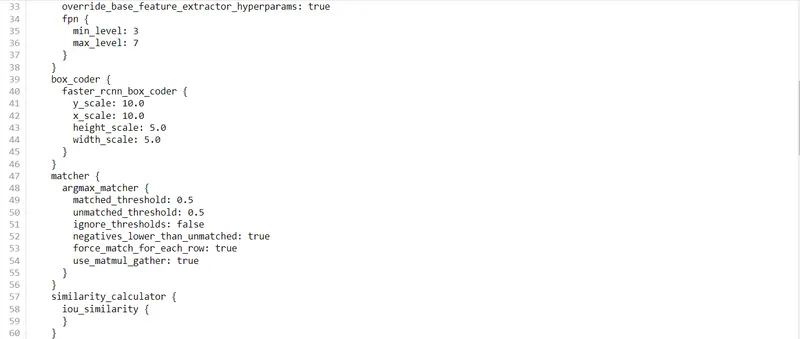
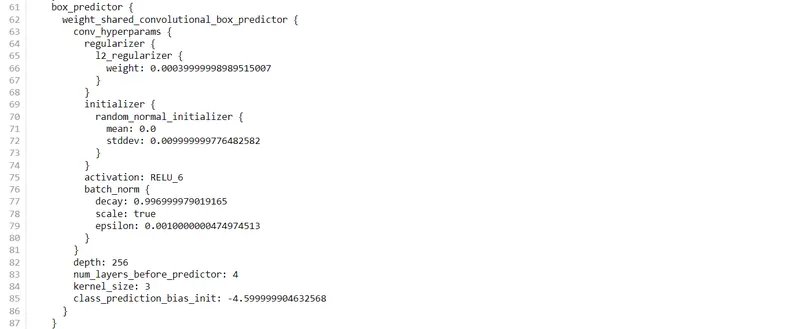
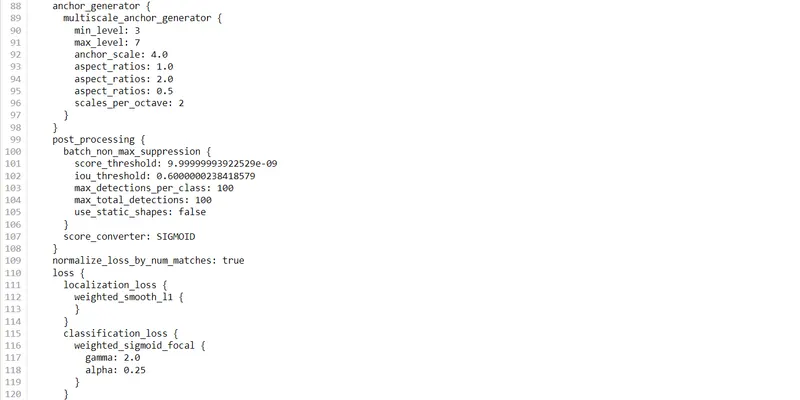
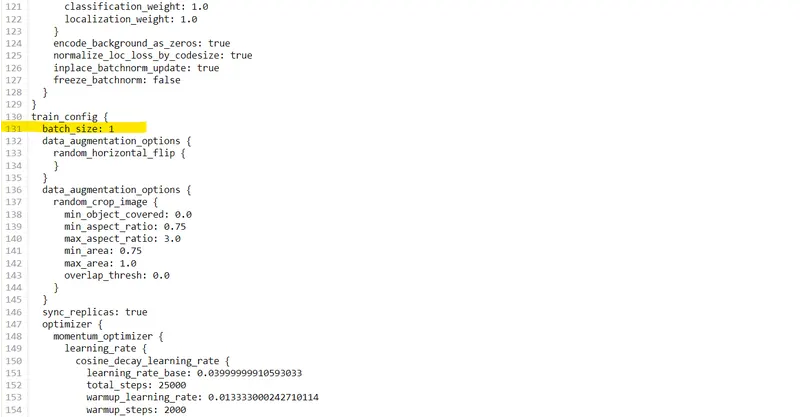
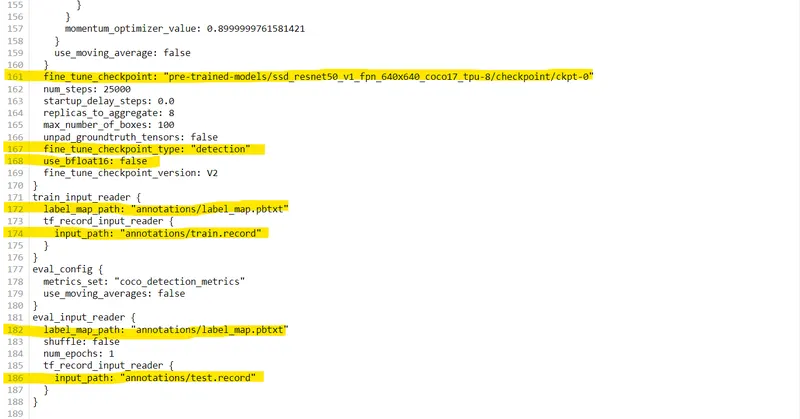
- Also, look at the changes that I made in the pipeline.config file which is highlighted in yellow color.
- line 3: num_classes = 6, # Set this to the number of different labeled classes
- line 131: batch_size = 1,# Increasing batch size also increases memory and vice versa
- line 161: fine_tune_checkpoint: "pre-trained-models/ssd_resnet50_v1_fpn_640x640_coco17_tpu-8/checkpoint/ckpt-0" # Path to the checkpoint of a pre-trained model.
- line 167: fine_tune_checkpoint_type: "detection" # Set this to "detection" since we want to be training the full detection model.
- line 168: use_bfloat16: false # Set this to false if you are not training on a TPU
- line 172: label_map_path: "annotations/label_map.pbtxt" # Path to label map file
- line 174: input_path: "annotations/train.record" # Path to training TFRecord file.
- line 182: label_map_path: "annotations/label_map.pbtxt" # Path to label map file
- line 186: input_path: "annotations/test.record" # Path to testing TFRecord.
Step 4: Training the Model
- In order to train the model we need a model_main_tf2.py script.
- So before we begin training our model, let's copy the model_main_tf2.py file from this directory TensorFlow/models/research/object_detection/model_main_tf2.py and paste it into our
training_demo. - Now, to initiate a new training job,
- 1. open a new anaconda prompt terminal and activate tensorflow environment.
- 2. Change the directory inside the
training_demofolder and run the following command:python model_main_tf2.py --model_dir=models/my_ssd_resnet50_v1_fpn --pipeline_config_path=models/my_ssd_resnet50_v1_fpn/pipeline.config 
- Once the training process has been initiated, we will get something like this
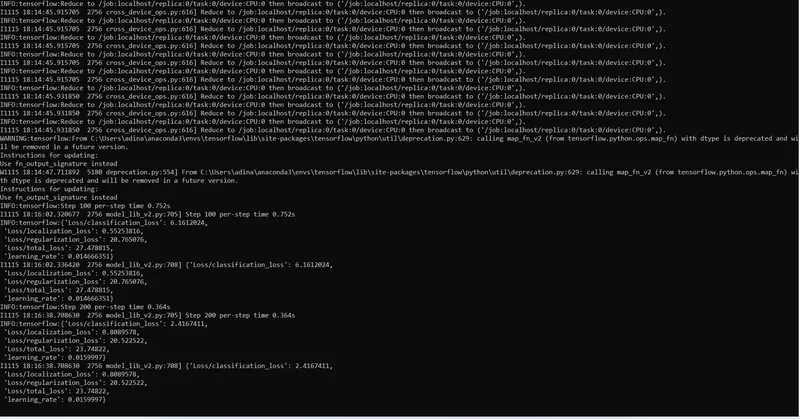
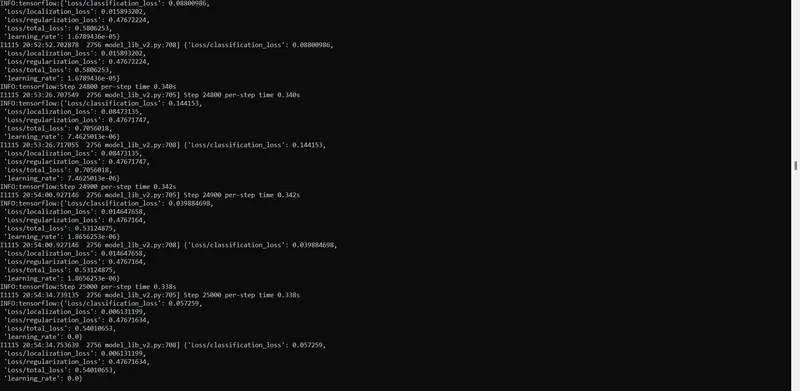
- The training script saves checkpoints every few minutes. Train the model until it reaches a satisfying loss.
- See a directory of the training folder after training the model.
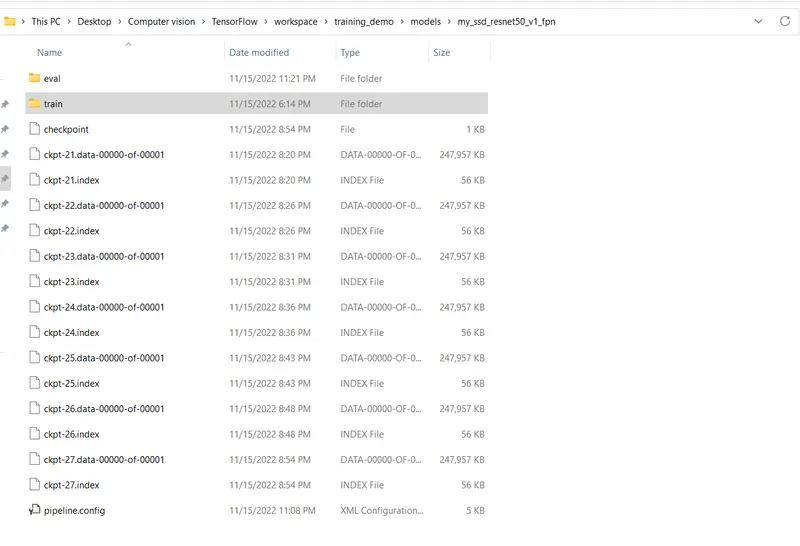
- The training result is stored in the form of tf event files (
events.out.tfevents.*) inside themodels/my_ssd_resnet50_v1_fpn/train 
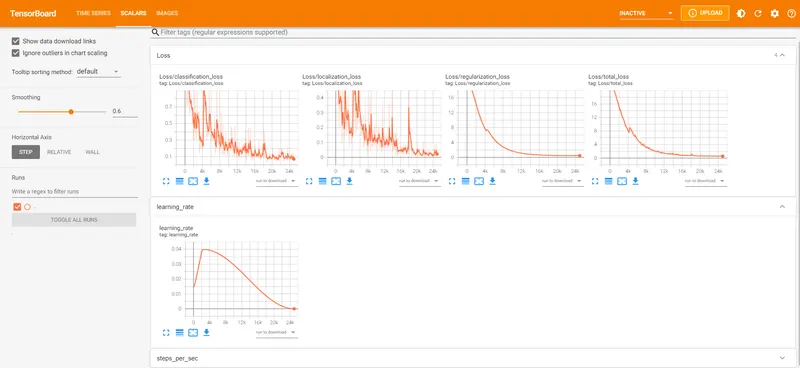
- Monitoring the training job progress using Tensorboard.
- To start a new TensorBoard server, change the directory inside the training_demo/models/my_ssd_resnet50_v1_fpn/train and then use the following command:tensorboard --logdir=.

- Once this is done, go to your browser and type
http://localhost:6006/in your address bar and this will open the webpage as shown below. - See Training Results and Loss inside of Tensorboard
Step 5: Evaluating the Performance of Tensorflow Object Detection Models
- In order to evaluate the model
- 1. open a new terminal.
- 2. activate the tensorflow environment and change the directory inside the training_demo folder.
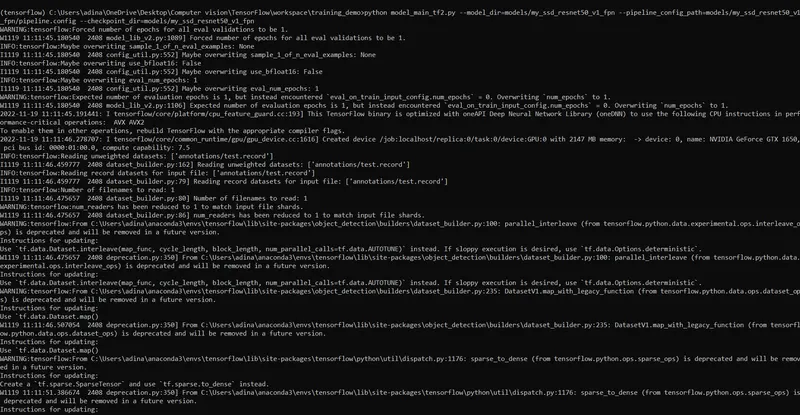
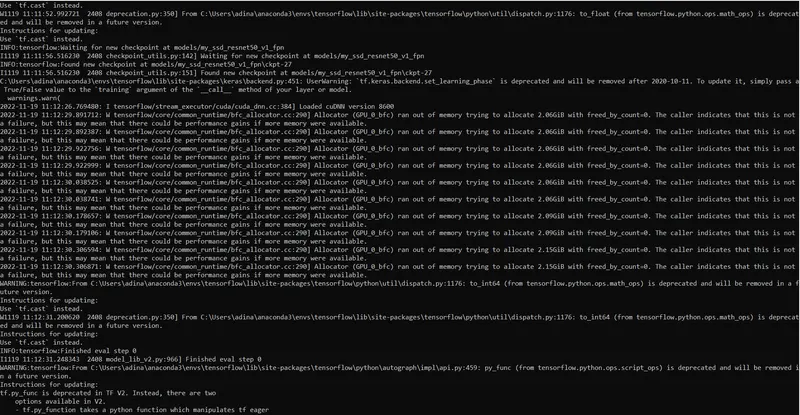
- 3. Run the following command :python model_main_tf2.py --model_dir=models/my_ssd_resnet50_v1_fpn --pipeline_config_path=models/my_ssd_resnet50_v1_fpn/pipeline.config --checkpoint_dir=models/my_ssd_resnet50_v1_fpn

- After executing above command we will get something like
- Mean Average Precision (mAP) and Average Recall (AR) of the model
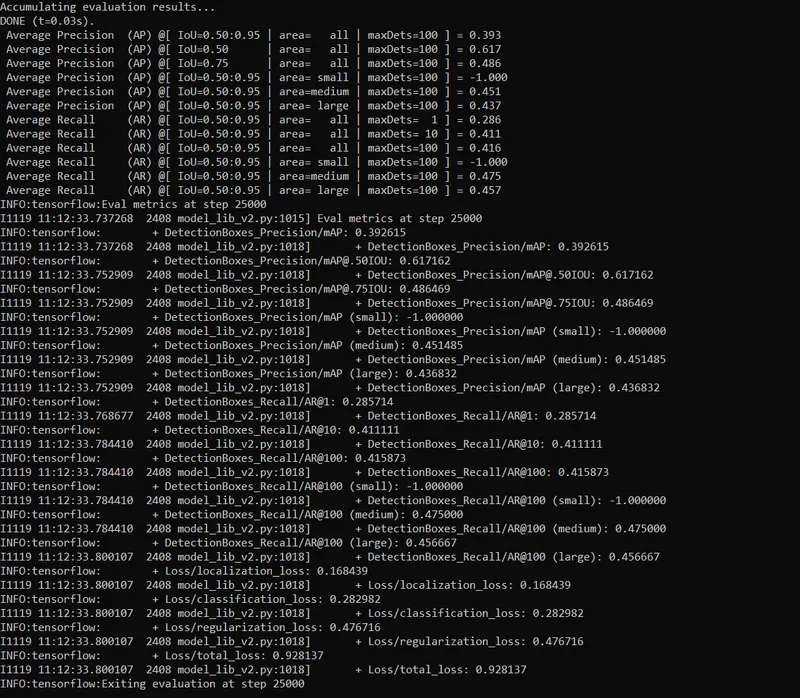
- To evaluate the performance of the model it uses the latest
models/my_ssd_resnet50_v1_fpn/ckpt-*checkpoint files. - and the results are stored in the form of tf event files (
events.out.tfevents.*) insidemodels/my_ssd_resnet50_v1_fpn/eval. 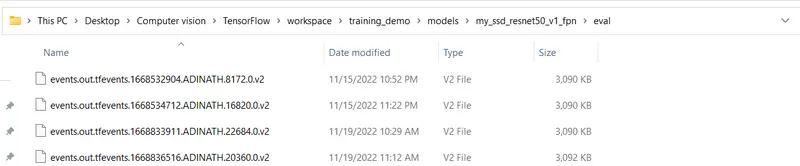
- These files can then be used to monitor the computed metrics using tensorboard.
- To start a new TensorBoard server, change the directory inside the training_demo/models/my_ssd_resnet50_v1_fpn/eval and then type the following command:tensorboard --logdir=.

- Now go to open browser and type
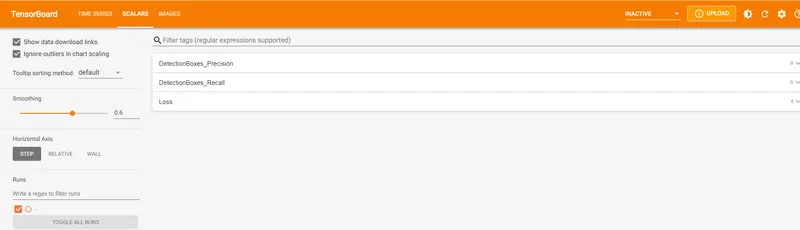
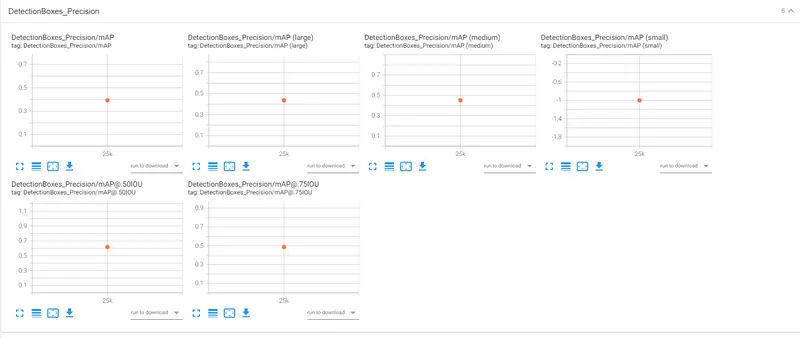
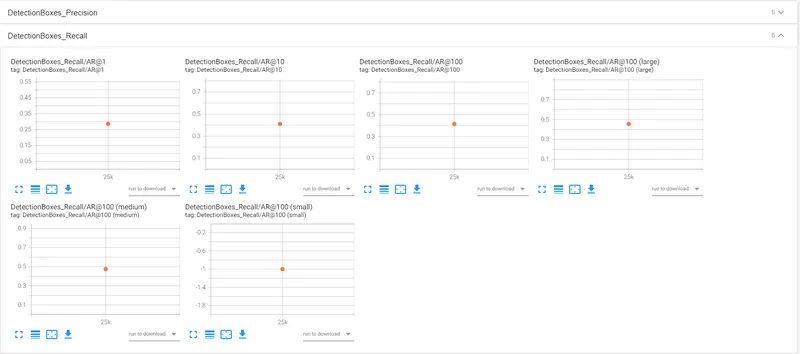
http://localhost:6006/in your address bar and this will open a new dashboard. - See mAP and AR of the model using Tensorboard
- Precision
- Recall
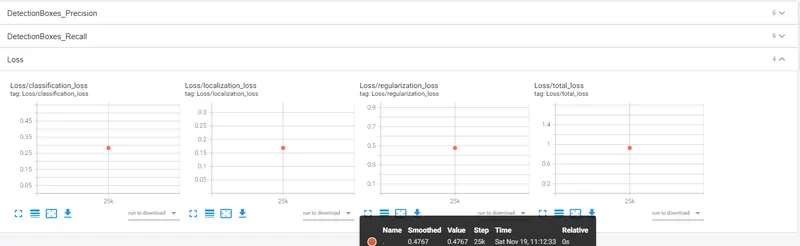
- Loss
Step 5: Exporting the Trained model
- Once the training job is completed,we need to extract the newly trained inference graph, later which is used to perform object detection.
- So in order to export the trained model, copy exporter_main_v2.py script from this directory TensorFlow/models/research/object_detection/ and paste it into the training_demo folder
- open a new terminal, activate environment, change directory inside the training_demo and finally use following command to export the trained model as shown below.
- python .\exporter_main_v2.py --input_type image_tensor --pipeline_config_path .\models\my_ssd_resnet50_v1_fpn\pipeline.config --trained_checkpoint_dir .\models\my_ssd_resnet50_v1_fpn\ --output_directory .\exported-models\my_model
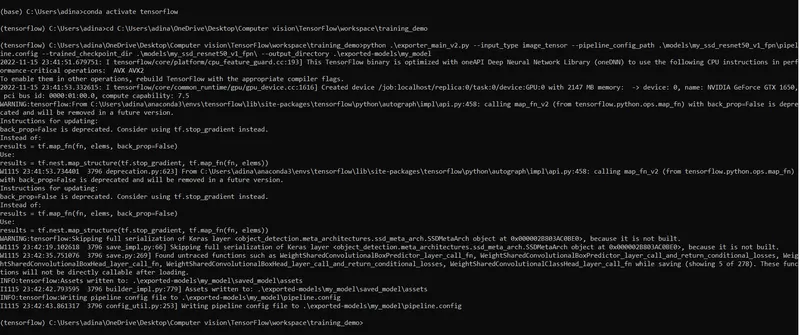
- once above execution complete,we can see new folder my_model inside the training_demo/exported-models directory as shown below.
-
training_demo/
├─ ...
├─ exported-models/
│  └─ my_model/
│     ├─ checkpoint/
│     ├─ saved_model/
│     └─ pipeline.config
└─ ...
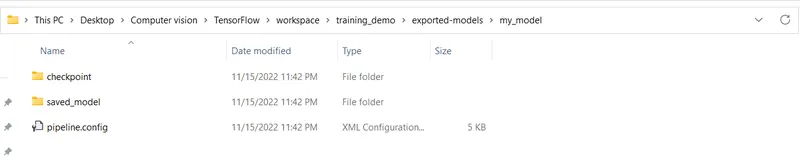
- Now this exported custom model is used to perform object detection
Step 6: Testing/Inferencing the trained model on images
- We trained the model on the custom dataset and exported it to an inference graph, which can be used for inferencing.
- We can use the following Inferencing script to test the model on images.
-
#Importing libraries import os os.environ['TF_CPP_MIN_LOG_LEVEL'] = '2' # Suppress TensorFlow logging (1) import numpy as np import pathlib import tensorflow as tf import cv2 import argparse import glob from IPython.display import display from PIL import Image import matplotlib.pyplot as plt import warnings warnings.filterwarnings('ignore') # Suppress Matplotlib warnings #Enable GPU dynamic memory allocation gpus = tf.config.experimental.list_physical_devices('GPU') for gpu in gpus: tf.config.experimental.set_memory_growth(gpu, True) #path to test image directory IMAGE_PATHS = r"C:\Users\adina\OneDrive\Desktop\Computer vision\TensorFlow\workspace\training_demo\images\test\*.jpg" #Path to the model directory PATH_TO_MODEL_DIR = r"C:\Users\adina\OneDrive\Desktop\Computer vision\TensorFlow\workspace\training_demo\exported-models\my_model" # Path to label Map PATH_TO_LABELS = r"C:\Users\adina\OneDrive\Desktop\Computer vision\TensorFlow\workspace\training_demo\annotations\label_map.pbtxt" #loadig model import time from object_detection.utils import label_map_util from object_detection.utils import visualization_utils as viz_utils PATH_TO_SAVED_MODEL = PATH_TO_MODEL_DIR + "\saved_model" print('Loading model...', end='') start_time = time.time() #Load the saved model and Build the detection function detect_fn = tf.saved_model.load(PATH_TO_SAVED_MODEL) end_time = time.time() elapsed_time = end_time - start_time print('Done! Took {} seconds'.format(elapsed_time)) #load Label Map Data for plotting category_index = label_map_util.create_category_index_from_labelmap(PATH_TO_LABELS, use_display_name=True) #Below function is used to run the inference on an input image and plot the result def inference_with_plot(IMAGE_PATHS,box_th=0.7): img_num = 1 for IMAGE_PATH in glob.glob(IMAGE_PATHS): image = cv2.imread(IMAGE_PATH) image_rgb = cv2.cvtColor(image, cv2.COLOR_BGR2RGB) image_expanded = np.expand_dims(image_rgb, axis=0) # The input needs to be a tensor, convert it using `tf.convert_to_tensor`. input_tensor = tf.convert_to_tensor(image) # The model expects a batch of images, so add an axis with `tf.newaxis`. input_tensor = input_tensor[tf.newaxis, ...] # input_tensor = np.expand_dims(image_np, 0) detections = detect_fn(input_tensor) # All outputs are batches tensors. # Convert to numpy arrays, and take index [0] to remove the batch dimension. # We're only interested in the first num_detections. num_detections = int(detections.pop('num_detections')) detections = {key: value[0, :num_detections].numpy() for key, value in detections.items()} detections['num_detections'] = num_detections #detection_classes should be ints. detections['detection_classes'] = detections['detection_classes'].astype(np.int64) image_with_detections = image.copy() #SET MIN_SCORE_THRESH BASED ON YOU MINIMUM THRESHOLD FOR DETECTIONS viz_utils.visualize_boxes_and_labels_on_image_array( image_with_detections, detections['detection_boxes'], detections['detection_classes'], detections['detection_scores'], category_index, use_normalized_coordinates=True, max_boxes_to_draw=200, min_score_thresh=box_th, agnostic_mode=False, line_thickness=5) #Save detections cv2.imwrite(f'./detected_images/output_{img_num}.png',image_with_detections) img_num+=1 #Display detections display(Image.fromarray(image_with_detections)) print('Done') #Use the following function to test the model on video. #videopath videopath = "./video/traffic_video.avi" def run_inference(videopath,box_th = 0.8): cap = cv2.VideoCapture(videopath) width= int(cap.get(cv2.CAP_PROP_FRAME_WIDTH)) height= int(cap.get(cv2.CAP_PROP_FRAME_HEIGHT)) writer= cv2.VideoWriter('./video/output.mp4', cv2.VideoWriter_fourcc(*'DIVX'), 20, (width,height)) while cap.isOpened(): ret,frame = cap.read() #if ret 0, then we have reached the end if not ret: break frame_rgb = cv2.cvtColor(frame,cv2.COLOR_BGR2RGB) frame_expanded = np.expand_dims(frame_rgb,axis=0) # The input needs to be a tensor, convert it using `tf.convert_to_tensor`. input_tensor = tf.convert_to_tensor(frame) # The model expects a batch of images, so add an axis with `tf.newaxis`. input_tensor = input_tensor[tf.newaxis, ...] # input_tensor = np.expand_dims(image_np, 0) detections = detect_fn(input_tensor) # All outputs are batches tensors. # Convert to numpy arrays, and take index [0] to remove the batch dimension. # We're only interested in the first num_detections. num_detections = int(detections.pop('num_detections')) detections = {key: value[0, :num_detections].numpy() for key, value in detections.items()} detections['num_detections'] = num_detections # detection_classes should be ints. detections['detection_classes'] = detections['detection_classes'].astype(np.int64) image_with_detections = frame.copy() # SET MIN_SCORE_THRESH BASED ON YOU MINIMUM THRESHOLD FOR DETECTIONS viz_utils.visualize_boxes_and_labels_on_image_array( image_with_detections, detections['detection_boxes'], detections['detection_classes'], detections['detection_scores'], category_index, use_normalized_coordinates=True, max_boxes_to_draw=200, min_score_thresh=box_th, agnostic_mode=False, line_thickness=5) writer.write(image_with_detections) #save output video cv2.imshow('object_detection', cv2.resize(image_with_detections, (800, 600))) if cv2.waitKey(25) & 0xFF == ord('q'): cap.release() cv2.destroyAllWindows() break run_inference(videopath) - See the result of object detections in images.
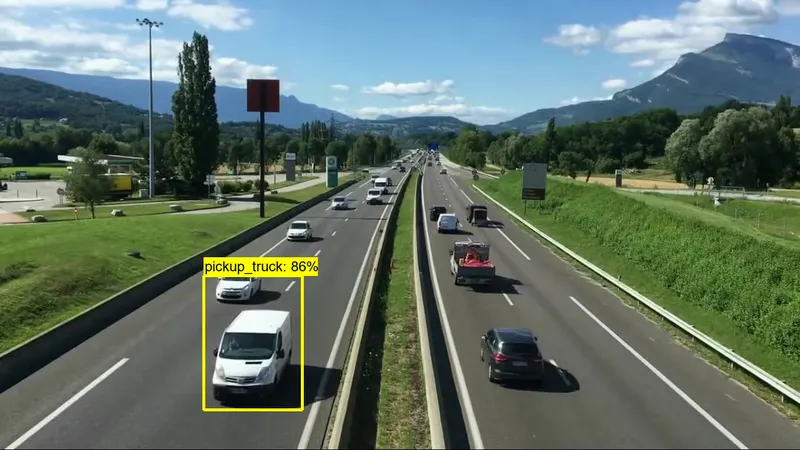
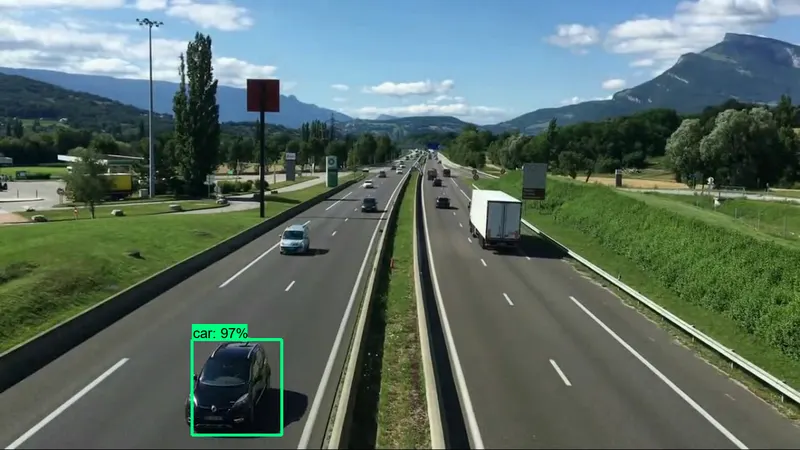
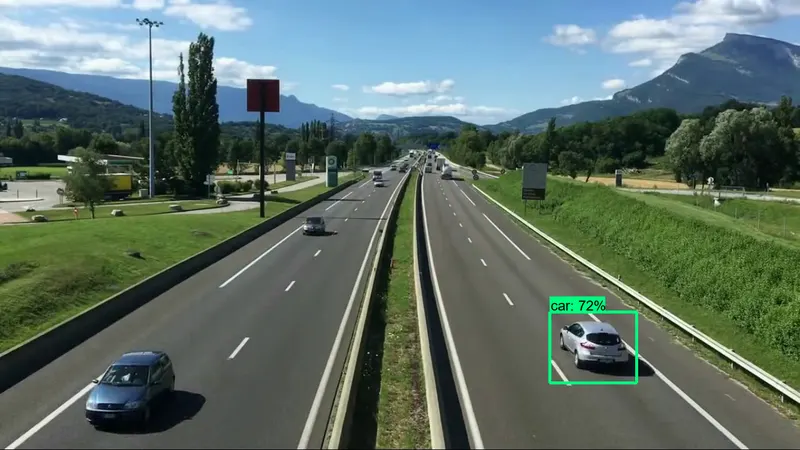
See the result when we run the inference video.
- See output file at https://drive.google.com/file/d/1Fn0x5Nxb9qxv4ilFWTQY-uKb5PTYgYzl/view?usp=share_link
OR
- To watch the output video please click here
Conclusion:
- In this project,I have created my own object detector using Tensorflow 2 Object Detection API.
- For training the model,I preapred image dataset by extracting frames from custom video file uisng opencv library.
- Then annotateed all the images using labelImg annotation software.
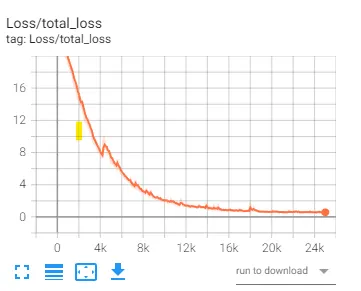
- After training my total loss graphs:
Total Loss
Evaluation results:
Viewing the evaluation results in tensorbord.