Project 1 - Interfacing a 16*2 LCD with Arduino using I2C protocol
Project 1 - Interfacing a 16*2 LCD with Arduino using I2C protocol
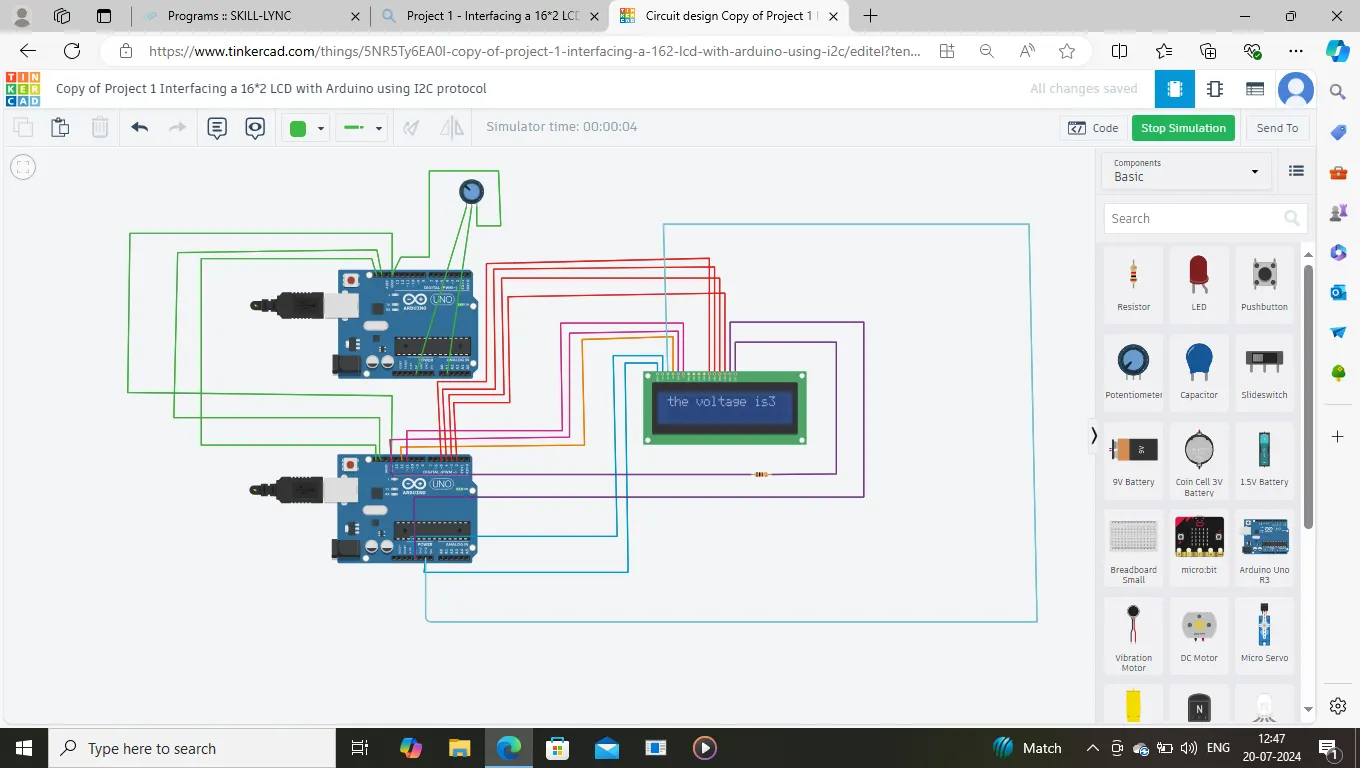
Objective: To send a message from slave to master using Inter-Integrated Circuit (I2C) communication protocol in arduino and display the message on 16*2 LCD screen.
//MASTER
#include
void setup()
{
pinMode(A1, INPUT); //(A1 pin is configured as input )
Serial.begin(9600); //(No. of bits transmitting per second)
Wire.begin(); //(To begin I2Cprotocol)
}
void loop()
{
float value=analogRead(A1); // reads the value from A1 pin
signed int voltage=(value*5)/1024;
// int temp=(voltage-0.5)*100;
Wire.beginTransmission(1); //Communication to be started
Wire.write(voltage); // writing down the voltage what we got
Wire.endTransmission(); // communication to be ended here
delay(50); // time delay
}
//SLAVE
#include
#include
LiquidCrystal lcd(12,11,5,4,3,2); //pins connected to LCD display
void setup()
{
Serial.begin(9600); // no. of bits transmitting per second
Wire.begin(1); //to begin with I2c protocol
Wire.onReceive(ruso); // request call to receive data
lcd.begin(16,2); //LCD initialization
}
void loop()
{
delay(50);
}
void ruso(int y)
{
signed int voltage=Wire.read(); //voltage captured
lcd.setCursor(0,0); // to set cursor position
lcd.print("the voltage is");
//lcd.setCursor(0,1);
lcd.print(voltage);
//Serial.print("voltage value\n");
//Serial.println(5);
delay(50);
}
OUTPUT ATTACHED BELOW IN FORM OF SCREENSHOT:
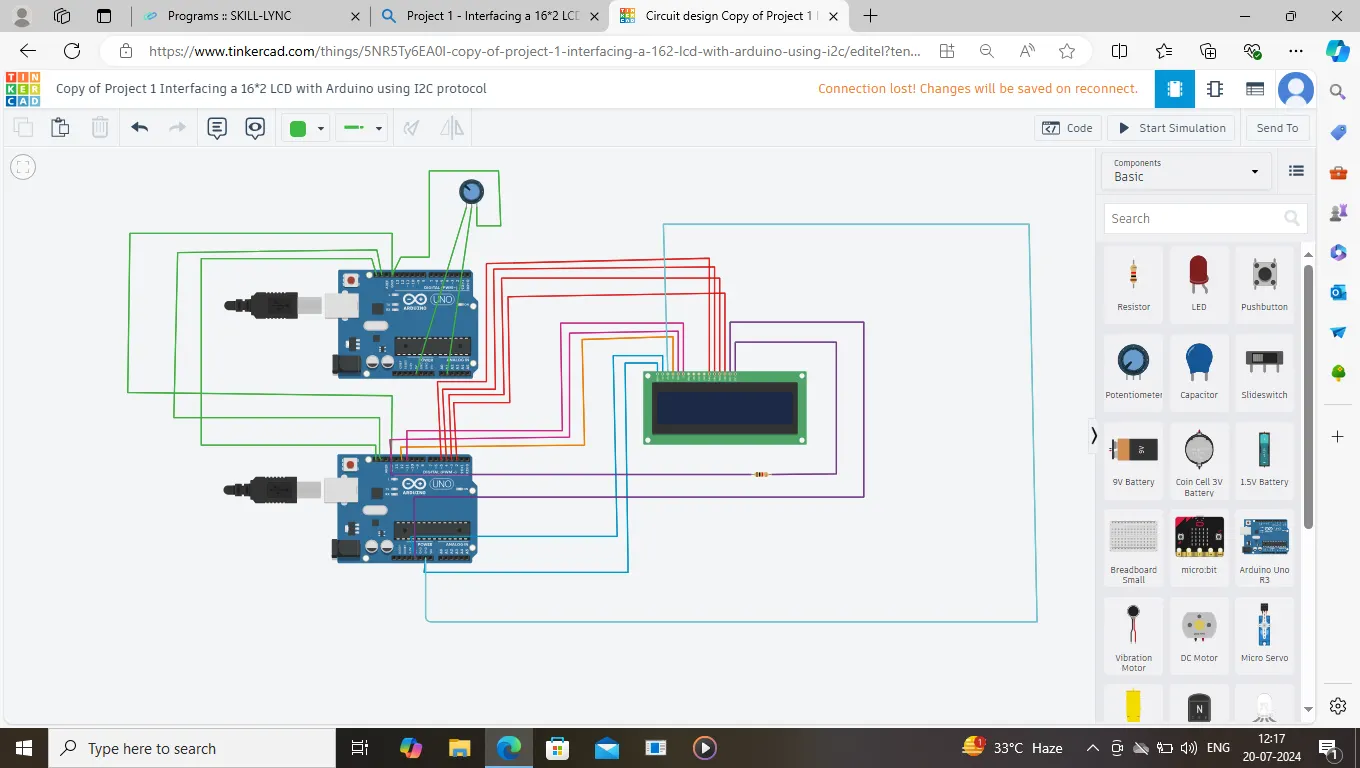
SCREENSHOT-1 CIRCUIT DIAGRAM CONNECTION BELOW:
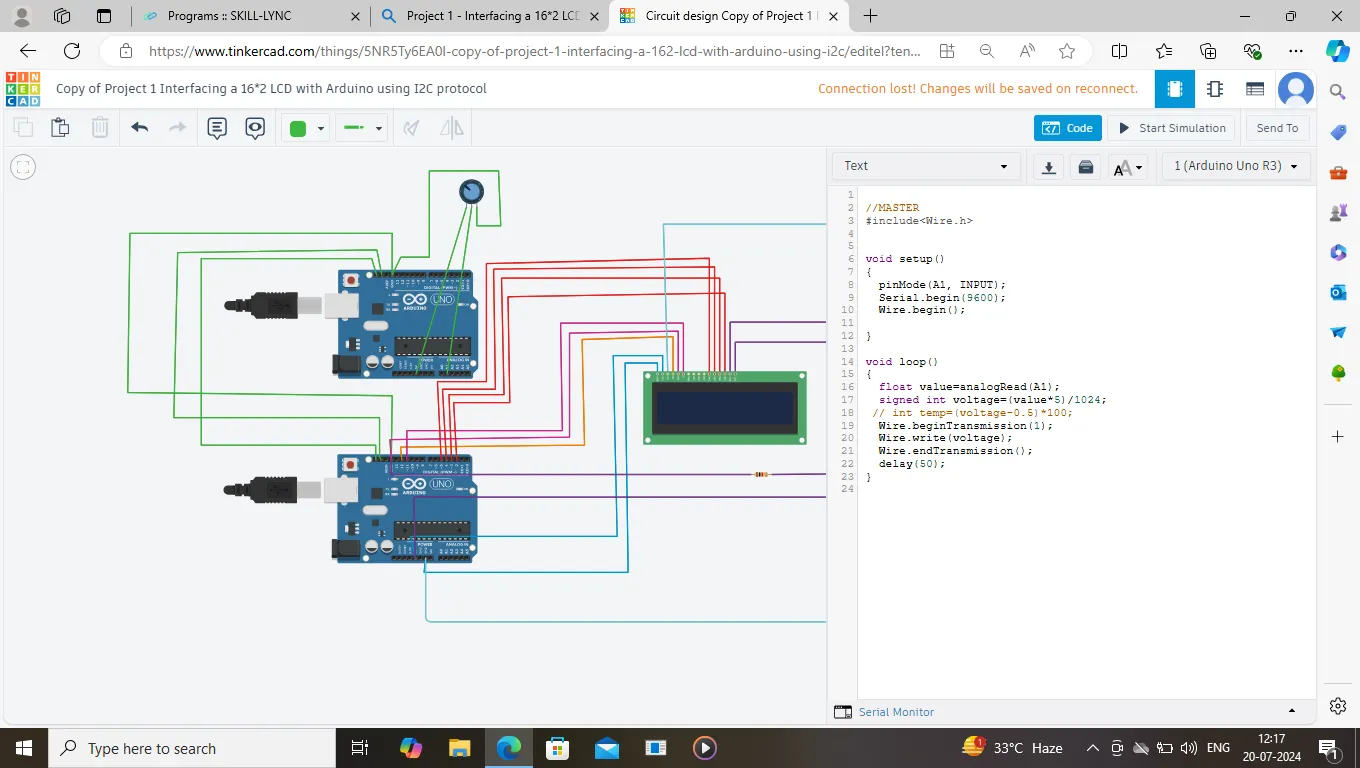
SCREENSHOT-2 SHOWING CIRCUIT DIAGRAM WITH MASTER CODE:
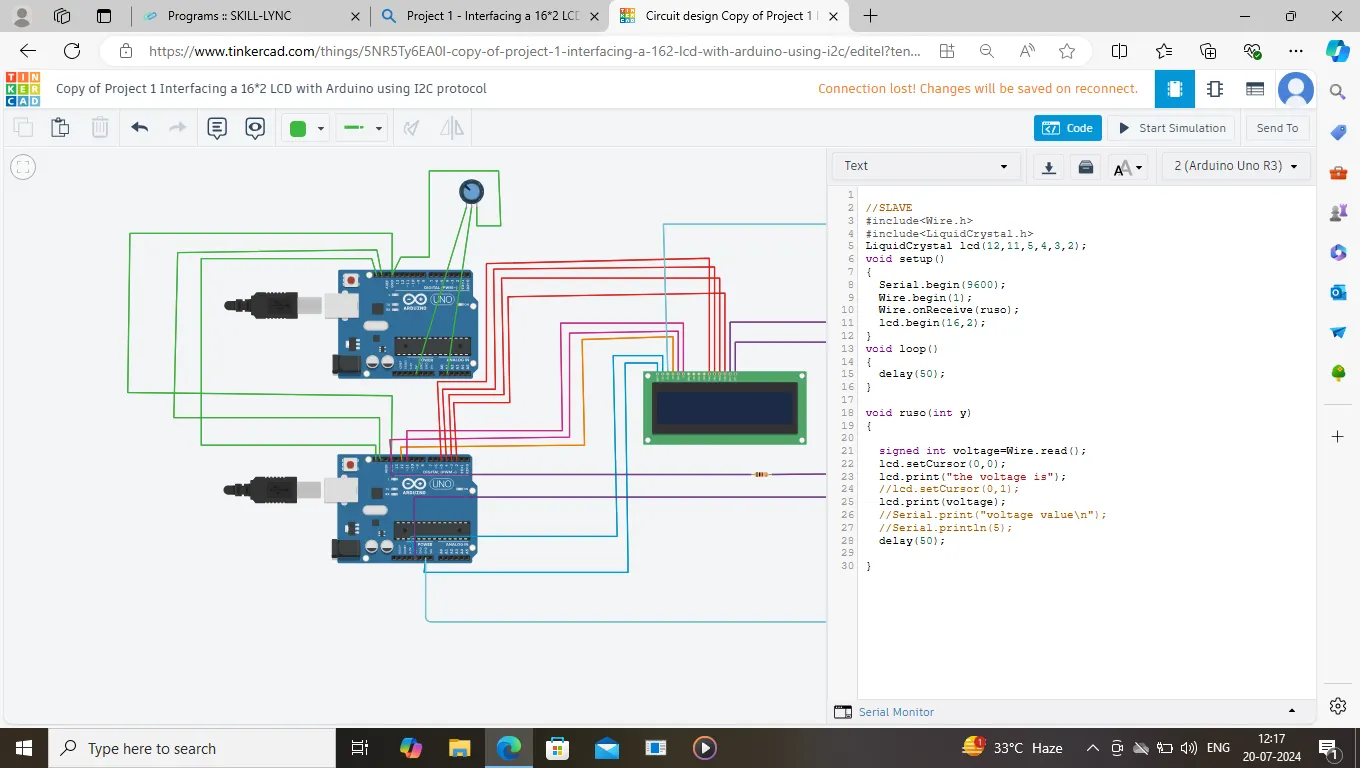
SCREENSHOT-3 SHOWING CICUIT DIAGRAM WITH SLAVE CODE:
SCREENSHOT-4 GIVES OUTPUT: