Project 1 : CFD Meshing for Tesla Cyber Truck
https://drive.google.com/file/d/1Mb2rFhtsONcSIQkBwrM0xnZ0LSsB3K_1/view?usp=drive_link
Link for the file.
Introduction: The main objective of this project is to ‘Topological Cleanup’ of the given model.
There are following basic tools for getting required surface.
1. Or – To isolate a face of the geometry.
2. And – To show the neighbouring face of the geometry.
3. Not – to hide the selected faces of the geometry.
4. !Not – To isolate a face of the geometry.
5. All – To show all the faces of the geometry.
6. Invert – To show the opposite faces of an isolated face of the geometry.
7. Lock – To lock the existing faces of the geometry.
8. PID – To differentiate different regions of the geometry using colours and region name.

Geometric checks: Before doing any ‘Topological’ cleanup, we must go through ‘geometry checks. It was seen that, after doing ‘geometry checks’, there were multiple single coons found, before doing meshing activity, we must clear all the single coons.
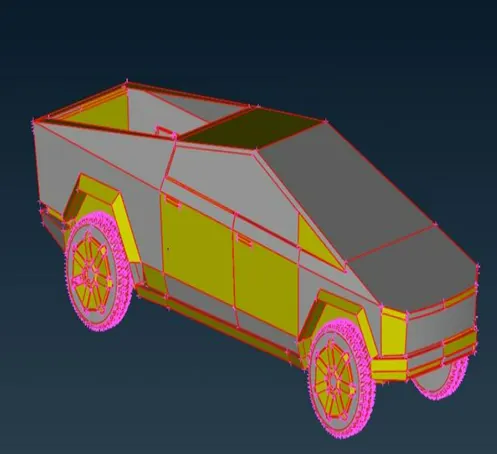
To remove all the false single coons, select all the faces & do ‘TOPO’ in the
TOPO > Faces > TOPO > Select faces > Centre click.
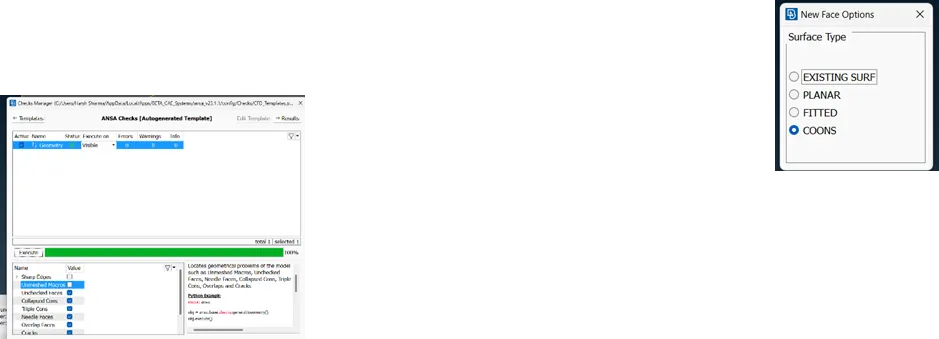
Create New Surface : After doing ‘Topo’ we have seen multiple blank surfaces, that need to be patched. There are four options by which we can patch any surface. We can use any of the option as per our requirement.
After all the surface patch, we have checked it’s geometry. We found that surface is fully ok & flaw less.
PID Selection: After removal of all the single & triple coons, we are now ready for surface meshing. Before meshing we need to assign the ‘PID’s ‘ To the different body parts of the cyber truck. So, we have assigned the PID to the different body parts of the body.
01. Body
02. Lights
03. Window
04. Tyres
These are the total four ‘PID’s’ who are concerned to the car body.
Meshing – Lights: We have defined the mesh length to the lights is 4 mm, as we have to assign this on our own.
Lights – Mesh Length – 4 mm. Mesh quality criteria – 1 – 5 mm
Element type – Tria
Total mesh Elements – 64736.
Total off elements – 0.
Meshing – Rims & Tyres: We have defined the mesh length to the tyres is 2 mm.
Rims & tyres – Mesh length – 2 mm. Mesh quality criteria – 1 – 3 mm.
Element type – Tria
Total mesh element – 6255447
Total off elements – 0.
Meshing – Window screen: We have defined the mesh length to the Window screen is 2 mm.
Screen – Mesh length – 2 mm. Mesh quality criteria – 1 – 3 mm.
Element type – Tria
Total mesh element – 4810649
Total off elements – 0
Meshing – Body: We have defined the mesh length to the body is 3 mm.
Body – Mesh Length – 3 mm, Mesh quality – 1 – 5 mm.
Element type – Tria
Total mesh element – 7613746
Total off elements – 0
Cyber truck total mesh elements – 18744578
Total off element - 0
Creation of Wind tunnel: For a wind tunnel, there is a fix standard for making a wind tunnel. Wind tunnel should be 4X length from the first point of the car. And for the back side, it should be 6X from the far reach position of the back side of the car. For top surface, it should be 3X distance from the top surface of the body. For side surface, it should be 1X from the car far side point from the both sides.
Cyber truck total length = 5869 mm.
Cyber truck total height – 390+ 1544 = 1934 mm.
Cyber truck total width = 1740 mm.
For wind tunnel fabrication, there is a fix standard for creating wind tunnel.
For top most portion from most top point of the body – 3(x) = 3*1934 = 5802 mm.
For bottom portion of the car. 5802+2000= 7802 mm.
For far front point of the car – 2934 + 5869*4 = 26410 mm.
For far rear point of the car – 2934 + 5869*4 = 26410 mm
For side portion of the wind tunnel – 1740*1 = 1740 mm.
Define wind tunnel points: For creating of the wind tunnel, firstly we need to define the fixed points as per the above value. TOPO > POINTS > RELATIVE > SELECT NODES > DEFINE THE VALUE IN ANY DIRECTION YOU WANT. X, Y, Z DIRECTION.
After creation of fixed points, we have to create straight lines with the points.
TOPO > CURVES > CREATE > LINE > SELECT THE POINTS.
Create surface with the help of these curves.
Meshing of Wind tunnel: After creating whole wind tunnels and after selecting all the different PID for each part of the wind tunnel. We have to mesh the wind tunnel. As wind tunnel is too large as compared to the car body. So, that we will mesh the wind tunnel with lesser mesh length near to the car body. And larger mesh length to the area of the wind tunnel which is far away from the car body. For this action, we will use Mesh >Perimeters > Spacing > Biasing(Geometric) > Factor selection (1.2) > DSTART (50MM) > DLIMIT (150MM). By this command we can divide the wind tunnel by the equally distributed spacing. And then mesh the wind tunnel in the ascending order from the car body to the far reach point to the car.
Wind tunnel total mesh element – 330608.
Creation of volumetric mesh: For volumetric mesh, we have to define the volume. For defining volume. VMESH > VOLUMES > DEFINE > DETECT ON (WHOLE DB).
We have seen that, there are two volumes, so we have deleted the duplicate defines volume.