Project 1 _Creating an Architectural and Structural plans for the provided plot size
PROJECT- 1
AIM- To create an Architectural plan for the provided plot size of 20ft x 60ft and develop relevant basic structural drawings.
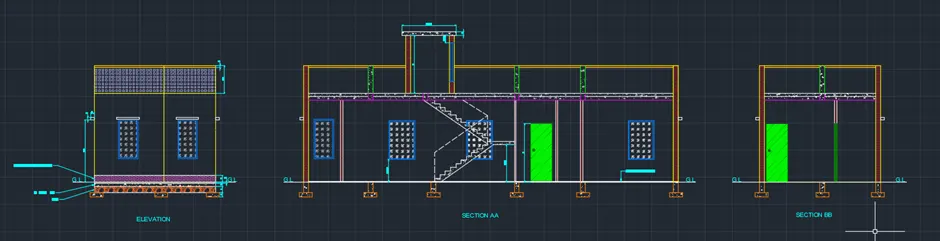
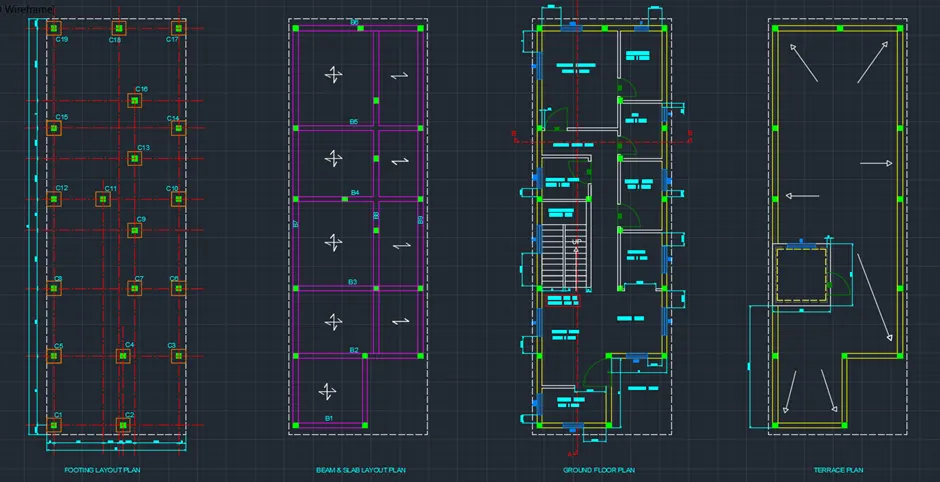
INTRODUCTION- For Project 1, we have used up all the known tools for drafting the plans on a given plot size of 20ft x 60ft. Here, the list of basic plans provided for the given residential project are as follows-
<!-- [if !supportLists]-->1. <!--[endif]-->Centre line plan + footing layout plan
<!-- [if !supportLists]-->2. <!--[endif]-->Column & beam layout plan
<!-- [if !supportLists]-->3. <!--[endif]-->Typical floor plan
<!-- [if !supportLists]-->4. <!--[endif]-->Terrace plan
<!-- [if !supportLists]-->5. <!--[endif]-->Elevation
<!-- [if !supportLists]-->6. <!--[endif]-->2 sectional plans
Keeping in mind the minimum dimensions and other criteria mentioned in the IS codes, the plans has been designed.
Also, the placement of the rooms is as per Vaastu Shastra . Following is the placement.
Orientation of the house- East Facing.
Living room- North-East
Kitchen- North
w/c- North-West
Bedroom- South-West
Study room- North
Storage room- South
Pooja room- East
The substructure of the residential bungalow is provided with an Un-coarse Rubble Masonry layer on top of which is the PCC. The house is provided with a 1inch flooring.

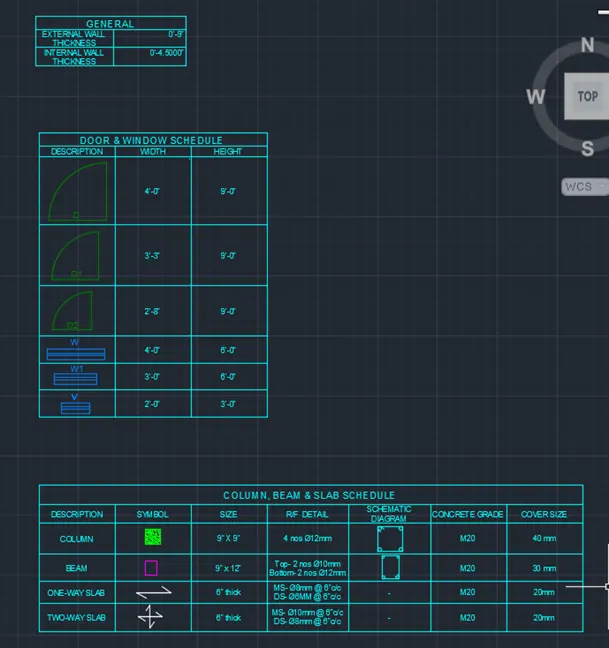
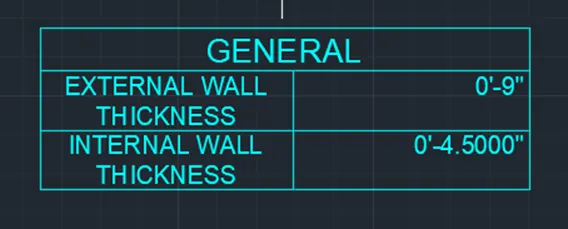
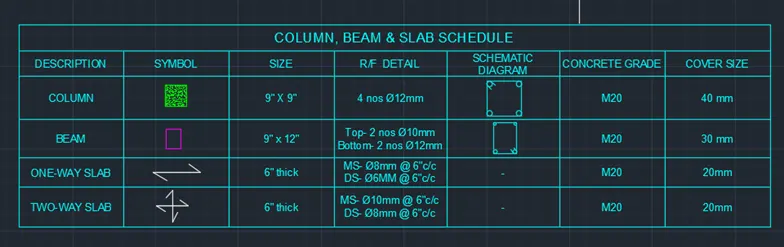
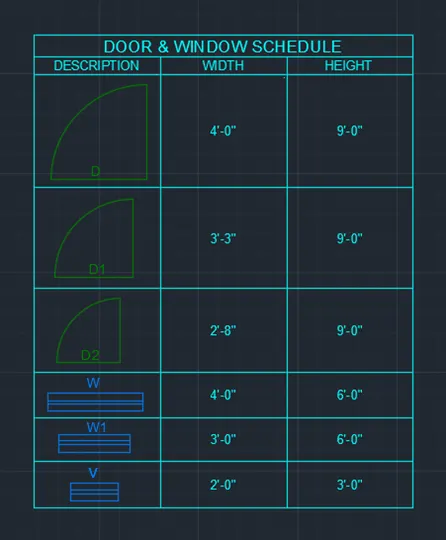
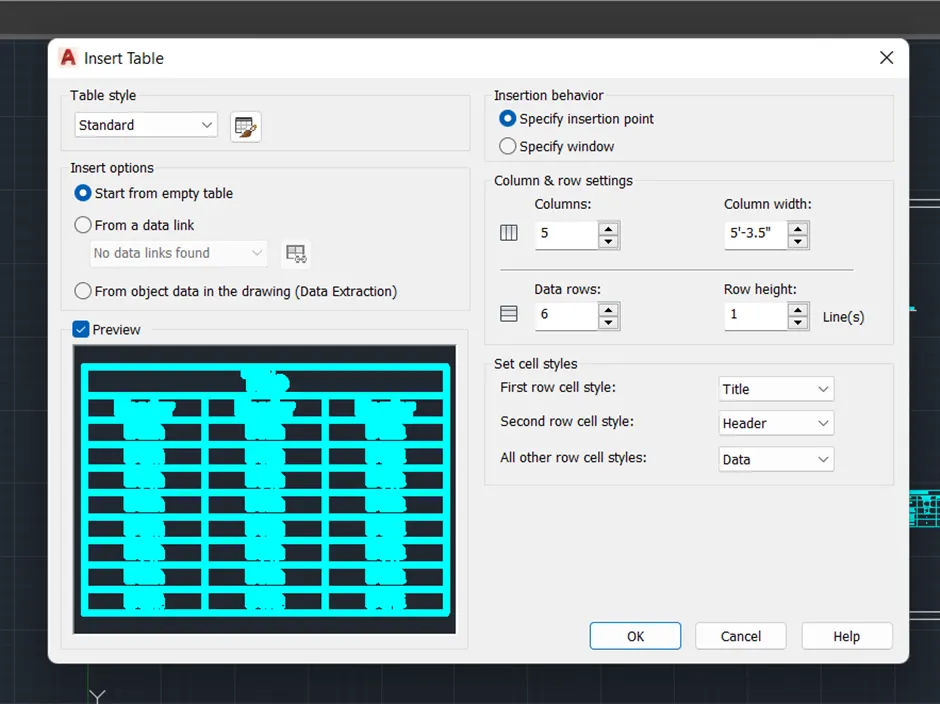
All the basic assumptions are mentioned in the plan. Also, the door, window, column, beam &slab schedule are shown in a tabular format.
PROCEDURE- For this project, the following commands are used-
<!-- [if !supportLists]-->1. <!--[endif]-->Line
<!-- [if !supportLists]-->2. <!--[endif]-->Rectangle
<!-- [if !supportLists]-->3. <!--[endif]-->Circle
<!-- [if !supportLists]-->4. <!--[endif]-->Arc
<!-- [if !supportLists]-->5. <!--[endif]-->Offset
<!-- [if !supportLists]-->6. <!--[endif]-->Trim
<!-- [if !supportLists]-->7. <!--[endif]-->Move
<!-- [if !supportLists]-->8. <!--[endif]-->Copy
<!-- [if !supportLists]-->9. <!--[endif]-->Rotate
<!-- [if !supportLists]-->1. <!--[endif]-->Dimension
<!-- [if !supportLists]-->1. <!--[endif]-->Leader
<!-- [if !supportLists]-->1. <!--[endif]-->Hatch
<!-- [if !supportLists]-->1. <!--[endif]-->Text
<!-- [if !supportLists]-->1. <!--[endif]-->Layer
<!-- [if !supportLists]-->1. <!--[endif]-->Table
<!-- [if !supportLists]-->1. <!--[endif]-->Table-edit
<!-- [if !supportLists]-->1. <!--[endif]-->Block
<!-- [if !supportLists]-->1. <!--[endif]-->Xline
Pre-drafting-
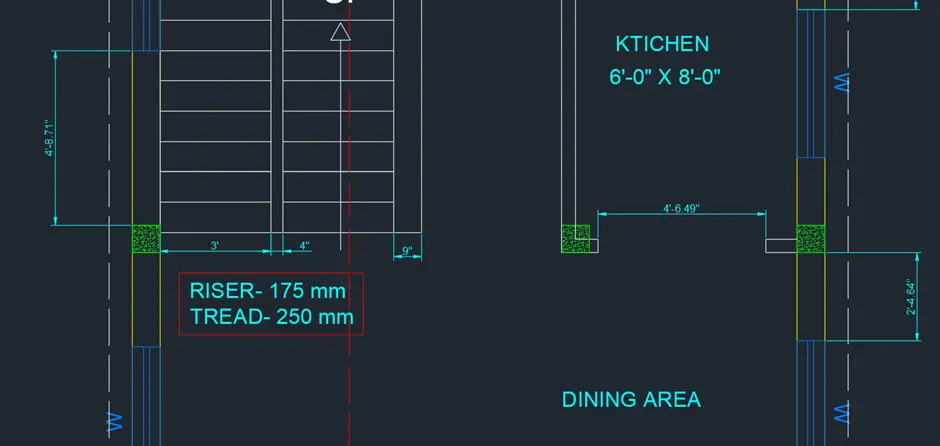
For the project, as per the plot size and Vaastu, the bungalow is designed. The dimensions of the important members are considered and plotted. The column, beam, slab, door, window & wall dimensions are assumed accordingly and the plan is drafted.
Steps-
- <!-- [if !supportLists]--> <!--[endif]-->Open AutoCAD.
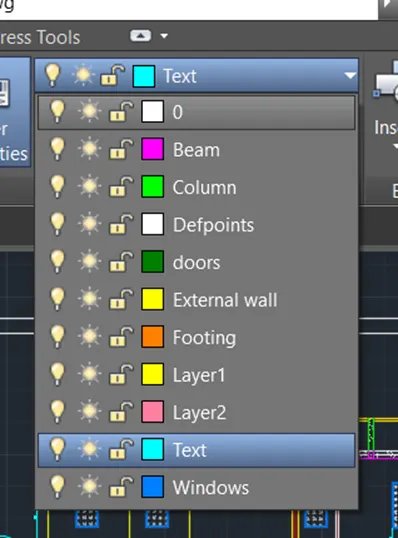
- - Type command- Layer, and name the layers and appoint them different colours. This would help to differentiate between the building elements. The below picture shows the list.
- <!-- [if !supportLists]--> <!--[endif]-->Start plotting the design using command- Line.
- <!--[endif]--> Further, for drafting walls in the typical floor plan the command OFFSET is used.
- <!-- [if !supportLists]--> <!--[endif]-->For drafting the columns, REC command is used and later the column is hatched.

The columns can be placed either by creating a block or simply by Copy command.
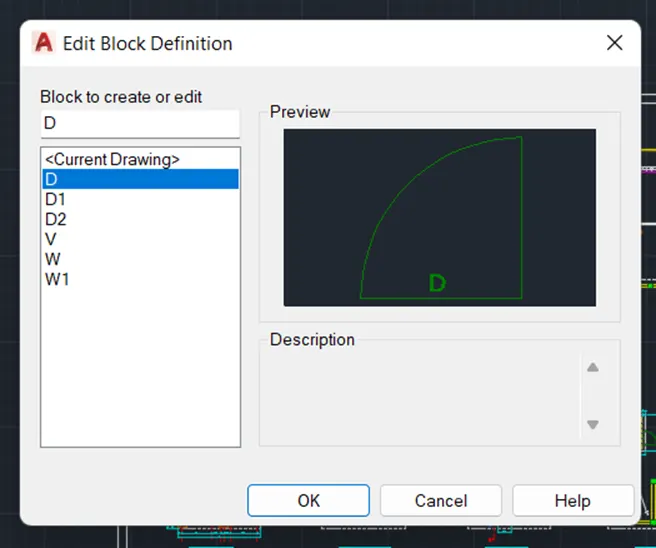
- <!-- [if !supportLists]--> <!--[endif]-->The windows and doors are placed by the command BLOCK.
- <!-- [if !supportLists]--> <!--[endif]-->Further the naming is done by using command- MTEXT and the dimensions are provided using command- DIM.
- <!-- [if !supportLists]--> <!--[endif]-->The size of doors, windows, column, beam, slab & wall is shown in a tabular format using command- TABLE
Hereafter, all the necessary commands are used to draft the plan as per requirement.
RESULT-