Project 1
- 1. Create Civil 3D Design File.
-
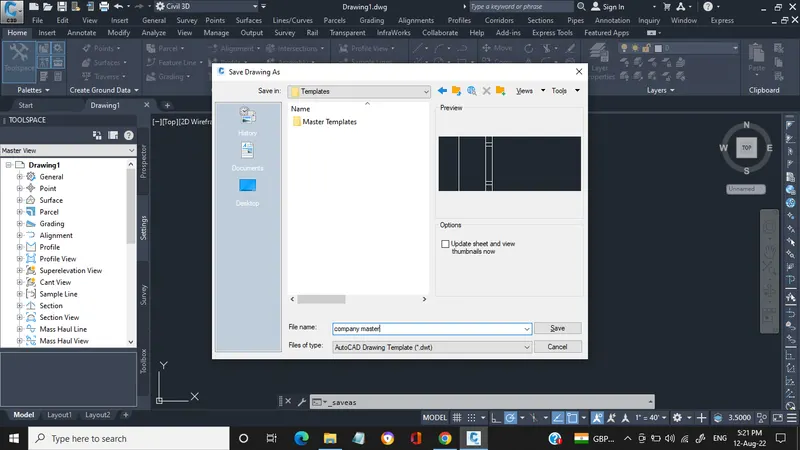
- Create a company master template file.
- Open a new drawing page.
- Open file and click on a save as.
- Select the file location where you want.
- Naming a file as company master.
- Select the .dwt in files of type.
- Click on a save.
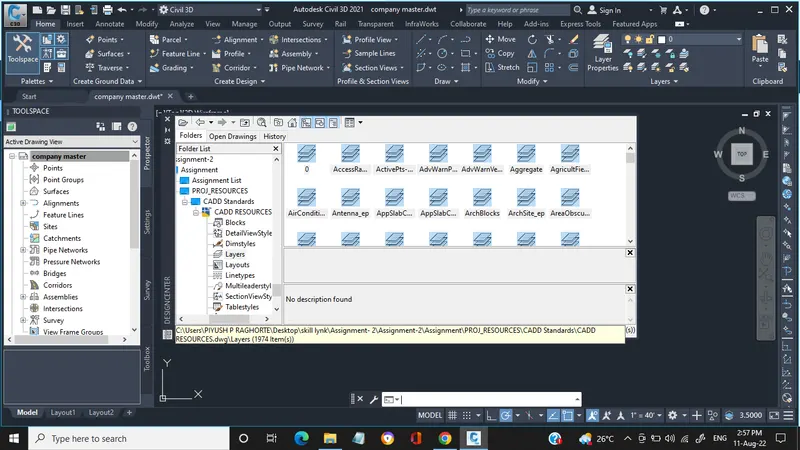
- Get the necessary layers, text styles, blocks, dimension styles, multileader styles, and the layout from the .DWG CADD Standards File provided.
- Open a company master.dwt in Civil 3D which is we created recently.
- Press control + 2 to open design centre.
- Open file location in design centre which is provided as project resources.
- Drag the files such as necessary layers, text styles, blocks, dimension styles, multileader styles, and the layout to the company master.dwt.
- Create surface File & Create Surface by using given Survey Data.
-
- Create an aerial file using the template file and Name the file using the naming convention outlined in the File Naming Convention folder.
- In Civil 3D go to file > open and select the path of company master.dwt and click on open.
- Go to file > save as and put the name of file using naming convection which is provided as AERIAL.dwg.
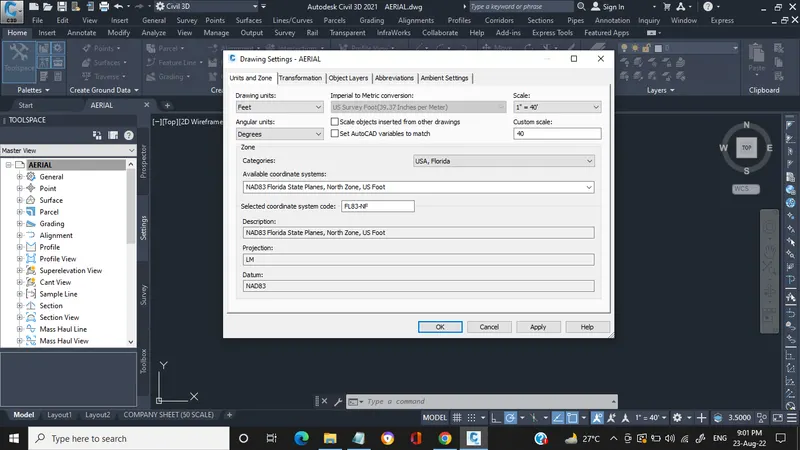
- Go to toolspace > drawing setting click a right click on aerial select edit drawing setting and set the co-ordinate as a FL83-NF.
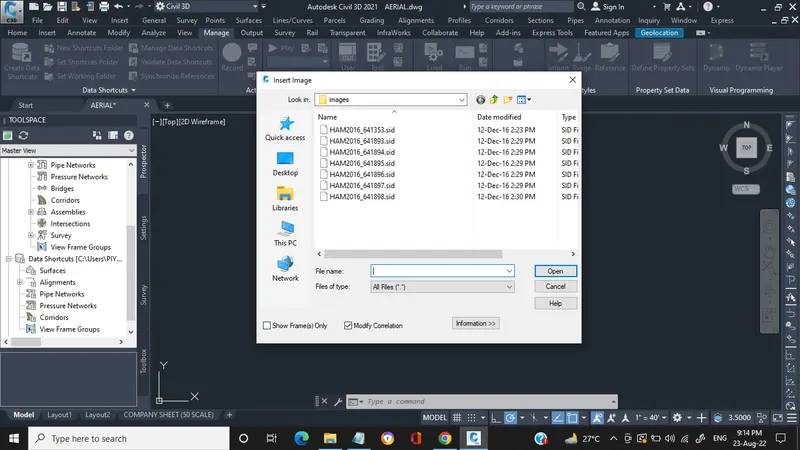
- Use the correct command to insert the aerials for the project as discussed in the lecture.
- A command of mapiinsert and press enter.
- Select a path of .Sid files select a files of required aerial and click on open. (press z enter e enter)
- 3. Create Alignment by Using Proper Geometry Standard & apply Supeelevation.
-
- Make sure the coordinate system is set to FL83-NF and Create Alignment file.
- In Civil 3D go to file > open and select the path of company master.dwt and click on open.
- Go to file > save as and put the name of file using naming convection which is provided as ALGNRD.dwg.
- Go to toolspace > drawing setting click a right click on ALGNRD select edit drawing setting and set the co-ordinate as a FL83-NF.
- Put a external reference file as aerial file to create alignment of existing road.
- create alignment of existing road with the help of alignment creation tool in CIVIL 3D.
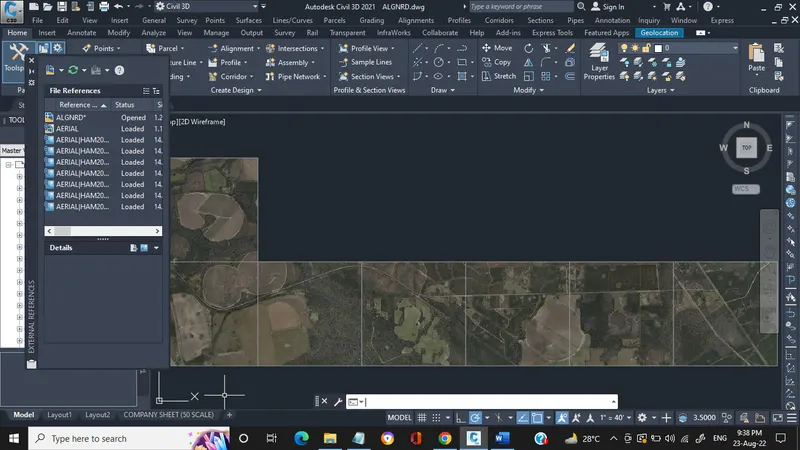
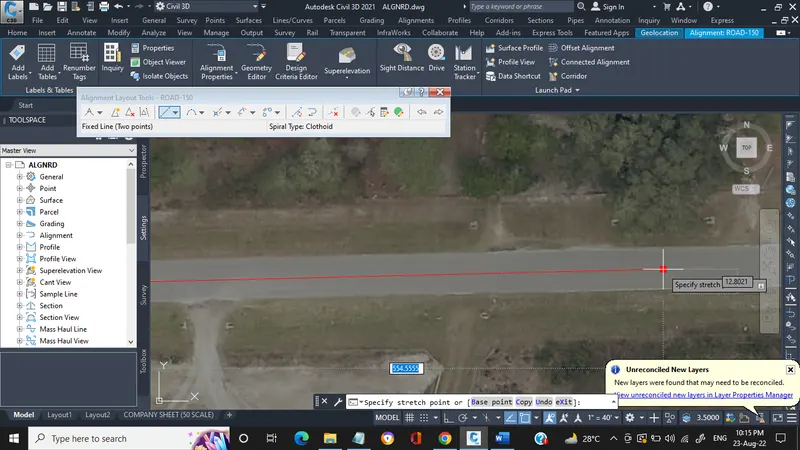
- Create View frames & sheet & create seperate .dst file for the same.
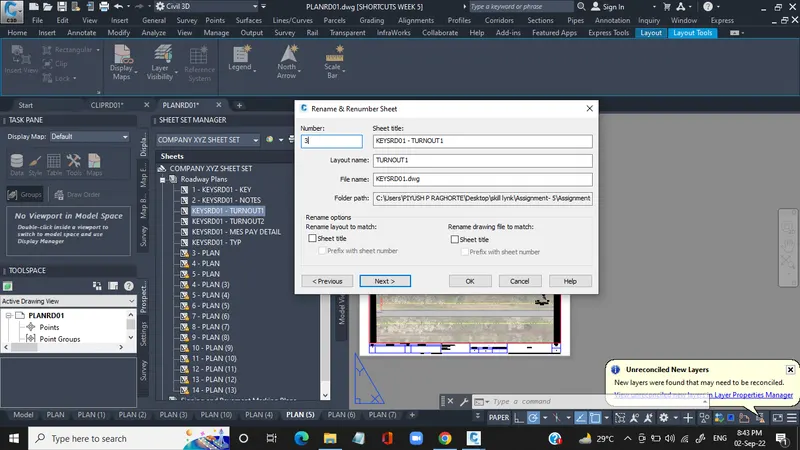
- 5. Workout quantity by using civil 3d.
-
- Creating Quantity File.
- Open a new drawing page.
- Open file and click on a save as.
- Select the file location where you want.
- Naming a file as QTDSRD .
- Click on a save.
-
- Copy in the DSGNRD01 AutoCAD objects into the file.
- Open file DSGNRD01.
- Press ctrl + A to select all objects in DSGNRD01.
- Copy all selected objects.
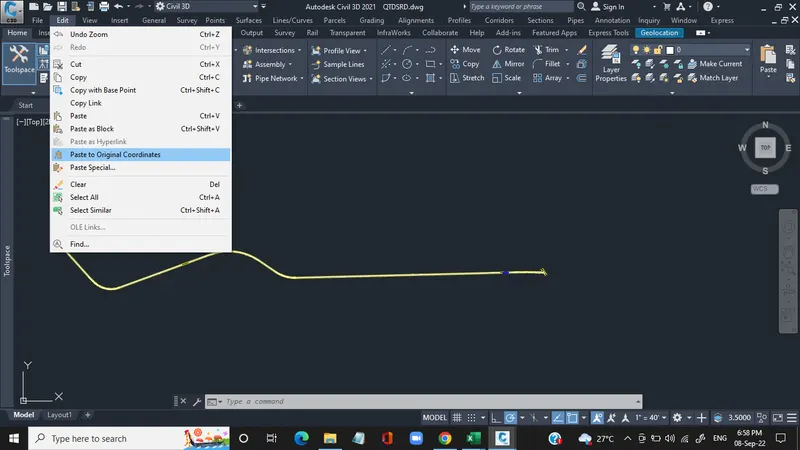
- Go to the QTDSRD.
- In edit select paste with original coordinate.
-
- Fix the pay items noted in the assignment video.
- Using quantity manager, apply the appropriate pay items to the AutoCAD objects based upon the lecture.
- Draw AutoCAD item which is required for the pay items.
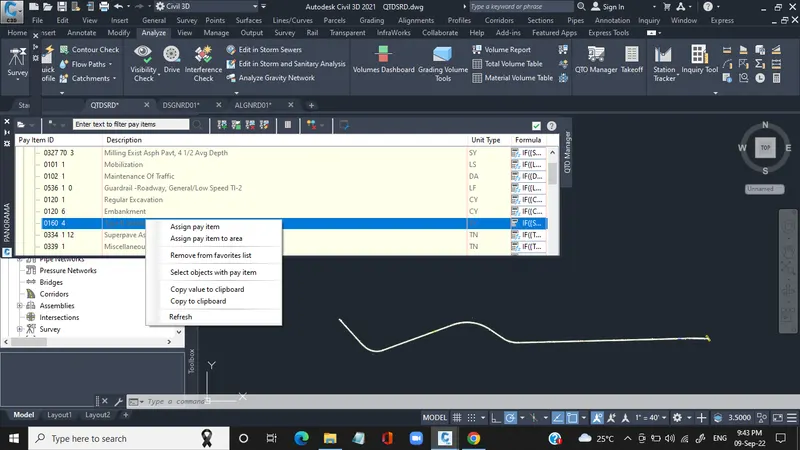
- Go to analyze and QTO manager.
- In QTO manager open master per items list file and original categorization file.
- Add a csv file in open pay item file window.
- Then assign the object to the pay item according to their items.
-
- Perform quantity takeoff to create quantity summary sheets.
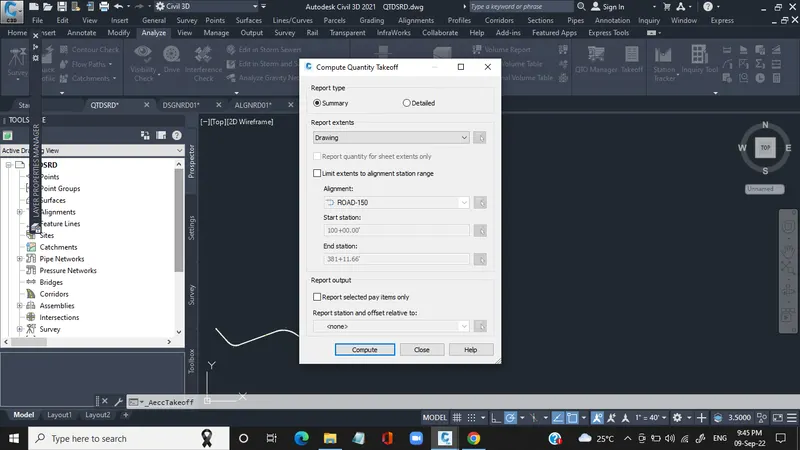
- After previous steps go to the analyze and takeoff.
- In compute quantity take off selectionary and click on compute.
- In quantity takeoff report select summary html.xml and click on save as.
- Fillup the provide Excel sheets according to take off quantity.
-
- Link the quantity summary Excel sheets into AutoCAD and create layouts.
- Create a new working file.
- Insert a layout form a design centre.
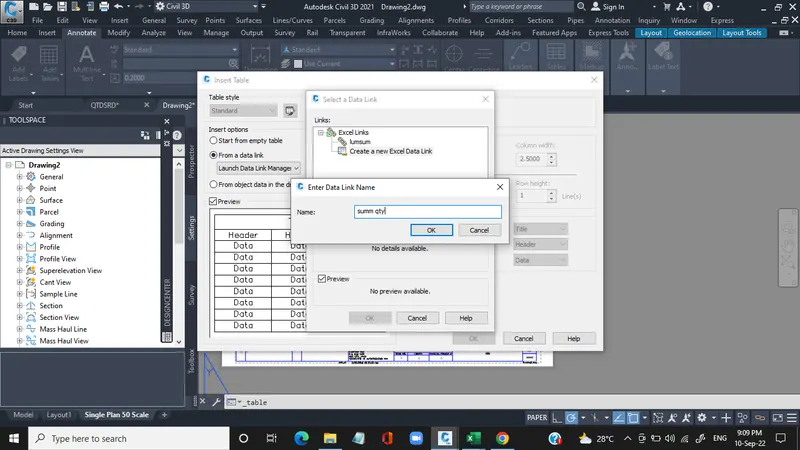
- Then go to annotate table and insert table.
- In insert table window create a new Excel data link of Summary sheet.