Project 1 - 2D meshing on the instrumental Panel
Aim :-
Perform 2D meshing for the given Instrumental panel within the prescribed quality criteria. Assign thickness after meshing the model.
Steps to be followed :-
- Geometry Clean-up.
- Midsurface extraction by middle/offset method.
- Midsurface for the Rib region by extend & intersect.
- Batch meshing.
- Quality checks & clean up.
Procedure :-
1. Import the given model to ANSA.
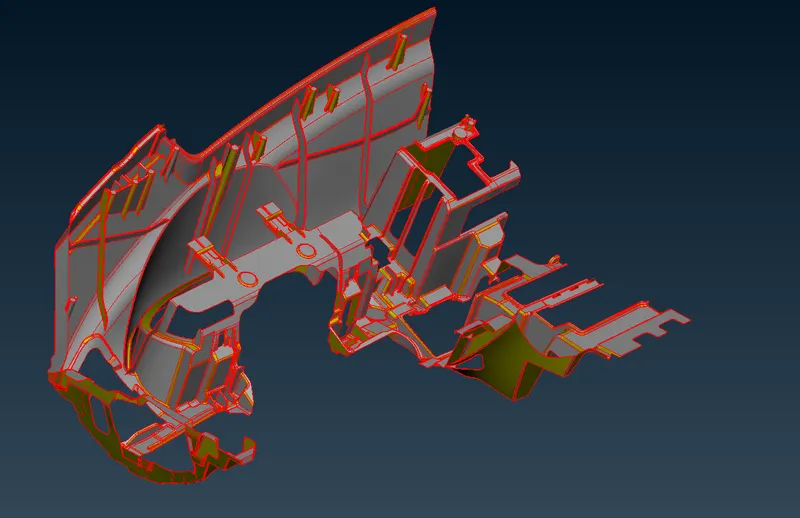
Fig : 1 (Geometrical Error)
2. Perform topo for the model and check for geometrical errors in checks->geometry->execute.
Autofix the errors which are possible , and manually fix the geometrical errors using Faces module, CONs module & Hot Points.
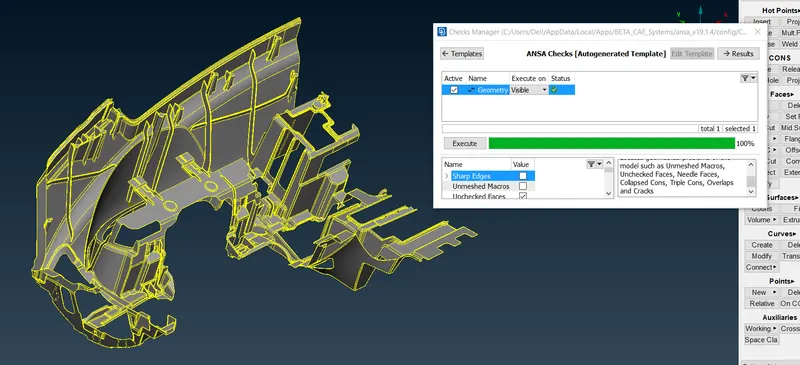
Fig : 2 (Cleaned-up Gemetry)
3. After the geometry is free from errors, extract the mid surface by faces->middle & faces->offset method.
Symetrical surfaces can use faces->middle as shown in fig : 3.1
Non symetrical surfaces canuse faces->offset as shown in fig ; 3.2
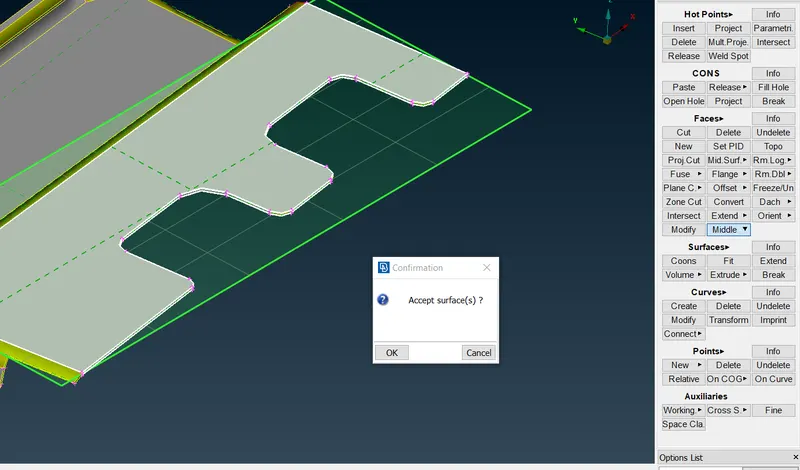
Fig : 3.1 (Faces->Middle Method)
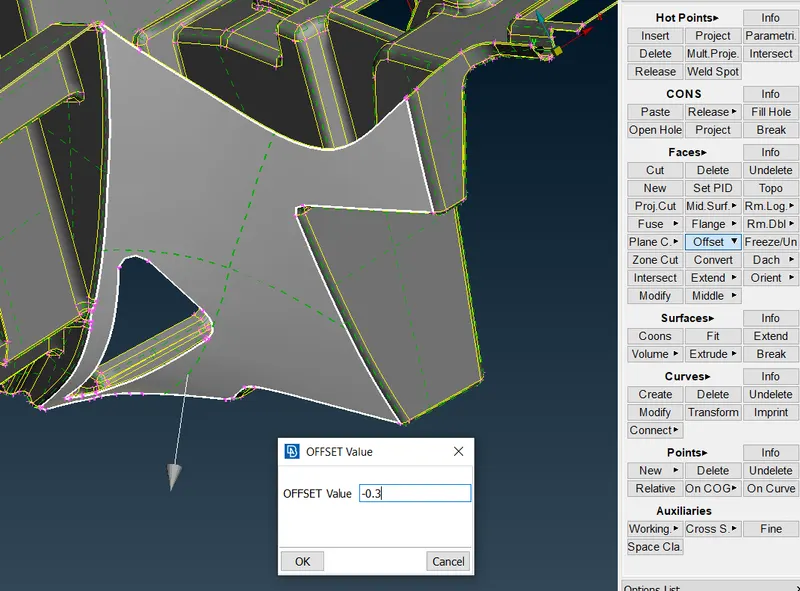
Fig : 3.2 (Faces->Offset Method)
4. With these 2 mid surface generating techniques, extract mid surface for the given model completely.
5. Connect the ribs using Faces->New, Faces->Intersect & Faces->Extend.
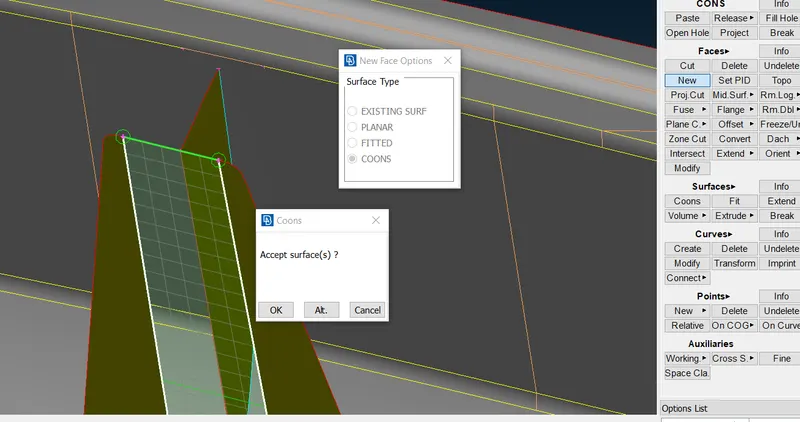
Fig : 4.1 (Faces->New)
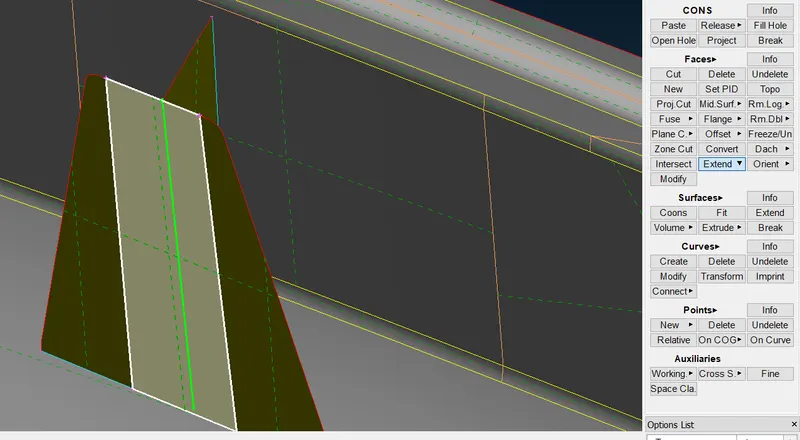
Fig : 4.2 (Faces->Extend)
6. Similarly perform above operations for all the ribs.
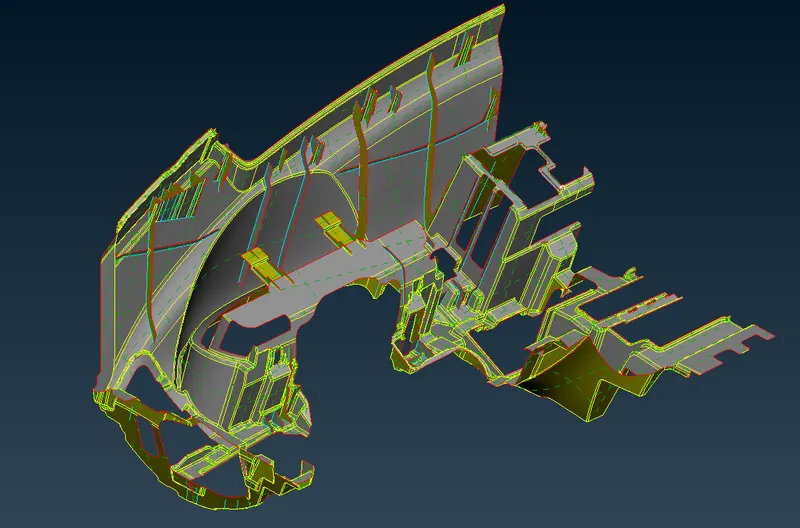
Fig : 5 (Mid Surface)
7. Assign property ID for different thinkness and a separate PID for the mid surface generated.
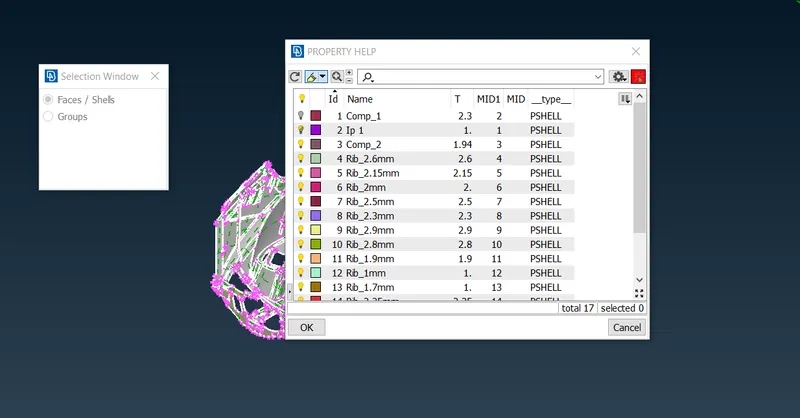
Fig : 6 (PID Assignment)
8.After extracting the mid surface, meshing need to be done. Batch meshing is done in order to save time and to get a better meashing pattern with controlled quality.
9. Batch meshing is performed as shown in the fig below;
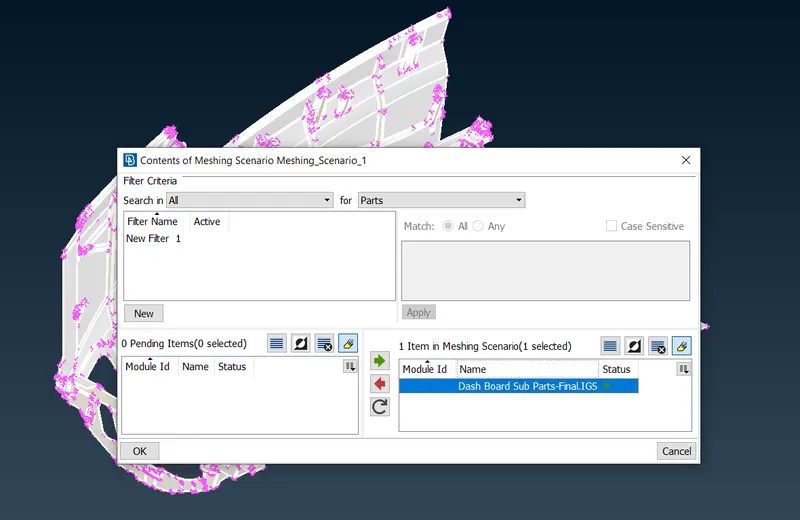
Fig : 7.1 (Select the mid surface)
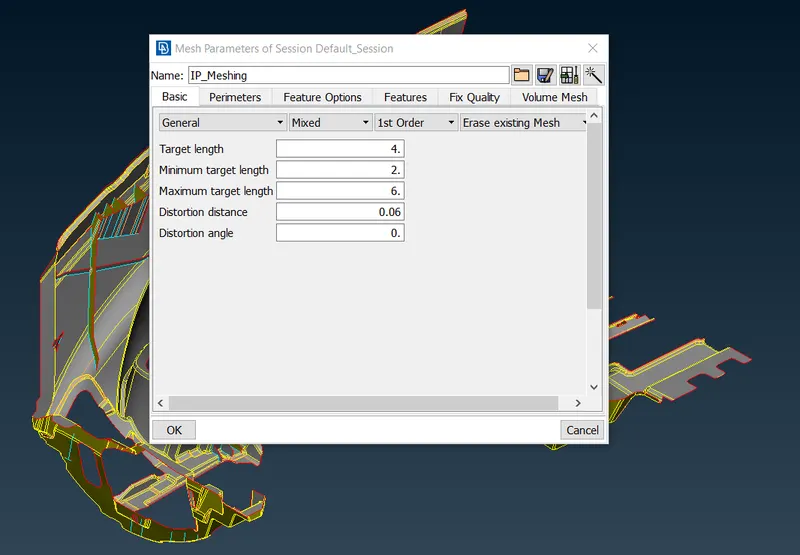
Fig : 7.2 (Assign Length parameters)
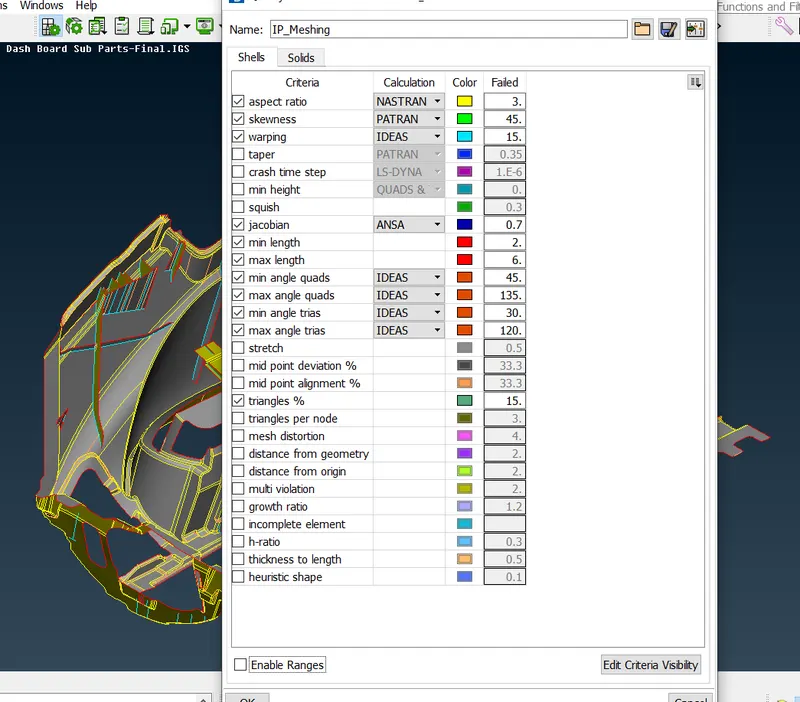
Fig : 7.3 (Assign Quality parameters)
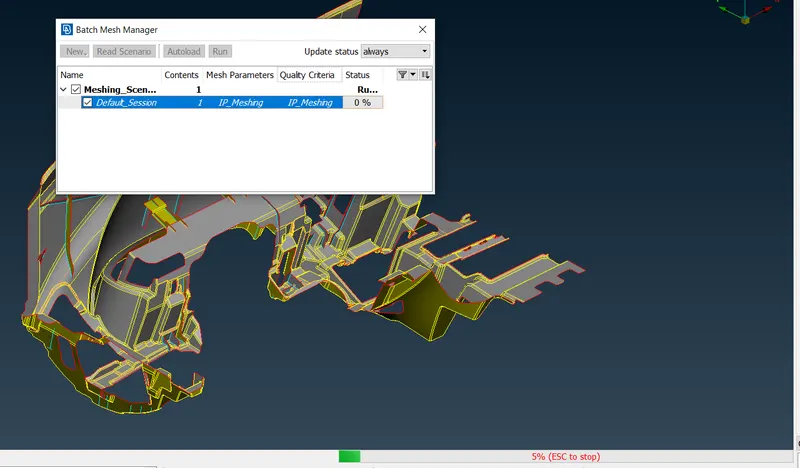
Fig : 7.4 (Execute Batch Mesh)
10. There might be some failed features and off elements due to quality issues, clear those errors using smooth, reconstruct, reshape, fix quality & improve commands.
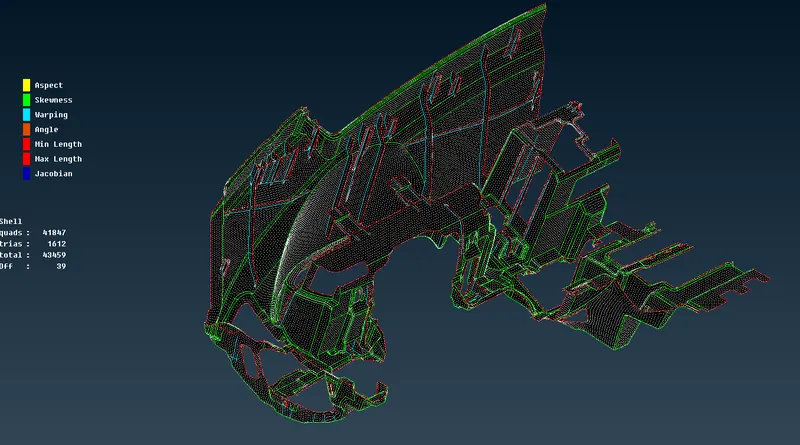
Fig : 8 (Final mesh model)
Learning Outcome :-
- Midsurfacing methods.
- Midsurfacing the Rib.
- Batch meshing.
- Feature Captiuring.
- Fixing up the failed feature.
Conclusion :-
The given Instrumental panel is meshed using batch mesh mthod. Quality criteria is maintained, with a very minimum off elements at the triple cons and sharp areas like ribs all other area are maintained with a good mesh flow. Tria elements is less than 4% of the total elements.