Project 1 - 2D meshing on the instrumental Panel
Project1- 2D Meshing on Instrumental Panel
Aim-
- To perform mid-surface extraction and then 2D shell mesh on the mid surface of instrumentation panel.
Objective-
- To do geometry cleanup for the component.
- To generate the mid surface of the given parent component.
- To perform 2D meshing according to given quality criteria.
- To create PIDs for ribs and doghouses and parent mid surface.
- To clear all the failing elements from quality failure.
- To assign thickness to the ribs and components FE.
Theory -
A dashboard (also called dash, instrument panel (IP), or fascia) is a control panel set within the central console of a vehicle or small aircraft. Usually located directly ahead of the driver (or pilot), it displays instrumentation and controls for the vehicle's operation.
Where the dashboard originally included an array of simple controls (e.g., the steering wheel) and instrumentation to show speed, fuel level, and oil pressure, the modern dashboard may accommodate a broad array of gauges, and controls as well information, climate control, and entertainment systems.
Contemporary dashboards may include the speedometer, tachometer, and odometer, engine coolant temperature gauge, and fuel gauge, turn indicators, gearshift position indicator, seat belt warning light, parking-brake warning light,and engine-malfunction lights. Other features may include a gauge for alternator voltage, indicators for low fuel, low oil pressure, low tire pressure, and faults in the airbag (SRS) systems, glove compartment, ashtray and a cigarette lighter or power outlet – as well as heating and ventilation systems, lighting controls, safety systems, entertainment equipment and information systems, e.g., navigation system.
Dashboards are generally made of polyvinyl chloride, invented in the early 1920s and now used in everything from water pipes to shower curtains. PVC can be rock hard or cloth flexible. To achieve that, scientists add plasticizers to the PVC, according to Shelby F.
Polypropylene (PP), Acrylonitrile-butadiene-styrene (ABS), Styrene maleic anhydride (SMA), Polyphenylene Ether (PPE), and Polycarbonate (PC) are the materials commonly used in an automobile dashboard.
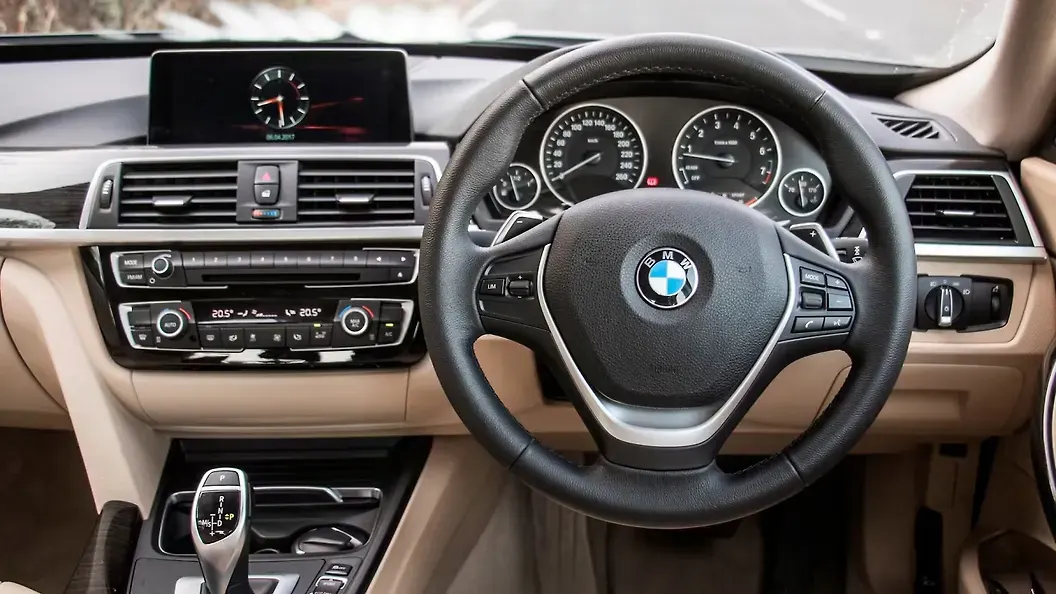

Trim Body of Dashboard/Instrument panel-
Procedure-
Stage-1
Importing the Model-
- Here we will be importing the CAD file into ANSA.
- Here is many types of file format supported by ANSA for CAD model like IGES,STEP and somtimes Parasolid also depending upon the requirment of industries.
For importing the model
we will go on pull down tab >> File >> open >> select the all format >> select the model from folder
Imported model-
- Hence model is imported on ANSA GUI by following these peocedure.
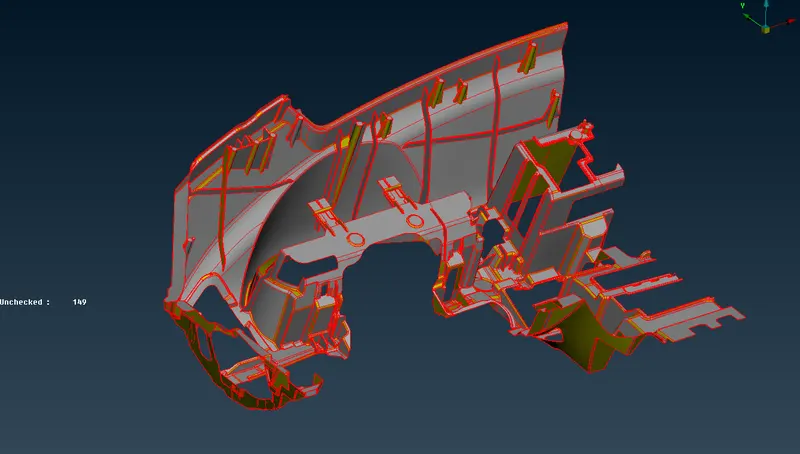
[Note-There are single/free edges on the model which need to get fixed]
Stage-2
Topological cleanup
- Now on this model we will perform geometrical cleanups to eliminate all kind of geometrical errors.
- First we will do topo on the model,
For that, Go to topo module > faces > topo > select the component
After topological cleanup we can see that model is now free from free edges.
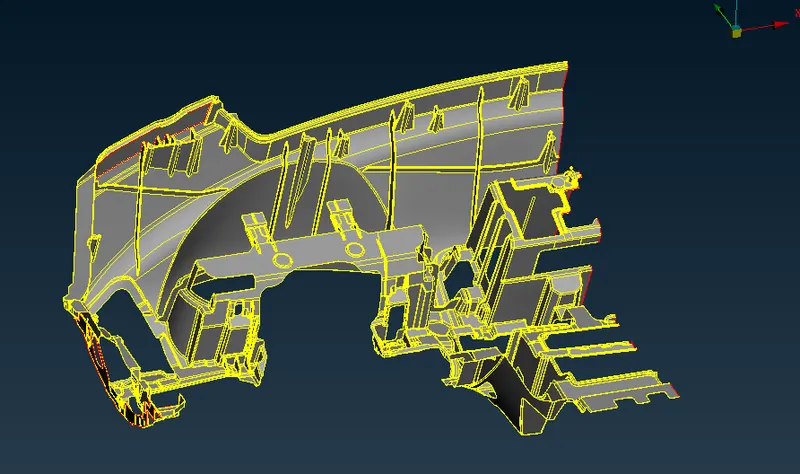
Stage-3
Initial check and Geometry cleanup-
- Now after topological cleanup will to geometric check on this component.
Go to utilities > check > geometry
Click on geometry a new window will popup
- check this as table as shown in figure,
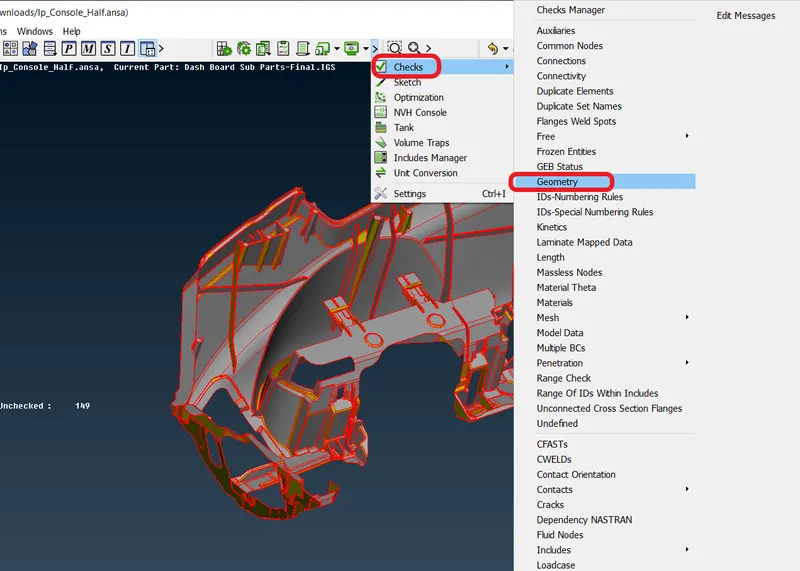
When you click on geometry then a new window will pop-up on GUI as shown below.
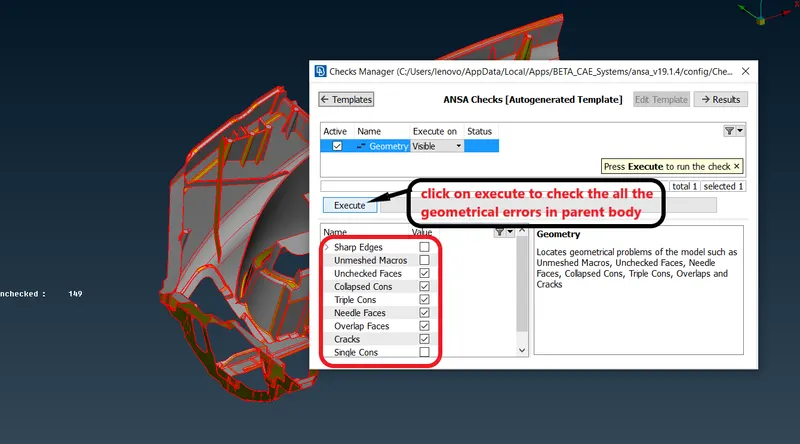
- After clicking on execute we can see all kind of errors.
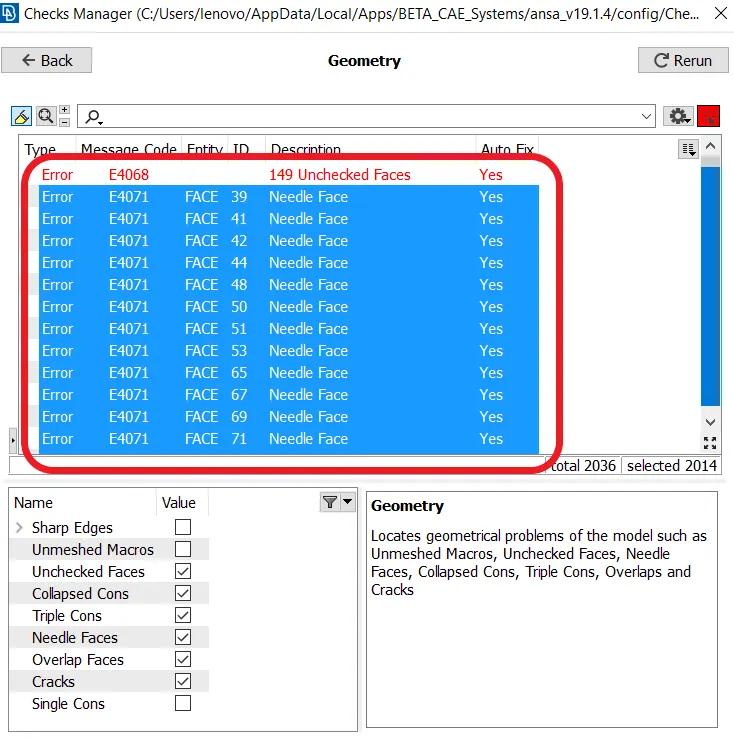
- Now need to fix all the geometrical errors in the model if presenet.
- Those errors can be fixed by automatically in check box itself, or manually as per condition.
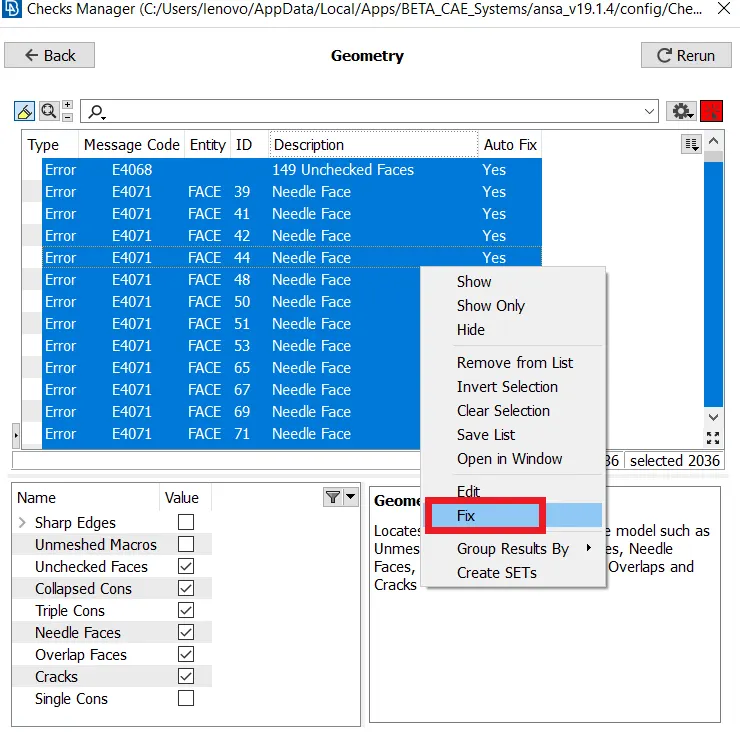
- After using this fix tool we will see many more errors will show in the parent body which cant be fixed automatically.
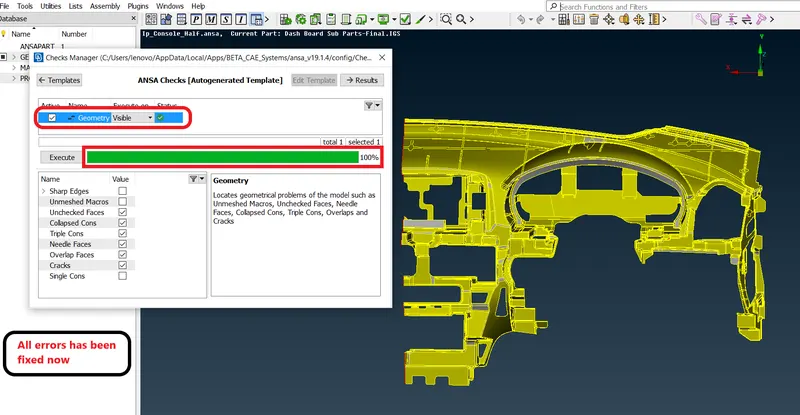
- Then we will perform some manual methode to fix all the errors.
Cleaned Geometry-
Stage-4
Midsurface Extraction-
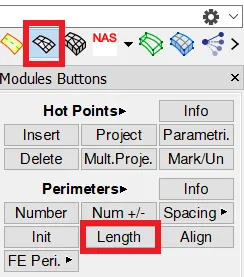
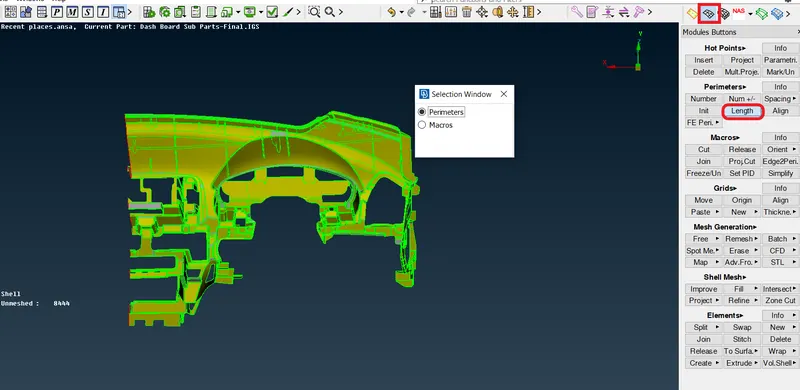
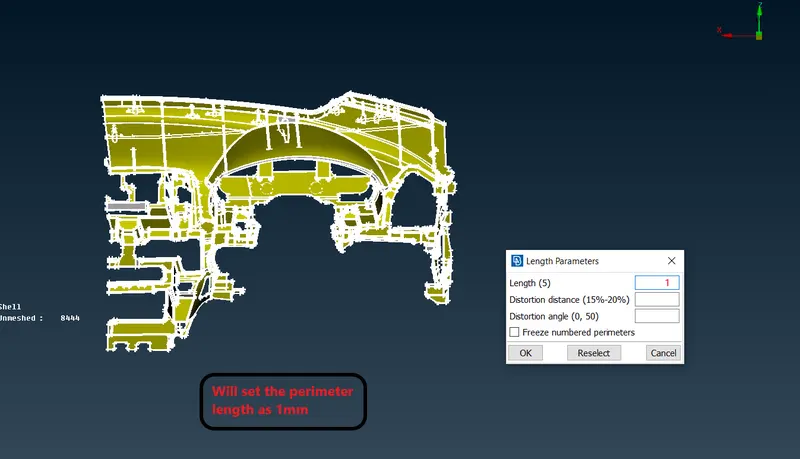
- Before midsurface extraction we will change the perimeter and macros length as 1mm.
- We are doing it just because to get a proper and finished surface while extracting midsurface.
- For giving the perimeter and macros length.
- Go to mesh module >> Length >> perimeter >> select region by box drag >> middle click >> put 1mm
- Simmilarly we will do for macro length also,
Now final model ready to extract midsurface,
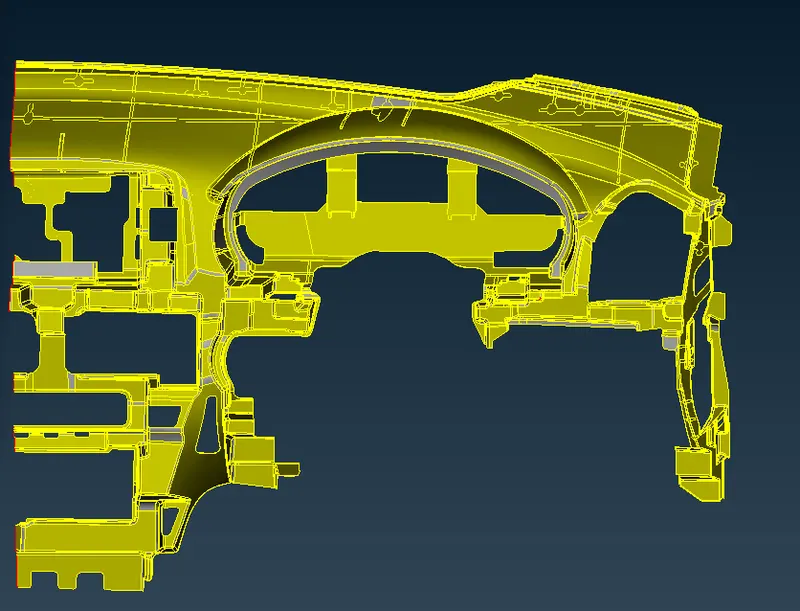
Midsurface extraction:
Why we need midsurface extraction?
As we know we have to mesh this 2D component, and as we can the real CAD model is not perfect 2D. Its having some thickness at every part in the whole component.
- If model is having thickness less than 6 mm then its may be sheet metal or plastic component.
- And for sheet metal and plastic component midsurface is neccessary for meshing purpose
And since we are going to apply trias and quads elements so we need to change this model ito perfectly 2D as sheet.Then we can apply Trias and quads elements on the sheet. For that we can choose multiple option for extracting the mid surface like,
- Automesh
- Casting
- Offset the surface
- Use of middle line
By these methodes we can extract midsurface for this particular component.
- Here we will start extarcting midsurface from complex areas like cap top surface as shown below.
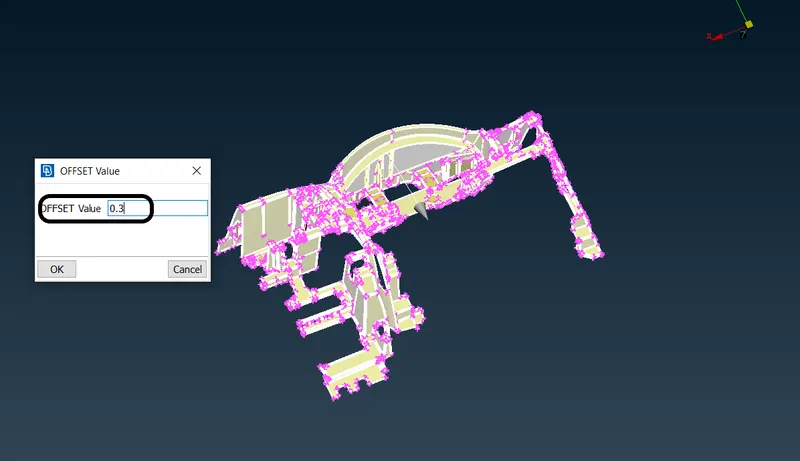
- In this methode we have uses offset surface at middle.
- Go Topo module >> faces >> offset >> put distance.
Note- While extracting midsurface, uncheck to delete original surface]
here, we can see that the parent body thickness is 0.6 mm.
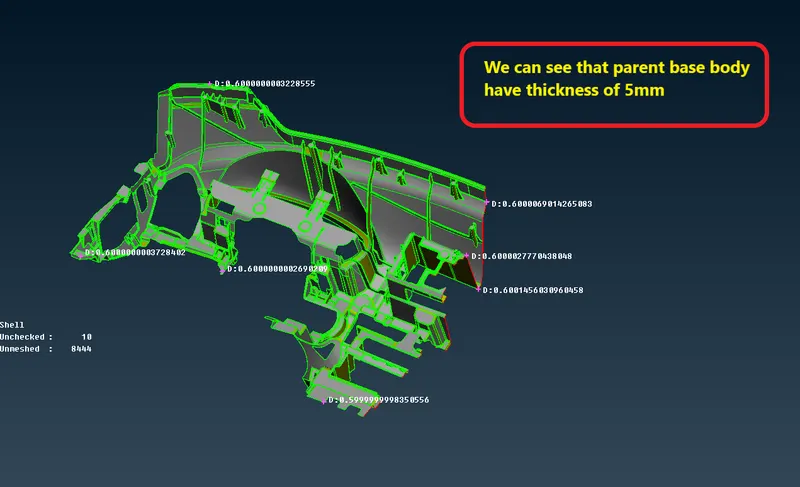
- So now we will try to offset this surface at 0.3 mm.
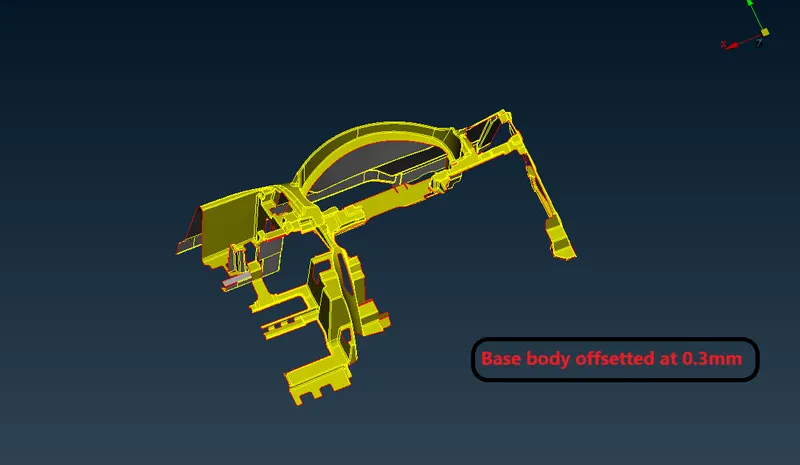
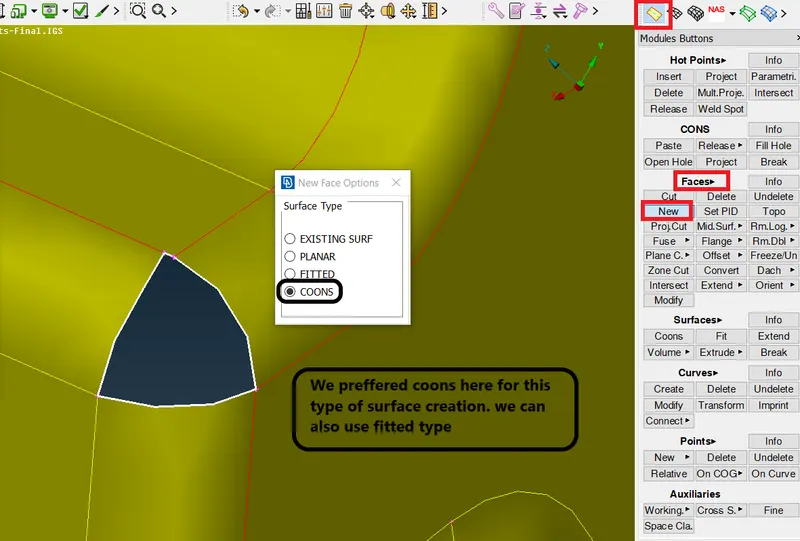
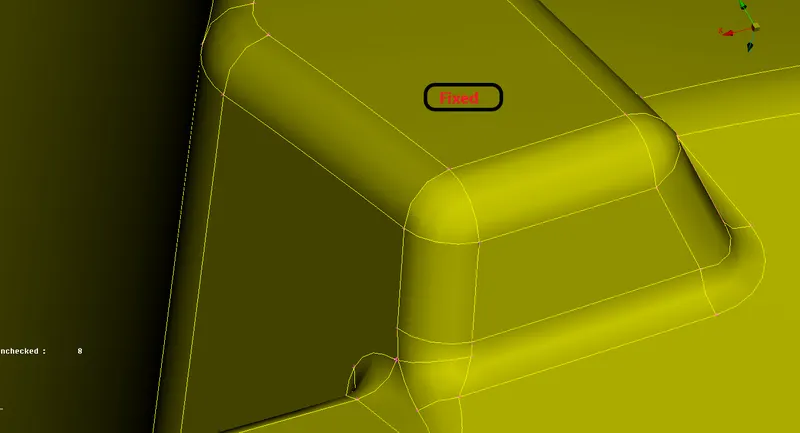
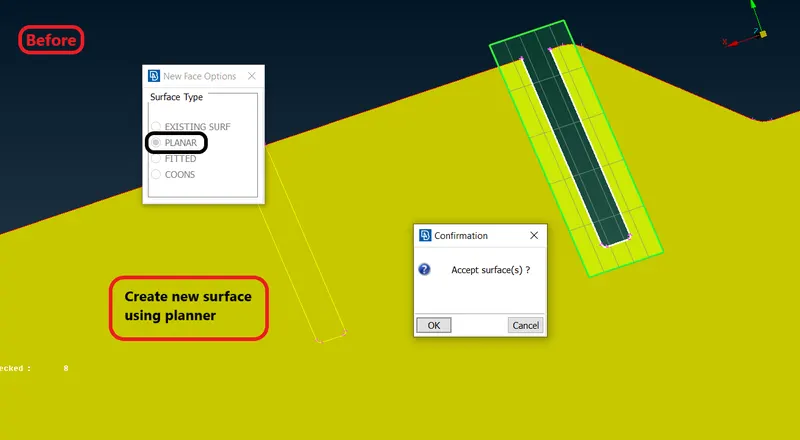
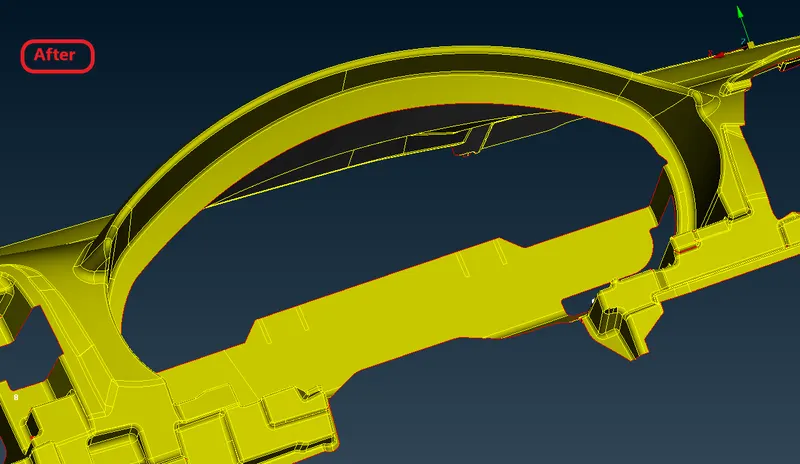
- After offsetting this particular component we can see lot of surface failure which we need to fix as shown below.
Corner surfaces-
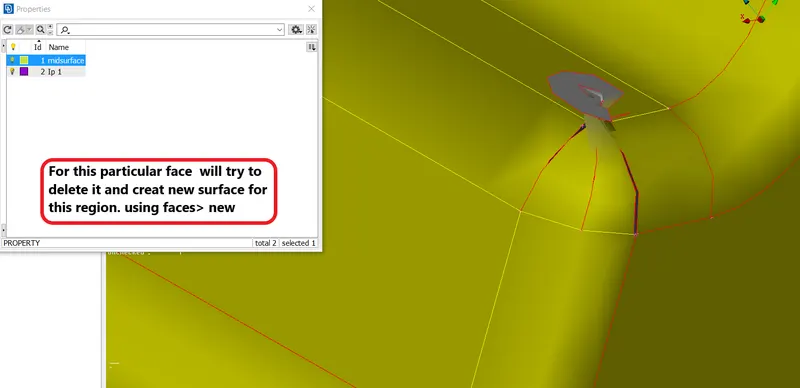
Planner surfaces,
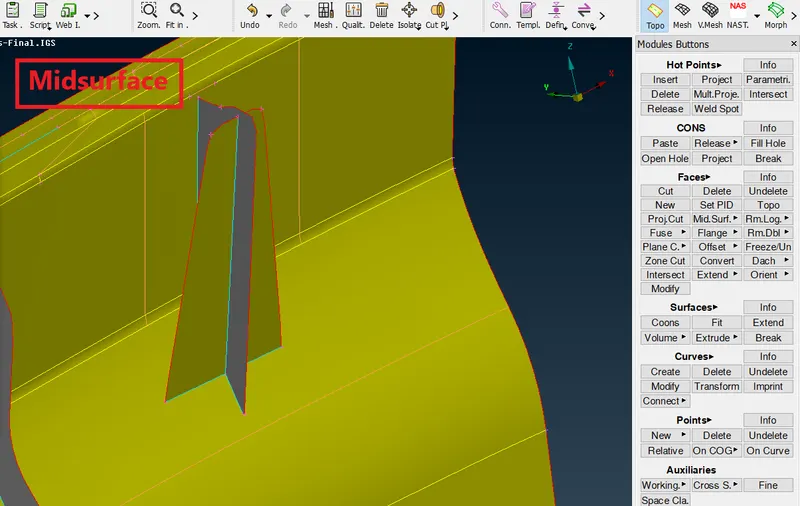
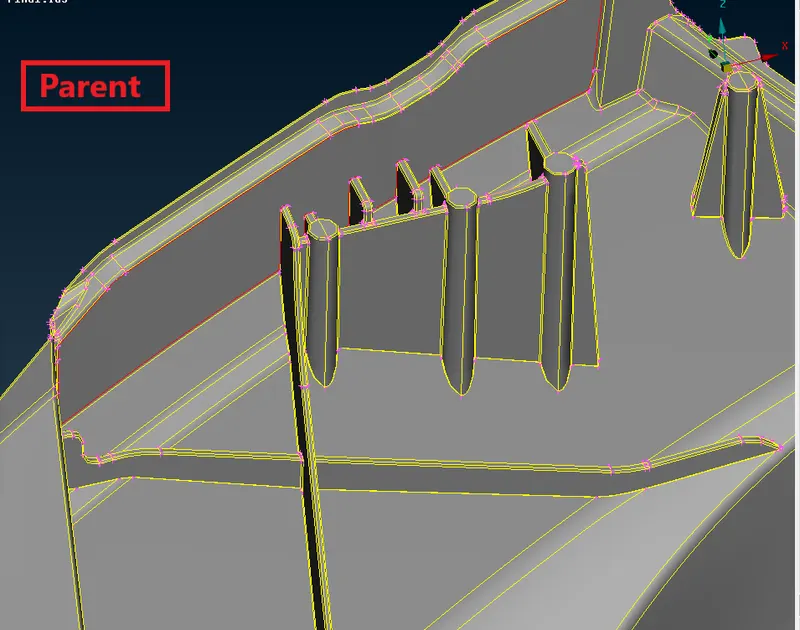
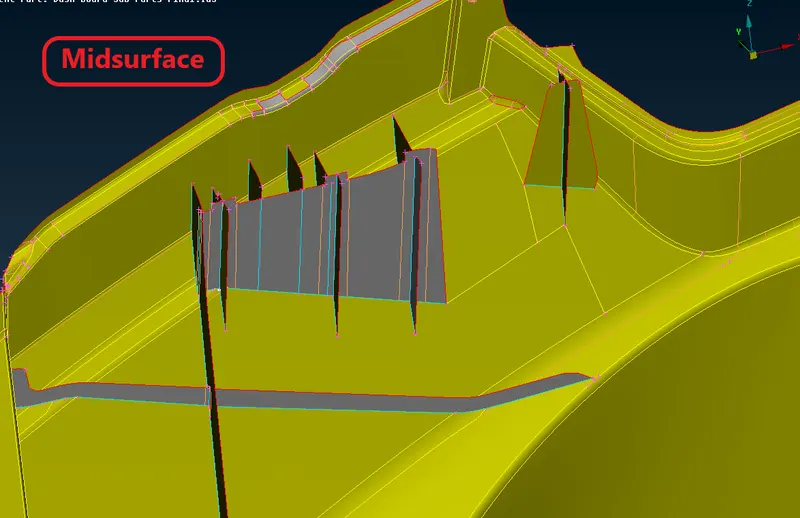
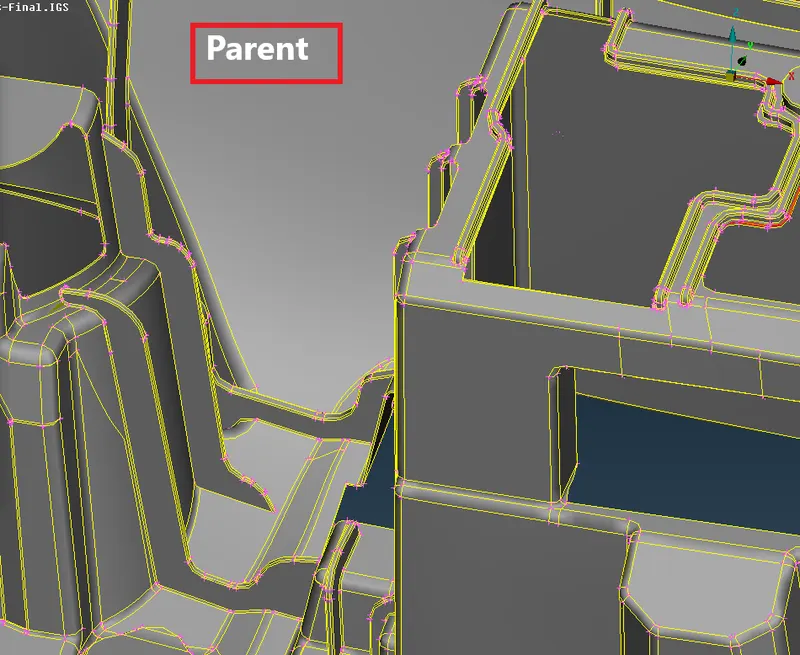
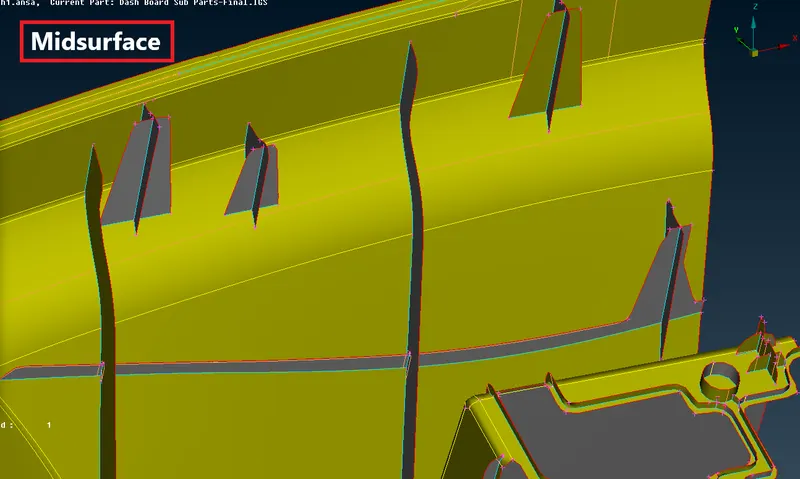
Offsetting the Ribs and Dog houses-
- There is lot of approaches we use to extract midsurface for Ribs and dog houses.
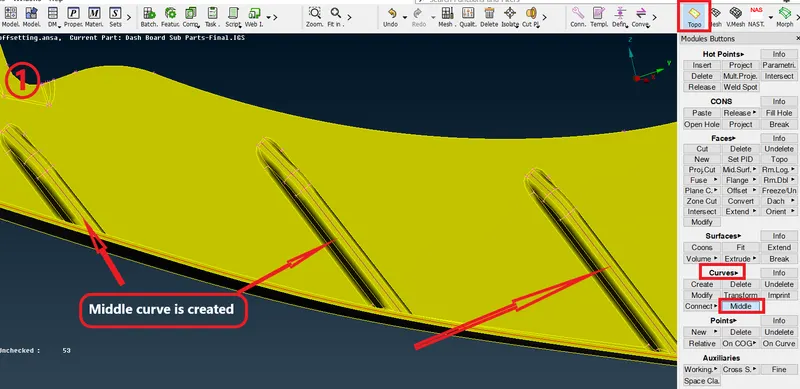
1. Creating middle curve-
- Creating a middle curve using curve tool in topo module.
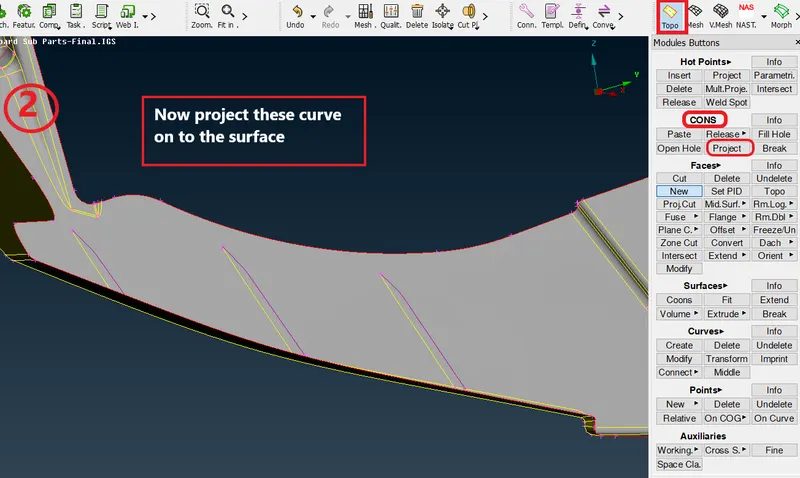
- And then project those curve onto respective surface.
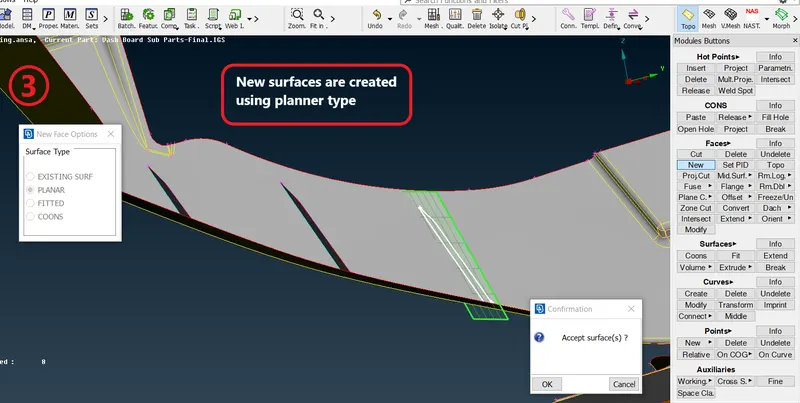
- And then create nes surface by selecting coons.
2. Offsetting the surface at mid-
- In this methode we will offsett the surfaces at mid.
- In case of Dog house we will get intersected surface.
- So for that we will use intersect tool to create surface intersection in faces in topo module.
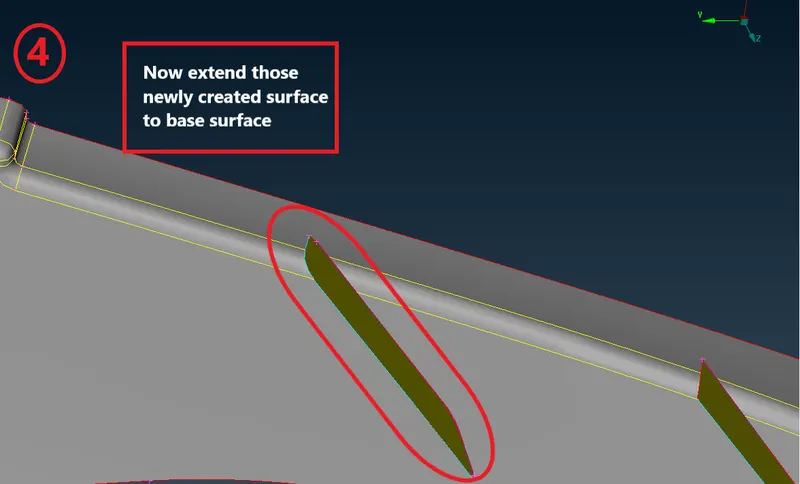
- Then after that we will extend those surfaces to base midsurface.
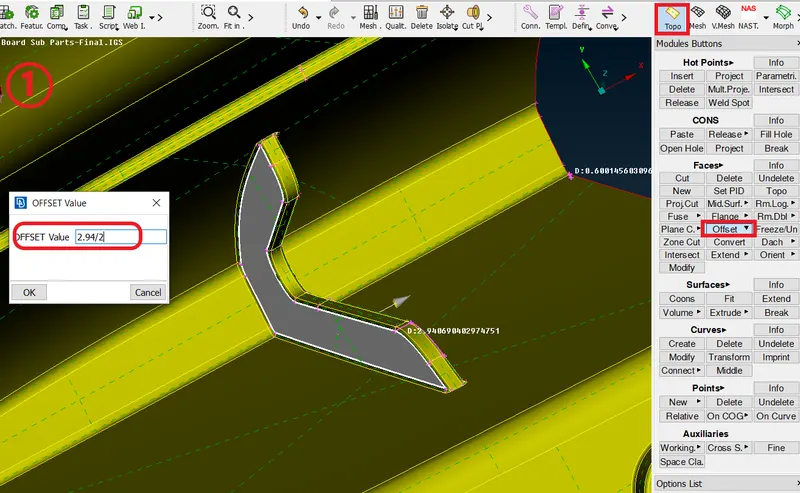
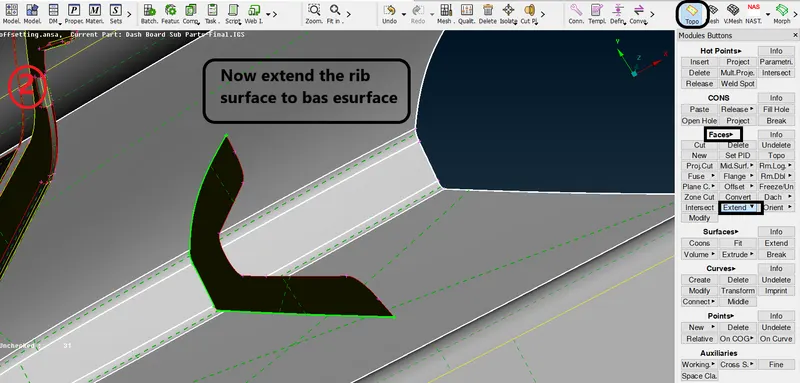
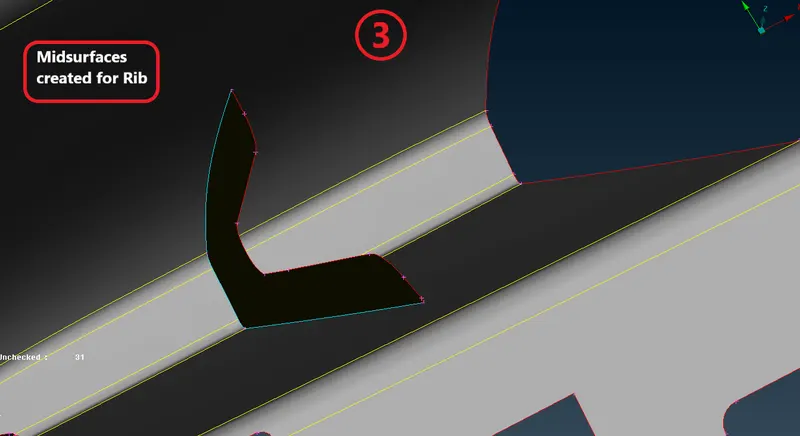
Simillarly we will do for all ribs and Dog houses-
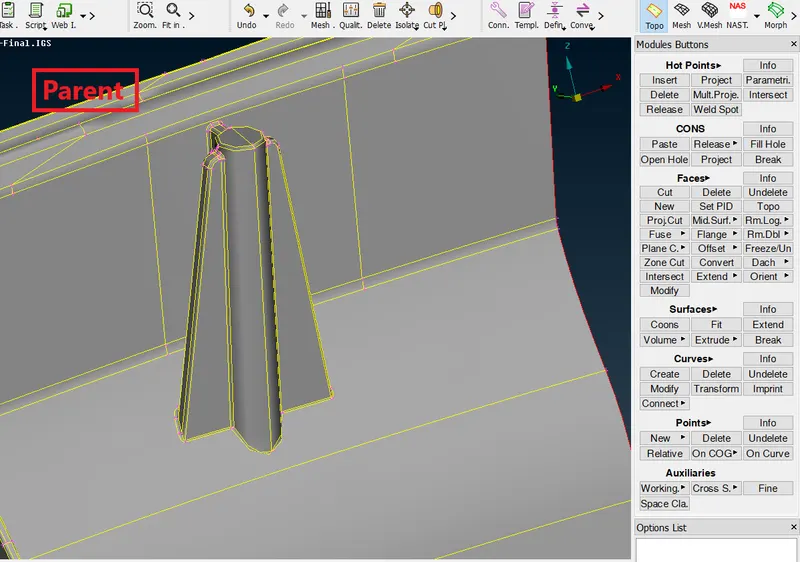
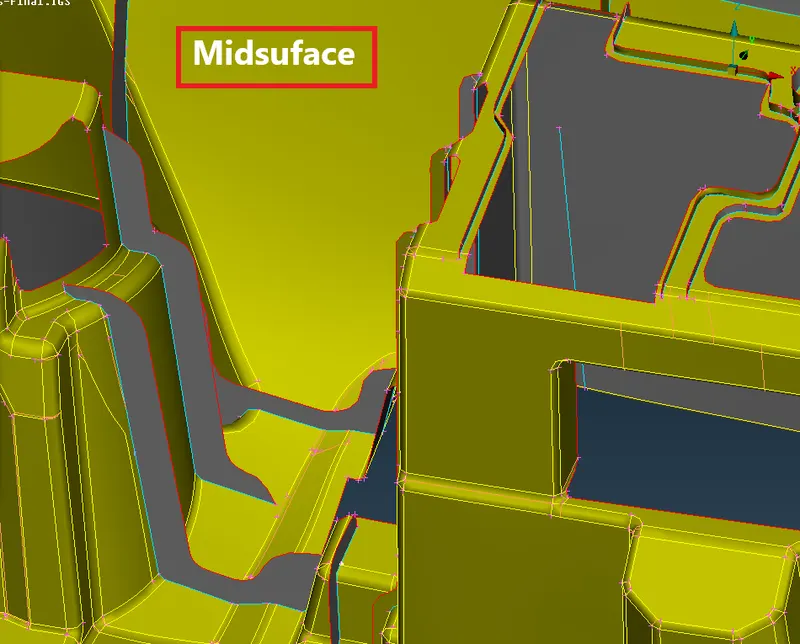
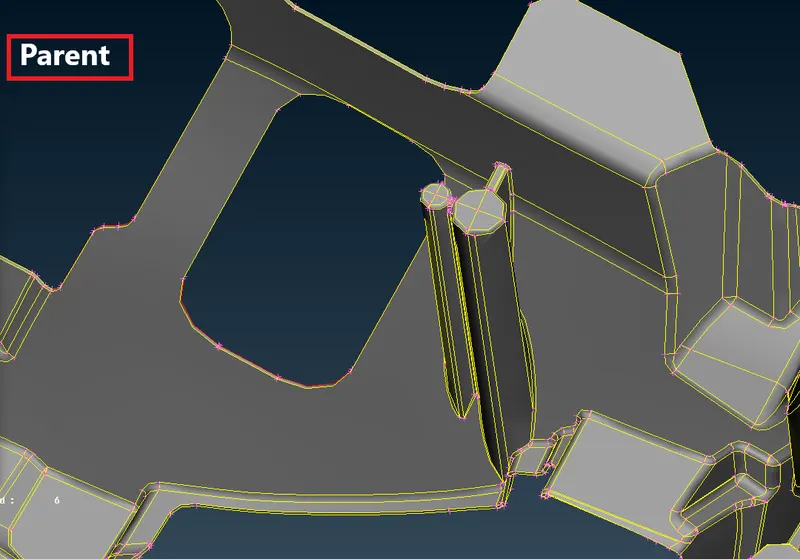
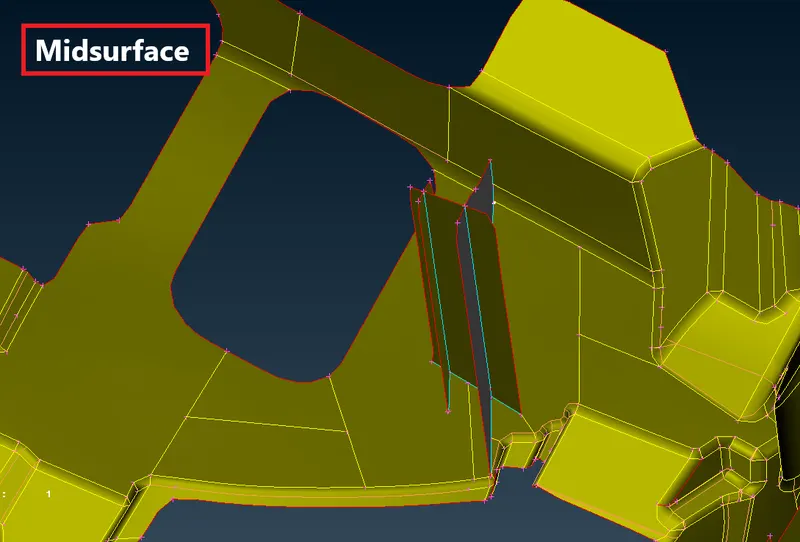
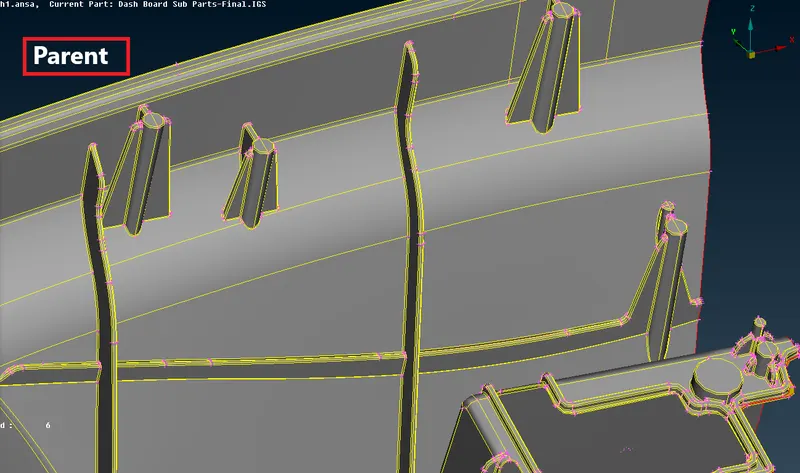
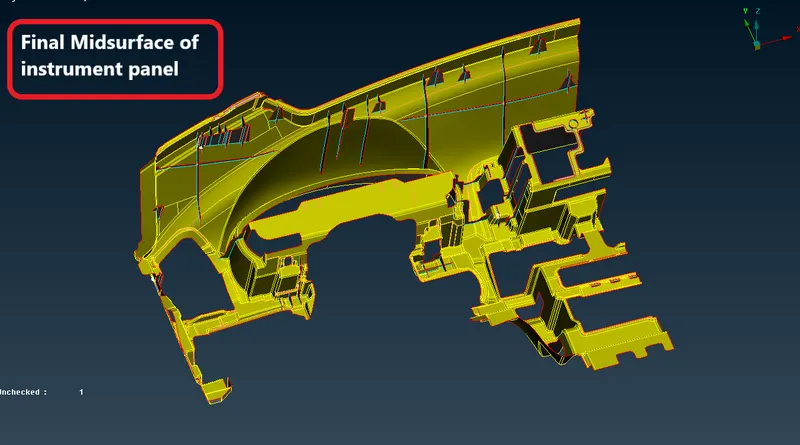
Final midsurface-
Stage-5
Meshing-
Once geometry cleanup and midsurface extraction is completed it means there should not be any ustitched surfaces, unwanted free edges etc. Meshing meshing is next step
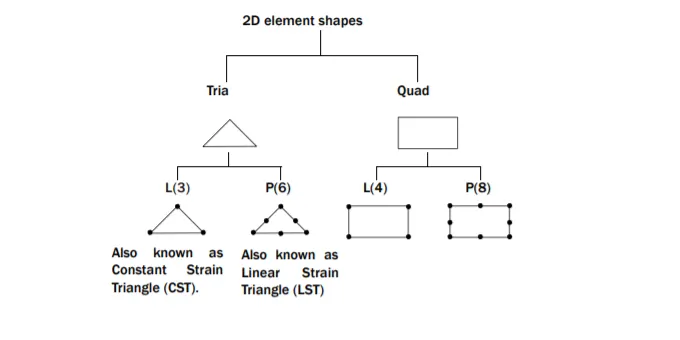
Mesh module >> Mesh generation >> Best >> select component and mesh
- In 2D meshing with ANSA preprocessor easiest way of meshing is by Best mesh option.
- After giving mesh to the surface usually we will be using Reconstruction (Recon.) from shell mesh for better mesh flow.
- Uses of some other tools also like smooth,split,swap,cut,join,projcut etc. For better mesh flow
Given Quality criteria for this model:
Target Element Length = 4 Unit
S.N. Quality criteria Functions Values
1 Aspect Ratio Ratio of max lenth/min legth 5
2 Skewness Deviation from ideal shape 45
3 jacobian Transformation of coordinate system 0.7
4 Warping Angle between the two planes of the same element(quad) 15
5 Min.Length shortest length of any given element 2
6 Max.Length largest length of any given element 6
7 Target avg. length Average length of element 4
8 Min. angle quad Minimum angle in any given quad element 45
9 Max. angle quad Maximum angle in any given quad element 135
10 Min. angle tria Minimum angle in any given tria element 30
11 Max. angle tria Maximun agnle in any given tria element 120
12 Tria % percentage of tria in mesh surface 15
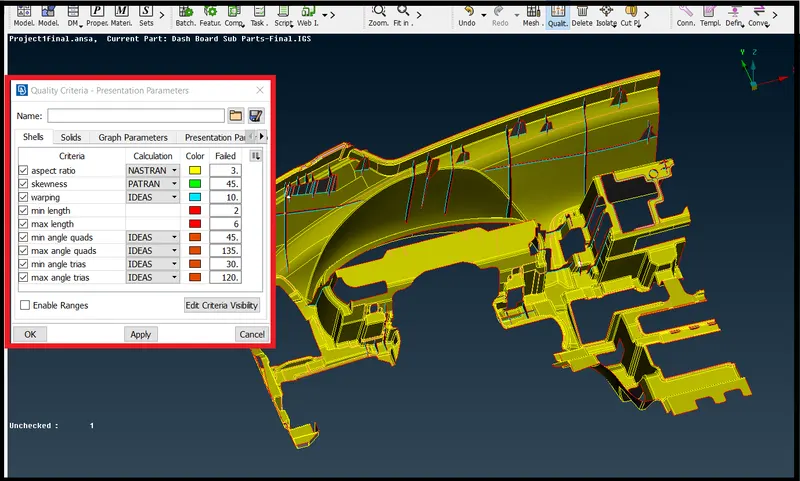
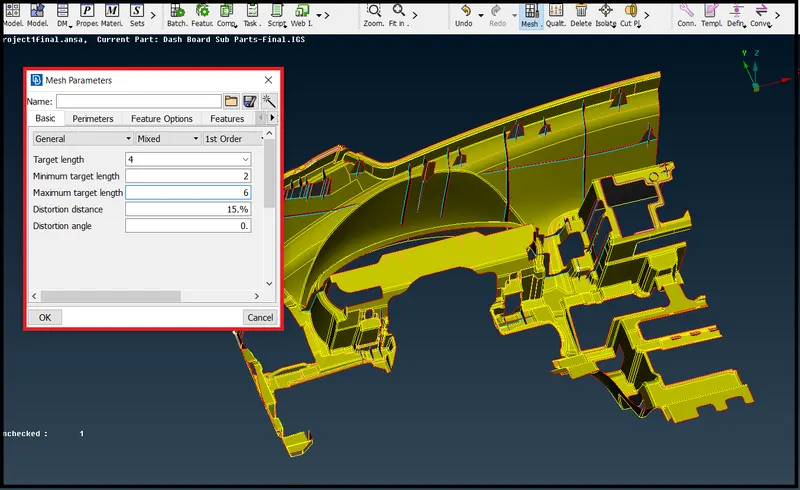
Start Meshing-
Some thumbrule while meshing for better mesh flow-
- Feature capturing is must while meshing it means all shared edges should have better nodes connectivity.
- Try to keep less number of trias.
- Avoid trias on feature line and edges should swap it.
- Avoid opposite trias, use split option and combine them.
- Try to keep less number of trias on fillets, use split or swap tool.
- Avoid rotational quads, Recons. or split into trias and move them.
- Use mixed type of elements on complex geometry means trais and quads for this 2D meshig.
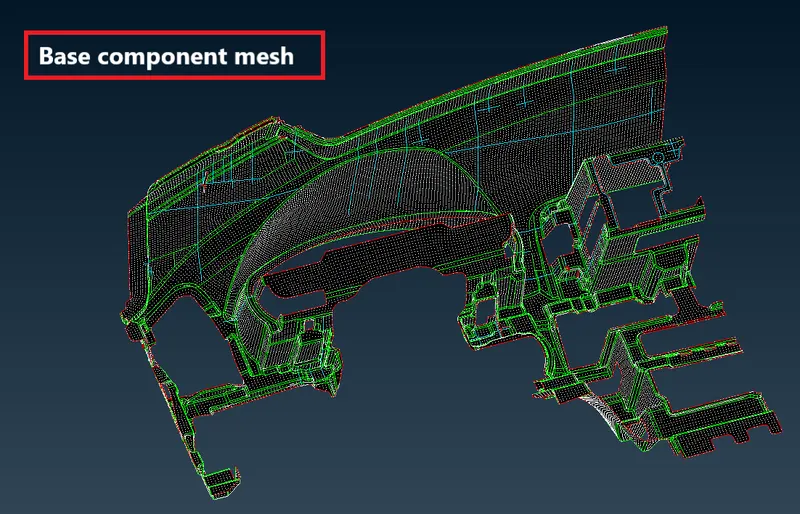
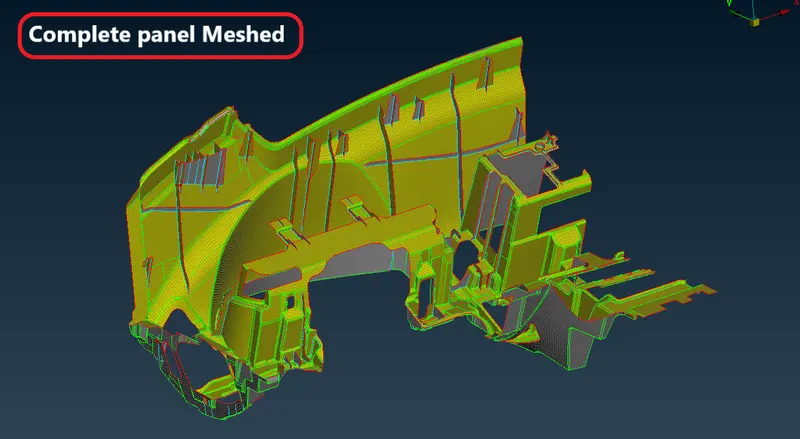
Assigning Thickness to shell mesh-
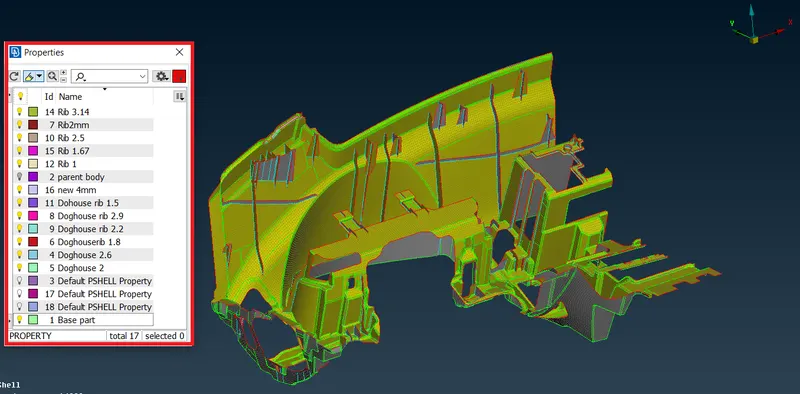
- Since here every part is having different thickness so now we will assign PID's indivisually and also assign the thickness for every part.
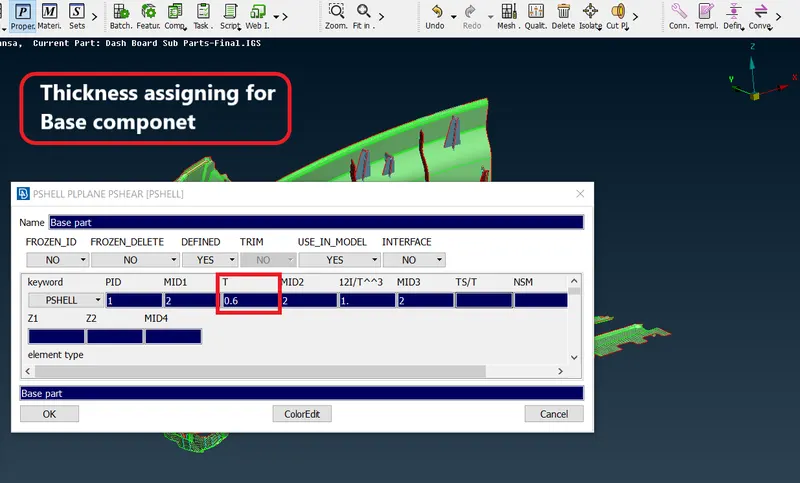
Now assign thickness for all ribs and Dog houses as well,
- Final check-
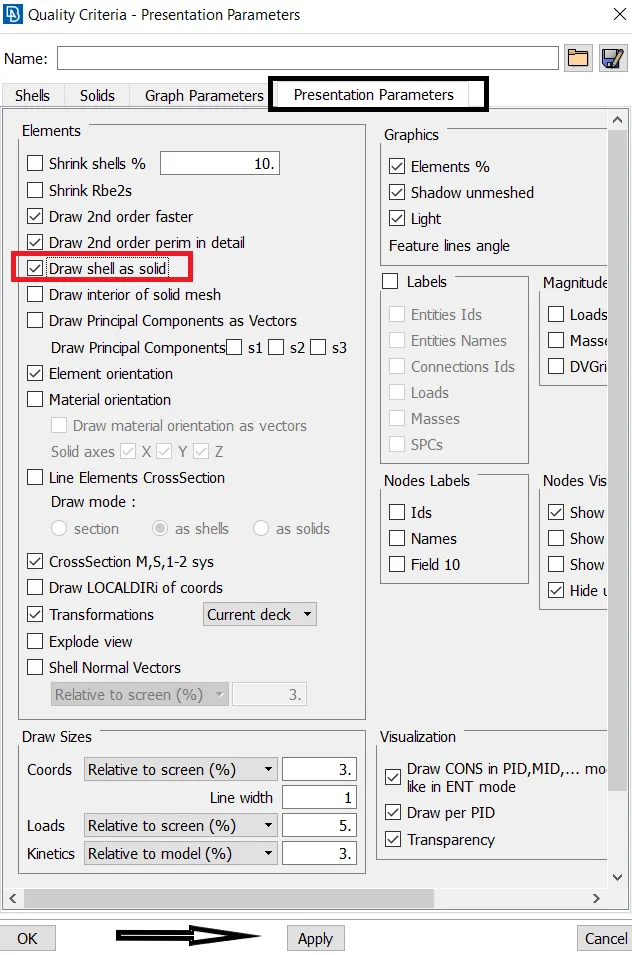
- For final check we will first on the 2D visibility of elements.
- so that we can visually chack that every part is having its own thickness elements or not.
- For that go to Quality table >> Presentation parameter >> check on Draw shell as solid.
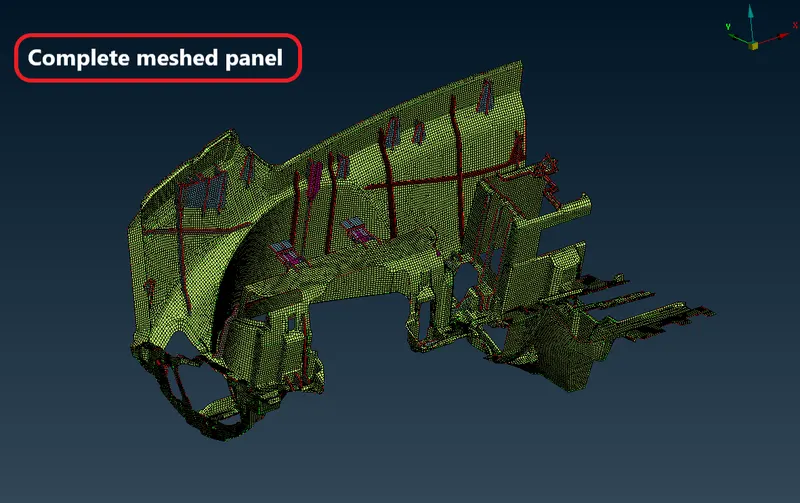
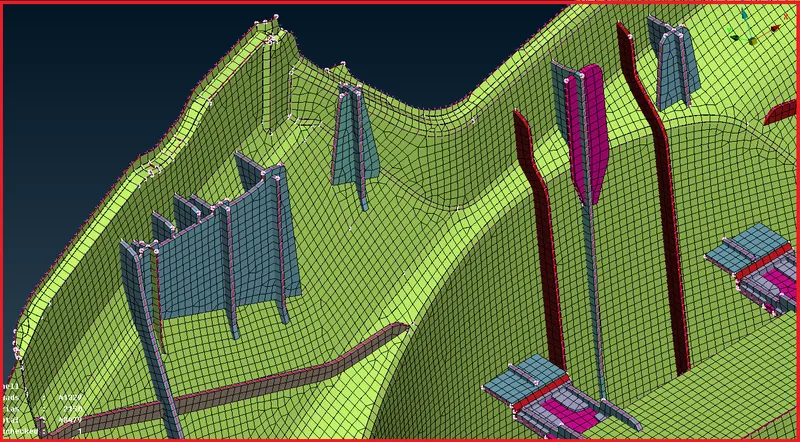
Final mesh with thickness representation-
Result-
- Hence we have cleared all geometrical glitches successfully over the component.
- Extracted midsurface for all the ribs dog houses and base component.
- Meshed the midsurface according to given quality criteria.
- Cleared all the failing elements from quality.
- All feature have been captured properly.
- A good mesh flow have been achived with less tria concetration.
- Thickness assigned for every part with different-2 values according to parent body.
Learning outcome-
- How to perform geometry cleanup for complex geometry.
- The midsurface extraction for complex geometry like intrumental trim body.
- How to extract midsurface for Ribs an dog house.
- How to achive less tria concentration with proper mesh flow.
- How to clear failing elements from quality.
- How to assign different-2 thickness for trim body and ribs
Model link- https://drive.google.com/file/d/1p5B8Y_lUTFmYrduMi0PgOq9lhgkA3bBK/view?usp=sharing