Mobile Phone Drop Test Simulation using LS-DYNA
Aim:
1) To perform the Drop Test Simulation of Mobile Phone on the Floor by setting up the model.
2) To provide initial velocity to the mobile so that, it goes and hits the rigid floor at a certain velocity.
3) To get the output contour animation and other plots upon running the simulation.
Procedure:
Importing the Model:
1) We first open the LS Prepost software and import the keyword file (.k file).
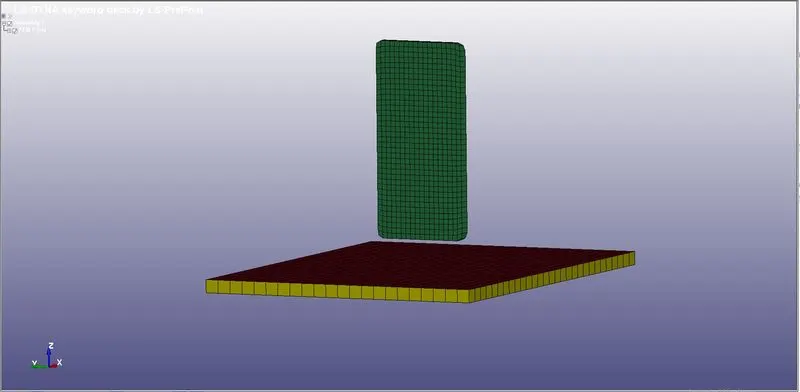
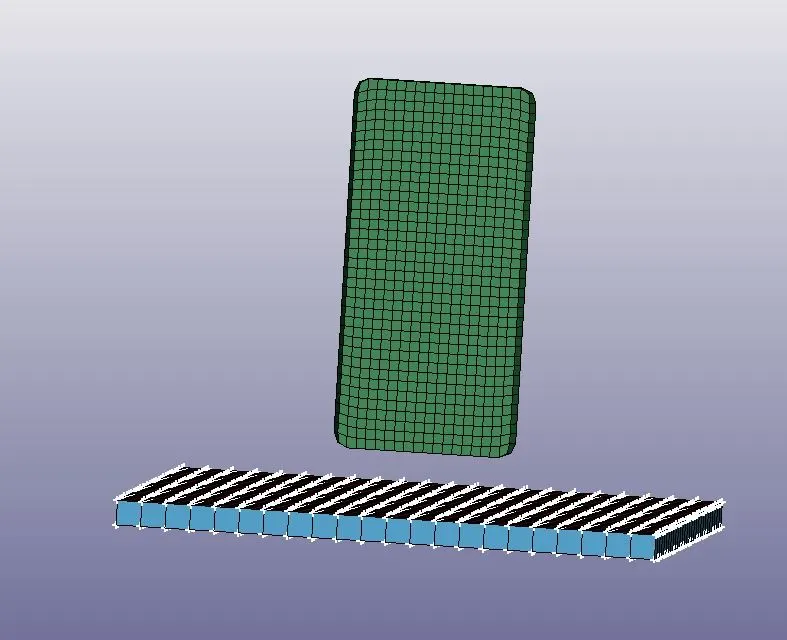
2) We see that the model consists of a phone and floor parts which have already been meshed as shown in the image given below.
Assigning Material:
3) We then, assign the material properties to the parts i.e. phone and floor. For the mobile phone, we are using Aluminum Material properties. Although many material models exist for metals, one of the most robust models is *MAT_024 or *MAT_PIECEWISE_LINEAR_PLASTICITY. This material model is the standard workhorse and is the recommended starting point for elastic-plastic simulation of metals and general plastics since it can also handle viscoelastic behavior (i.e., strain-rate dependency) and for defining this material we are using MAT_024(MAT_PIECEWISE_LINEAR_PLASTICITY)This is Material Type 24, which is an elastoplastic material with arbitrary stress.
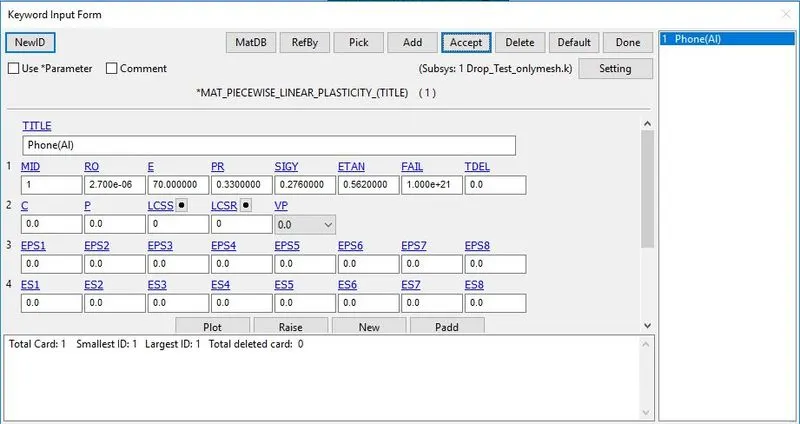
Here,
- MID: Material identification. A unique number or label not exceeding 8 Characters must be specified.
- RO: Mass density.
- E: Young’s modulus.
- PR: Poisson’s ratio.
- SIGY: Yield stress.
- ETAN: Tangent modulus, ignored if (LCSS.GT.0) is defined.
4) Since a Floor is an undeformable Object in this Condition and we are going to Focus our result in an area of Mobile Phone we can Use MAT_RIGID. By setting bodies (i.e., parts) to use *MAT_RIGID, where deformation and stresses are not of interest, significant CPU savings can be realized. In the background, LS-DYNA retains the surface mesh of the part for contact behavior and calculates an inertia matrix to simulate the dynamic behavior of the body. What is useful with this approach is that the body still retains its inertia and physical characteristics as it interacts with other bodies within the simulation but at a fraction of the numerical cost of dragging around a fully deformable-body. The implementation of rigid bodies opens doors to making your models run faster and allow you to focus on what is important and avoid getting distracted.
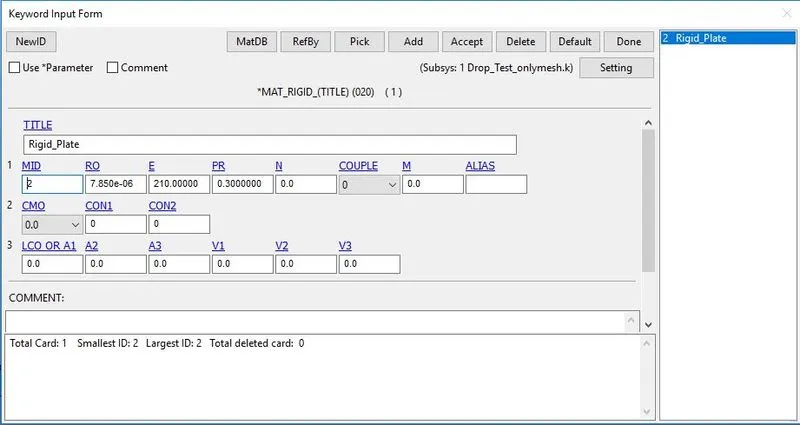
Here,
- MID: Material identification. A unique number or label not exceeding 8 characters must be specified.
- RO: Mass density
- E: Young’s modulus. Reasonable values have to be chosen for contact analysis
- PR: Poisson’s ratio. Reasonable values have to be chosen for contact analysis
Assigning Sections:
5) Section Creation Define the section Properties for different Elements. For Shell Element we use SECTION_SHELL and for Solid Element we use SECTION_SOLID. The Mobile Phone Elements and Part of Plate Elements are made of solid elements, so we use the SECTION_SOLID.
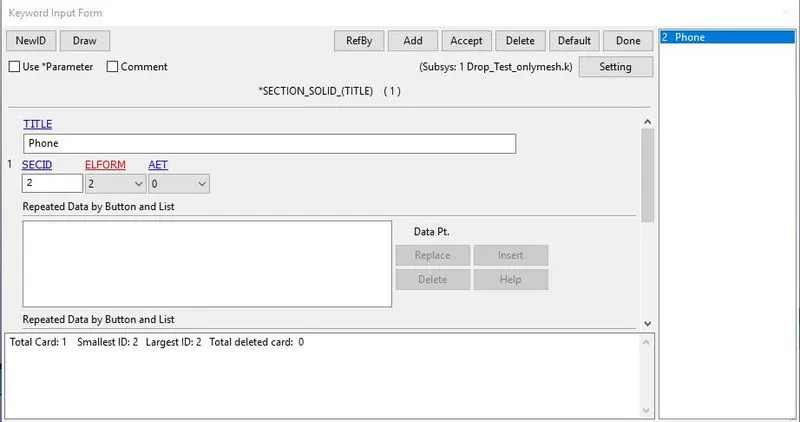
Here,
- SECID: Section ID. SECID is referenced on the *PART card. A unique Number or label must be specified.
- ELFORM: Element formulation options.
- ELFORM: 2 Fully integrated S/R solid intended for elements With poor aspect ratio, accurate formulation.
6) We also create SECTION_SHELL for the shell floor that is present in the parts library.
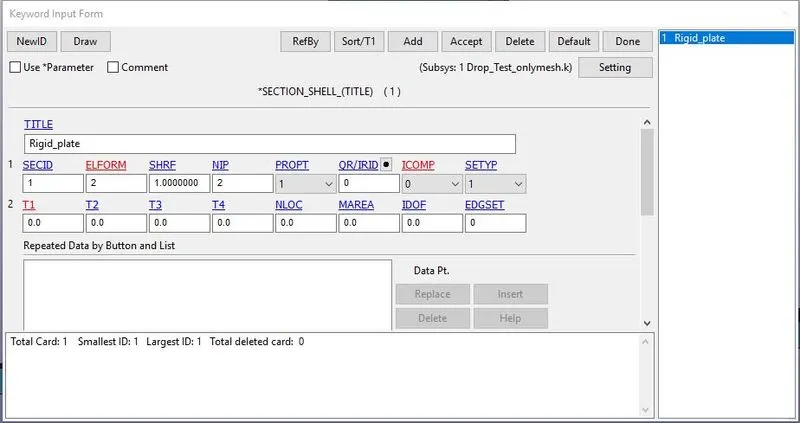
Here,
- SECID: Section ID. SECID is referenced on the *PART card. A unique Number or label must be specified.
- ELFORM: Element formulation options.
- ELFORM: 2 Fully integrated S/R solid intended for elements With poor aspect ratio, accurate formulation.
Assigning Materials and Sections to Parts:
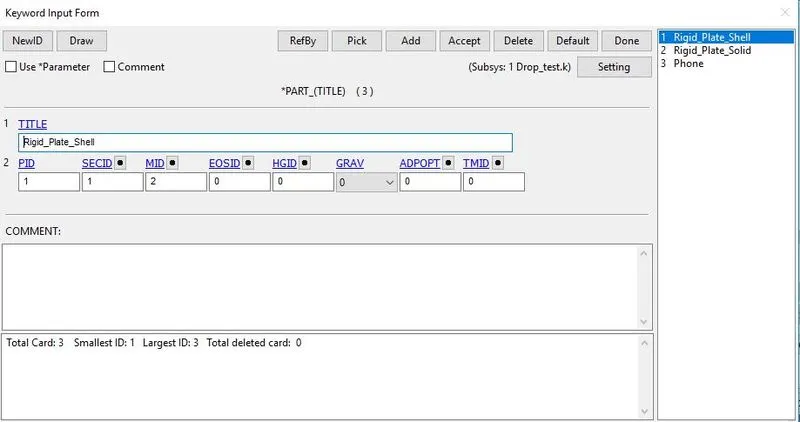
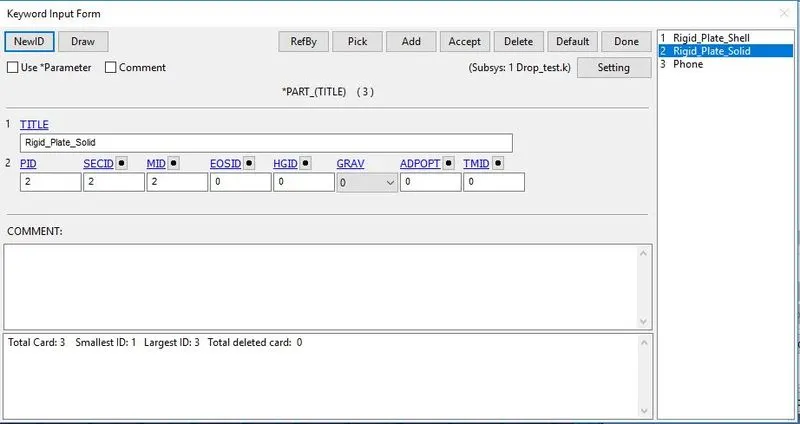
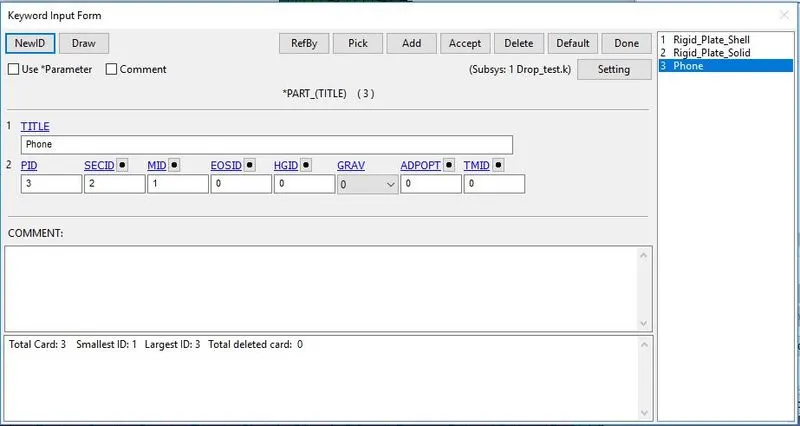
7) The Material and Section keyword is created and now they have to be assigned to the respective Parts.
Contact Creation:
8) The Mobile phone is been dropped onto the floor the contact must be created between these parts or else the mobile phone will simply pass through the floor. We are going to use two-way contact definition Two-way contacts - masters and slaves are reversed and contact checked both ways. Contact Algorithms are Penalty based – use numerical springs to prevent penetration of nodes of one surface into segments of the other Transfers loads between two parts. CONTACT_AUTOMATIC_SURFACE_TO_SURFACE is defined between The Mobile Phone and Floor is set to be Master and Mobile Phone is set to be Salve and Master and Salve type is set to be Part ID.
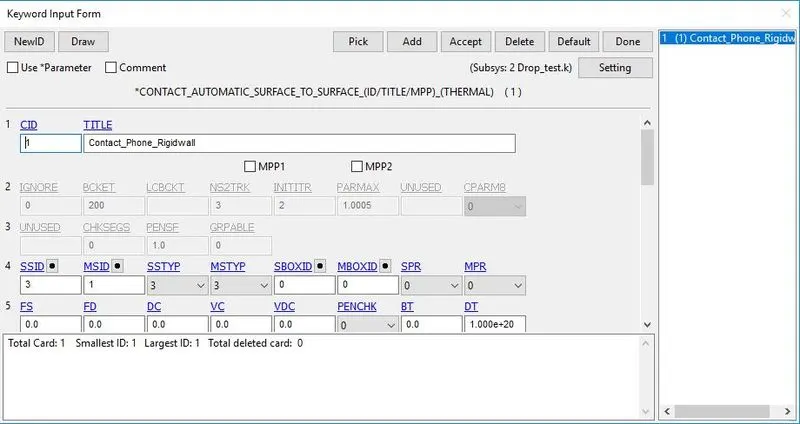
Here,
- SSID: Slave SetID, it is defined using part type.
- MSID: Master SetID, it is also defined using part type.
- SSTYP: Slave Set Type, it is selected according to the part.
- MSTYP: Master Set Type, it is also selected according to the part.
Boundary Condition:
9) Boundary_SPC-Single point constraint is used on Floor to lock all the degree of freedom during the simulation so that Floor doesn’t move during the impact of the Mobile Phone. Each DOF is set to 1, a value of zero means no Constraint, and 1 means the DOF is locked.
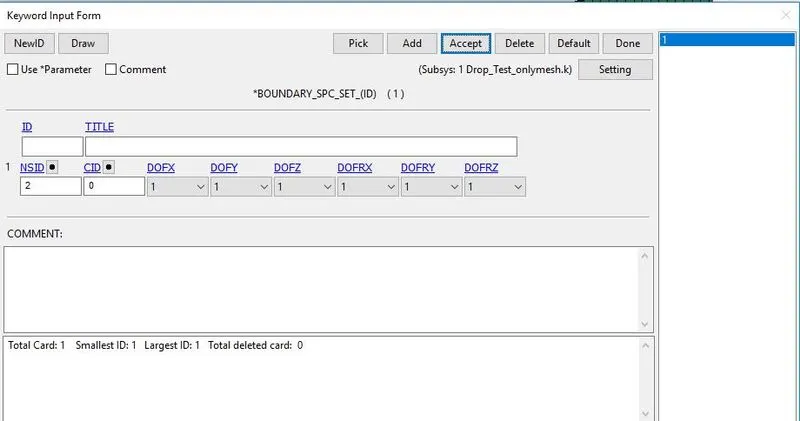
Here,
- NSID: Node Set ID, we already created the node-set for the floor.
- DOFX: Degree of Freedom along Translational X-axis.
- DOFY: Degree of Freedom along Translational Y-axis.
- DOFZ: Degree of Freedom along Translational Z-axis.
- DOFRX: Degree of Freedom along Rotational X-axis.
- DOFRY: Degree of Freedom along Rotational Y-axis.
- DOFRZ: Degree of Freedom along Rotational Z-axis.
Initial Velocity:
10) The Initial Velocity is defined to the mobile phone with the value of 10 mm/ms in negative Z direction which is towards the Floor is added.
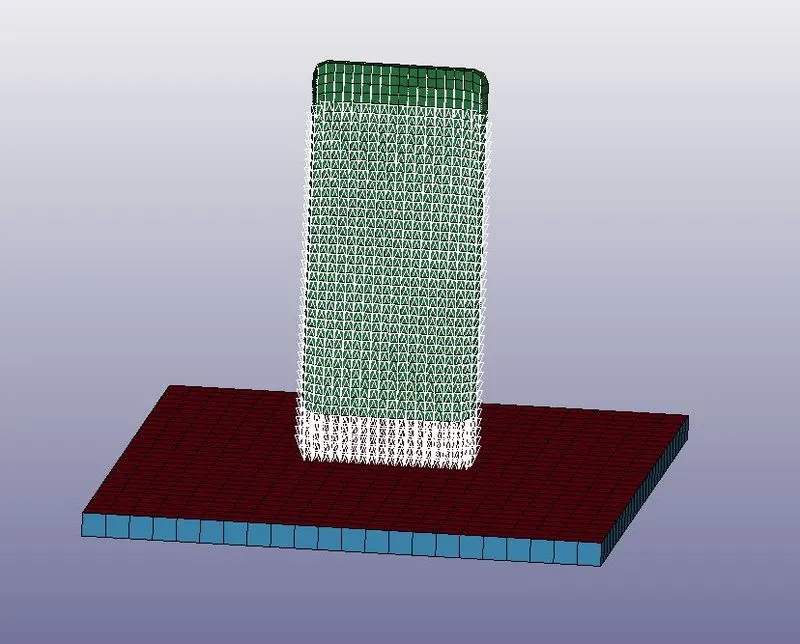
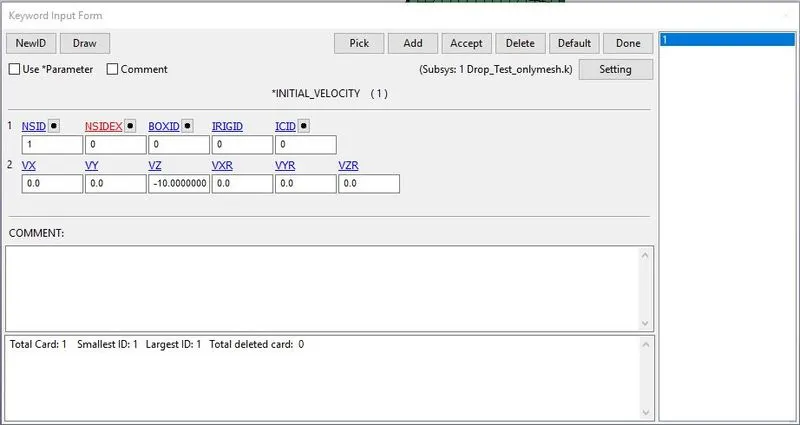
Here,
- NSID: Node Set ID, we already created the node-set for the floor.
- VX: Velocity along Translational X-axis.
- VY: Velocity along Translational Y-axis.
- VZ: Velocity along Translational Z-axis.
- VXR: Velocity along Rotational X-axis.
- VYR: Velocity along Rotational Y-axis.
- VZR: Velocity along Rotational Z-axis.
Control Cards:
11) Control_Termination is defined at what time the simulation ends or the end time of the simulation and it is set to 5 ms.
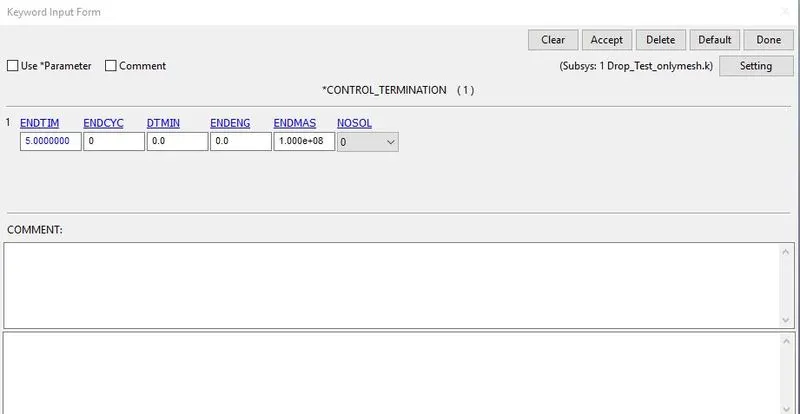
Here,
ENDTIM: It is the time at which the simulation ends.
12) Control_Energy provides controls for energy dissipation options.
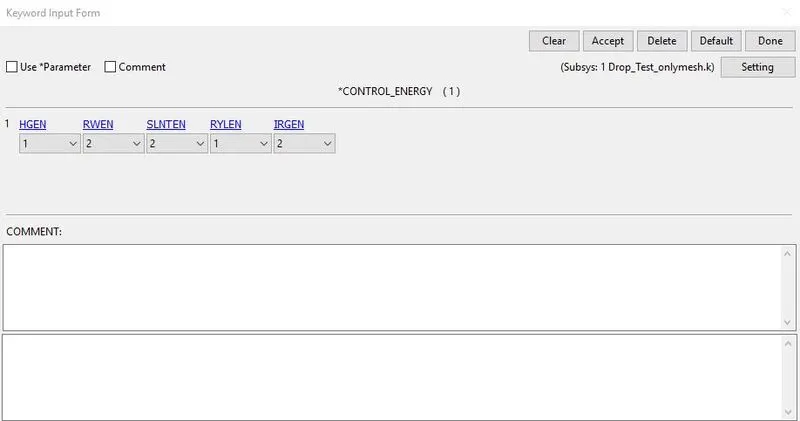
Here,
- HGEN: Hourglass energy calculation option. Is set to 2 In Which hourglass energy is computed and included in the energy balance.
- RWEN: Rigid wall energy dissipation option: Is set to 2 in Which energy dissipation is computed and included in the energy balance.
- SLNTEN: Sliding interface energy dissipation option Since the Contact is Defined it is set to 2 so that energy dissipation is computed and included in the energy balance.
Database Creation:
13) BINARY_D3PLOT is defined as the frequency at which the animation file is to be created and is set to 0.1ms.
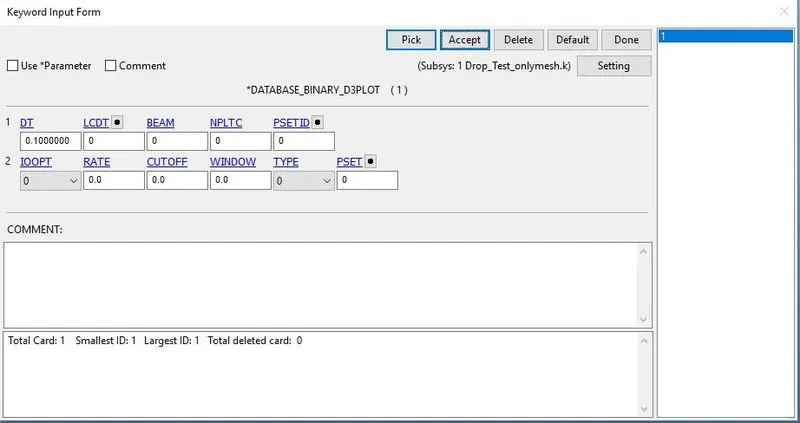
Here,
DT: Time-frequency at which the animation files should be printed.
14) ASCII_option keyword is the output request in ASCII format, The following keywords are Activated.
- ELOUT: Element Data
- GLSTAT: Global Data
- MATSUM: Material Energies
- RCFORC: Contact forces and Rigid wall forces
Keywords:
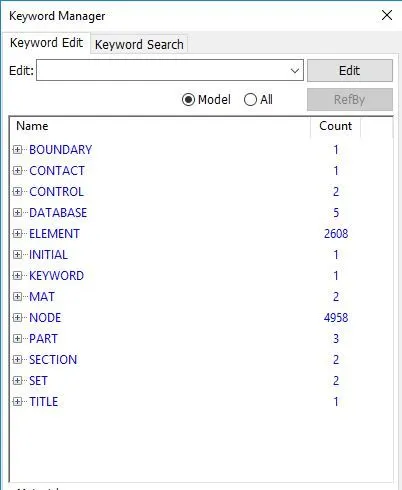
15) Finally, we have set up the simulation model and have a final look at our keyword manager which contains all the necessary parameters for running the simulation.
Model Check:
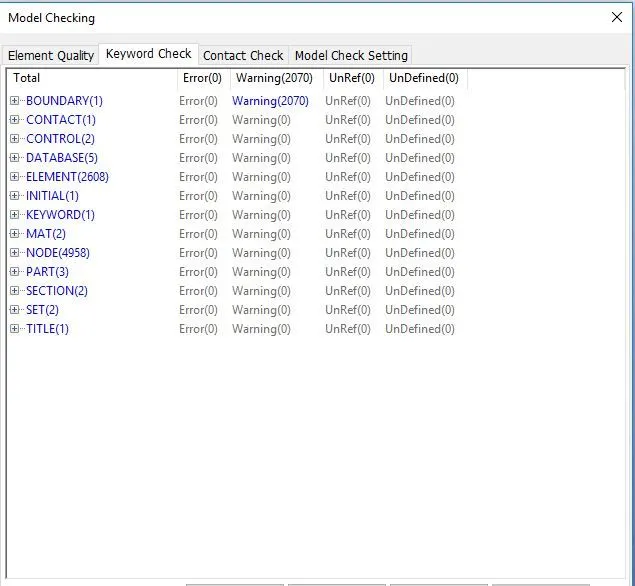
16) We perform model checking to find any errors or warnings present simulation model.
Results:
1) We save the LS Dyna keyword file in a different folder and we go to the LS-Run Manager and run the simulation by importing the LS Dyna keyword file. The simulation finishes successfully with a normal termination.
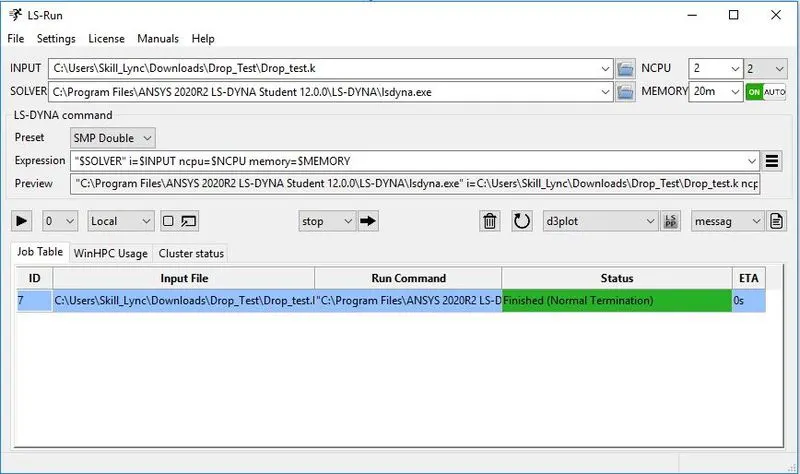
2) We then go to the message file and open it with a text editor to see the time taken to complete the simulation.
Contour Animation:
3) We input the binary d3 plot keyword file and first we plot the contour animation for von misses stress for that we go to the Post-processing tab and click on the Fringe component. Then, we plot the Vonmises stress under the stress tab.
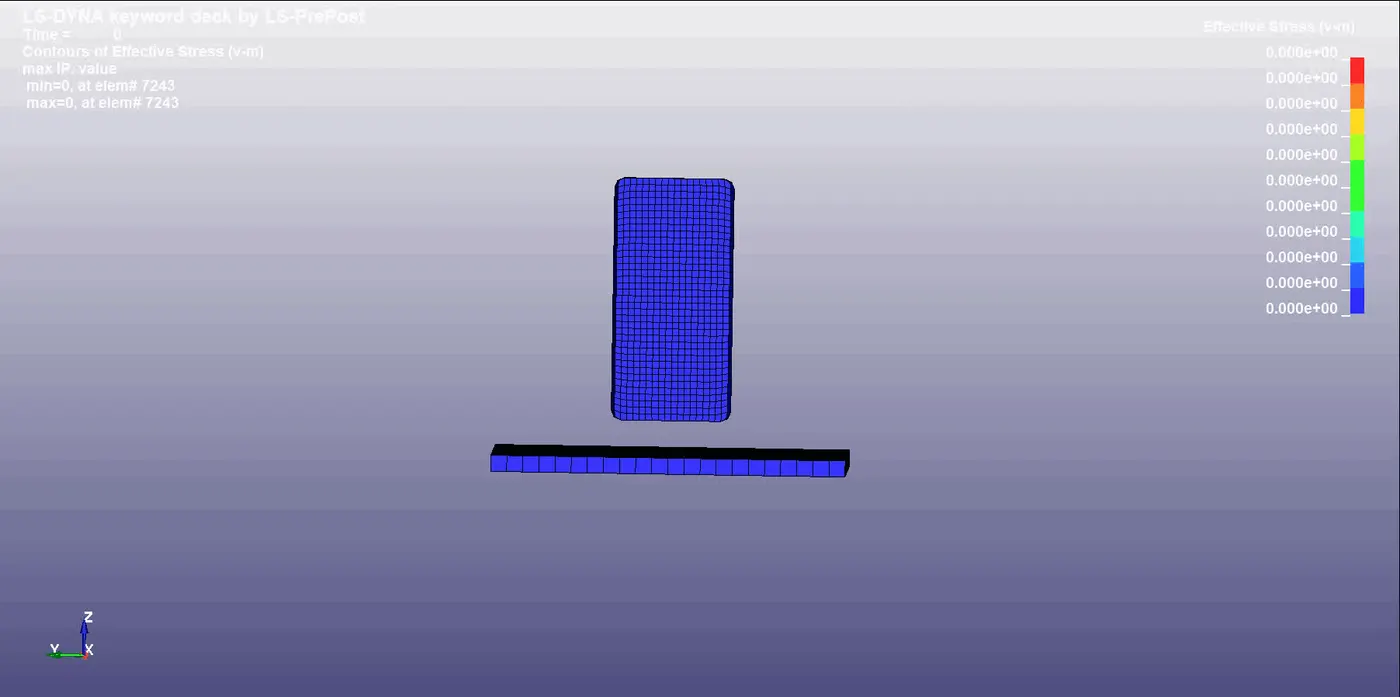
The min Vonmises stress is found to be at 0 GPa at element no 7243 and max Vonmises stress is found to be at 0.067269 GPa at element 6278.
4) We also plot the effective strain under the Strain rate tab.
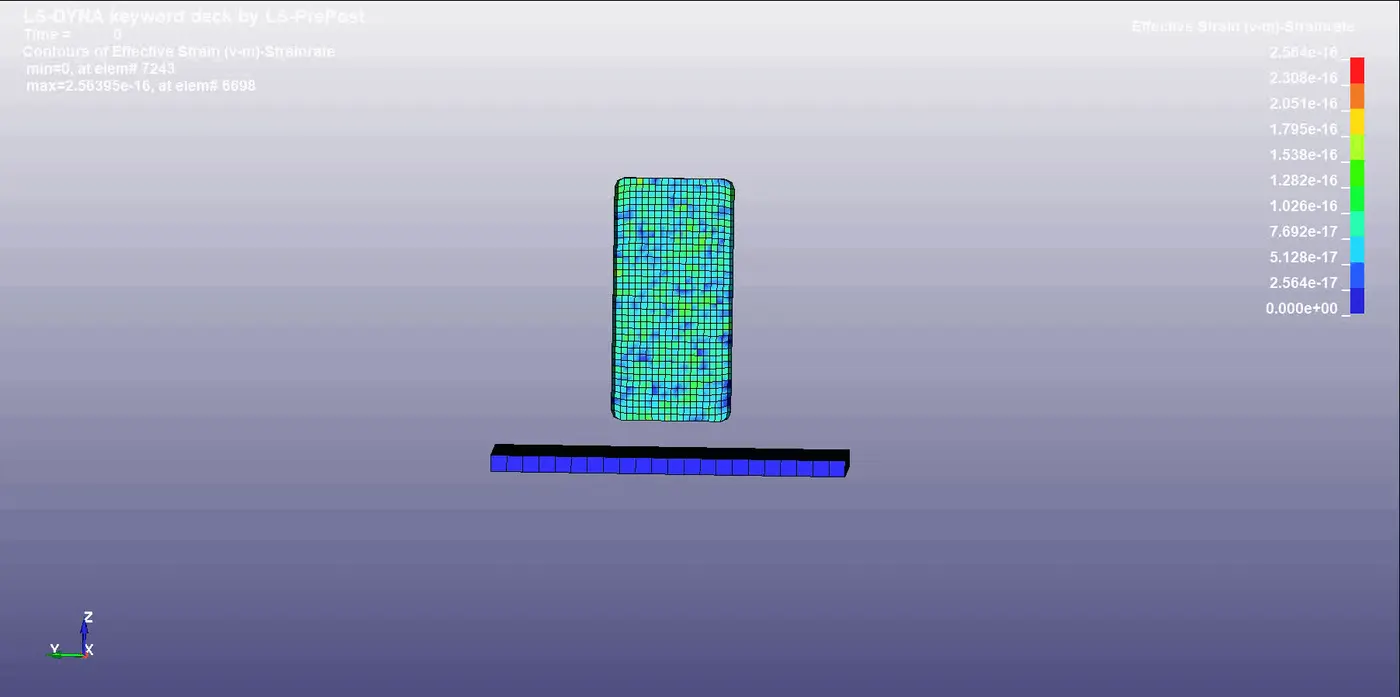
The min effective strain is found to be at 0 at element no 7243 and max Vonmises stress is found to be at 0.203216 at element 6223.
Plotting:
5) After we see the animation contours, we plot the energies, contact forces, etc. using the ASCII tab in the Post-processing tab. First, we plot the global data i.e. the glstat which consists of internal energy, kinetic energy, and total energy.
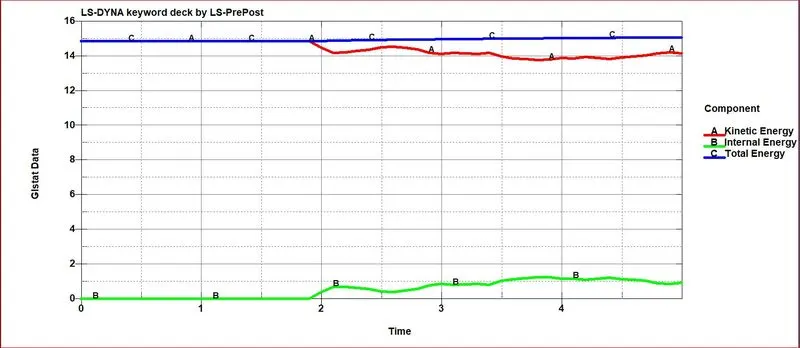
It shows how the kinetic energy of the mobile phone drops down as it hits the bottom plate and at the same time internal energy is gained by the mobile phone due to the impact. Total Energy is a Straight line with no deflection which means the hourglass energy and contact energy are very less compared to the internal and kinetic energy.
6) We plot the material energies i.e. the matsum which consists of hourglass energy for the different parts or materials.
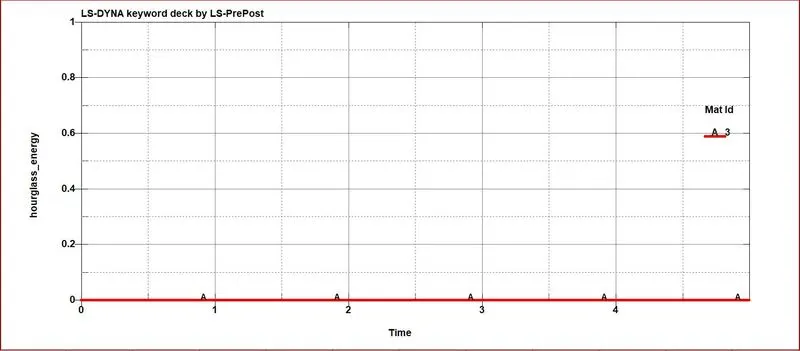
Hourglass energy is very low as compared to internal energy and remains at 0 J till the end of the simulation. Hourglass energy should not exceed 15% of internal energy.
7) We plot the contact forces i.e. the rcforc which consists of contact forces during the collision of the phone with the floor.
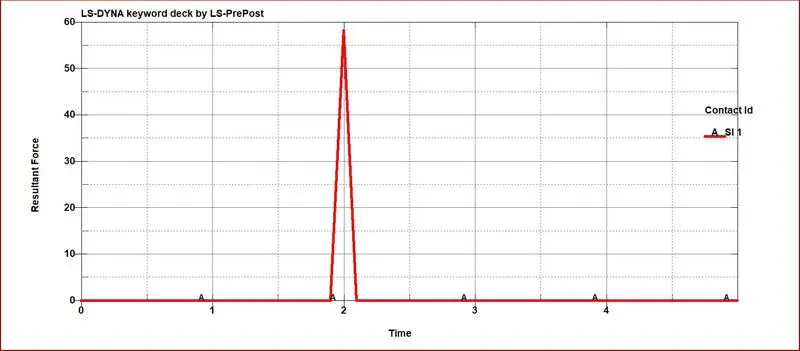
The contact force spikes up at 2ms when the phone hits the floor and hence the having highest force i.e. around 60 N and after that, it decreases and becomes zero for the rest of the simulation.
Conclusion:
1) We have initially set up the drop test model by assigning section, material, boundary conditions, control cards, and database.
2) We have simulated with a 5ms runtime.
3) We have also taken the animation contour for von mises stress and effective strain, also we have plotted the plots for global energy data, material or hourglass energy, and contact forces.