Hood design-Week 2
OBJECTIVE:
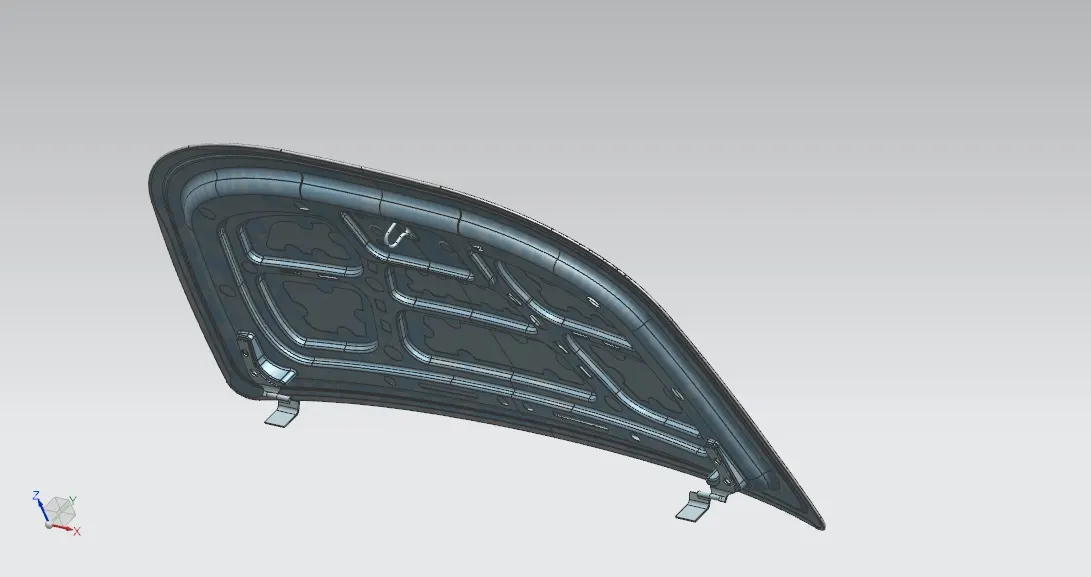
Design Hood outer panel, inner panel and the necessary reinforcements by following the Master section mentioned with the design parameter explained in the videos. Submit an assembly of Hood inner panel, outer panel, latch, hinge and the reinforcements.
INTRODUCTION:
PEDESTRIAN SAFETY : Safety is the most important criteria in automobile designs which concentrates on both pedestrian and occupant safety. The pedestrians are the most vulnerable road users and are at high risk of traffic accidents.
The major reason for the fatality of the pedestrian in traffic accident is due to the head injury resulting from the hard impact of the head against the stiffer hood or the ground. This leads to the necessity of new inner hood panel which is less stiffer and pedestrian friendly.
The fatality of a head injury is based on the head injury criterion (HIC) value. This HIC value is calculated on the basis of the resultant acceleration of the head’s centre of gravity (hereafter called the head centre) during head impacts.
HIC15 < 1000 = Yellow
1000 < HIC15 < 1350 = Orange
The pedestrian safety system needs to meet several test criteria. (Euro-NCAP, 2011) The tests are designed to evaluate impact to the pedestrian’s different body parts. As seen in Figure , adults as well as children have to be taken into consideration. European Union has set a demand that by 2015, all pedestrian involved in an accident with a car moving 40kph or less must survive.
THE EXPLANATION OF PARTS & PARAMETERS USED IN THE HOOD PANEL:
- HOOD - It is also known as bonnet. The hood or bonnet is the hinged cover over the engine of car that allows access to the engine compartment, or trunk on rear-engine and some mid-engine vehicles for maintenance and repair. Hood comprises of inner hood panel & outer hood panel, which is then set together using hemming process.
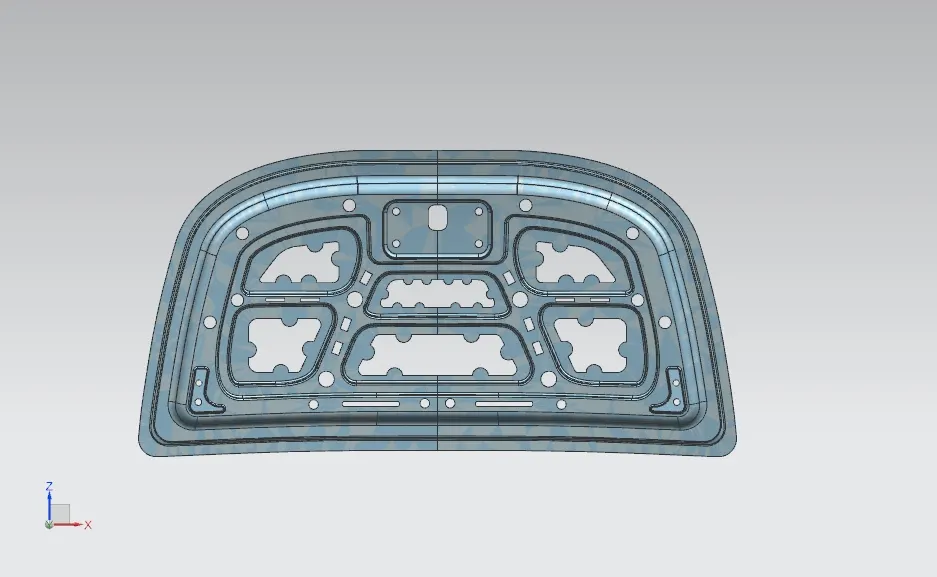
Fig. Hood Inner Panel
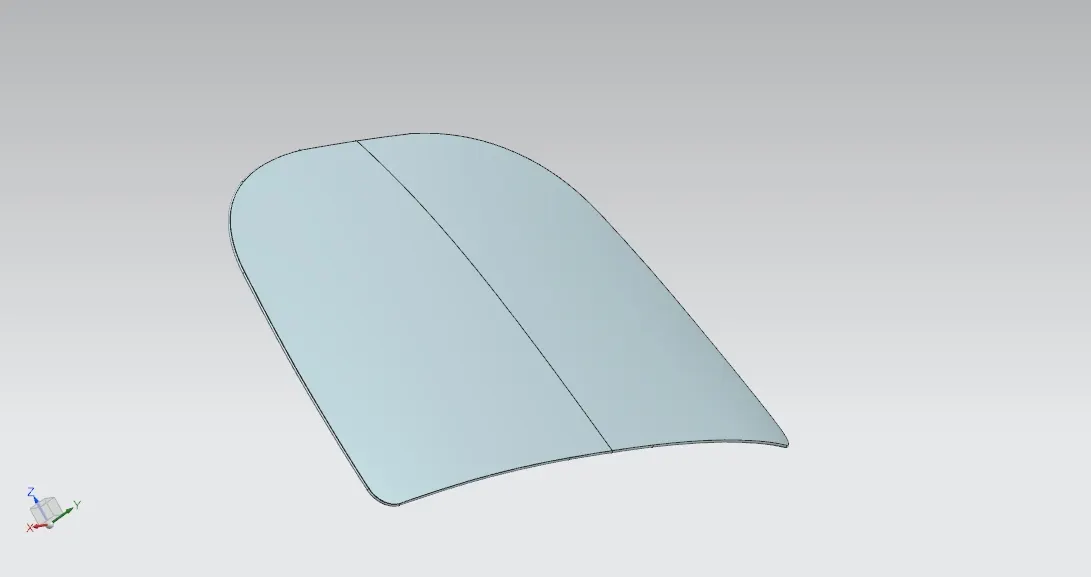
Fig. Hood outer Panel
- HINGE - Hinge is used as a controlling element for opening & closing of the hood. It connects the hood & engine compartment of car. The hood's hinges serve one other purpose besides holding the hood-safety. In case the hood latch should fail, the hinges are there to keep the hood attached to your car. Otherwise, if you were traveling at high speeds and the latch fails, the hood could break from the damaged hinges and cause disaster and injury.Actually, even if only one hood hinge fails, a strong slipstream can topple the hood and hammer it against the windshield.
• Allows hood to open and close without losing alignment
• Holds hood down in case of a collision
• Provides a direct fit
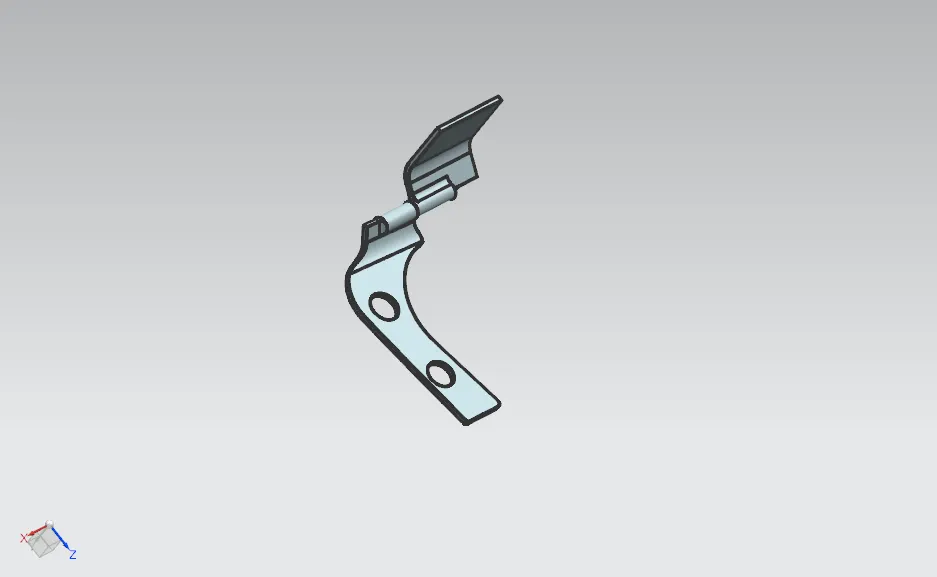
fig. Hinge
- LATCH - Latch is a striker, which is placed over the hood & get attached to the hole provided in engine compartment. thus it is used for locking purpose of hood with engine compartment.
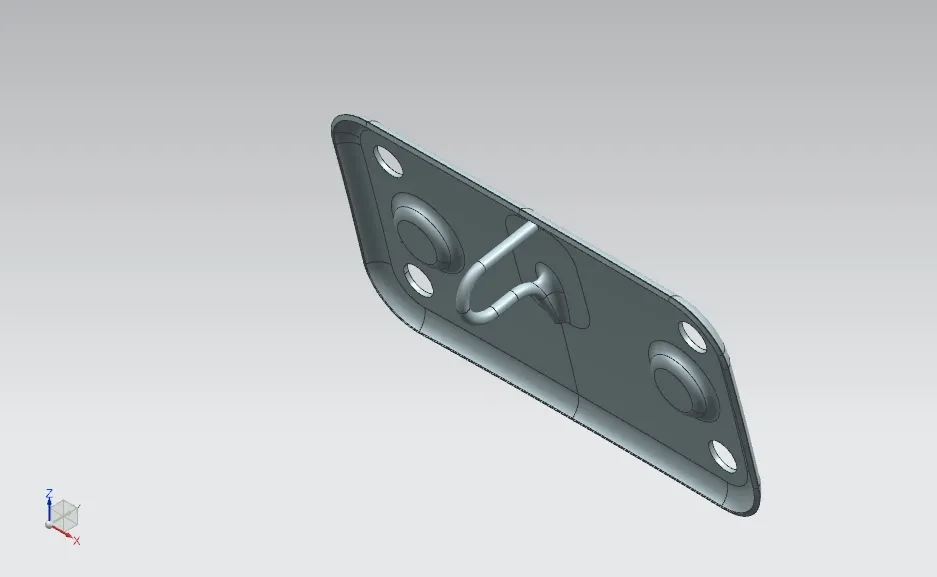
Fig. Latch
- REINFORCEMENTS - Hood reinforcement structures as provided to reduce impact in collisions & sound absorption. Glass fibre / glass filament is the most widely used material to reinforce sound absorption elements in the automotive industry.
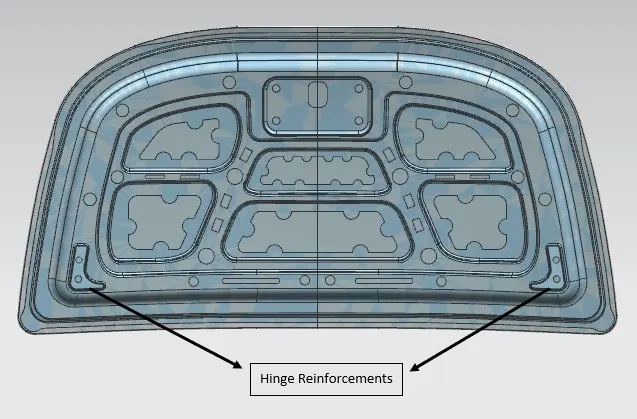
Fig. Hinge reinforcement on inner hood panel
- LATCH TRAJECTORY - While assembling the latch with the hood panel it is strictly recommended that the position of latch striker should be placed such that the latch striker exactly fit into the lock hole in the engine compartment. Keeping this in mind, the latch striker is placed on the inner hood panel using latch trajectory path. This path is created using the the hinge axis taken as reference to draw a big trajectory path.
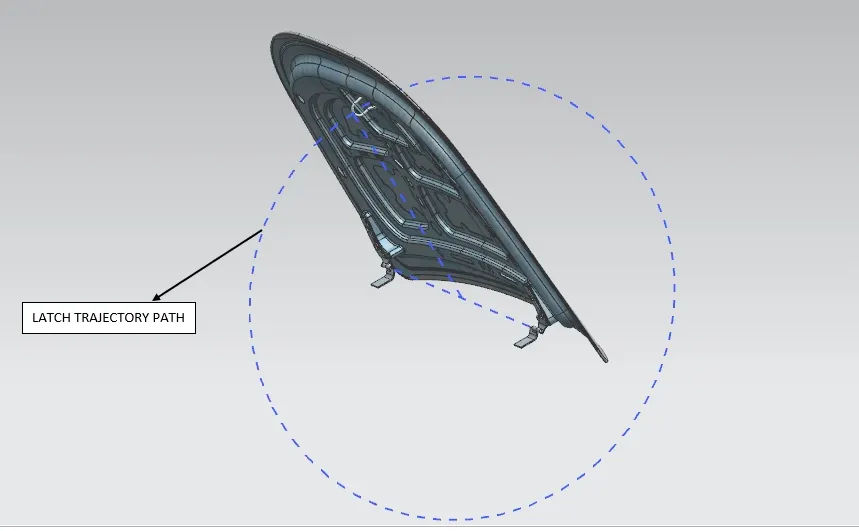
Fig. Latch Trajectory Path
- EMBOSSED SURFACE - Embossed surface plays an important role in car hood panel while crashing or accident of car. Because during the collision, hood is most affected part which sustains all the impact forces while crashing. most of the impact forces are directly flows in the direction of collision & thus can harm the driver sitting under the car, thus to overcome this problem generally, V or Y shaped embosses are given in inner hood panel. so that, the impact forces coming in the direction of collision is diverted towards the corner point of the hood & driver couldn't be harmed.
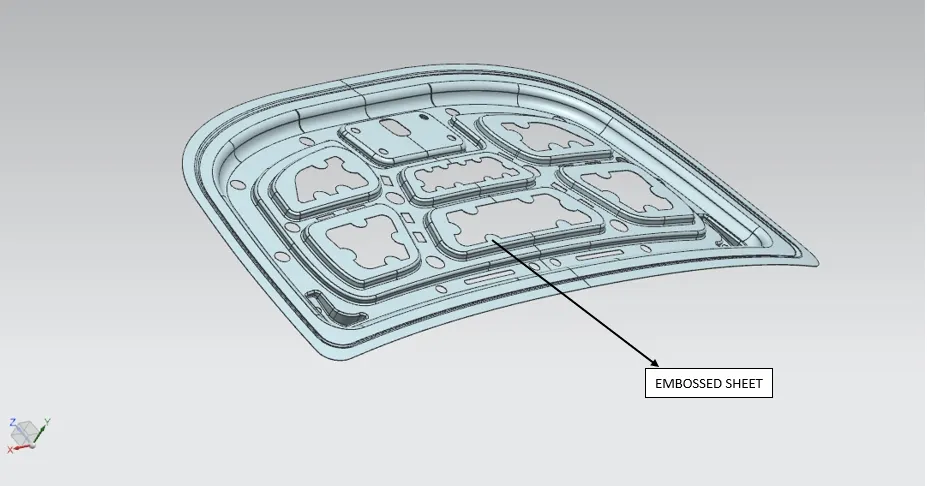
Fig. Embossed surfaces on inner hood panel
- MASTIC DATA - As we know that the main purpose of the outer panel is for the aesthetic looks. Thus we cannot use bolts or welding. This has to be done with the help of the hemming and mastic sealants. Mastic sealants are elastic compound that behaves like the rubber. It is placed between the outer and inner panel. Initially is it in paste form, but after the hot furnace bath it gets hardened thus joining the outer and inner panel. Mastic sealant has the tendency to increase the strength of the panel and has influence of 80mm diameter. The minimum gap between the inner hood panel & outer hood panel is 2 mm.
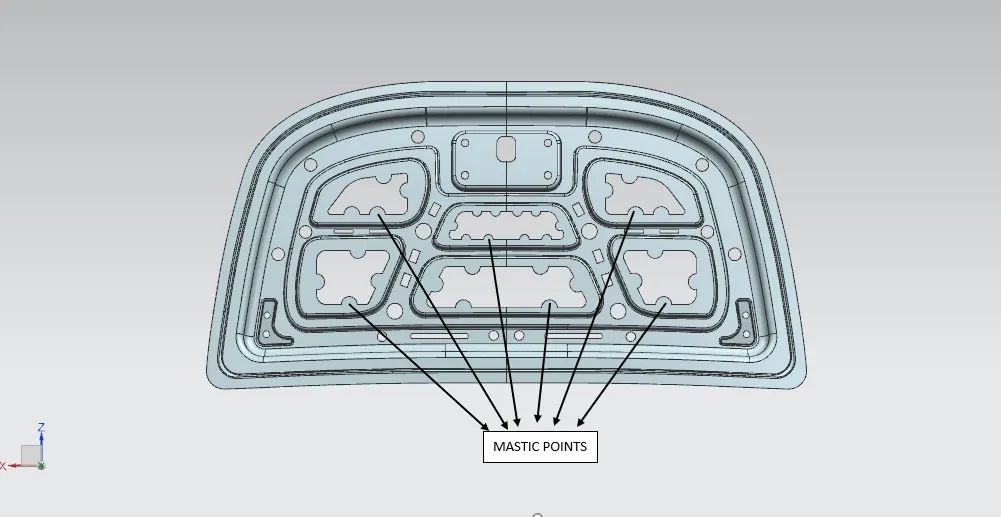
Fig. Mastic Point
- THE MANUFACTURING PROCESS USED IN THE HOOD PANEL ARE:
- DEEP DRAWING
- HEMMING
- DEEP DRAWING - Deep drawing is a sheetmetal forming process in which a sheet metal blank is radially drawn into a forming die by the mechanical action of a punch. It is thus a shape transformation process with material retention. The process is considered "deep" drawing when the depth of the drawn part exceeds its diameter.
Fig. Deep Drawing process
- HEMMING - Hemming processs is basically used to join the inner hood panel & outer hood panel together.
Hemming metalworking processe in which a sheetmetal edge is rolled over onto itself. Hemming is the process in which the edge is rolled flush to itself, while a seam joins the edges of two materials.
Hems are commonly used to reinforce an edge, hide burrs and rough edges, and improve appearance.
Fig. Steps of Hemming Process
- MASTER SECTION : Here is the master section of the hood panel, which is provided as the dimensional refernece for the design of hood panel. Along with the master section hood thickness & other informations are also provided , i.e.
Hood Thickness Information
- Outer Panel Thickness = 0.75mm
- Inner Panel Thickness = 0.75mm
- Reinforcement Thickness = 1.5mm
Fig. rear releif Fig. Front Releif
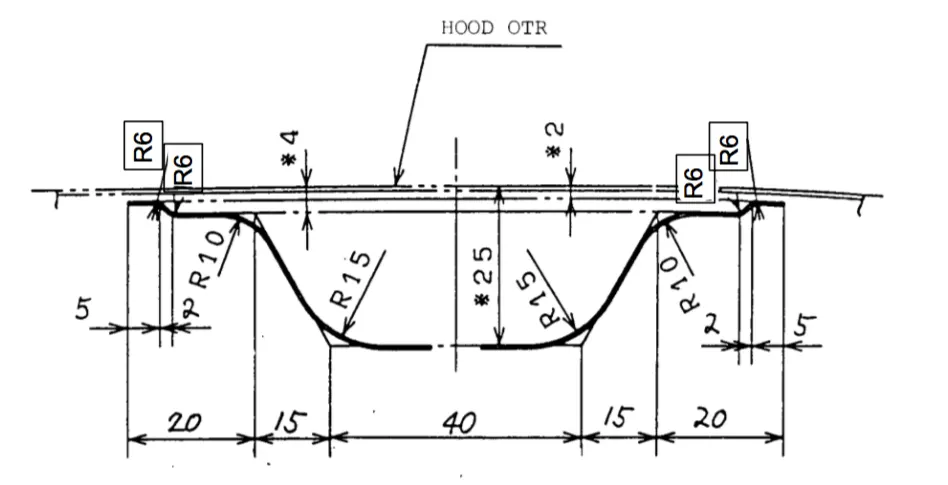
Fig. Master Section of Hood Panel
- HERE IS THE FINAL ASSEMBLY MODEL OF CAR HOOD PANEL USING THE GIVEN INFORMATIONS: