Hood design-Week 2
DESIGN A HOOD USING NX CAD
AIM
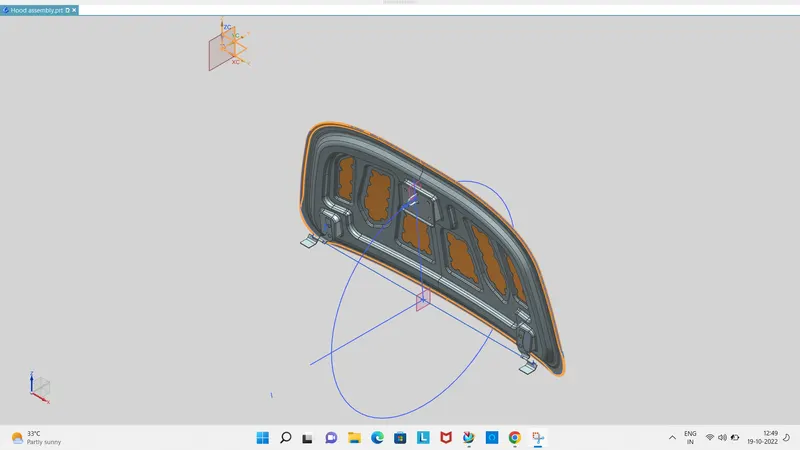
In this project a hood assembly will be designed which would consist of hood outer pannel, hood innner pannel . The latch for the hood will also be placed at appropriate position considering that the hood should be opened and closed easily using its mechanism . The hinges will also be placed at appropriate position for the rotation of the hood inner panel.
INTRODUCTION:
- The hood is an opening body pannel that cover the engine in a front engine vechicle in some cases like rear engine vehicles it acts as the cover of the boot space .
- The hood is also conisidered as another type of door in a vehicle as it consists of an outer panel and inner panel.
- The inner pannel provides strength while the outer panel function as the metal cover.
- Hoods also play a major role in the aerodynamics of the car, therby reducing the drug and increasing the downforece of the car.
- Hood also help to direct imapact of the any head on collision away from the passenger cabin there by reducing the damages to the passengers.
- These hoods are designed in such a way that less damages are caused to the pedestrians during accident.

DESIGN CONSTRAINTS TO BE FOLLOWED :
- Passenger safety
- Pedestrain safety
- Manufacturing feasibility
- Position the striker along the trajectory of the centre of the hinge axis.
- Joining techniques of the inner and outer pannel.
PASSENGER SAFETY
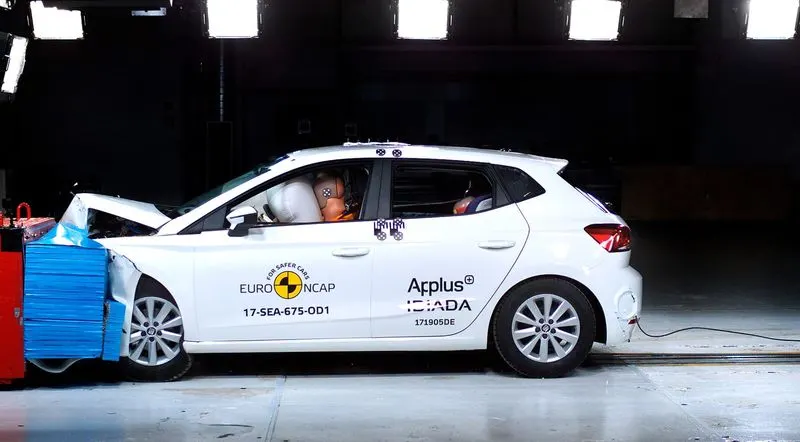
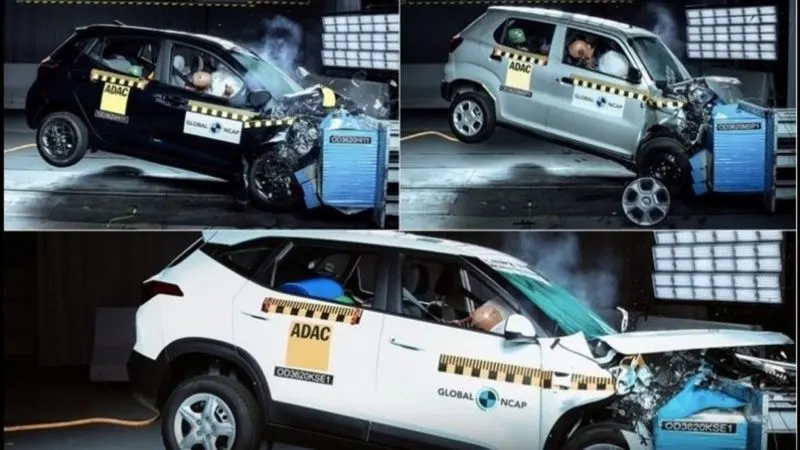
Whenever a frontal crash occurs in the car ,the first part affected will be the hood. So must be designed in such a way that it should not come from the body of the vehicle and must absorb the energy as far as possible ad diver the force towards the force towards the side panel of the car so that the amount of force which is sent to the cabin is lesser since the force lesser the passenger will experience safety is ensured.
PEDESTRIAN SAFETY
Safety of the pedestrains need to be considered during the desing as per the NCAP Euro assessment. Hood is of two types based on the side reference line . The side reference line is an imaginary line drawn from the grownd at an angle of 45 degree. If this line falls on the fender, then the hood is inlaid, and if the line falls on the hood, the hood is wrapped around the hood.
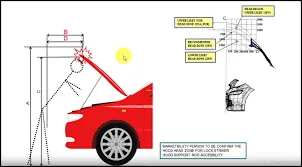
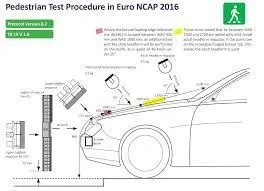
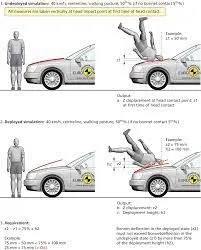
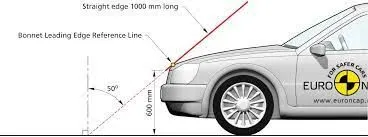
Child and adult impact areas on the hood are defined by wrap around distance . The space between the wrap around length of 1000- 1500mm in the child head impact zone and from 1500- 2100 WAD is the adult head impact zone. We know the area where the pedestrain going to be hit;as a desing engineers, we must make sure that they are exercising the most minor force such that they were not getting any serve injury without compromising the strength of the hood so that passenger safety must be assured.
The head imapact area is definedas the side reference line and wrap-around distance. This zone will get a red , yellow, and green rating using the head injury criteria calculated using the expression. For this reason, the inner panel and created the embosses
COMPONENTS USED IN HOOD
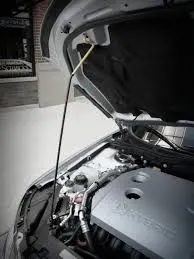
SUPPORT ROD
The support rod is usually inside the engine compartment, when we open the hood and keep it in open the hood and keep it in open condition, one end of the support it. This support rod as to be fixed manually into the hood. The design of the support rod is not linear but it should be mounted such that it does not collide with other parts, also the support rod should be mounted on the opposite side of the battery from car.
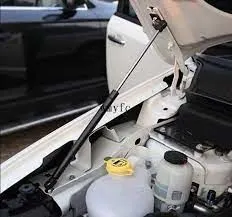
GAS STAY
A gas stay is used to open the hood . it uses compressed gas to open the bonnet automatically gas stays for the frond hood are mainly used in high end performance cars where the bonnet weightis high.
OUTER PANEL
The outer panel is actually called the skin of the vehicle which is designed by the styling team to get a good look for a vechicle by covering the inner panel and engine parts of the car. This should not be welded to the inner panel but using the sealant and mastic points makes contact between the inner panel and outer panel which acta as a bond between both and makes the hood stiff.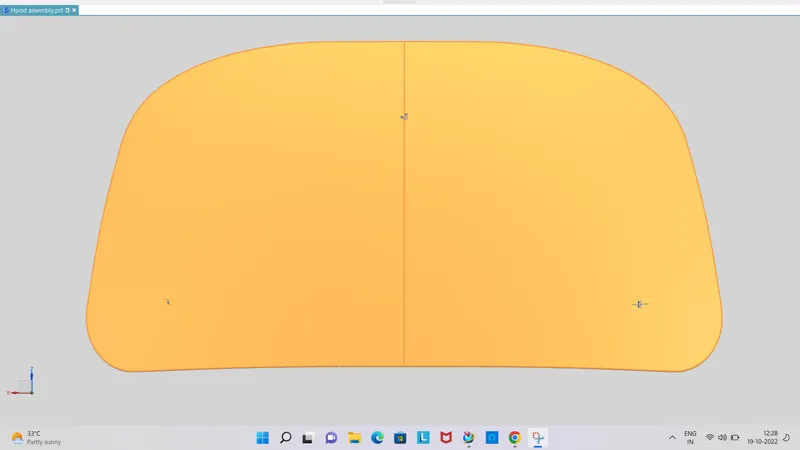
INNER PANEL
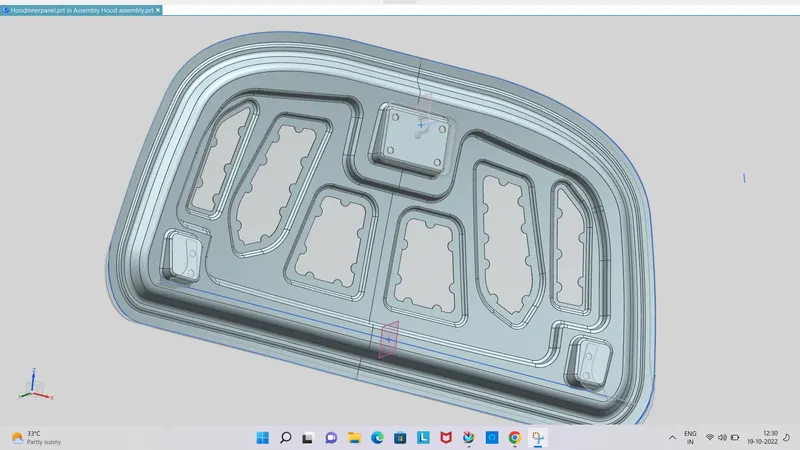
The main part of hte hood which giveg support to the outer panel of the car and with its embossing shapes dissipates the force in different directions when the vehicle takes crashes to not to injure the men in the car.
LATCH TRAJECTORY
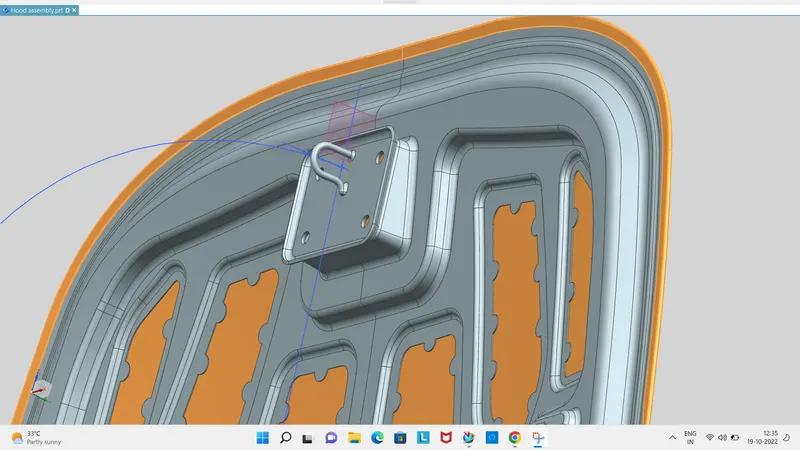
This is the part of the hood that has a trajectory or hook type design used to lock or unlock from the vehicle engine compartment.
HINGE ASSEMBLY
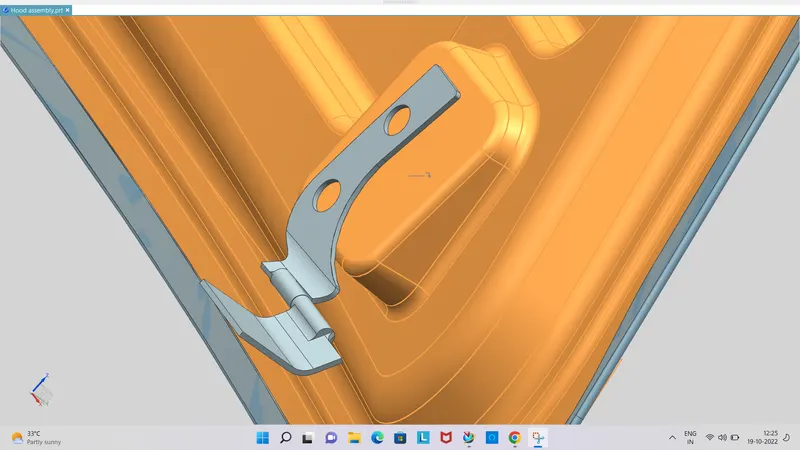
This hinge was placed on the hood to give rollover action to tilt down the hood.
DATA USED-
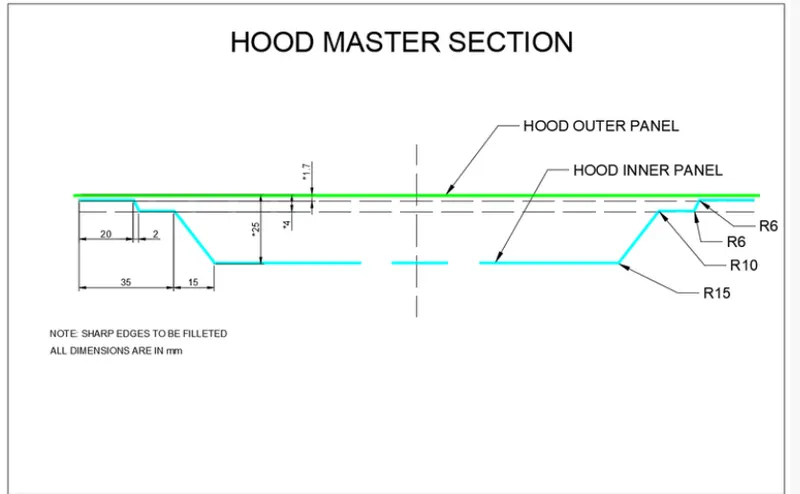
HOOD THICKNESS
- Outer panel thickness =0.75mm
- Inner panel thickness =0.75mm
- Reinforcement thickness = 1.5mm
DEEP DRAWING
- Deep drawing is a manufacturing process that is used extensively in the forming of sheet metal into a cup or box-like structures. Pots and pans for cooking, containers, sinks, automobile parts, such as panels and gas tanks, are among a few of the items manufactured by sheet metal deep drawing.
-
A deep drawing of sheet metal is performed with a punch and die. The punch is the desired shape of the base of the part, once drawn. The die cavity matches the punch and is a little wider to allow for its passage, as well as clearance. For many calculations, the sheet metal thickness is assumed to remain constant. However, there are changes in thickness in certain areas, due to the forces involved.
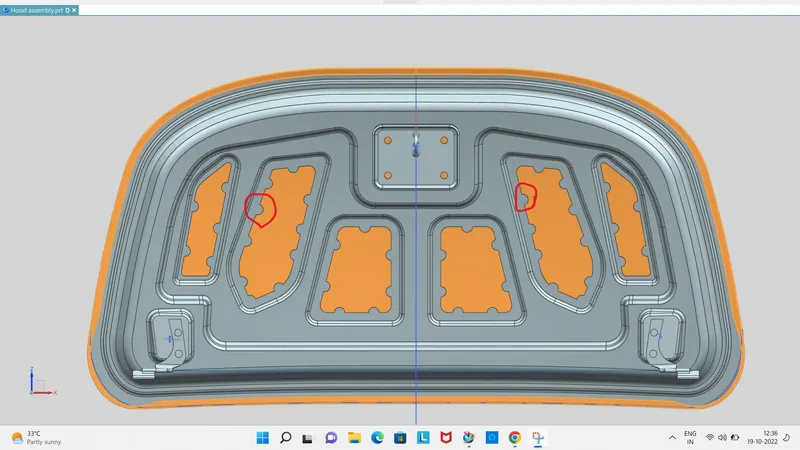
Mastic sealant
The mastic points are regions where mastic interferes with the outer panel to the inner board. We can't use spot welding because this gives less elegantly fulfilling results. Accordingly, mastic is used to join the panel as it doesn't modify the actual metal.
Embosses
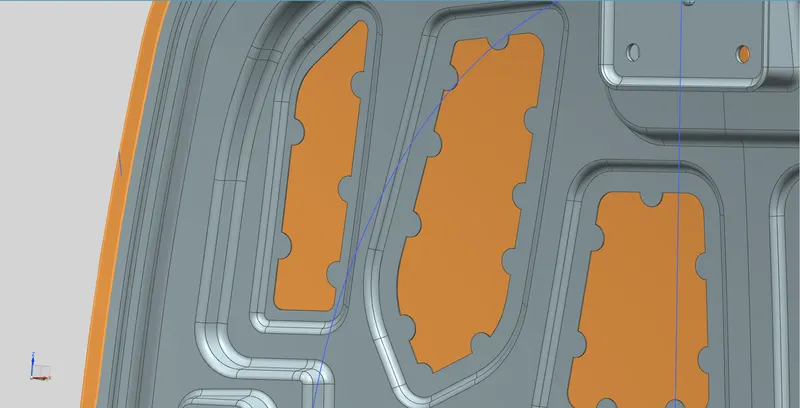
The design of embosses is done by the force distribution of frontal impact. It is designed so that the reduction of force starts when it is directed till the corner, i.e., up to the hinges, and loses the maximum amount (of force) till the end.
Reinforcement
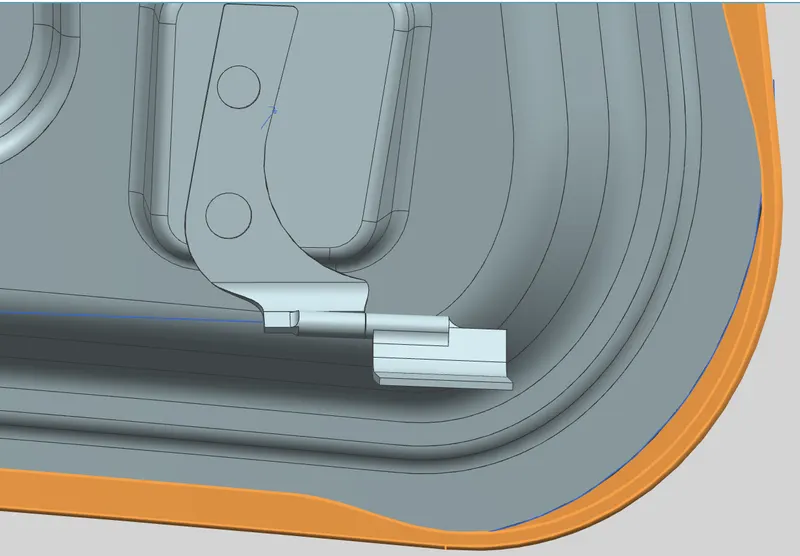
The Zone near the turn and Latch has more chances of disillusionment in the hood panel. Consequently, to avoid any failure to rotate and latch region upheld with extra materials whose thickness is regularly directed by the vehicle. The reinforcements give additional fortitude inner panel of the centres where various parts, for instance, the lock and rotate, will be put. The reinforcement ensures that the turns and the snare have better assistance to avoid frustration.
Hemming
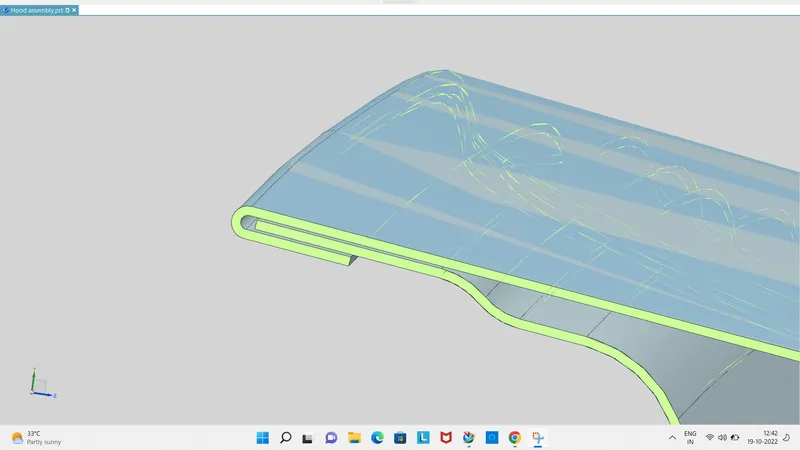
The Heming process involves joining the outer and inner panels of the hood by bending their corner curvature areas to 180 degrees. There is also some corner relief given to the sheet to get stationed so that the rollers that do the Heming of sheets can roll appropriately in the required area. Hemming is a sheet metal operation widely used in the automobile sector because the welding or joining process can not be done on styling parts as it may affect the car's aesthetics.
Reliefs
Reliefs are provided at the front and side portion of the panel for smooth rolling operation .so that no tearing of the sheet happens when the roller passes through a specific portion.
TOOLS
- Trim Body – It is used to trim one or more bodies using a face or plane. You can also specify the bodies to retain and the bodies to discard.
- Offset Surface – It allows you to offset one or more existing surfaces.
- Offset in Face – This command will allow you to offset particular edges or curves on selected faces.
- Trim Sheet – It is used to trim off a portion of a sheet body using curves, faces, edges or planes.
- Through Curves – It will allow you to create a body Through multiple sections, where it’s shape changes to pass through each section.
- Law Extension – This command extends a curve or edge to create a sheet body at desired angle length by changing the rules under angle law and length law.
- Trim and Extend – It helps you to trim and extend intersecting surfaces and make corner at their intersection.
- Face Blend – It creates fillets between faces.
- Edge Blend – It creates fillets on edges.
- Extend Sheet – It will allow you to extend an existing surface to required distance.
- Emboss – Emboss command creates an embossing by modifying a body with faces created by projecting a curve/section along a direction. You can modify the emboss using options like endcap location and draft angle.
- Projected Curve – It is used to project an existing curve/curves on a selected plane or surface by selecting a direction for projection.
- Mirror Geometry – As name suggests, it allows you to mirror geometries about selected plane or surface.
- Sew – It combines sheet bodies together by sewing their common edges. There shouldn’t be any gaps larger than specified tolerance.
- Thicken – It is used to convert a surface to solid body by providing thickness.
- Extrude – It helps you to create a feature from a sketch. You are also able to create thin feature using a sketch or curve under this command.
- Wave Geometry Linker – With this you can create, associative or linked copies of any entity of a part into other parts. It may be a surface, edge, curve, body, sketch etc. The changes made to the original entity will be reflected in the copy of that entity.
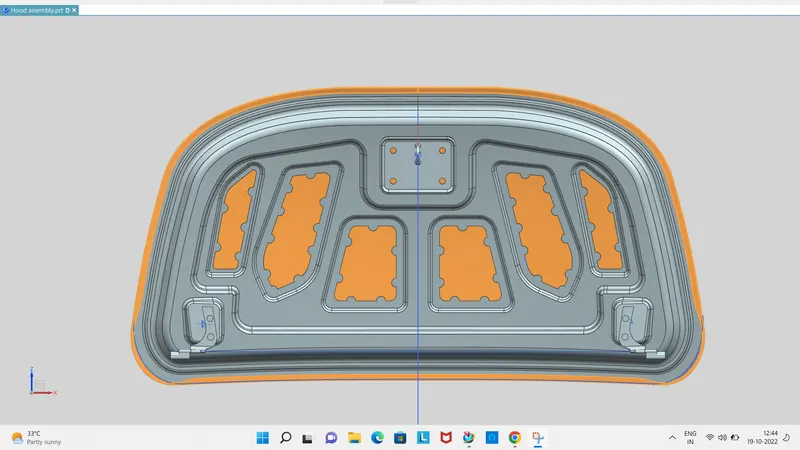
TOP VIEW
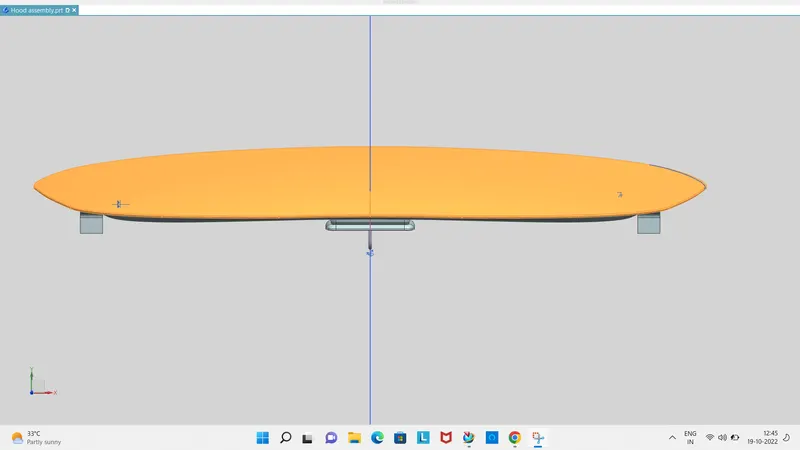
FRONT VIEW
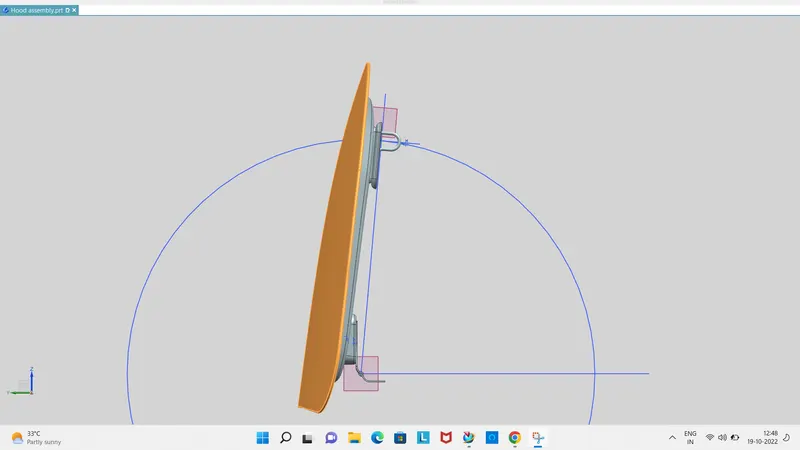
SIDE VIEW
ISOMETRIC VIEW
CONCLUSION
Therefore, we have designed a hood that falls under the rulesand regulation of the manufacturer's standards.