Hood design-Week 2
Objective : The purpose is to design a Hood (Bonnet) of a car by refering the given master section of the hood and hood outer panel surface.
Hood is the outer panel covering the front engine of the vehicle. It opens to allow access to the engine compartments for the ease of maintenance or repair of the vehicle. Hood is also considered as another door as it consists of the outer panel, an inner panel like side doors of a vehicle. It is also called as Bonnet in US and CANADA.
Purpose for designing a Hood
- It provides access for engine maintenance and also covers all the necessary parts from outer environment.
- It reduces NVH level which gives a quiet drive.
- It absorbs most the forces which occurs during a frontal crash, thus keeping passengers safe.
- It reduces the drag effect caused when vehicle is in forward motion.
Design considerations of Hood
Wrap around distance pedestrian safety is an important concern when it comes to hood design. It is the area covered on the hood when the car hits a pedestrian. This distance is used to differentiate the adult impact zone and child impact zone.When the crash, the whole human body wraps around the front shape of the car and the head impacts on the bonnet. The distance on which the head impacts on the car from the ground is called as the Wrap Around Distance (WAD).It is a measurement of distance from the ground to the head impact zone over the outer surface of the car.
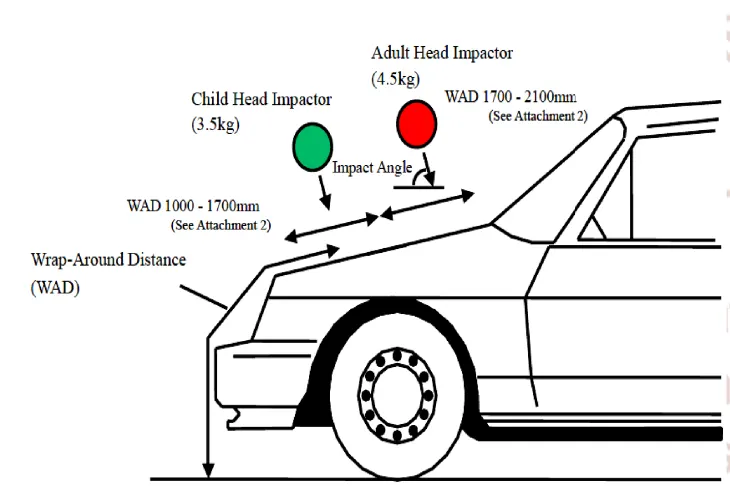
While conducting crash analysis, two test areas will be created Child head impact zone and the Adult head impact zone. The child head impact zone is between 1000 to 1700 mm WAD and the adult head impact zone ranges between 1700 to 2100 mm WAD. While designing the inner panel of the hood, we make sure that material is removed from the adult and child head impact zone.When we remove the material that portion weakens.So anything that hits that particular zone will get minimum impact.
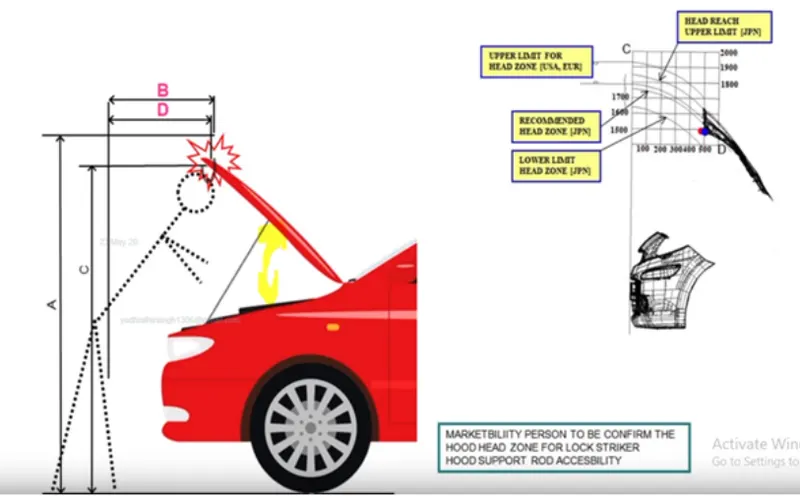
Head clearence zone is also very important design consideration.When the hood is in fully open condition it should not hurt the head of the person that is standing next to the hood, this is controlled by the opening angle of the hood. The opening angle of the hood is decided based on the average height of the person. In some countries the average height of people is 5 - 5.5 ft and in some countries it is 6 ft and above.
Noise Vibration Harshness (NVH) NVH level refers to the ability of the car to contain the noise, vibration and harshness from the outside. NVH can be from the outer environment and also from the engine. With that clear, a car is said to have good NVH levels if it can isolate the cabin from these variables.A hood is designed in such a way that it does not allow most of the engine noise to reach the outer environment and the car cabin.
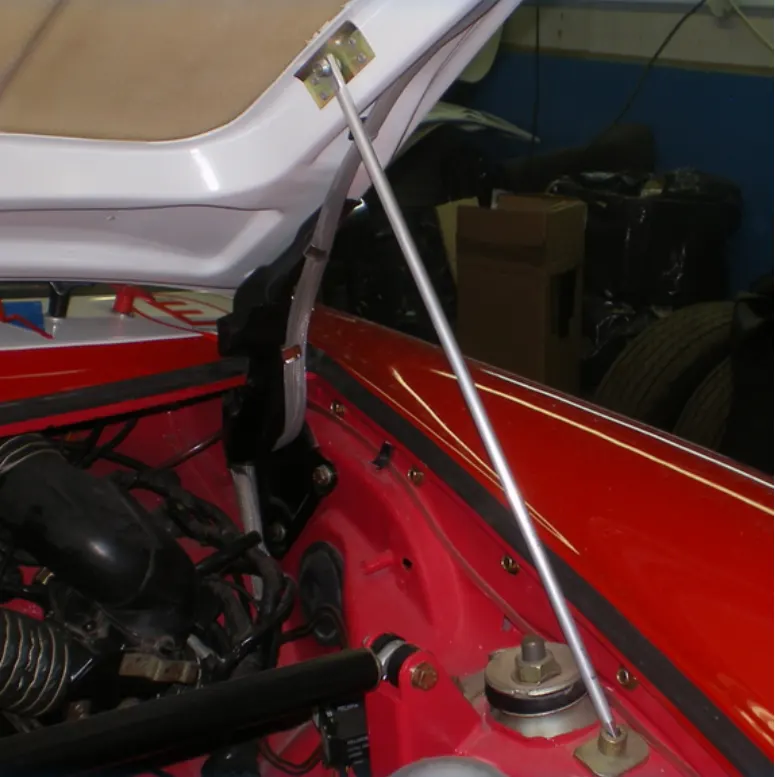
Support rod or Gas stay Support rod is used tokeep the hood in open condition. The support rod has to be fixed manually onto the hood. Design of support rod is not linear but it should have some bends to increase the rigidity and strength of the rod. The support rod should be mounted on opposite side of battery to avoid interference with each other. These are usually used where weight of the hood is less.
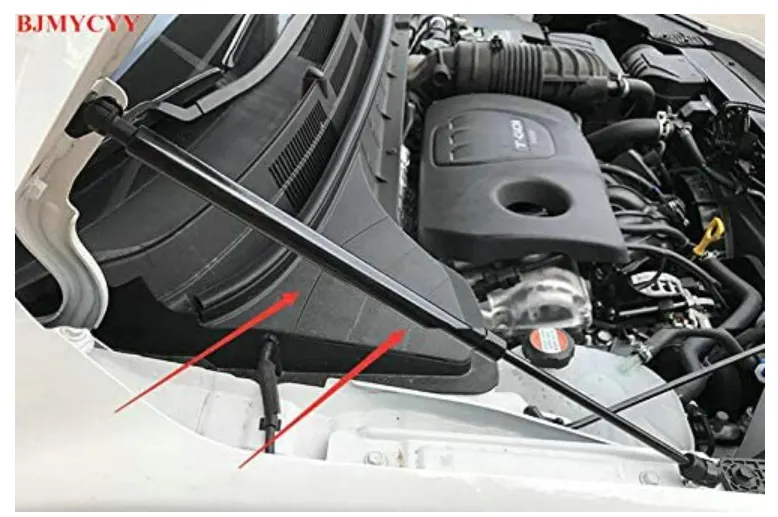
Gas stay its purpose is to list the hood with the help of gas pressure. Manual lifting of the hood is not needed. These are used where the weight of the hood is more and are also used in premium vehicle.
Manufacturing process for Hood
The material used for hood is steel,aluminium or carbon fibre.
The manufacturing process comprises the following steps:
- Blanking
- Stretch forming or Deep drawing
- Trimming
- Deburring
- Welding(Hemming)
- Grinding
- Painting
- Polishing & Waxing
- Coating
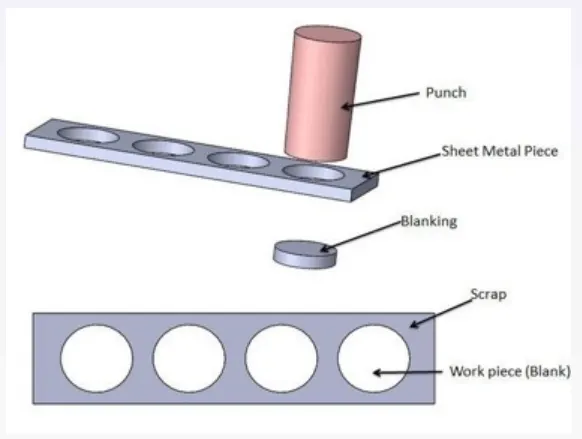
Blanking is a steel manufacturing process in which a flat, geometric shape (or “blank”) is created by feeding a coil of sheet metal into a press and die. In this process the blank is punched out from large metal sheet.
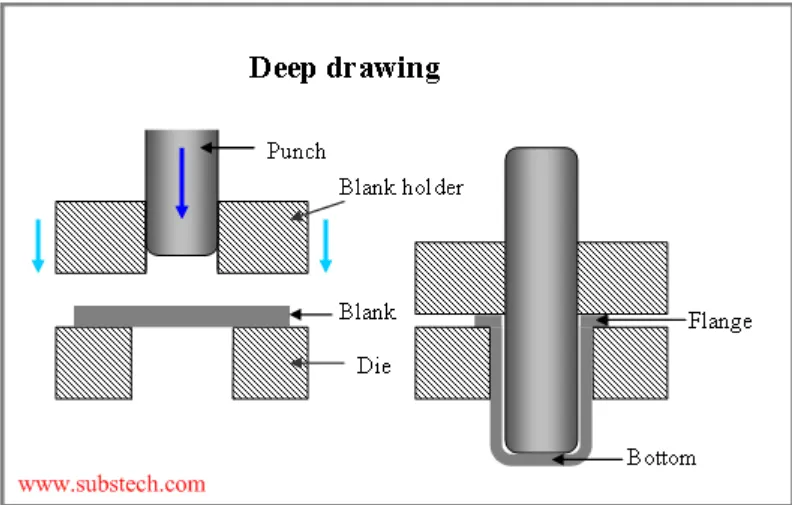
Deep drawing is a sheet metal forming process in which a sheet metal blank is radially drawn into a forming die by the mechanical action of a punch. It is thus a shape transformation process with material retention. The process is considered "deep" drawing when the depth of the drawn part exceeds its diameter.
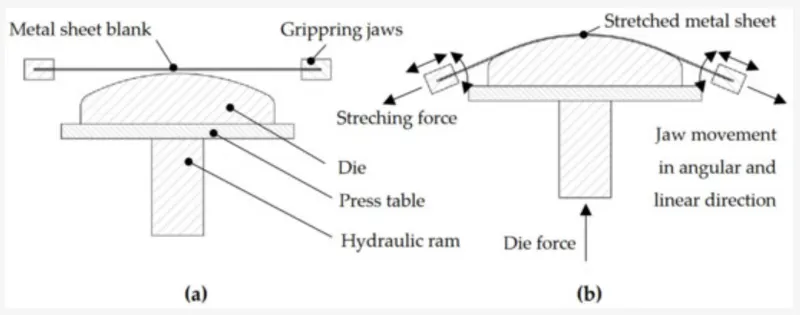
Stretch forming is a metal forming process that simultaneously stretches and bends a selected material over a machined form, called a die, to form a part with one or several different curve radii. This process produces perfectly curved parts with smooth, wrinkle-free contours.
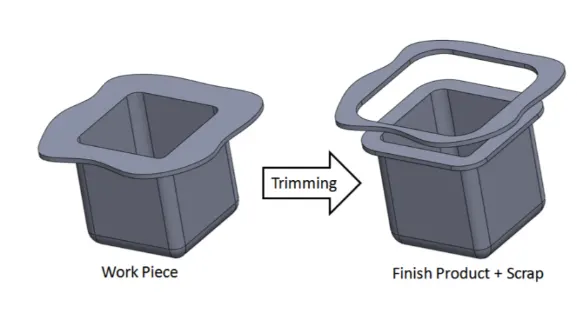
Trimming is the removal of excess metal from a stamped part to allow the part to reach the finished stage or to prepare it for subsequent operations.
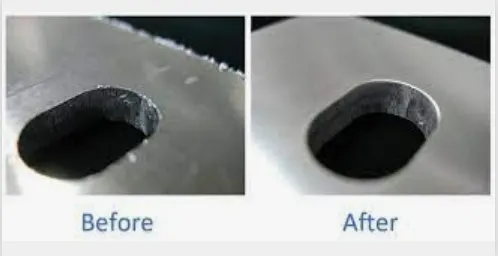
Deburring is the removal of irregularities and sharp edges on metal products. The burrs are tiny pieces of metal that are stuck to the surface of the sheet metal, mostly around the cut edges. These are caused by machining work such as laser, water jet, punched or plasma cutting.
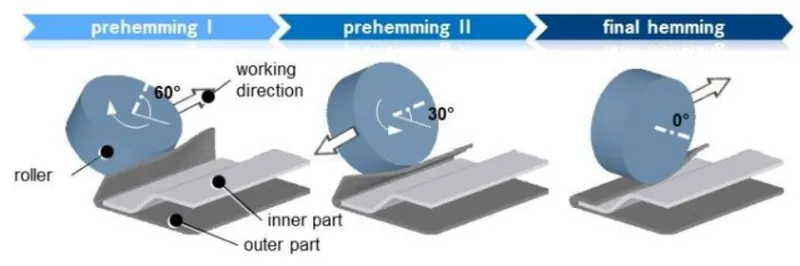
Hemming is a sheet metal forming process in which sheets are joined by bending it to 180°. Automotive body panels and automotive parts such as deck-lids, trunk-lids, doors, hoods and tailgates are formed by hemming process. In this process, usually a sheet is bent with the help of inner sheet in three different stages.Various grades of high strength sheets, aluminium alloys, recycle-friendly aluminium alloys, magnesium alloys, light weight alloys are used as workpiece materials in hemming process. Sheet metal is made by taking a large cast ingot and rolling it into a long ribbon of the desired thickness. This long, flat piece of metal is then rolled into a coil and sent directly or cut into sheets before being sent to a machine shop.
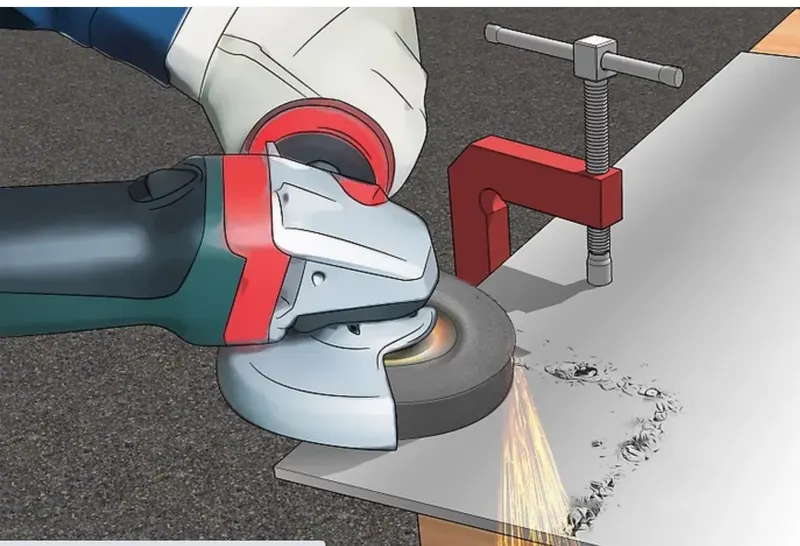
Grinding is a large and diverse area of sheet metal manufacturing. It can produce very fine finishes and very accurate dimensions; yet in mass production contexts it can also rough out large volumes of metal quite rapidly.
Design process of Hood
Design of Inner panel
- First we create an extract of given outer panel skin data and name it as working file. The original file be named as parent file.
- Now we use this working surface to create inner panel of hood. We work on one half of the surface.
- First we will use the master section and create the offset surfaces as needed.
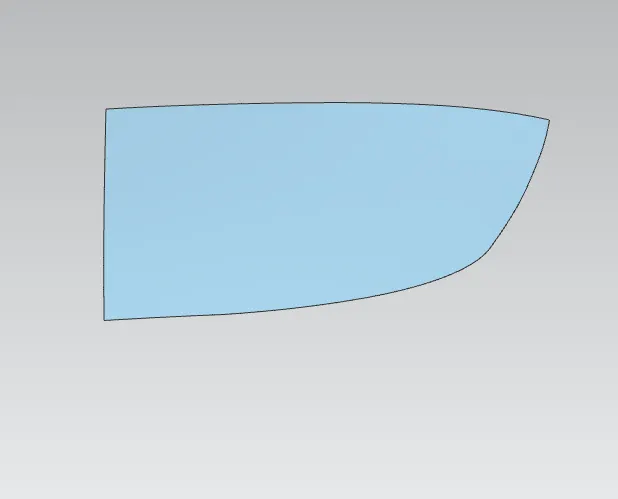
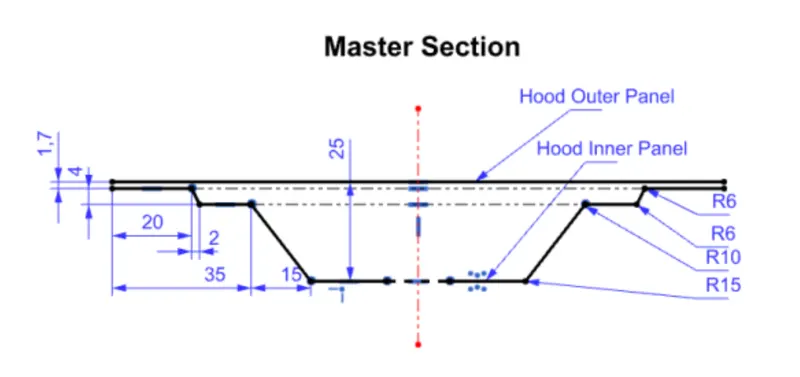
- Now we use through curves, blend and law extension operations to create the required surfaces.
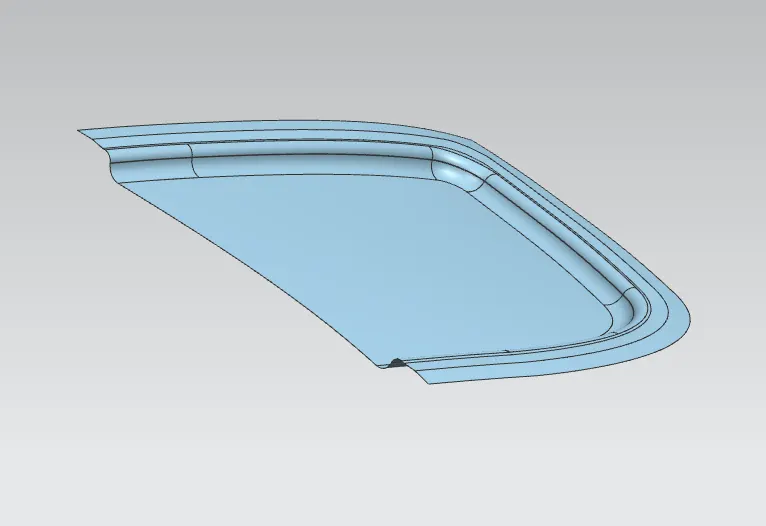
- Now we create the required embosses and maintain a particular angle for the embosses.
The embosses on the inner panel are designed in such a way that during a head on collision it distributes the impact forces and directs it towards outside (hinges) of the hood, which protects the passenger during a crash. The width and depth of the emboss is determined by simulations and analysis to check for failure.
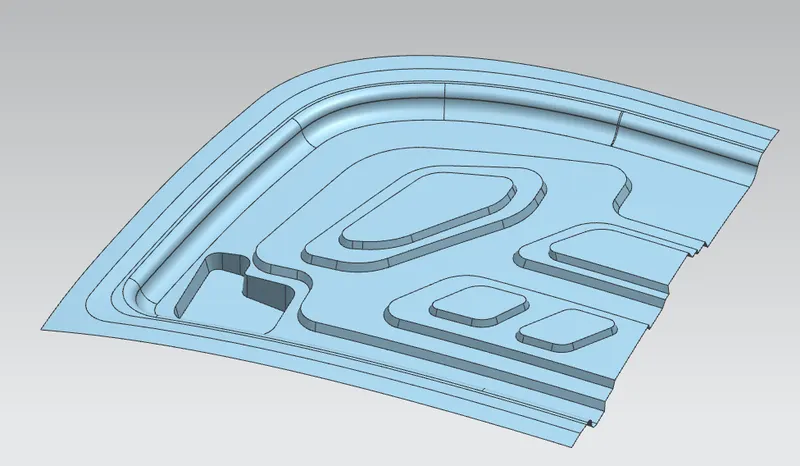
- Now we do cutouts for mastic points.
Mastic points are areas where the inner hood panel is joined with the outer panel using a mastic glue. This mastic glue keeps the inner panel stuck to the outer panel. We cannot use welding since it would'nt look good aesthetically. Mastic sealants are elastic compound that behave like rubber. It is applied between the inner and outer panels at specified spots.A gap of 5mm is maintained between inner and outer panel to apply mastic glue. Each spot of mastic sealants has its effect around a circular region of 80mm diameter.
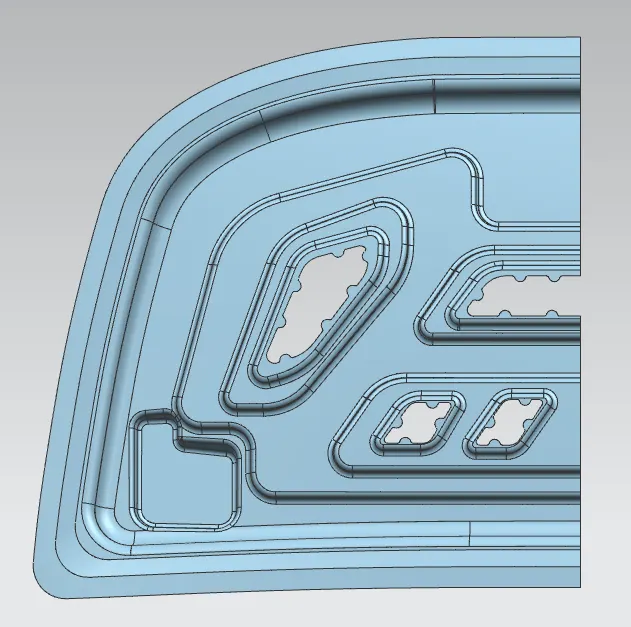
Once mastic points are done whole component is formed using mirror option.
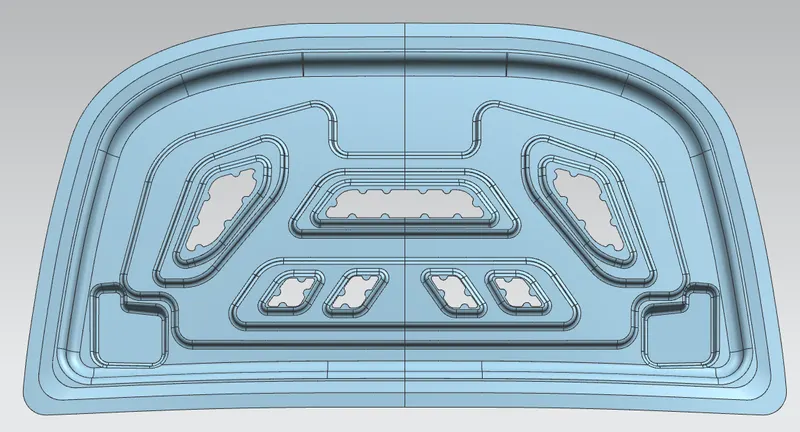
Now we do hinge assembly. Once the hinge assembly is done we need to fix the hinge axis. Both the hinges should have same hinge axis.The hinge axis is positioned in such a way that the axis lies in the same line so that it is parallel to the “x” axis plane. This is done in order to position the latch and sticker trajectory motions exactly perpendicular to the hinge axis.
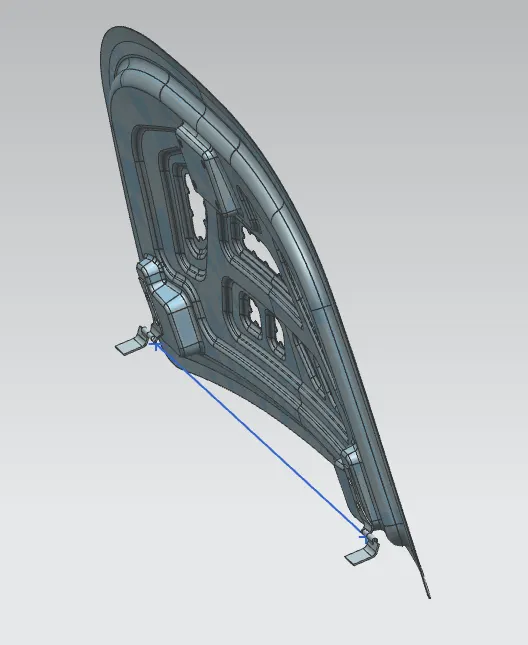
The latch trajectory shows the path of the striker when the hood is opened and closed on a vehicle. The radius of the circular trajectory is determined by the set standard based on the average height of a person. The radius is measured from the hinge axis up-to the latch. We first create a circle with hinge axis as centre. Then we create a line tangent to the circle.At the same time we also create a line to the striker latch parallel to Y axis. Now we align striker line with the line tangent to hinge trajectory in assembly workbench. This will give the latch trajectory. The striker should be perpendicular to the trajectory of the hood.
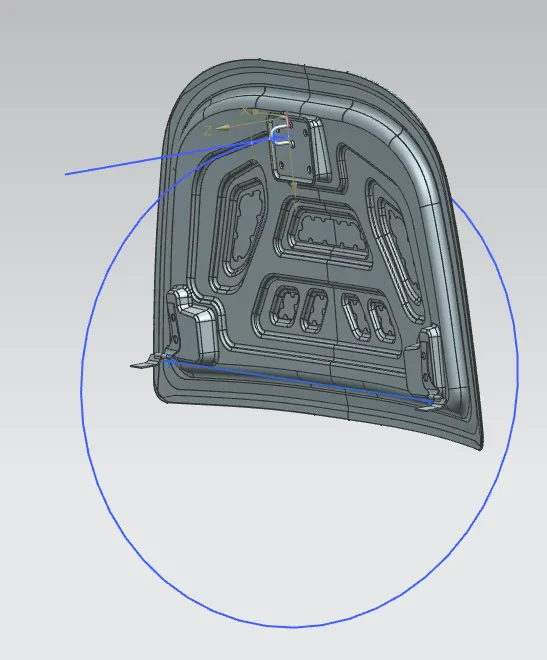
once striker & hinge emboss is created we than thicken the part to 0.75mm
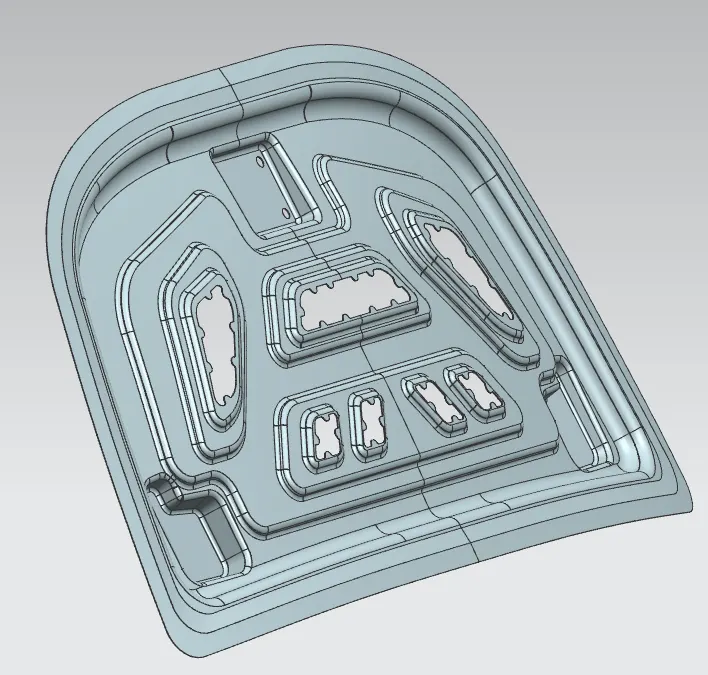
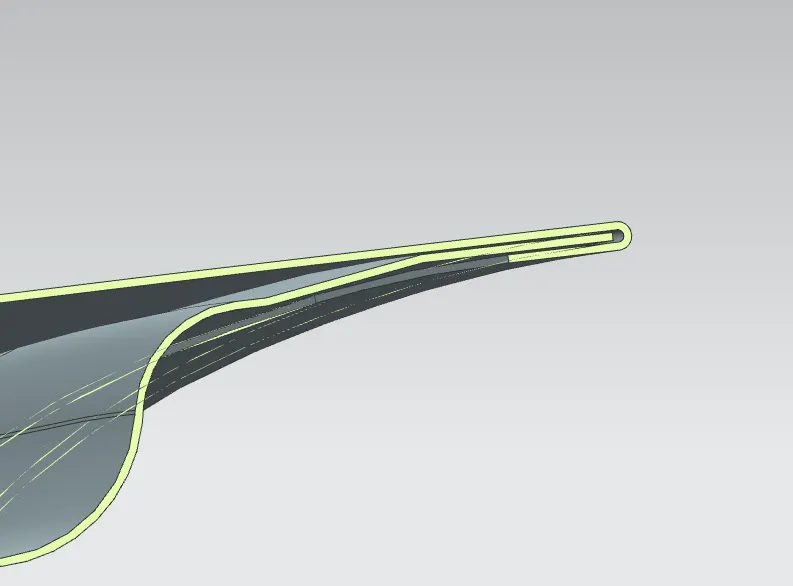
Now we work on outer panel to create hemming.We create offset surface of 2.65mm and then use 3 face blend option to create hemming and then thicken the part.
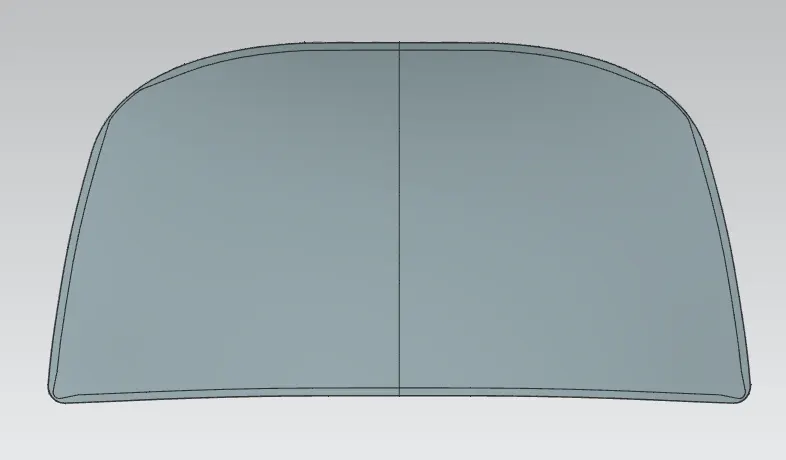
Reinforcements are provided according to the design requirements. Mainly it is provided at the hinge and latch regions to improve the strength.
CONCLUSION
Thus, with the give master section and class A surface model the hood is designed using siemens NX_CAD.