Hood design-Week 2
CHALLENGE 3-HOOD DESIGN
Introduction:
A hood is an opening panel that protects the engine and other important parts in a car. The Hard material outside and the impact absorbents protect the passengers in the vehicle. The shape of the hood also plays a key role. It is designed to be aerodynamic and offers very less drag. The main parts of a hood are latch, striker and the support rod. A support Rod is made of various shapes to address the opening angle standards.
Design Approach:
For designing any hood, the outer panel or a styling surface is provided. In this project, an offset body is created to the styling surface. For this, multiple surfaces are offsetted, trimmed and joined based on the master section. With this, the major part of designing an inner panel is done. Then, for the embosses, sketches are drawn on the parallel planes and then projected onto one side of the curved surface of the hood. Then later they are embossed using the emboss command on the surface modelling section. The embosses created on the body are later made soft using edge blend. The part is mirrored onto the other side and then sewed and thickened. Later the hemming process is done using the commands such as law extension, offset curve on the surface, trim sheet and three plane blends.
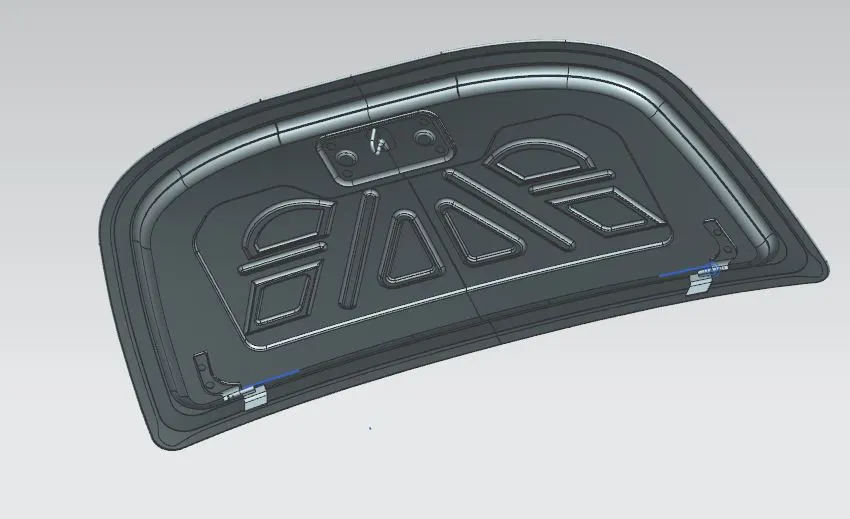
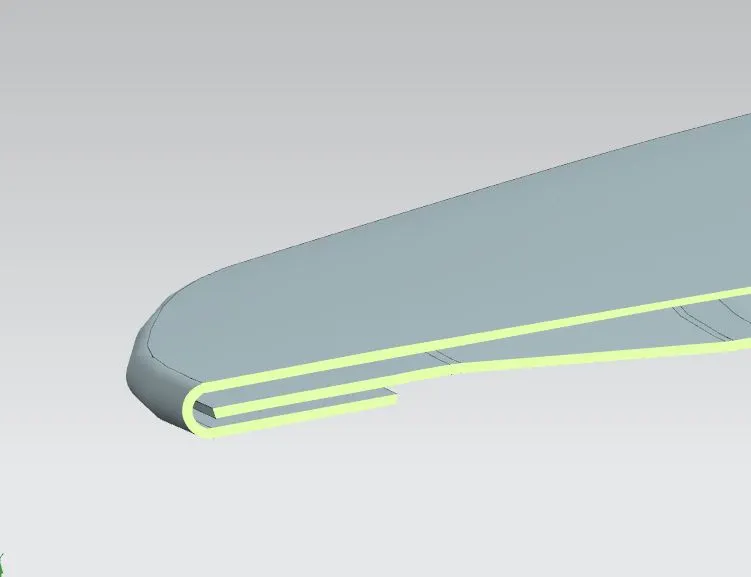
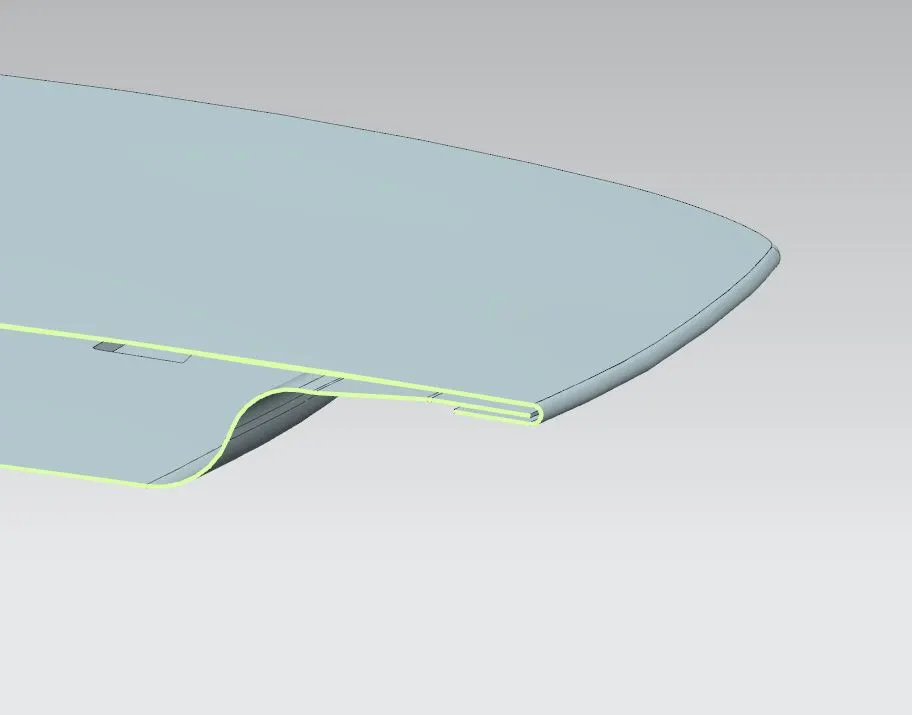
Hemming:
Hemming is a process used to attach two thin sheets with rollers. For a hood, 2 rollers roll thrice on the corners for a perfect hem. A hem also provides or increases the strength of the hood. The following is the hem created for the hood.
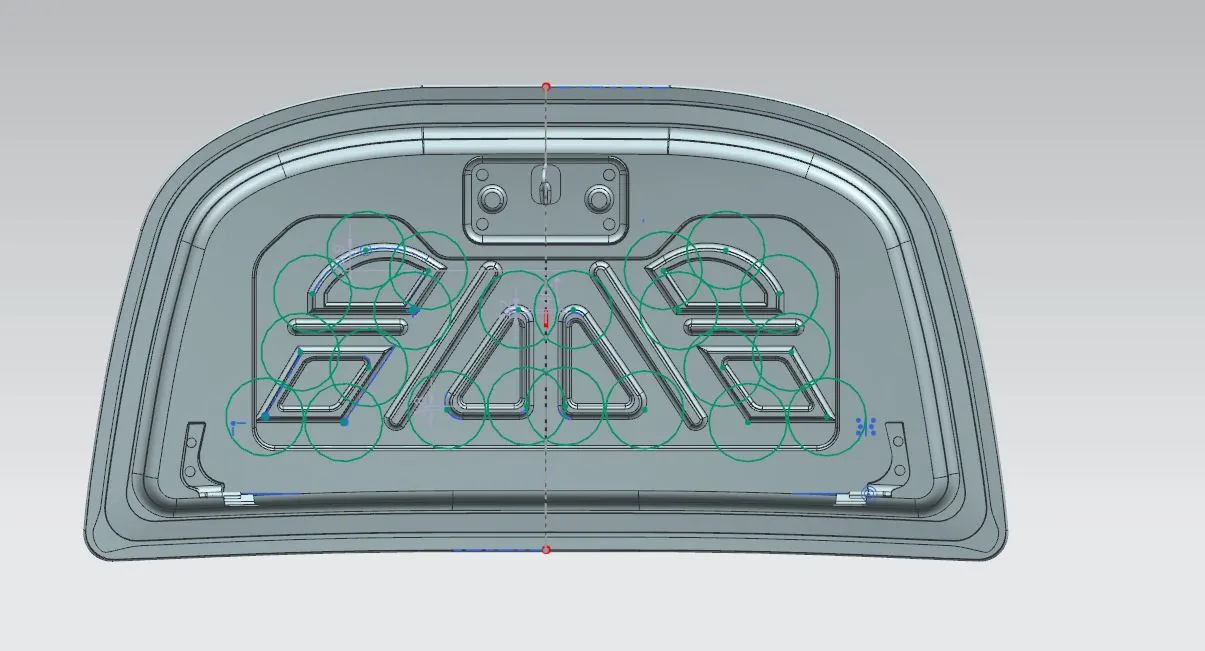
Mastic Data: The mastic data points are of 80mm diameter. These mastic points are responsible for the adhesion between the outer panel and the inner panel. These points are usually strategically placed for uniform adhesion. The adhesion is achieved by a gluey material that helps to provide strength to the hood. The circles drawn in the figure below are the representation of mastic points.
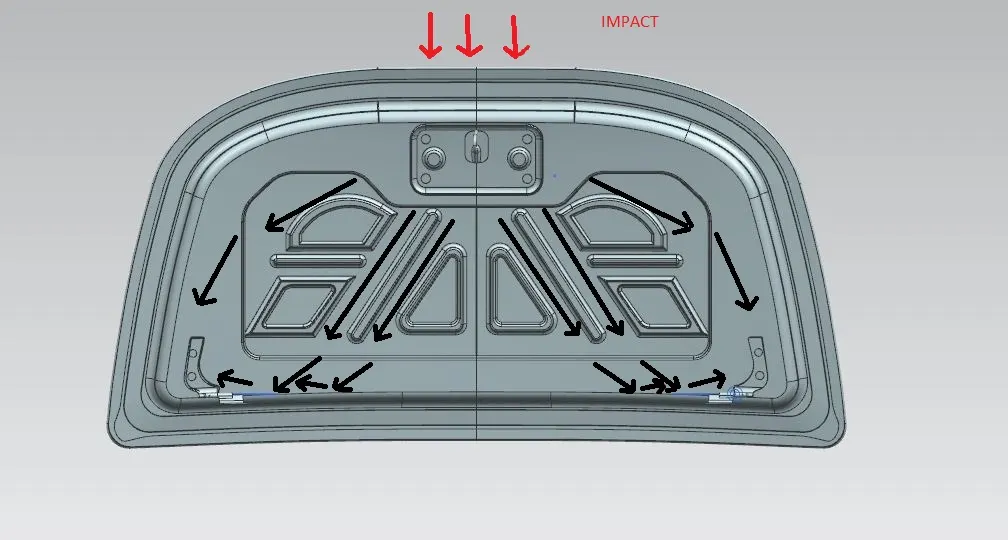
Force / Impact Distribution: A hood is basically designed to reduce/restrain the impact of a crash. By the time the force or impact reaches the driver in the seat, the force needs to reduce.
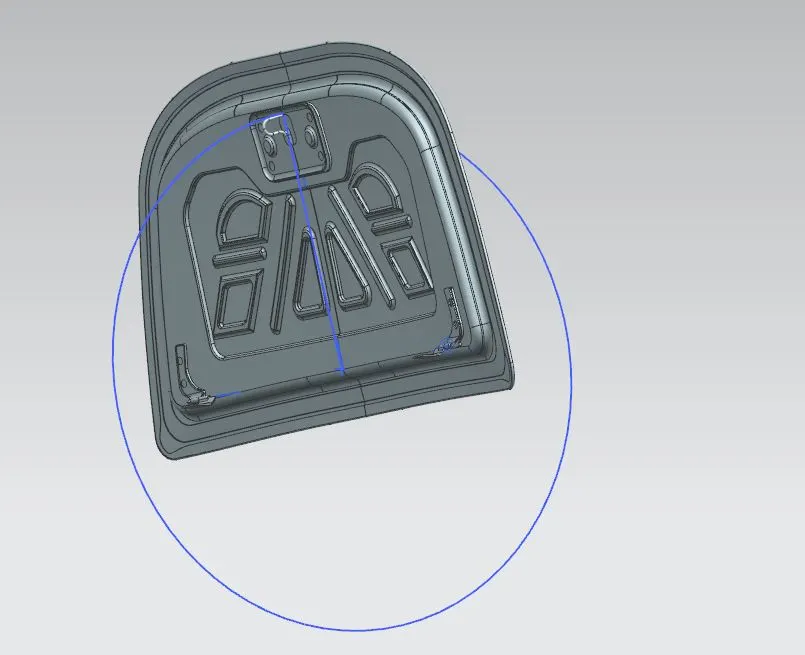
Latch Trajectory: For precise closure of the hood the latch trajectory theory needs to be satisfied. A circle needs to be drawn considering the length between midpoint on the axis of the hinges and the latch at the top as radius. The latch/Stricker point needs to be tangent to the circle drawn locally. The figure below shows this theory being satisfied.
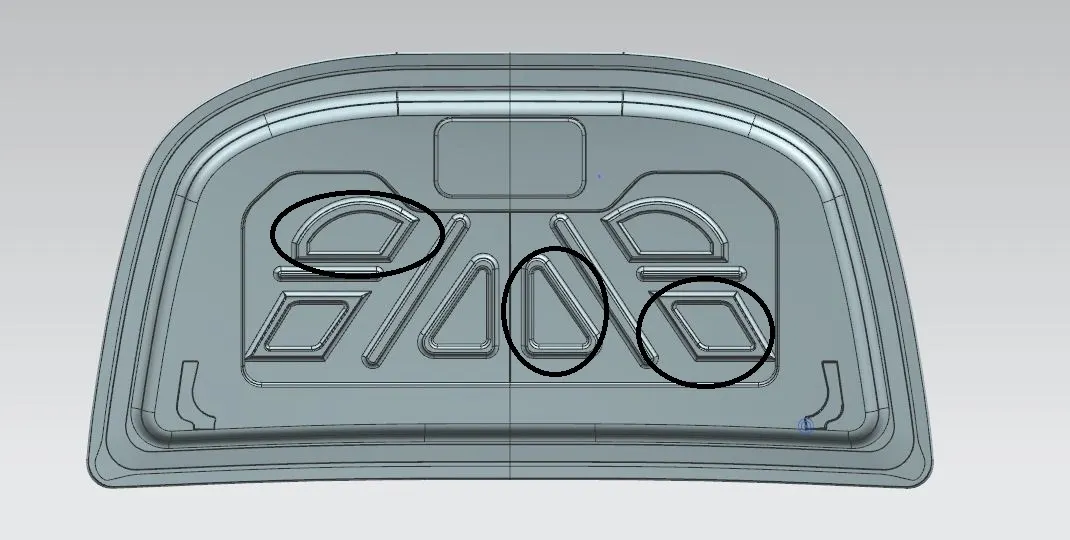
Emboss: An emboss is drawn to help from the crash forces. The impact of the forces is restrained or restricted using the embosses created on the inner panel surfaces. For achieving the embosses required in this project, I have first sketched them on the plane parallel to the inner panel face. Then, I have projected them using project curve command and have selected emboss from the surface modelling tools. In emboss operation, the sheet-metal is drawn to different depts for easy punching. Emboss is also added beneath the latch and the hinge positions to compensate for the material removed and also provide strength. This operation is used to stiffen the whole part too.
Manufacturing Process: The manufacturing process followed to manufacture a car hood/bonnet are as follows
(1) Blanking
(2) stretch forming
(3) trimming and punching
(4) deburring
(5) welding
(6) grinding
(7) painting
(8) baking
(9) polishing and waxing
(10) coating.
Conclusions:
Considering all the design factors, a hood has been designed. The latch and Stricker placement, the impact analysis has been done. The hemming process is also done to ensure the component is foolproof. Commands such as law extension, offset curve to face, project curve, emboss, trim sheet, edge blend, sew, thicken are used as part of surface modelling to get the final output in sheet metal with an outer sheet thickness of 0.75mm and an inner sheet thickness of 0.75mm.