Hood design-Week 2
DESIGNING OF HOOD (BONNET) OF A CAR WITH SAFETY REQUIREMENTS AS PER EURO NCAP (NEW CAR ASSESSMENT PROGRAM)
AIM:
To design a hood of a car with its design requirements and safety requirements as per Euro NCAP (New Car Assessment Program) to get a good rating for the car.
ABSTRACT:
Body in white (BIW) is the stage in automobile manufacturing in which a car body's frame has been joined together, that is before painting and before the motor, chassis sub-assemblies, or trim (glass, door locks/handles, seats, upholstery, electronics, etc.) have been integrated into the structure. Assembly involves different techniques such as welding (spot, MIG/MAG), riveting, clinching, bonding and laser brazing.
In car design, the "body in white" phase is where the final contours of the car body are worked out, in preparation for the ordering of the expensive production stamping die. Extensive computer simulations of crash-worthiness, manufacturability, and automotive aerodynamics are required before a clay model from the design studio can be converted into a body in white ready for production.
INTRODUCTION:
Hood is defined as the front top of a car or other vehicle that covers and protects the engine, or a protective covering that removes fumes or exhaust.
The Hood is the outer panel covering the front engine of the vehicle. It opens to allow access to the engine compartments for the ease of maintenance or repair of the vehicle. Hood is also considered as another door as it consists of the outer panel, an inner panel like side doors of a vehicle.
MATERIALS:
Hoods are typically made out of the same material as the rest of the body work. This may include steel, aluminum, fiberglass or carbon fiber. However, some aftermarket companies produce replacements for steel hoods in fiberglass or carbon fiber to make the vehicle lighter.
Design consideration for hood:
The Hood is an opening body panel that covers panel provides strength while the outer panel functions as metal cover the engine in a front-engine vehicle. The Hood is also considered as another type of door in a vehicle as it consists of an outer panel and inner panel. The inner
Hood is not that simple component what is seen from outside, this is also a very critical component because of the frontal crash and pedestrian safety requirements. Not only pedestrian safety requirements this is the one which dissipates the energy outside the car body rather than sending inside the car body.
The first important criterion for designing the hood is the region at which the car is developed.
OPENING ANGLE:
As the opening angle varies from region to region, first we consider the opening angle according to the region where the car is developed.
In India and Japan Market the average height of the Human is 5.5ft (approx.), but in European and US Market the average human height is 6ft.
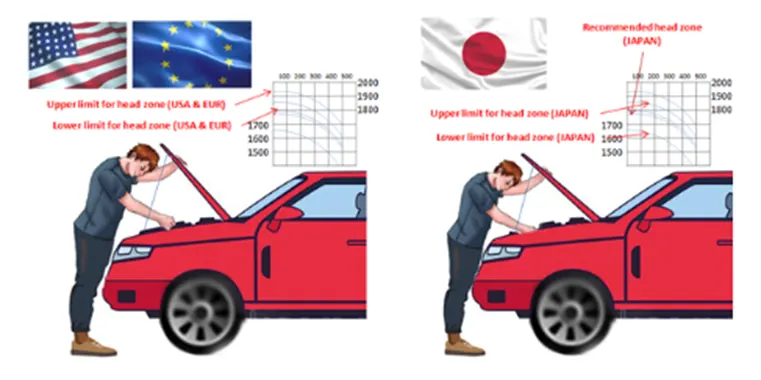
The movement of the hood can be controlled by either one of them:
<!-- [if !supportLists]-->· <!--[endif]-->Gas stay
<!-- [if !supportLists]-->· <!--[endif]-->Support rod
1. Gas Stay
A gas stay is a type of spring that, unlike a typical mechanical spring that relies on elastic deformation, uses compressed gas contained within an enclosed cylinder sealed by a sliding piston to pneumatically store potential energy and withstand external force applied parallel to the direction of the piston shaft.
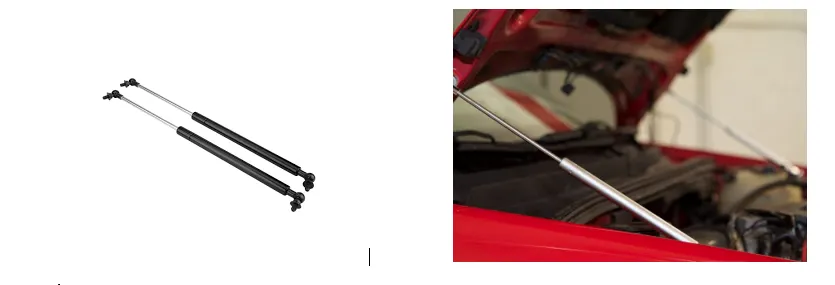
2. Support Rod
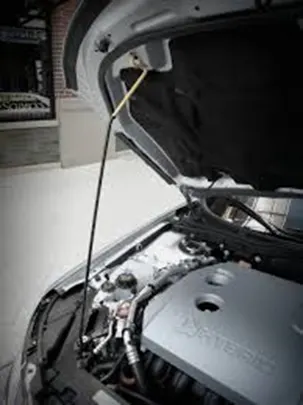
This is the most commonly used rod for opening and closing the hood at a certain angel. One end of the rod is hinged to the engine compartment and the other end is set free so that it can be locked to the hood inner panel when the hood is opened. This is usually used when the weight of the bonnet is small.
It is very important to consider that the support rod should not collide inside the engine compartment. 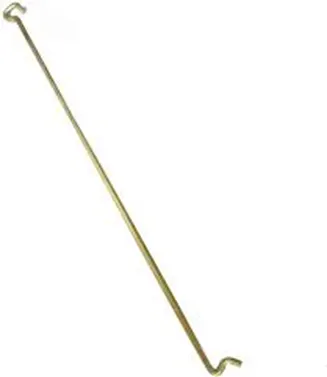
Padestrian safety NCAP (New car assessment program) standards:
Globally, various NCAPs are present that carry on the pedestrian safety tests on new vehicles and rate them accordingly.
1. Head Impact
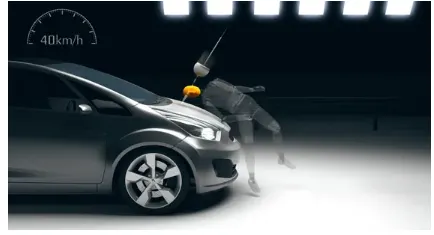
This test is carried out for a vehicle speed of 40 km/h. To have an estimate of the potential head injury in the fateful event of a vehicle striking an adult or a child, a head form impactor is used in a series of impact tests and the impact sites are then assessed for and rated accordingly.
This test will give essential information about the deformation clearance, energy-absorbing structures and deployable protection systems such as pop-up bonnets and external airbags in a new vehicle.
2. Upper Leg Impact
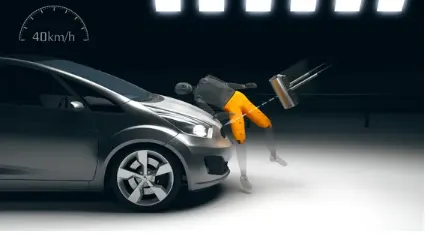
The facility carries out the test at the vehicle speed of 40 km/h. An adult upper leg form impactor is used in a series of impact tests and then the impact sites are assessed. The protection is then rated as good, adequate, marginal, weak or poor. The test procedure allows to check the energy-absorbing capacity of the structures of a vehicle and also check whether the geometry of the vehicle allows mitigation of injuries.
3. Lower Leg impact
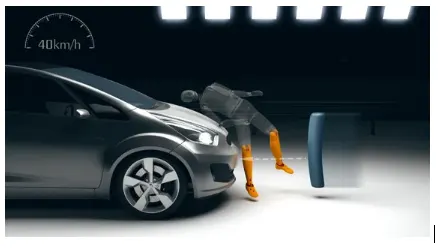
Euro NCAP carries the test at the same speed standard as the above ones. It uses an adult leg impactor and a series of tests are carried out. Impact sites are then assessed and the protection rating is offered.
4. AEB Pedestrian
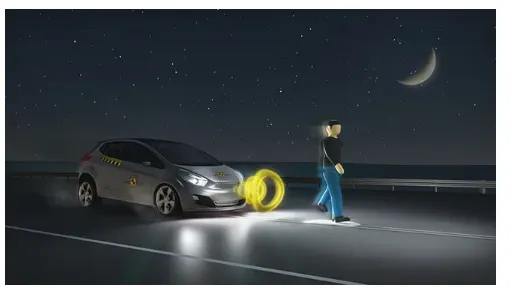
For this test, the NCAP uses a specially-designed pedestrian form which has articulated limbs to replicate the walking motion of a human. Cars are assessed on the basis of how forgiving the front-end design is in case of impact. AEB pedestrian tech may not be able to completely avoid a collision in some cases. The tests are done in the day as well as night to ensure vulnerable road users are protected all the time.
5. AEB Cyclist
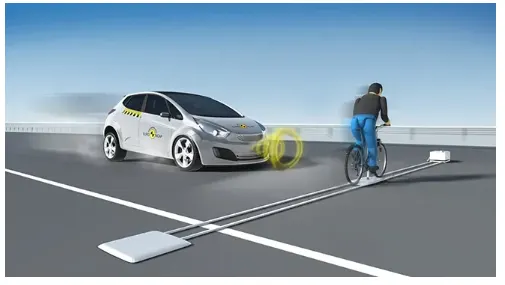
For this test, Euro NCAP uses a specially designed cyclist form which will replicate the actual cyclist on the road. Euro NCAP offers the highest rating if the collision is completely avoided. The vehicle is also awarded if the speed is reduced as any reduction in speed of impact can significantly reduce the injury to the vulnerable user.
Hood design on the tool:
Now getting into the hoods design on the tool,
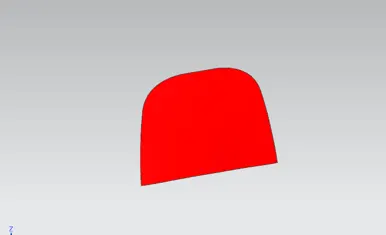
The outer panel is given as a skin data. Which is the one what we get from the styling team. We are going to study the engineering feasibility and reporting them whether this styling is possible or not. And at the same time we will also tell little feedback on modifications what can be done or in the mean time we can tell about the modifications which is needed that styling looks feasible.
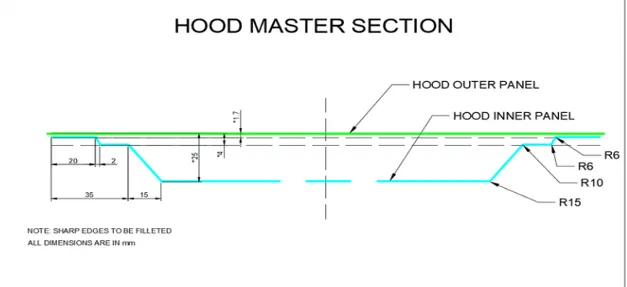
While getting into the hood design we will have to first define the edges of the hood, which attaches to the engine compartment. We have a predefined edge from the styling team. If we have some changes in the design of engine compartment we will have to modify the edges according to the edges of the engine compartment to match, this is what the engineering in designing this. For doing this we will have master section, which is predefined sketch which is adoptable on different situation.
Given Data :-
Hood Thickness Information
<!-- [if !supportLists]-->· <!--[endif]-->Outer Panel Thickness = 0.75mm
<!-- [if !supportLists]-->· <!--[endif]-->Inner Panel Thickness = 0.75mm
<!-- [if !supportLists]-->· <!--[endif]-->Reinforcement Thickness = 1.5mm
Given Styling Surface of Hood:
Given Master section which is from the previous car
Steps involved in designing the hood inner panel:
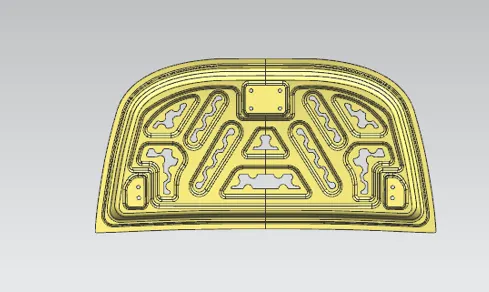
<!-- [if !supportLists]-->· <!--[endif]-->Offsetting the skin of outer panel.
<!-- [if !supportLists]-->· <!--[endif]-->Creating the flanges with reference to the master section.
<!-- [if !supportLists]-->· <!--[endif]-->Creating the embosses inside.
<!-- [if !supportLists]-->· <!--[endif]-->Creating hinge emboss.
<!-- [if !supportLists]-->· <!--[endif]-->Creating the striker emboss with the help of latch trajectory.
For producing the hood we normally deep draw the part. Most of the steel parts are deep drawn. When there is deep drawing process, one will have to stamp the part. We define the geometry and open the part a lot to provide the tool to come in and go out during stamping.
Deep drawing:
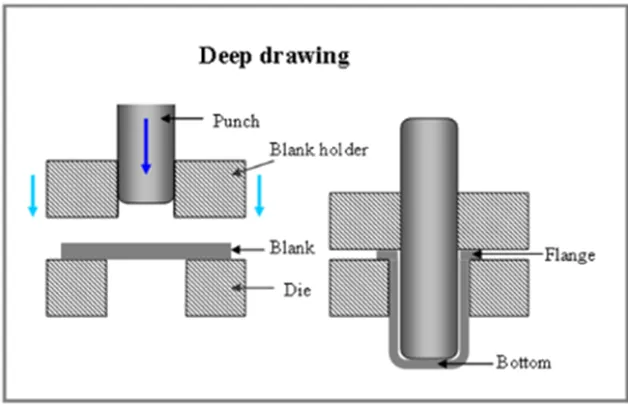
Deep drawing is a sheet metal forming process in which a sheet metal blank is radially drawn into a forming die by the mechanical action of a punch.
It is thus a shape transformation process with material retention. The process is considered "deep" drawing when the depth of the drawn part exceeds its diameter. This is achieved by redrawing the part through a series of dies. The flange region (sheet metal in the die shoulder area) experiences a radial drawing stress and a tangential compressive stress due to the material retention property.
Embosses in the inner panel:
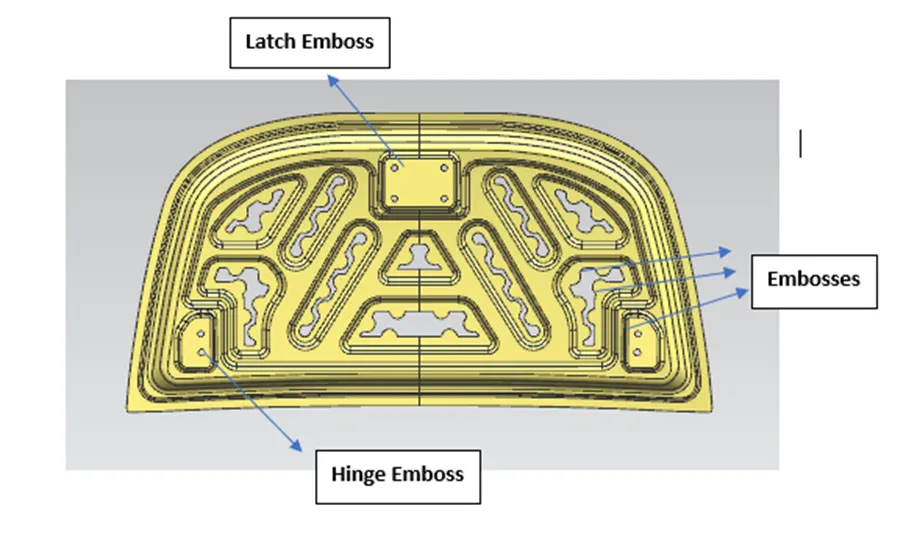
Whenever the collision happening the force goes straight. We as design engineers have to try dissipating the force to outside the car as early as possible. So that we create embosses in such a way, that the force direction changes towards the hinge. As a design engineer, It’s our responsibility to dissipate the forces on the way of embosses. So that it doesn’t goes directly straight and make the force do dissipate towards the hinge. During this situation the energy what we experience during collision will reduce a lot, so that the passengers inside the cabin not get affected. We cannot give 100% guarantee that the passenger will not at all be affected, the force which is getting inside the cabin will reduce drastically with adding embosses like this.
Latch and striker position(latch trajectory):
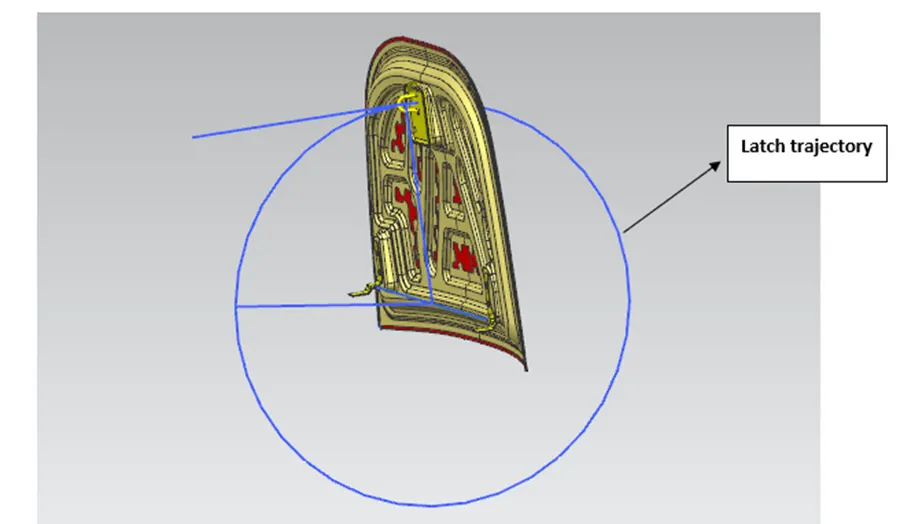
To check the correct position for latch and striker we have to go for a study. This study is similar for all closure components like hood, side doors and back door. Whenever we design a swinging part this concept is implemented.
Given hinge assembly part:
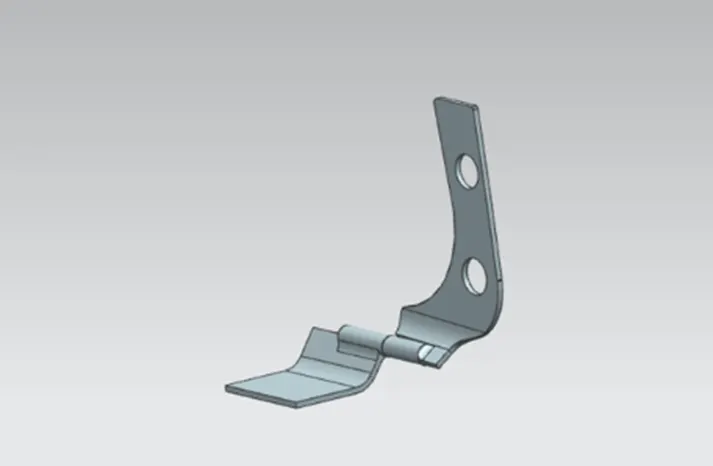
As we are already provided with the hinge from the previous car we just assemble the hinge with inner panel to achieve the trajectory and we have also given with latch and striker from the previous car.
Given Striker part:
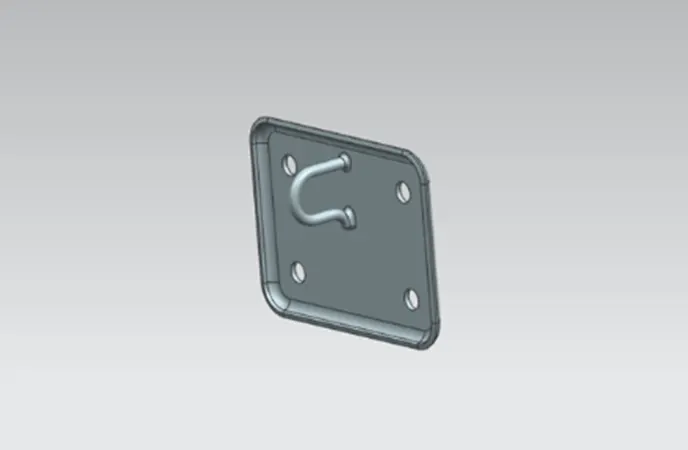
This striker part is also used to validate the trajectory.
The hinges are the part which is going to connect the engine compartment to the hood and these hinges are going to be in same axis. On defining the hinge axis, we will be going to position the hinge speculatively/trial based. By positioning this we get a hinge axis point. We predefine the latch and striker position from the previous vehicle and we validate that position for our current model. From the hinge axis we draw a circle which meets the striker center point.
Hemming:
Hemming is a forming operation in which the edges of the sheet are folded or folded over another part in order to achieve a tight fit. Normally hemming operations are used to connect parts together, to improve the appearance of a part and to reinforce part edges.
There are various types of hemming operations:
<!-- [if !supportLists]-->· <!--[endif]-->Conventional die hemming
<!-- [if !supportLists]-->· <!--[endif]-->Roll hemming
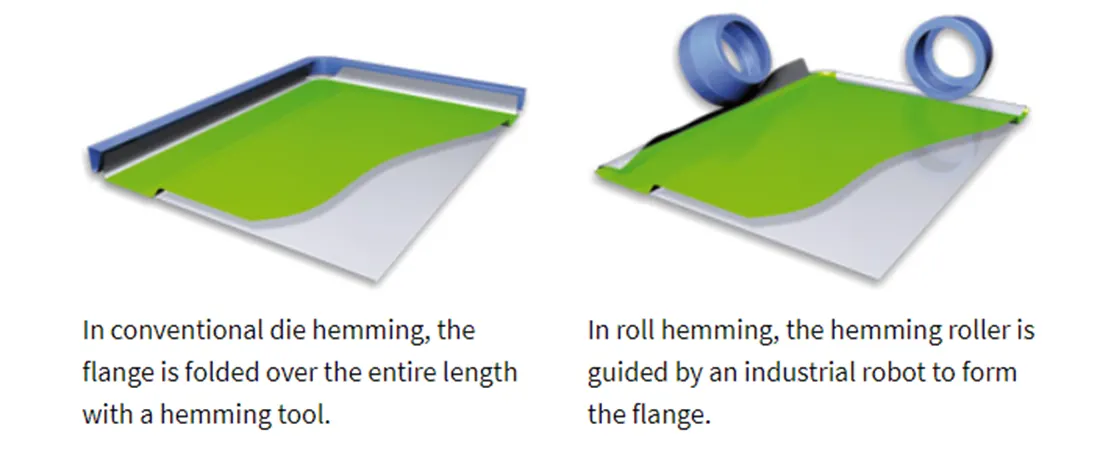
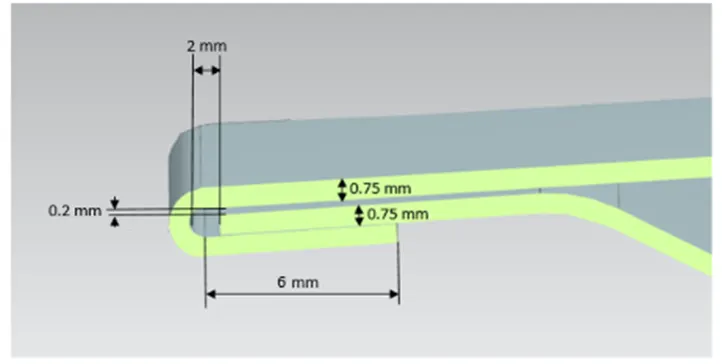
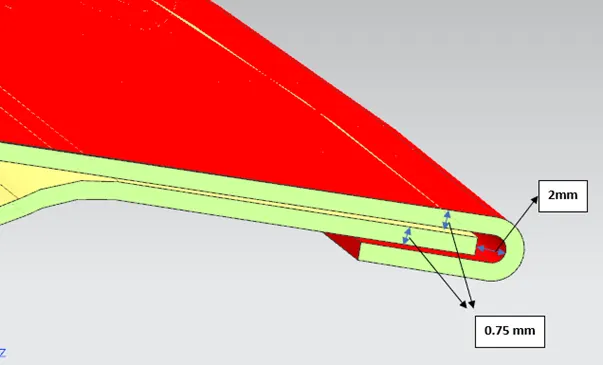
We already designed the inner panel and outer with the thickness of 0.75mm. After that when we join these panels we will produce the bends along the edge of the outer panel towards inner panel. These bending process is called hemming. By doing this with provided nomenclature we avoid spot welds.
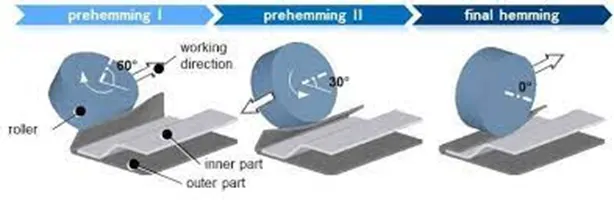
There will be different rollers assembled on different corners. Each rollers will roll over the edges of the sheet metal to close it with the inner panel. And these rollers will roll two or three times to enable perfect rolling provided with different rollers. To avoid intolerance issues we do hemming with different rollers and it will also saves time.
<!-- [if !supportLists]-->· <!--[endif]-->On first roller pass, the minimum closing is happened.
<!-- [if !supportLists]-->· <!--[endif]-->On second roller pass, it completely close the corners and
<!-- [if !supportLists]-->· <!--[endif]-->On third roller pass, it justifies the closing what it attends.
Normally hemming is done for assembling the outer panel with inner panel. And when you pass the rollers over the sheet metal there are some tendency that the sheet metal vibrates. Simulation team also studies that is these force making the panel come back to its original position or it is changing the design of the part. That is what the spring back effect is.
Reliefs:
- Rear Relief
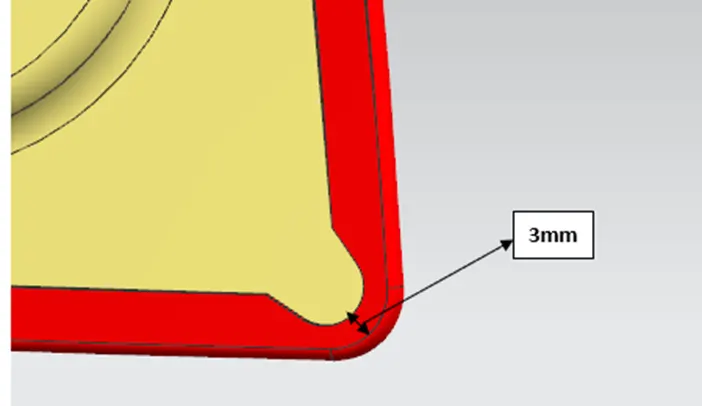
- Front Relief
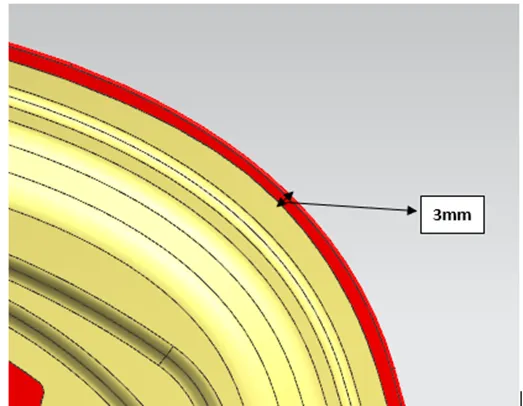
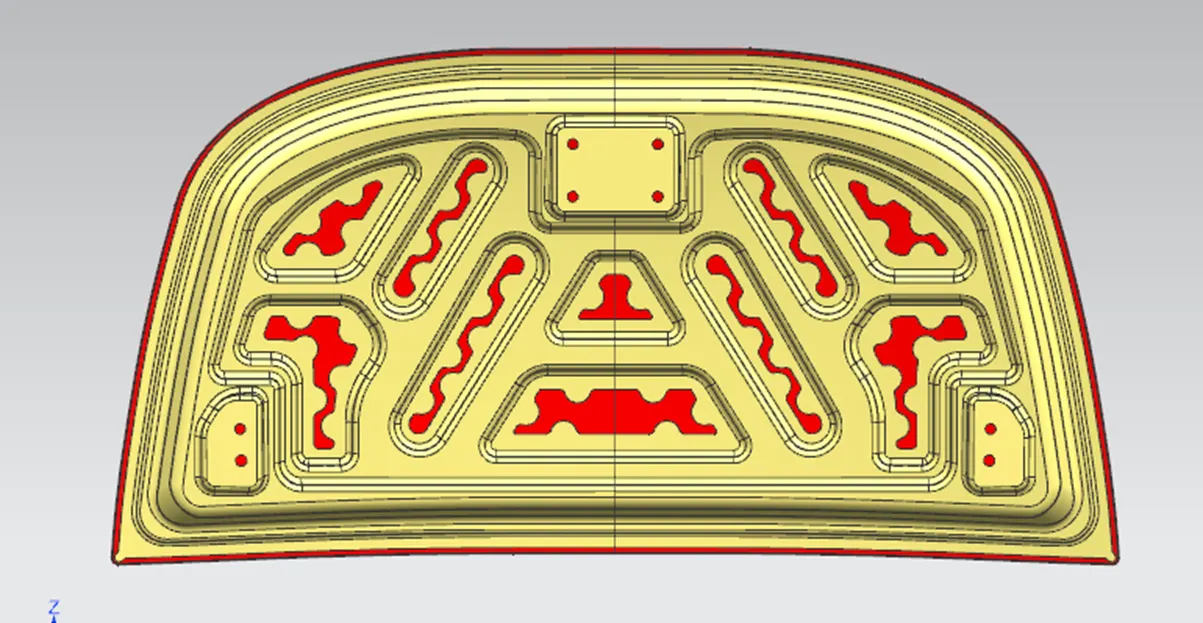
As we design the outer panel by simple offsetting the skin provided, these relief should be provided to completely design the outer panel.
Reinforcements:
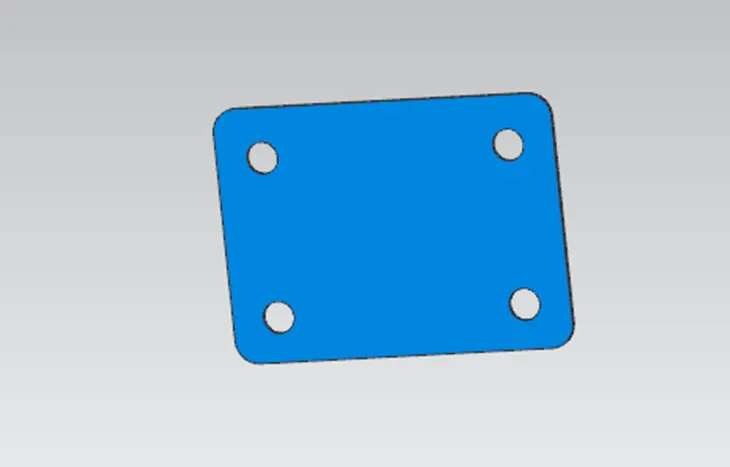
Striker reinforcement:
Whenever we add a weight to a material, we lose the strength of material locally.
We designed this latch by taking reference from the emboss created for the striker in the inner panel. We have given 1.5mm thickness to reinforcement as per given data from the previous car.
To compensate the loss of weight while adding the latch and striker in the inner panel we add reinforcement. This we called latch and striker reinforcement.
Hinges and Hinge reinforcements:
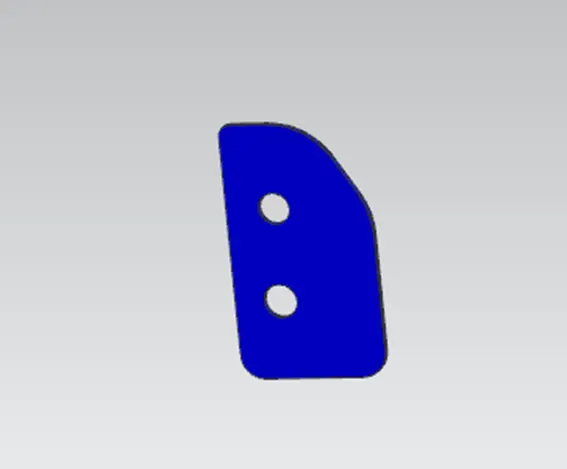
We create this reinforcement with reference to the hinge emboss created in the inner panel.
Without a hinge there cannot be a motion. To have a open/close motion, we need a hinge which is actuating and we need axis over which this motion will act. So when placing some hinges, we again loosing the strength. To compensate we add additional material which we called hinge reinforcement.
Reinforcements are the part which is added to compensate the lose of weight locally. Intentionally given to improve the strength of that area locally.
Mastic data:
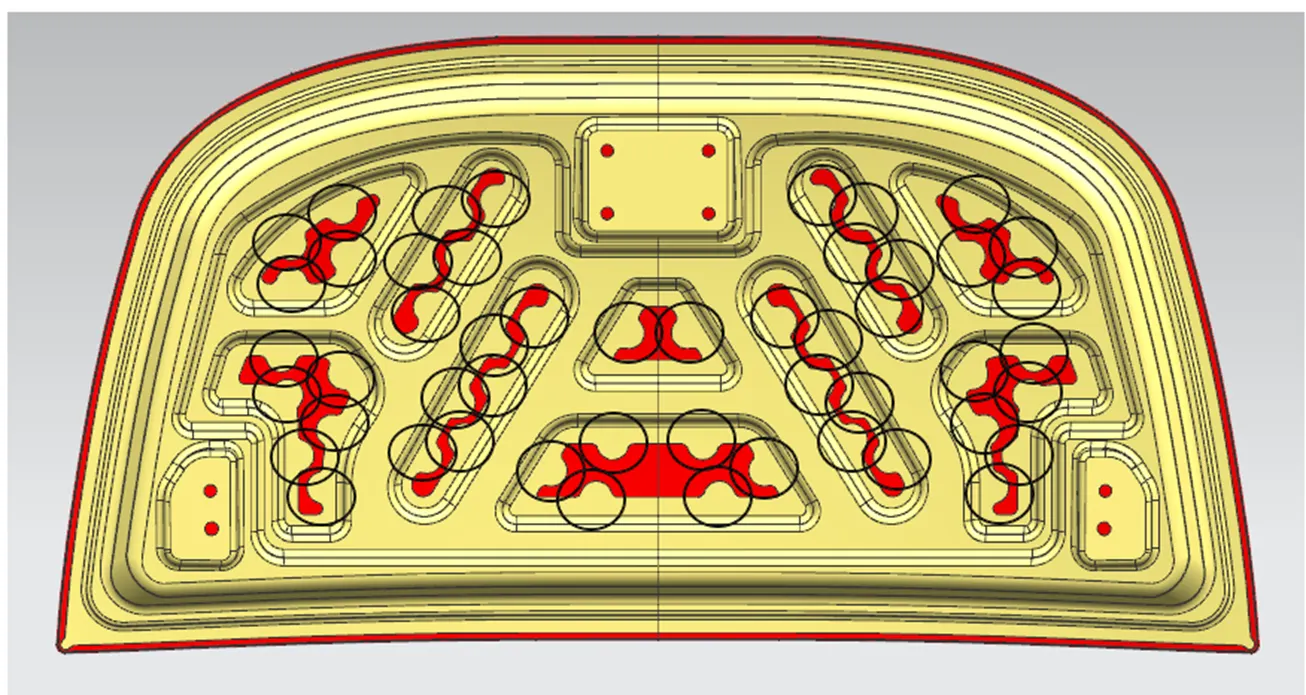
It is an NVH based thing. Every mastic sealant has the tendency of improving the strength locally around 60-80mm diameter. We will position the mastics in such a way that most of the hood regions are covered.
Mastic sealants are the small hardened rubber part. We will introduce this as paste inside between the outer panel and inner panel. And when it gets into the hot furnace will attach the inner and outer panel as sealants.
As hood outer panel is a styling surface, if we place any spots with spot wells the outer panel won’t looks that good. Always on the styling surface we will not add any spots or any negative grades which will reduce the aesthetics of the car. We only add the spots, riveting on the inside parts of the car. We will influence the spots and riveting on the skin panels. Skin parts won’t fit for rivets and spot welding.
So for that only we have introduced new joining techniques like hemming, gluing and mastics.
Now we have seen the importance factors like:
Head zone criteria, that how do we open and close the hood,
Hood balancer and
NVH criteria
These three are the important topics on designing the hood. We will have to keep these points when we design the hood.
Mastic points:
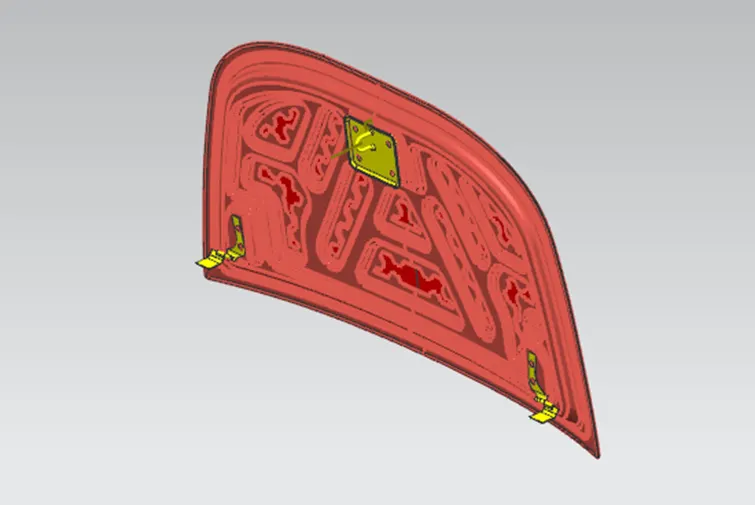
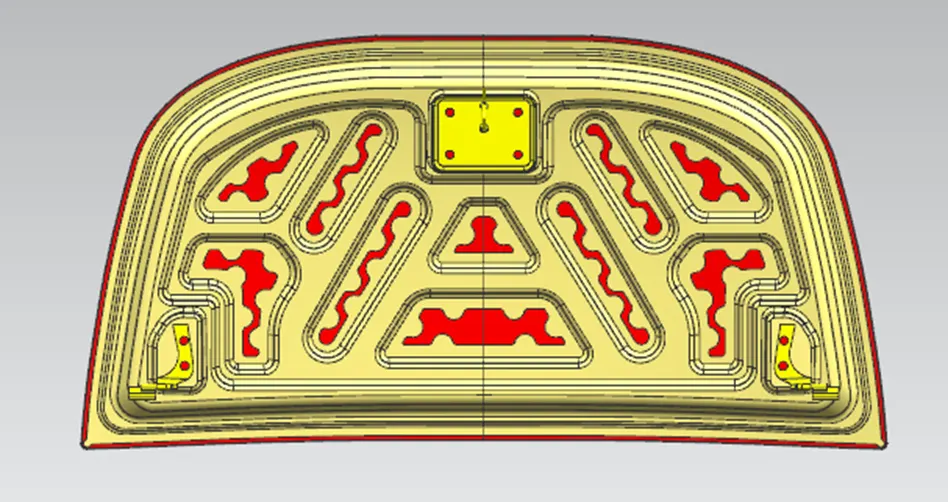
Final Model of the hood with its part assembled:
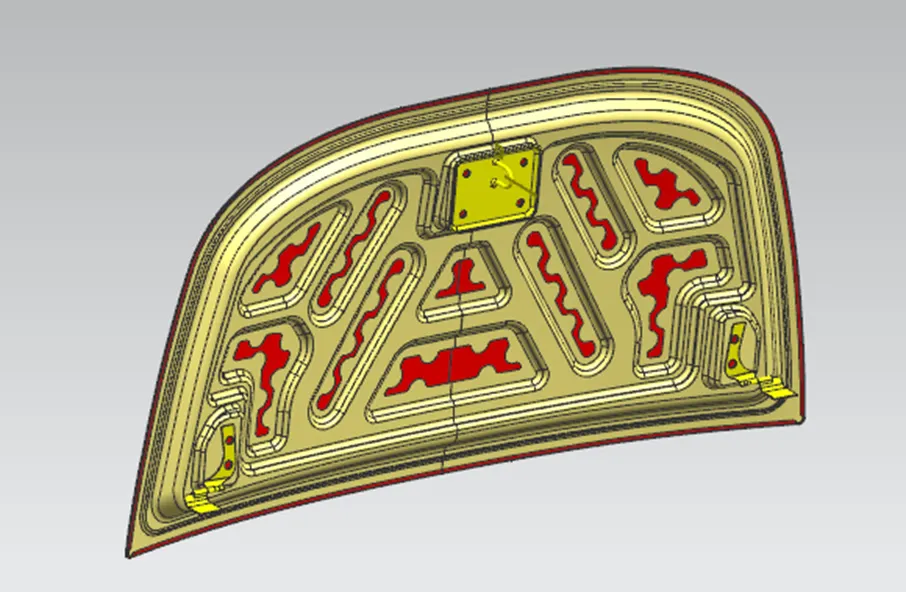
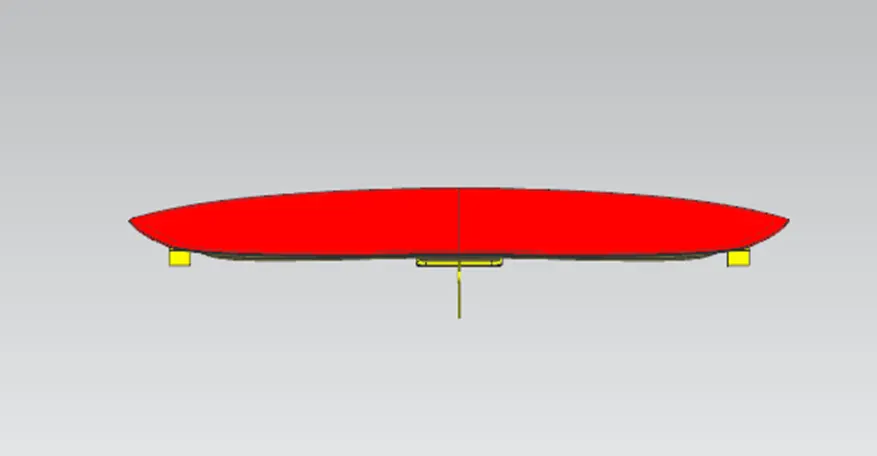
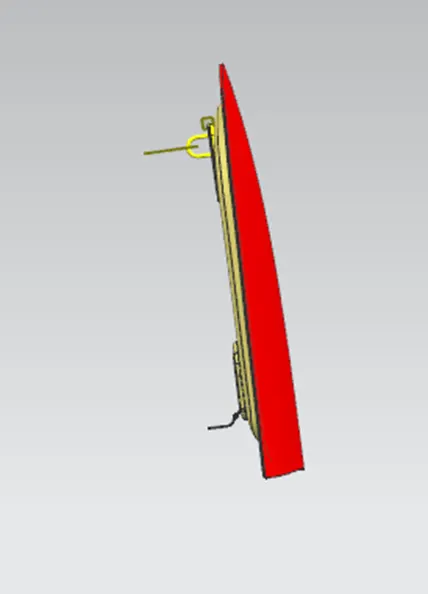
Orientation views of the hood assembly with hinge and striker along their reinforcements:
Isometric View:
Front View:
Top View:
Right View:
Conclusion:
The model of a hood of a car is successfully designed with its design requirements and safety requirements as per Euro NCAP (New Car Assessment Program) to get a good rating for the car.