Hood design-Week 2
HOOD DESIGN ASSEMBLY
First of all open nx cad and create a new file in assembly and name it as Hood Assembly1 and save it in a new folder 'hood design'.And make sure that the hood skin data,hinge,striker all the provided component files are in the same folder.
First step is to add the hood outer part which is provided with the challange.
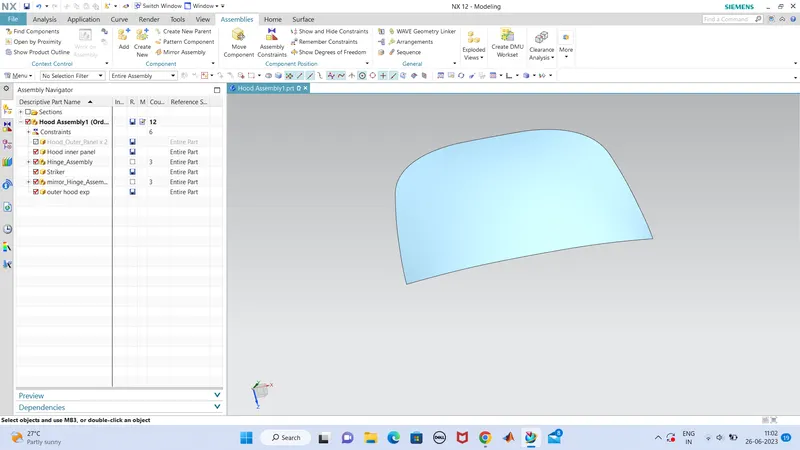
so the outer hood part is ready and we want the same as of hood inner panel.
first we trim this in correct centre by the plane and keep a half portion for easyness. and firstofall we create a tooling axis to this hood outer panel in any side.
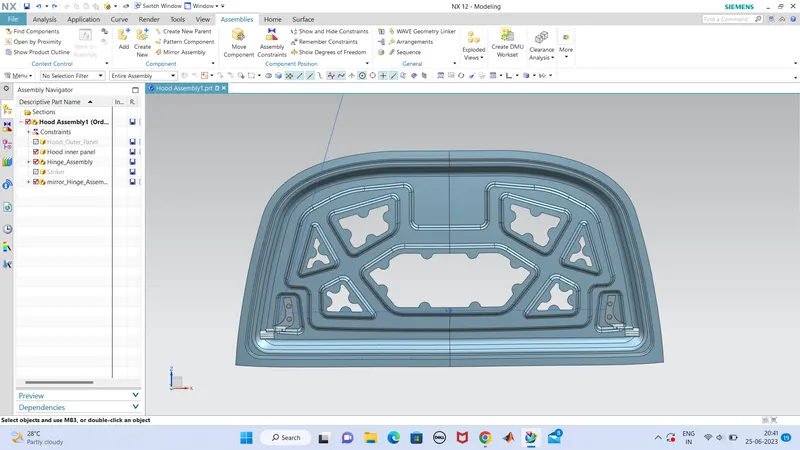
so we can add new part in asembly and name it as Hood inner panel and make it as a model type file. the by clicking 'inner panel' in the hood assembly1 assembly navigator, the hood outer is hiden but the sketch skelton would be there. so from that trace we can make it same as that of hood outer panel in the inner panel assembly.this is done by 'Wave geometry linker'.so the inner panel is made.
from the given challange reference we get the dimensions.
after creating hood inner panel ,select its part navigator and create offset of hood inner panel about 1.7mm and in that offseted surface create offset in curve about 20 mm(given in reference) and trim the remaining part from surface-trim sheet tool.so we got a offseted face .then offset the hood inner panel reference in downward direction again about 4mm for the next flange.. and same is done in this face to offset in curve. And a third flange also done is same process within the given dimensions respectively. so we got saome flanges.
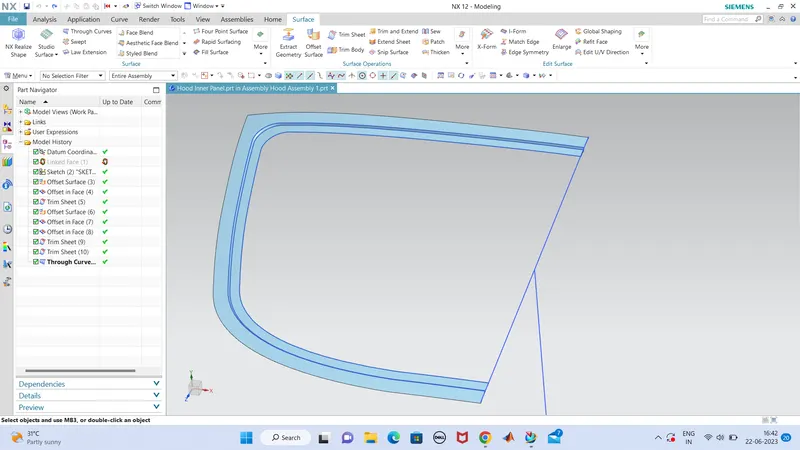
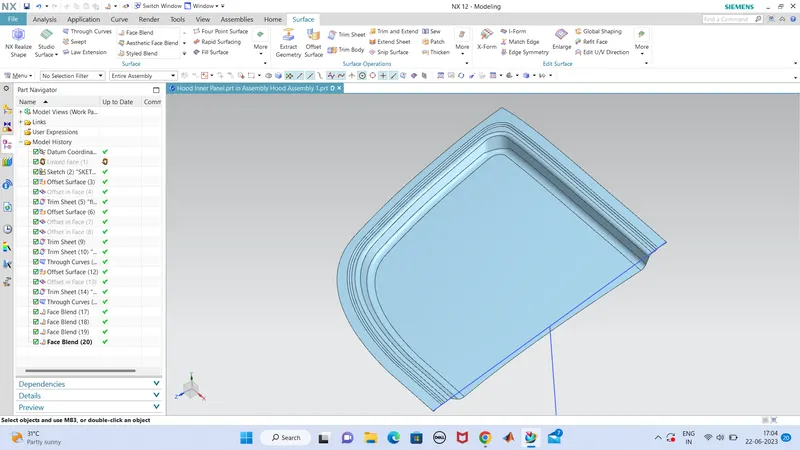
this each flanges are connected by through curves and the final look is here.
blend all the edges by a proper radius.
so the first step is done.
next we want to create the emboss for the structure that we want to provide mastix.
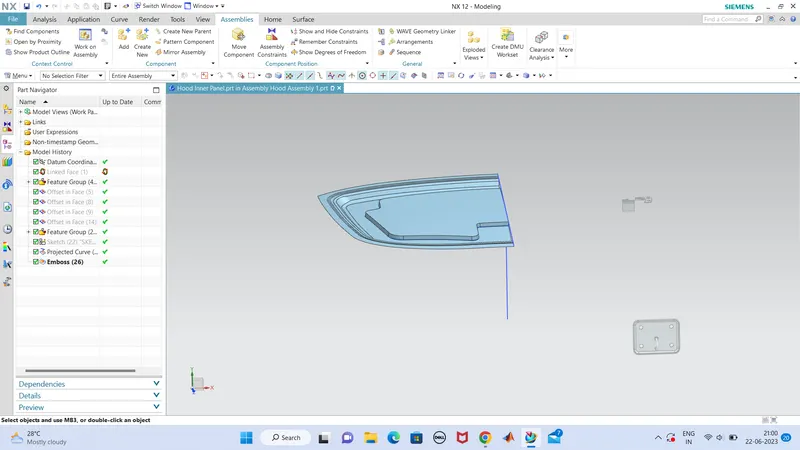
so first we create a sketch and emboss it in to the upward direction to outer panel about 10mm
.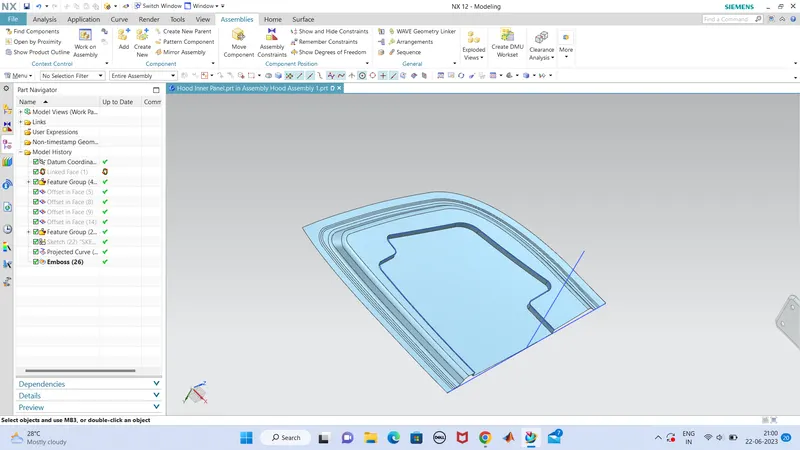
this is the sketched emboss that i have done. so next step is to create one more emboss because to fix the mastix clearance .mastix thickness is 5mm.
next create more sketches in this embossed face and emboss it agin for the mastix clearance and trim it in a desired sketch so as to provide safety to foriegn bodies(pedestrians).
while any pedestrian hitting the hood of car the impact will be reduced because of this trimmed sections in the hood inner panel and also to guidway to the forces while impact of accident to distribute in a safe direction manner.
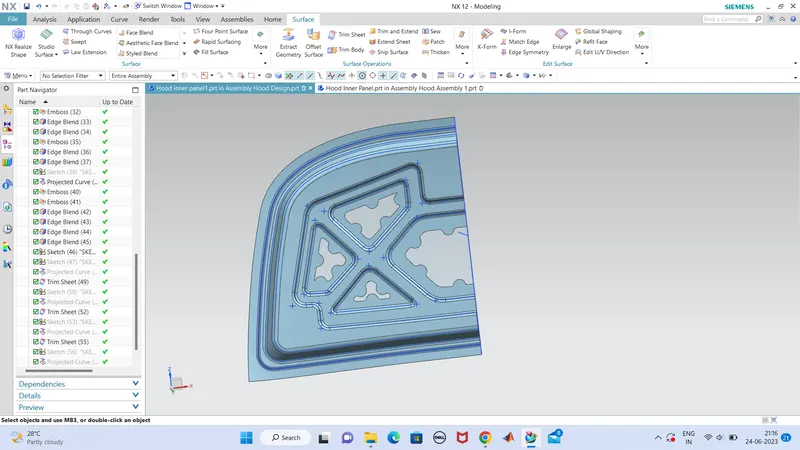
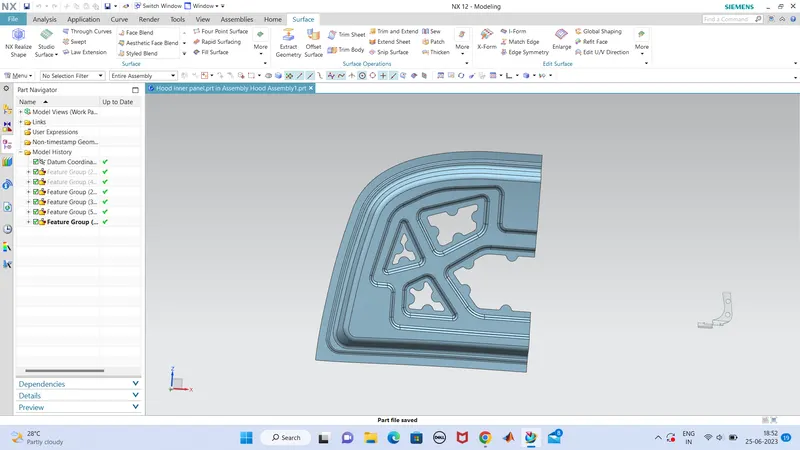
this is the finished part of a hood inner panel with all the embosses and trimmed portions with required dimentions.
next step is to provide hinges and strikers to the inner panel in correct location. so add new assembly file of striker,hinge. it is already given with the challange reference.
so first we fixing the hinges so to accomodate hinge we need a reinforcement, to balance the strength while fixing a external part.
so we sketch and emboss it in a required manner to hold the hinges. but we have to keep in mind that hinges should be parallel to the horizontal plane of the hood son we create a datum plane which is coplanar to the horizontal plane of hood. then emboss it to the plane with a required height and edge ange and blend its edge.
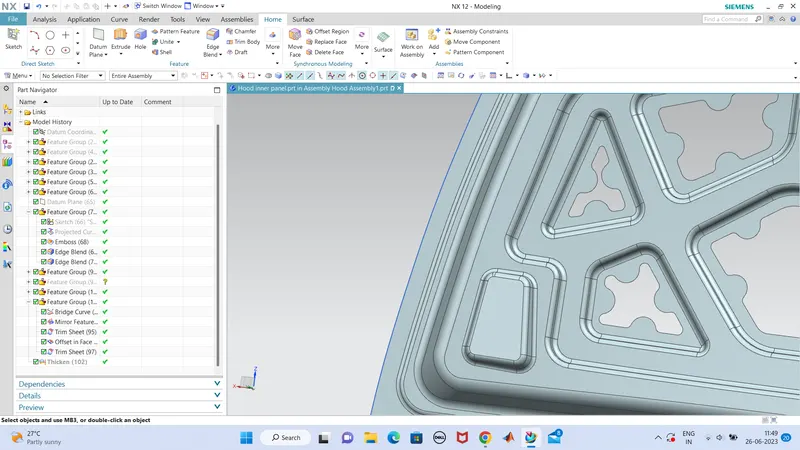
so we can mirror this current geometry by ,menu-inert-associative copy-mirror geometry.
so the part is mirrored.so we go a full sized inner panel.
next we can fix the hinges in the hing mount. for that create a hinge axis and create a datum plane which is exacty intersect the centre of this hinge axis.and fix the hinge in correct constrains. and mirror the hinge as well by the mirror feature. so the hinges are properly alligned and mirrored.
next step is to fix the striker, for that create tangentric circle which is tangent to the striker clamp and create a datum plane which is perpendicular to hood, so there will be a proper locking of striker and latch.
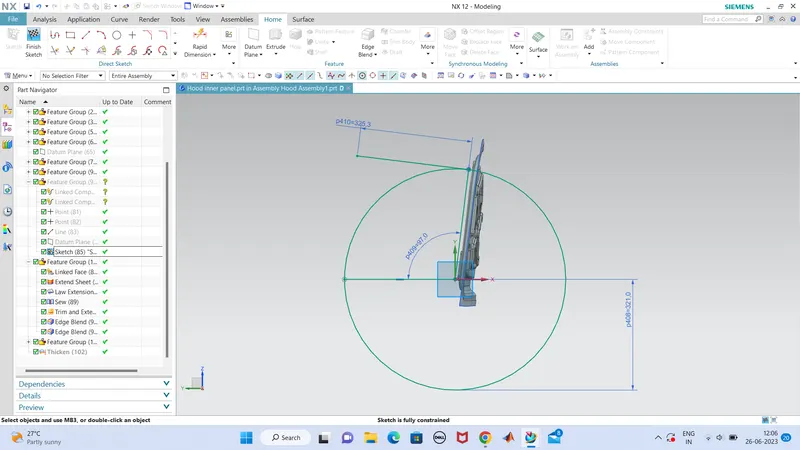
so fix the striker in the same way that hinges assigned. and in striker there a wave geometry linker is produced and wich is lay out to the hood inner panel and trim the extended portion and sew the used portion.
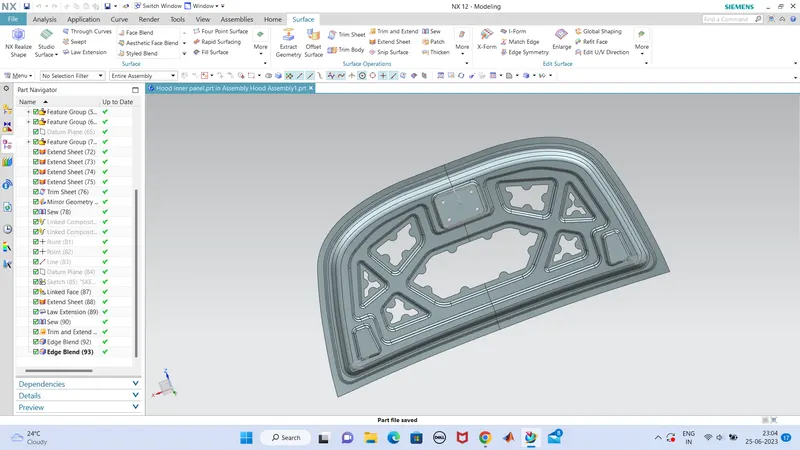
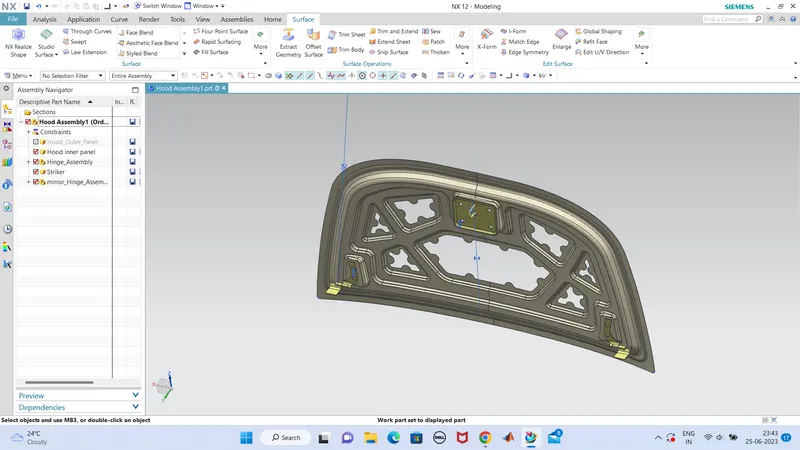
so the hood inner panel is ready.so activate the hood outer panel and next process is hemming.
for that offset a face of aouter panel and trim it in given dimention to hem. and using through curves connect these two faces.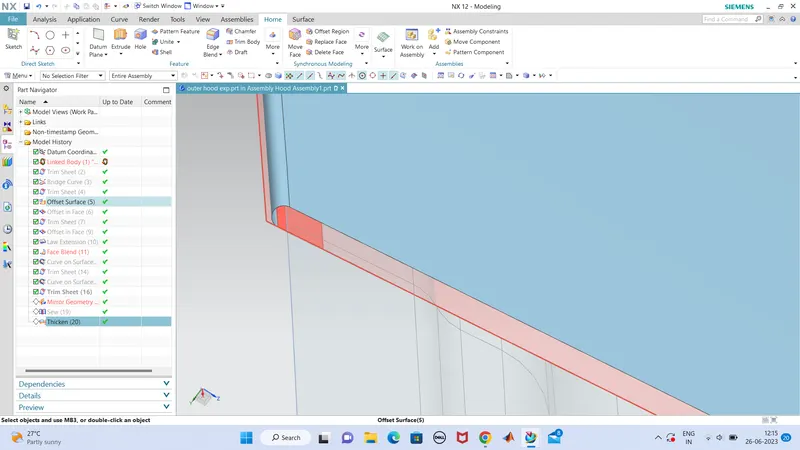
next is to thicken the inner panel as well as outer panel by 0.75 mm.
so the hemming process is done ,so we got the final look of the hood ,
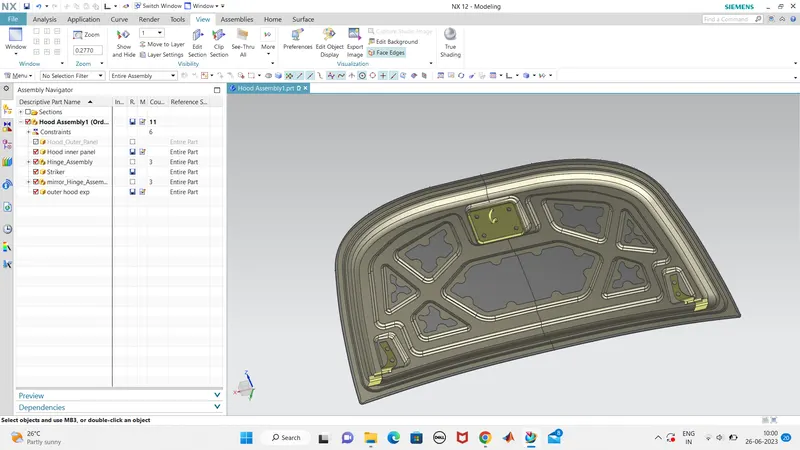
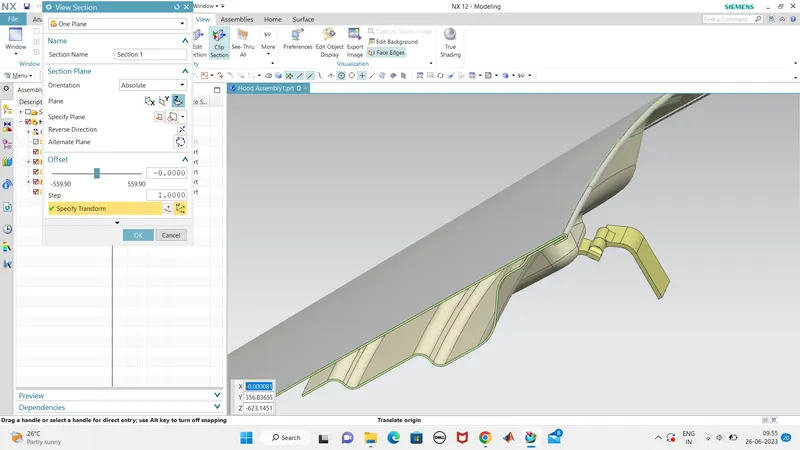
so we can check for the mastix section thickness,
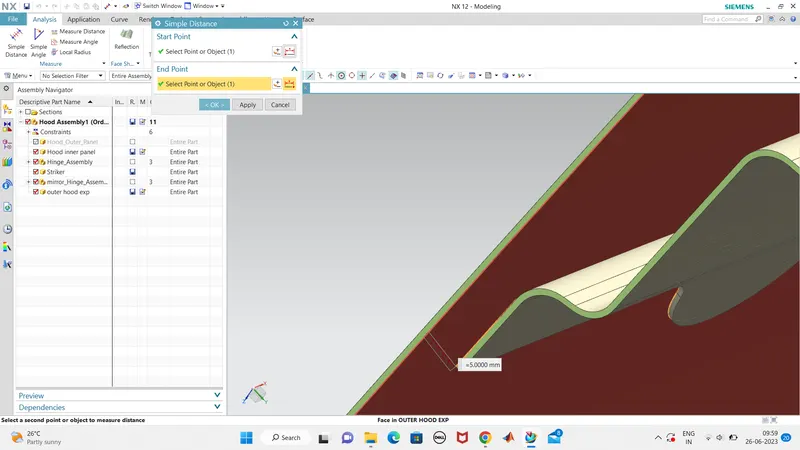
yes its is correct 5mm clearance for the mastix thickness.
so we can colour the part as we like.
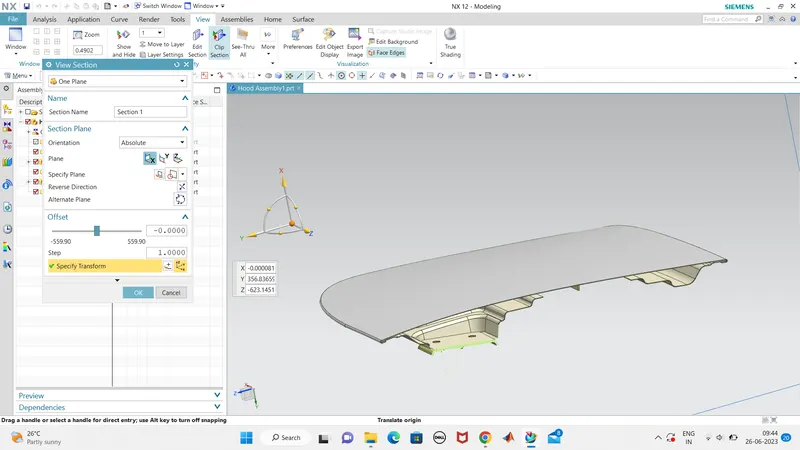
so the hood design challenge is done.