Hood design-Week 2
Tital- Hood Design
Objective:-
Design a hood with a given input data to satisfy the engineering & manufacturing & functional requirements.
What is Hood or bonnet ?
Hood is basically once type of door which is use to close engine compartment, also its consist two main parts as like inner panel and outer panel where inner panel give strengthe to the outer sheet & outer sheet is just planer outer aesthetic surface which gives good look for the car. In other contries its also called as bonnet which support by the pair of hinges to provide an access for repair and maintenance. It consist of outer, inner panels, paire of hinges, stricker with holding rod mastic, seal and other are some rainforcement. The hood design may vary car to car as per the styling the design of hood is change. Following are the major component of hood.
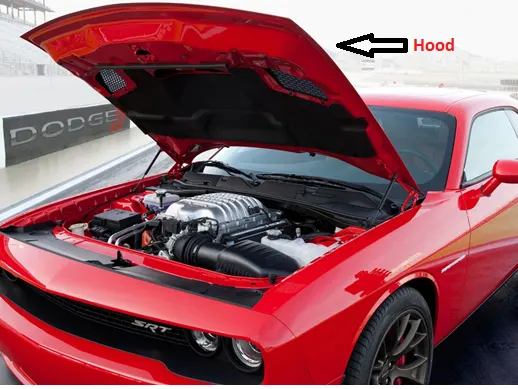
Fig-01 Car Hood
Need of Hood:-
The main purpose of hood is to protect engine compartments as result to increase the power of engine. for example in day to day life we seen that some metal particle or other rocks hits the tyre and it get punctured avoide this from fluid container hood is important. Its also protect IC engine from atmoshpheric
Manufacturing requirement:-
Minimum fillet radius = 3mm+Thickness
No sharp corners inside the component
No curvatures lesser than 5mm
Mounting areas and welding areas need to be flat
Provide appropriate corner relief on the area of curvature.
Provide exact mastic points to reduce the NVH.
Components:-
1. Outer Panel
2. Inner panel
3. Hinges
4. Striker Mechanism
5. Stay Rod or Gas stay Rod
6. Mastic Seal
7. Rainforcement
Details of each components:-
1. Hood Outer Panel:-
The outer panel is actually called the skin of the vehicle which is designed by the styling team to get a good look for a vehicle by covering the inner panel and engine parts of the car. This part should not be welded to the inner panel but using the sealant and mastic points makes contact between the inner and outer panel which acts as a bond between both and makes the hood stiff.
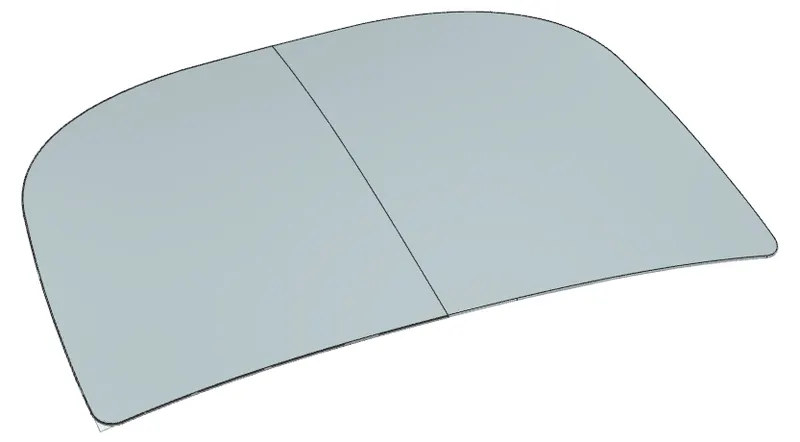
Fig-02 Hood outer panel
1. Hood Inner Panel:-
The main part of the hood which gives support to the outer panel of the car and with its embossing shapes dissipates the force in different directions when the vehicle takes crashes to not to injure the men in the car.
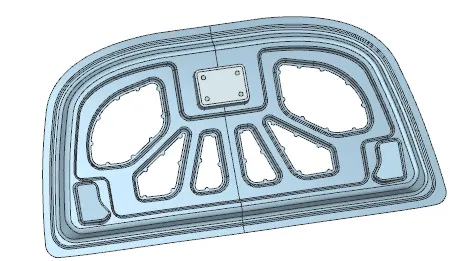
Fig-03 Hood Inner panel
3. Pair of Hood Hinges:-
The hinge consists of two parts- hinge at the inner panel and hinge at the engine compartment. This coupling allows the hood to open and close, as well as makes contact between the engine block to the hood. It also controls the lifting of the bonnet mitigates the consequences of a collision between a pedestrian and a vehicle.
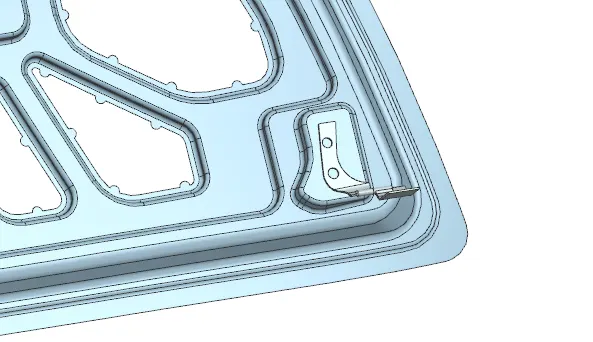
Fig-04 Hood Hinges
4. Hood Striker Mechanism:-
A vehicle hood striker and release mechanism is latched when the hood striker engages the latch portion of the mechanism as the hood is moved to its closed position. The mechanism is actuated to release the hood striker by a pushing action on the cable or strand movable in the sheath of a cable assembly rather than by the typical pulling action on current hood releasing mechanisms.
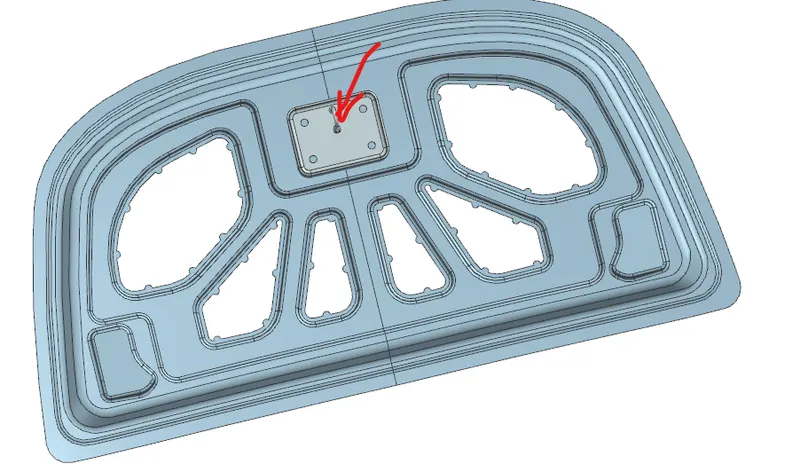
Fig-05 Hood Striker
5. Stay Rod or Gas stay Rod
- Gas Stay
These are used to lift the car hood. Its purpose to just give the lifting force to the hood, then it automatically opens the car hood by means of gas pressure. This is used where the car bonnet size is heavy to lift. Spring stays are designed to be used on upward lifting doors, once you have opened the door slightly the spring will push the door to the fully open position. Struts contain nitrogen gas under pressure and some oil to damp movement and to lubricate the seals.
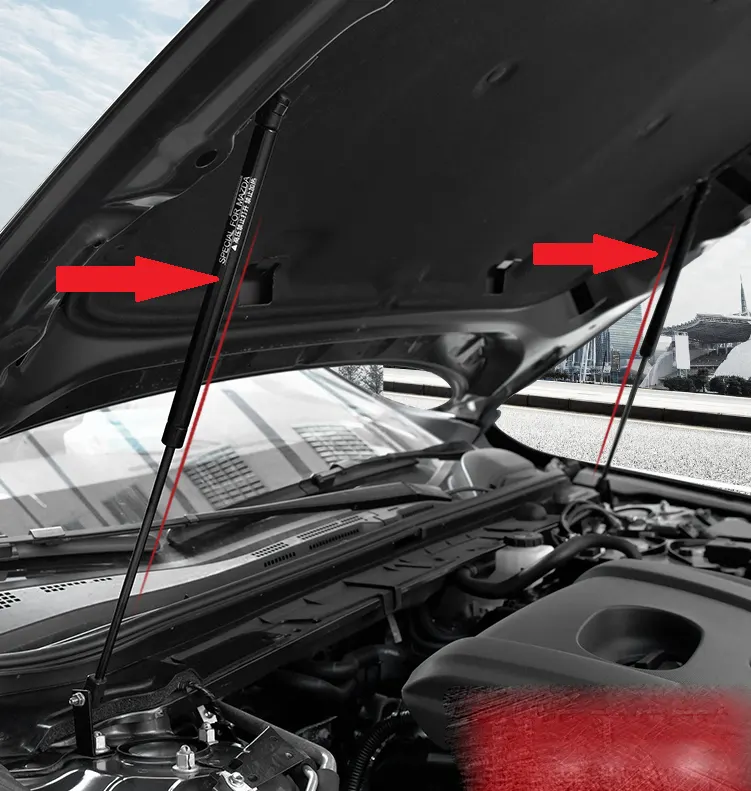
Fig-06 Gas Stay
- Stay Rod
Stay rod is also called as support rod and its widely used in many cars as the rate is cheap. In this type we have to lift the hood by ourselves and place the support rod in the space provided either in the hood or engine component. This is mostly used for where the car bonnet weight is small. Support Rod can be mounted with grommet side on the engine compartment of body and rod locking hole on hood or vice versa. Grommet and the clip of the rod are standard parts. Support rod is used to increase the support force, automatic buffering, stable and reliable, strong load-bearing capacity, safe use, not easy to fall, avoid hot hands, support the engine more easily, and balance the force without shaking.
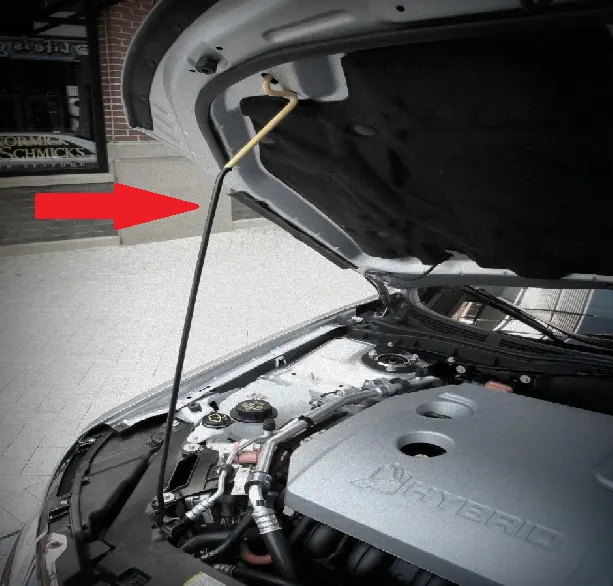
Fig-07 Stay Rod
6. Mastic Points
The mastic points are areas where the mastic is placed to attach the outer panel to the inner panel. We cannot use spot welding as it would give a less aesthetically pleasing result. Hence mastics are used to join the panels together as it does not melt the metal itself.
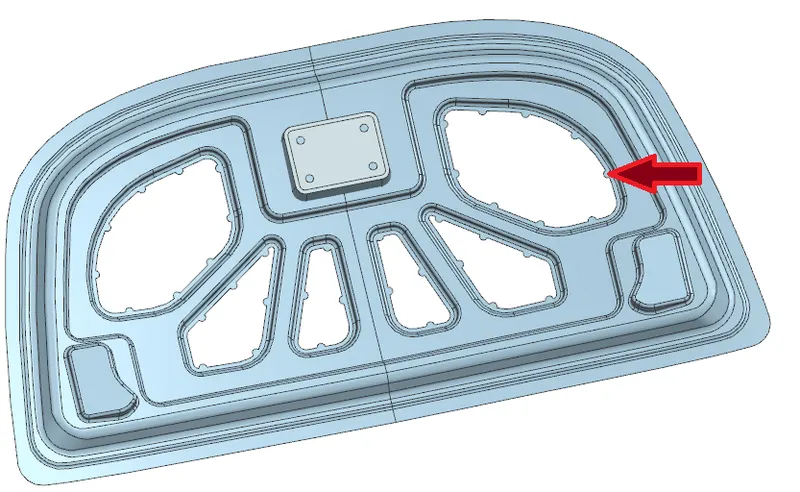
Fig-08 Mastic Points
7. Rainforcement
The area near hinge and latch has more chances of failure in the hood panel. Hence to avoid any failure, the hinge and latch areas are reinforced with extra material whose thickness is usually determined by the type of vehicle. If we add extra material in area where as we reduced the strength of that perticular space so as result to add rainforcement. Arrow head shown as rainforcement areas.
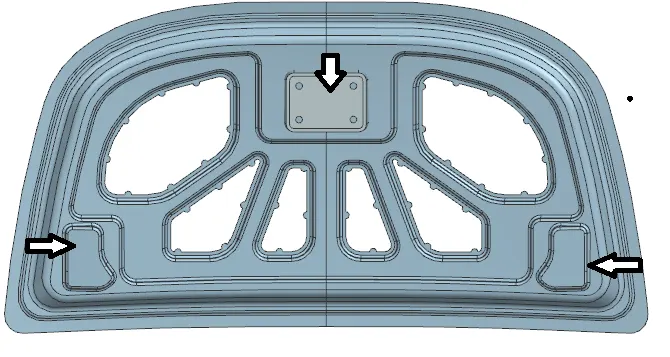
Fig-09 Rainforcement
Pedestrian Head Impact Zone
1.Wrap Around Distance
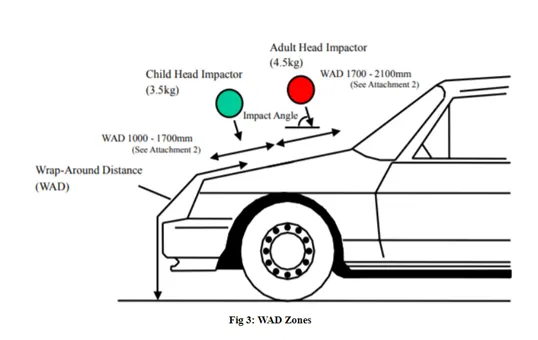
When a car crashes on the pedestrian, the whole human body wraps around the front shape of the car and the head impacts on the bonnet or the windscreen. The distance on which the head impacts on the car from the ground is called as the Wrap Around Distance (WAD).
To be specific the Wrap Around Distance is a measurement of distance from the ground to the head impact zone over the outer surface of the car. The wrap around distance is measured longitudinally in the centre of the vehicle from the ground.
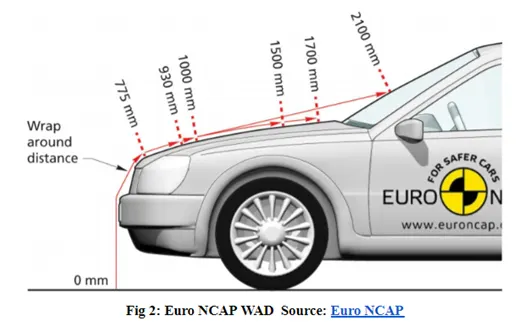
The severity of the injury caused by the frontal crash depends on the type and shape of the vehicle, speed of the vehicle and the movement of the pedestrian relative to the vehicle. In addition to these parameters, the wrap around distance plays a major role in the safety measurement of a pedestrian.
During the crash analysis, based on the Wrap Around Distance (WAD), two test areas will be created namely Child head impact zone and the Adult head impact zone. The child head impact zone is between 1000 to 1700 mm WAD and the adult head impact zone ranges between 1700 to 2100 mm WAD.
2.Bonnet Side Reference Line
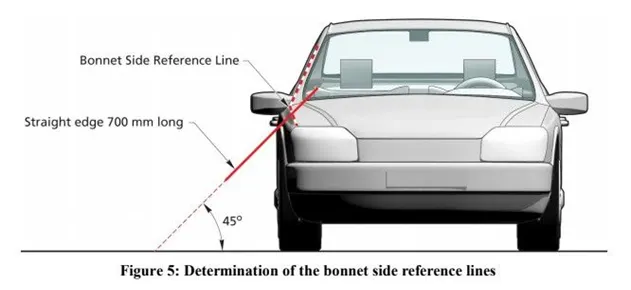
The Bonnet Side Reference Line is defined as the geometric trace of the highest points of contact between a straight edge 700mm long and the side of a bonnet, as defined in Section 3.3.1 and A-Pillar, when the straight edge, held parallel to the lateral vertical plane of the car and inclined inwards by 45 deg is traversed down the side of the bonnet top and A-Pillar, while remaining in contact with the surface of the body shell, any contact with door mirrors is ignored. Where multiple or continuous contacts occur the most outboard contact shall form the bonnet side reference line.
Design Consideration.
HOOD MASTER SECTION: The master section is to guide the design requirement along with dimensional constrain.
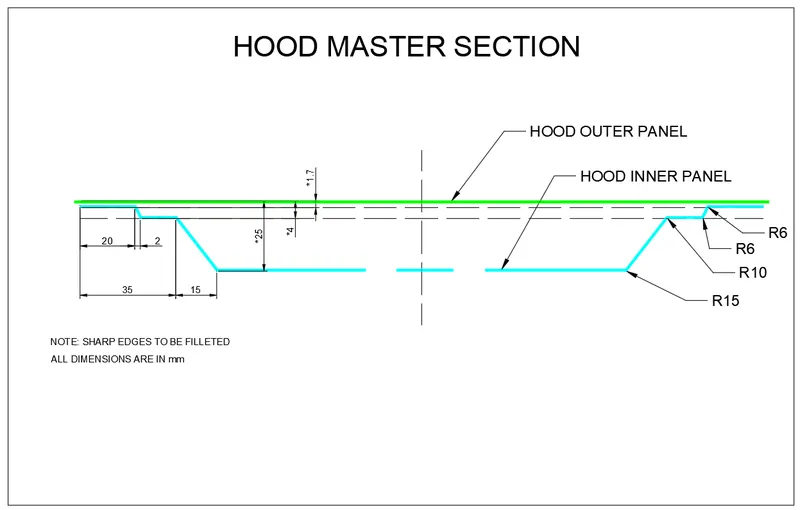
Fig-10 Master Section
Hemming Data:
Hemming is the process where two sheets are one over the other and its perform through the set's of roller, and it perform by machine shope,
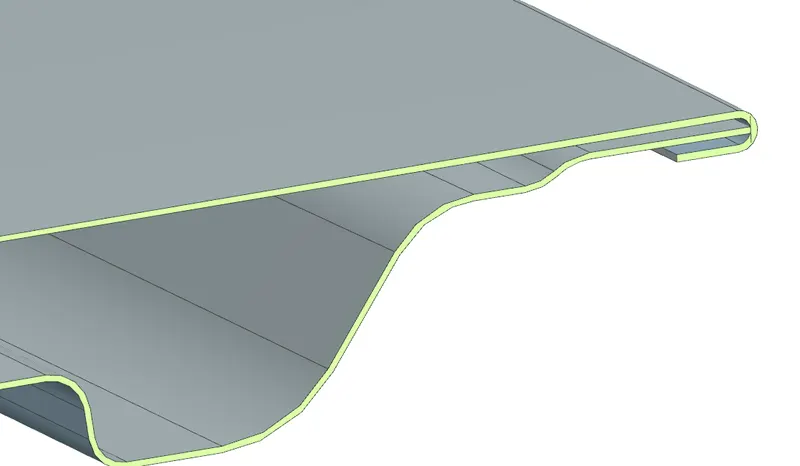
Fig-11 Hemming Data
Relief Rear & Front section:
A relief on the corners is provided for the hemming process in order to avoid spring back issues. When the rollers are moving on the panels the force that is used to bend the sheet metal has to be maintained within the limit to avoid spring back issue. Due to which a relief is given on the corners to avoid the red zones on the hood. 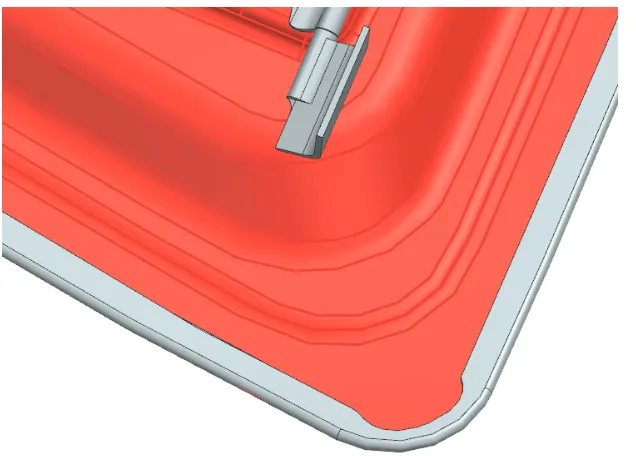
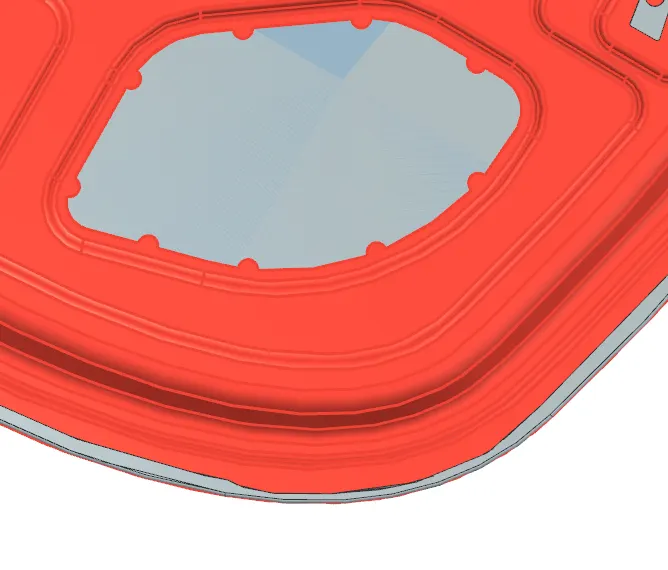
Fig-12 Relief rear section Fig-13 Front section
Isometric View
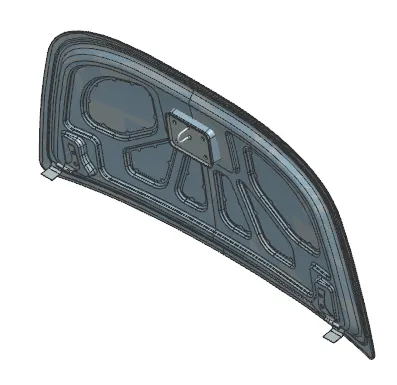
Fig-14 Isometric View
Top view
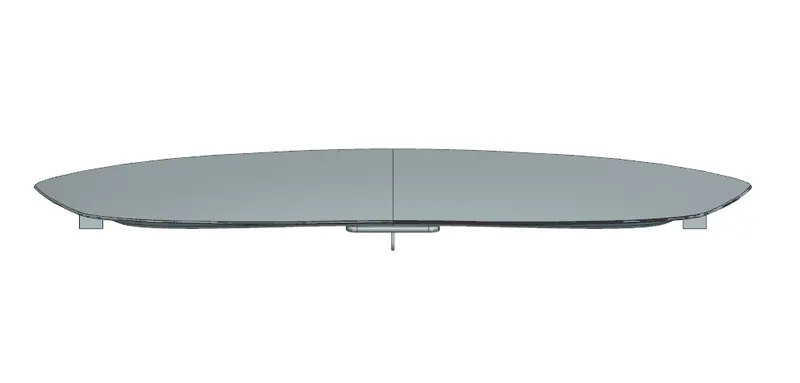
Fig-15 Top view
Right View
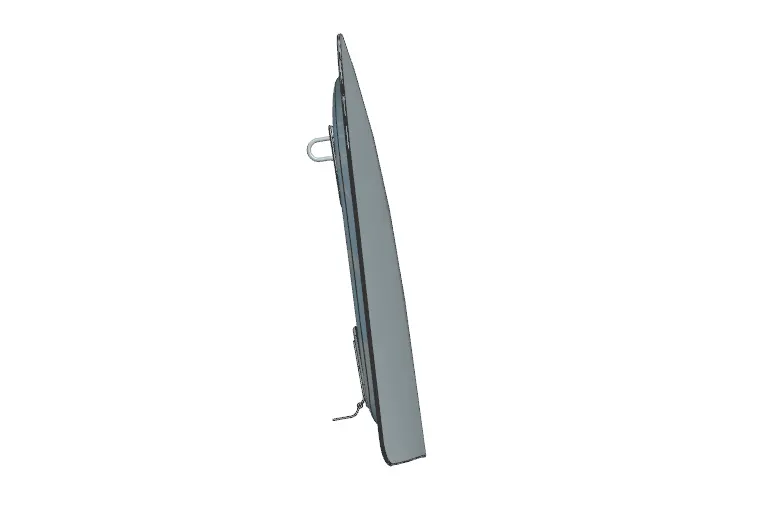
Fig-16 Top view
CONCLUSION
In this way successfully complited, with the give master section and class A surface model the hood have been designed as per the euro NCAP guidelines Using siemens NX_CAD. The main aim was to improve the pedestrian safety rating by reducing the risk of injuries.