Hood design-Week 2
Hood Design
Introduction:
The project focuses on the design of an automobile's front hood. The front hood is a vital component in any regular automobile. The hood's primary purpose is to provide the engine and engine bay protection from the elements. Another vital purpose is to provide protection to its occupants in an accidents. Majority of accidents occur head on, so it is highly essential that the hood of the car acts as a suitable crumple zone and absorb the impact of the collision. The various international standards and specifications must also be taken into consideration while designing a car hood.
For any typical car hood, the initial design of the component is obtained from the visual model of the final product. The inner panel for the hood is modelled using the model of the hood, keeping in mind the various standards, vital force transferring sections in case of an accident and suitable mastic points for adhesion. The outer panel is also designed to conform to the aesthetics of the vehicle. The manufacturing processes used in production are also considered accordingly.
Design Procedure:
The initial hood skin data is used to create the inner and subsequently the outer panel of the hood. The assembly of the hood in this project consists of the following parts:
1) Inner panel:
Using the hood skin data as the reference, the inner panel is designed in conjunction to the skin's surface. In actual practice, the panel begins as a blank of sheet metal. Then depending upon the design, multiple drawing operations are made. In this case, initial drawing operations of 2 mm, 4 mm and 25 mm respectively are simulated in the model. To show this operation, multiple surfaces are offset and law extensions are made to create the required offset surface. Edge blends are also given to the edges since all drawing operations create rounded edges. Next, the required piercing operations are given to the component to reduce the material required for the component. During the actual operation, many considerations are made, such as mastic points. Material removal is crucial when it comes to maintaining the structural integrity of the panel. The operation has to be performed without compromising its overall strength and shock absorbing capabilities. Excess material, if any are left, are removed by trimming. The thickness of the material used for this component is around 0.75 mm, which is the thickness given in this modelling operation.
The latch and hinge are two components attached to this inner panel. The latch acts as a temporary fastner for the hood, to keep the hood from popping open while driving. The inner panel also acts as anchor points for the latch and hinge attachments. Which in turn also means that those points are subject to forces every time the hood is opened or closed. The inner panel is usually very thin, about 0.75 to 1 mm, and creating a single unit with the latch and hinge integrated into the panel could result in deformation of the panel over time. So, reinforcements are given to the anchor points as separate replaceable components, which are usually thicker than the panel.
For fastening the inner panel to the outer one during the actual manufacturing process, adhesives are used. The locations where the adhesion is supposed to be applied are called mastic points, which can be seen as small semicircles along the edges of the sheet metal. Adhesion is used because any other method of joining the panels, such as spot welding, can warp the metals due to high temperatures and can ruin the finish.
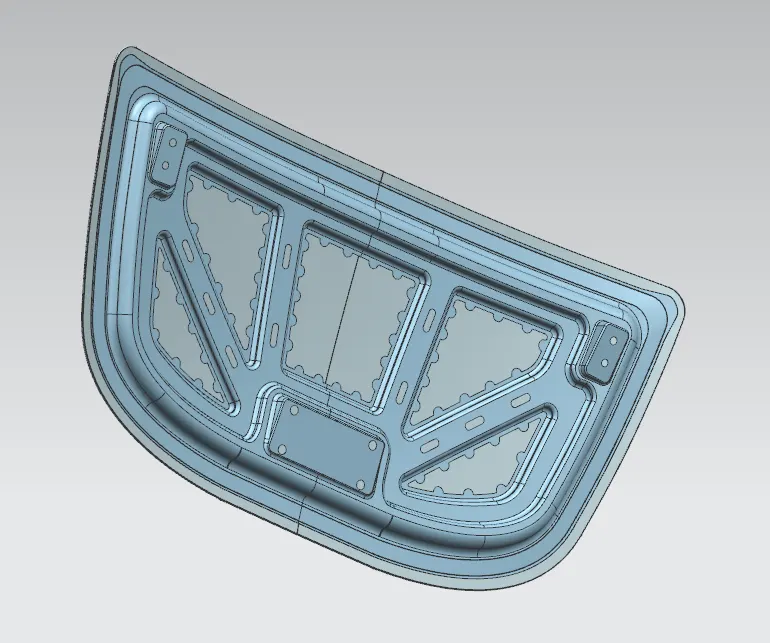
Another important design consideration to be made for this panel is its collapsibility during a collision. In case the vehicle suffers a collision head on, which is the most common type of impact, the hood must be able to direct the forces away from the cabin and towards the sides to protect the occupants.
2) Outer panel:
After the inner panel is created, the outer panel is modelled in a similar fashion. Since the outer panel consists of the same material used throughout the external surface of the entire vehicle, it is usually very malleable and can get dented very easily. So the outer panel is fixed to the more rigid inner panel by means of hemming. Hemming is a procedure where the flange of the outer panel is wrapped around the edge of the inner panel. It is a critical process since it governs the final look of the component. In the modelling process, the hem is given by offsetting the hood skin data and thickening it in such a way that it does not interfere with the inner panel, so proper dimensions are specified for the gap distance between the surfaces.
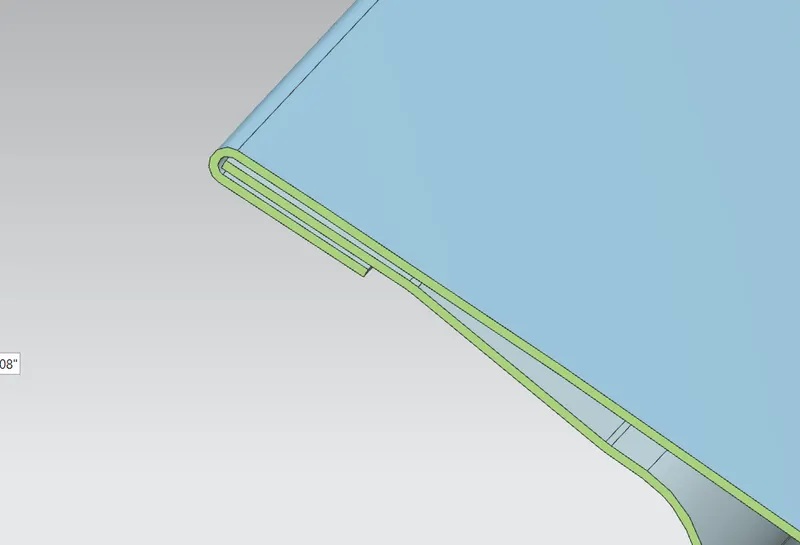
In actual practice, hemming does not create a proper seal near the corners. There will always be an excess of material near the corners if the outer panel is not modified and this can result in crumpling of the sheet which will affect the finish of the outer panel. To avoid this, a relief is given at the corners in the form of a cutout of fixed radius. This ensures that the material does not crumple at the corner.
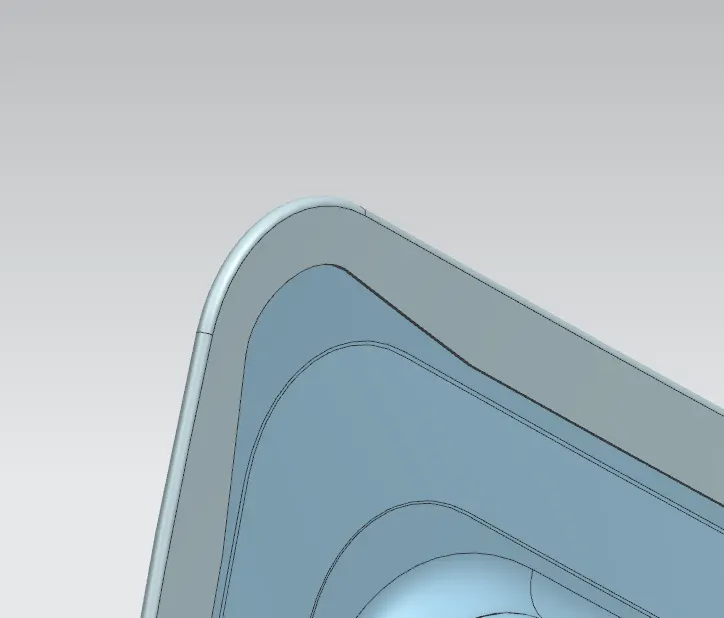
After the sheet is placed over the inner panel and wrapped around its edges, rollers are passed along the same edges. This presses the sheet onto the inner panel. Multiple passes are given to ensure a tight seal.
3) Latch Reinforcement:
Latches are mechanisms which keeps a component in position temporarily. They are extensively used in modern automobiles for doors and hoods.
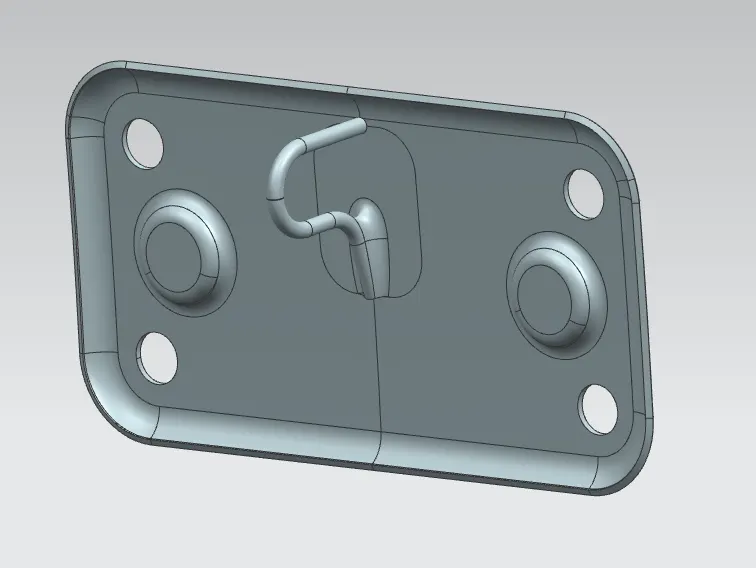
But in some cases, the latch needs a separate reinforcement. This is necessary to prevent warping of the sheet metal due to stresses caused by repeated motion of opening and closing of the hood. It also makes it easier for maintenance if the just the latch can be replaced in case of its failure.
It is highly necessary for the latch to follow a fixed circular path everytime the door is opened or closed. This is also known as latch trajectory. For a smooth engaging and disengaging of the latch, it must always strike the locking mechanism perpendicularly, i.e. the latch must move tangentially along the path.
4) Hinge Reinforcements:
Similar to the Latch Reinforcement, these reinforcements also serve a similar purpose of strengthening the sheet metal at the hinge region. These must also be aligned perfectly so that the hood opens or closes without struggle. In this case, a horizontal surface was needed to be created just to fulfil this criteria of perfectly aligning the hinges. This is necessary if the hinge is in the form of a single rod, in which case the axes of the reinforcements must be coincident.
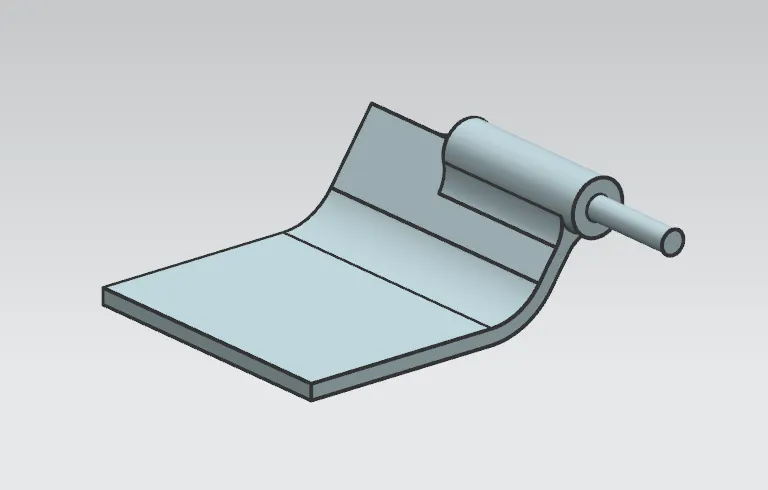
Latch Reinforcement - Engine Bay Side
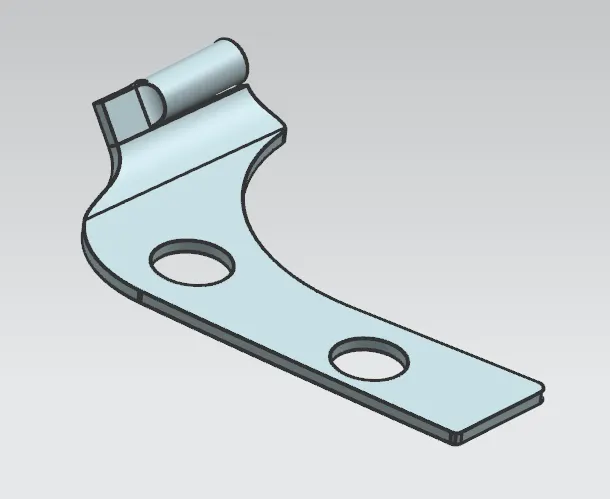
Latch Reinforcement - Hood Side
5) Assembly:
After all the components of the hood are modelled, they are assembled in the assembly file using suitable constraints. The reinforcements are placed in a proper manner, such that the latch trajectory circle intersects the latch prependicularly.
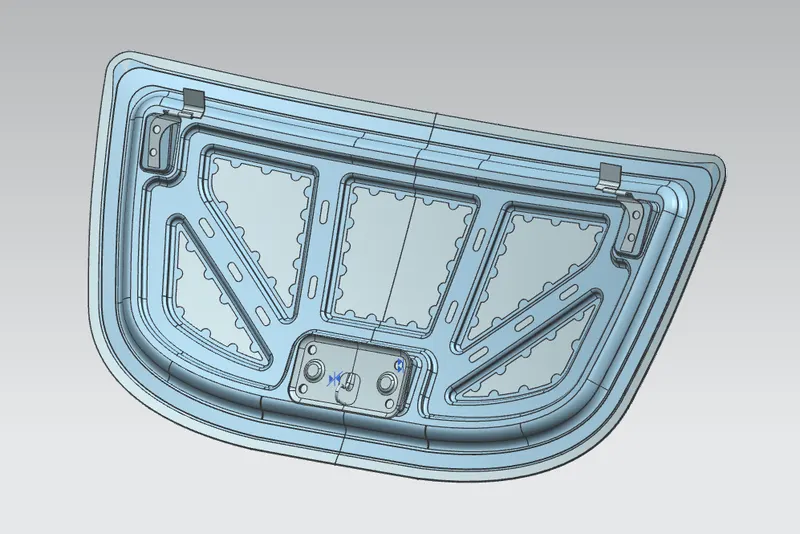
Hood assembly
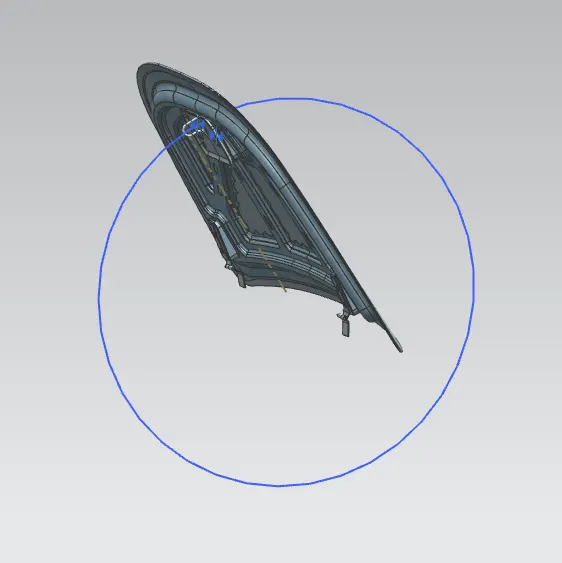
Latch Trajectory Circle
Conclusion:
The hood design was modellled successfully. The components were designed according to the requirements and dimensions. The processes required for manufacturing the components were also studied.