Fender Design Challenge
Objectve:
The main objective of this project is to design a fender using NX-CAD.
INTRODUCTION:
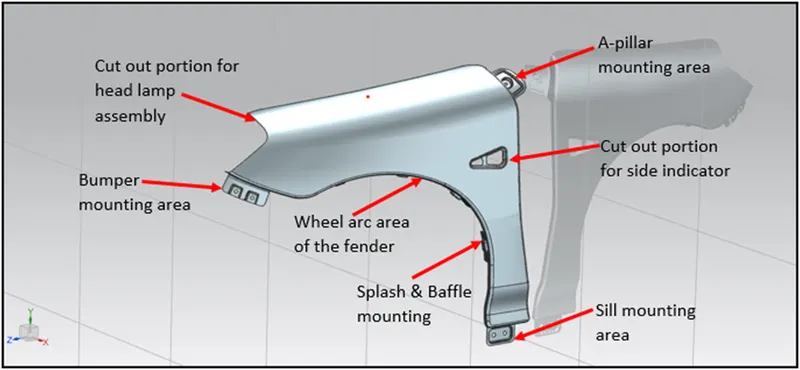
The word “FENDER” is comes from U.S english term.it is a separate closure and also close the side of engine compartment.fender is used to avoid chipping inside the compartment and pedestrain.while designing we also consider pedestrain safety.
TYPES OF FENDER:
- FULL BUMPER TYPE
- HALF BUMBER TYPE
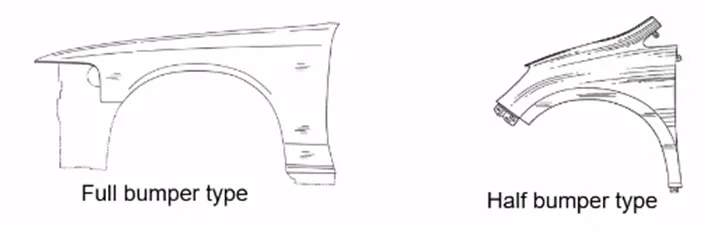
Note:In full bumber type,there is lots of wastage in it.so,now most of the oem use half bumber type.it reduce material usage and adding lots of plastic which reduce the car weight and increase the performance,better fender at low cost.
FENDER WHEEL ARCH:
To design wheel arch,we should consider a regulation which can be vary from region to region because of road condition.
For example,if you saw towards front some vehicle’s wheel outside from the fender,it does more chipping and make injury to pedestrain.to avoid that wheel should placed inside the fender.
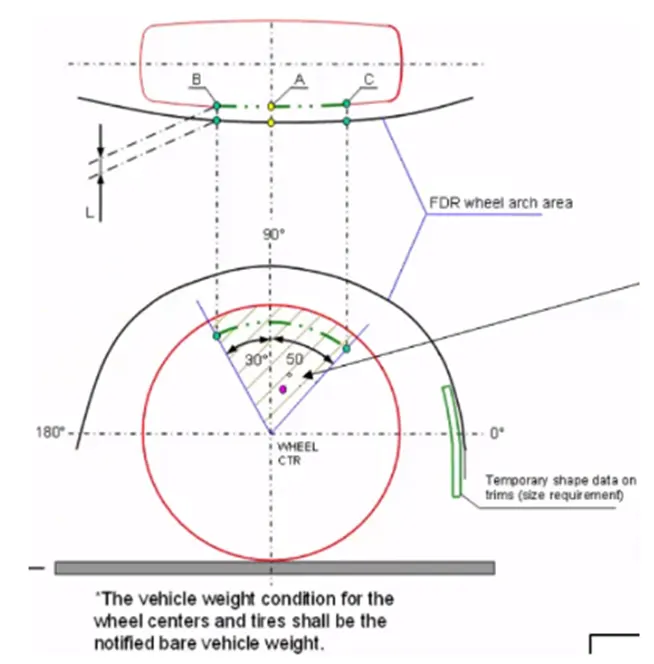
For the european requirement,the clearence and outer most skin atleast have 5mm. it doesn’t give to supplier most of time.
MOUNTING REGIONS ON FENDER:
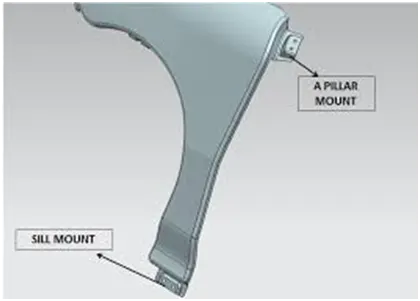
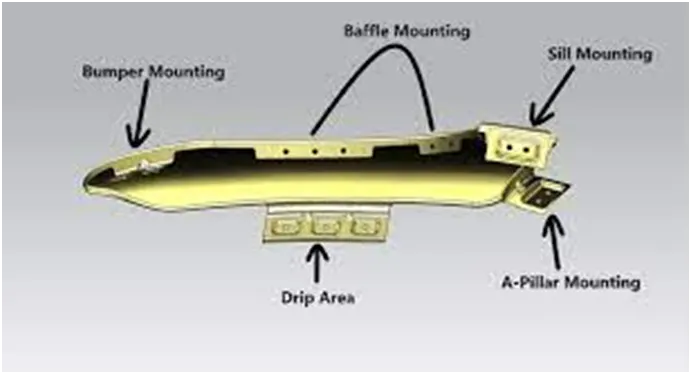
There are 5 mounting regions,
- A-pillar mounting
- Sill mounting
- Body mounting
- Bumper mounting
- Drip mounting
DESIGN METHODOLOGY:
DRIP AREA MOUNTING:
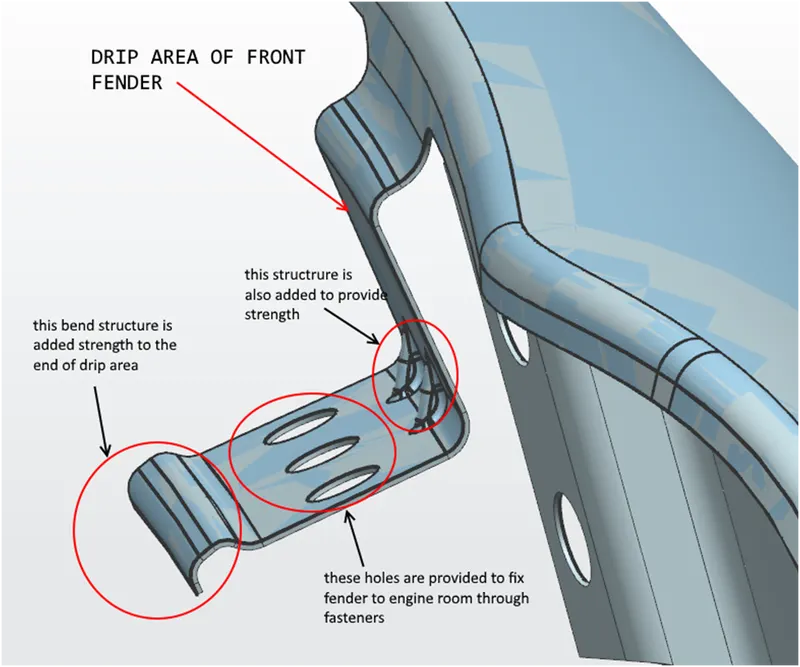
- It is the important mounting in fender because connect the fender withengine compartment.
- In that rear clearance of fender,cowl top part minimum need 200mm.
- Cowl top part consist of wiper motor and its instruments.
- In that front clearance of fender,head lamp sufficiently need 150mm.
- The front clearance and rear clerance are more important while designing the fender.
- Two ribs are added for improve the strength and stiffness of the part.
MASTER SECTION FOR DRIP AREA:
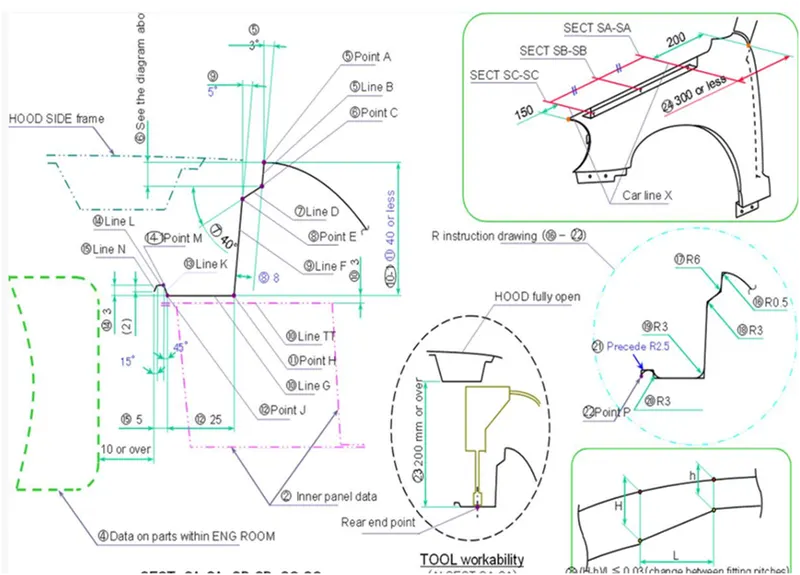
Geometric Dimensions:
- 3deg-pedestrain doesn’t see any parts which is inside the engine compartment.
- 37mm-minimum we should have 30mm to 40mm because of tool accessibility and fix that fastner in drip area.
- 10mm or more-should follow 10mm or higher b/w engine compartment and drip area.
- 43mm-most of the tools to make punch eassier at 40mm,if we exceed that depth upto 60mm.the spring back effect happens in fender.
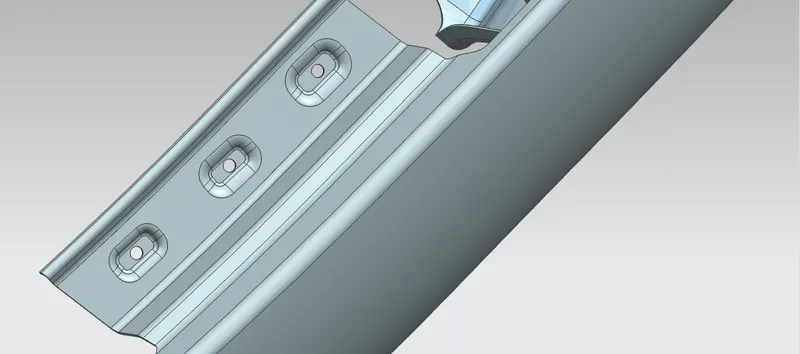
SILL MOUNTING:
It is the panel below the bottom of the door supporting the floor and may be used to combine the floor and the body.the sill mounting position is designed with hole and emboss.
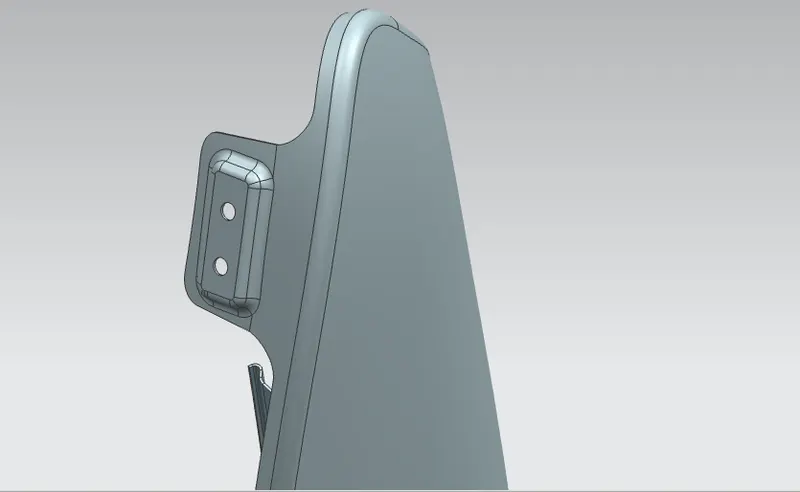
Bumper mounting area:
It is used to attach the plastic bumber to the fender with the help of the fastners.
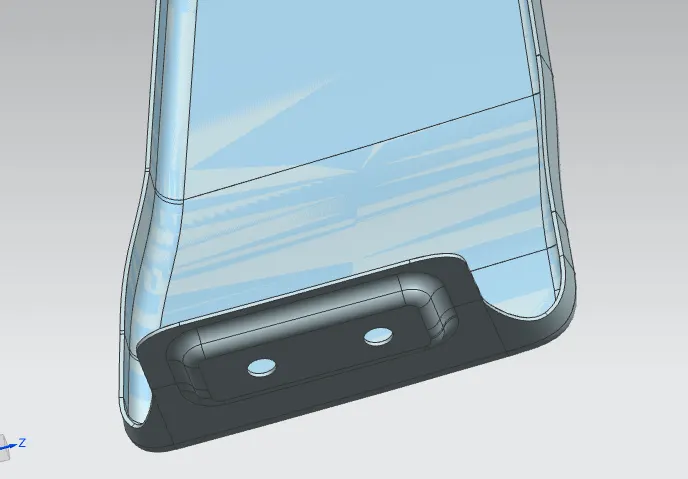
A-PILLAR MOUNTING AREA:
It is the structural pillar,which combine the body to the roof.front fender are attached to the A-pillar with the help of fastners.
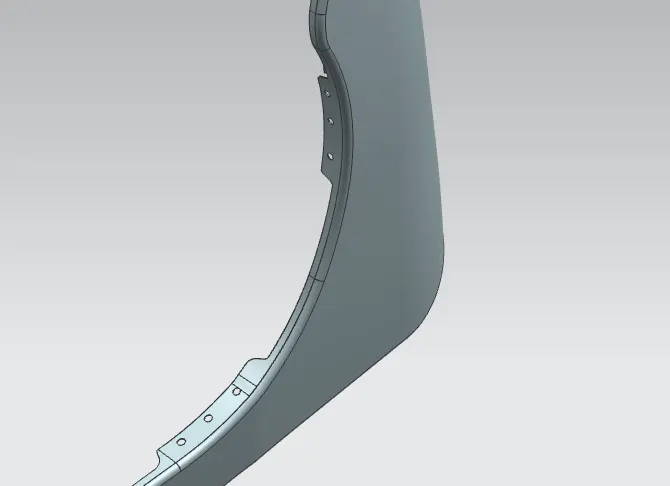
BAFFLE MOUNTING AREA:
Baffle or mud guard is attached in that fender wheel arch area.through this we can avoid chipping which can make injury for pedestrains and prodect the engine compartment as well.
screenshots:
A-PILLAR MOUNTING AREA
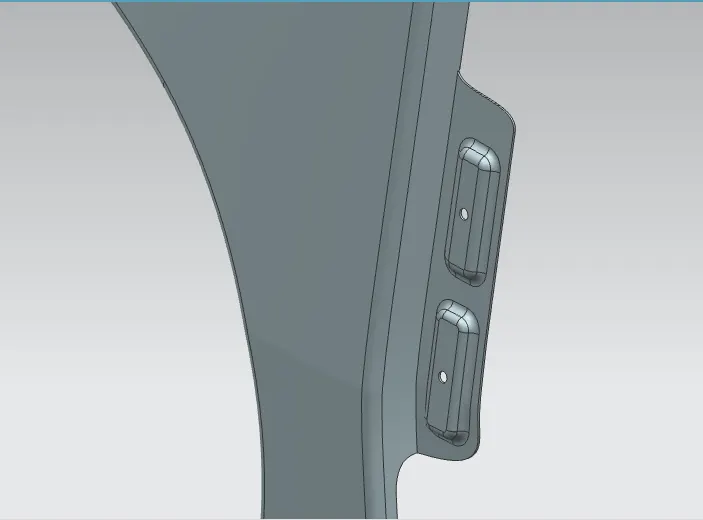
BAFFLE MOUNTING AREA:
Bumper mounting area:
SILL MOUNTING
Conclusions:
Finally,the front fender mounting area had created with the help of NX CAD by following master section.