Fender Design Challenge
- From the master section given below of side fender , create drip area for sill mounting, bumper mounting, A pillar mounting according to engineering standard concept.
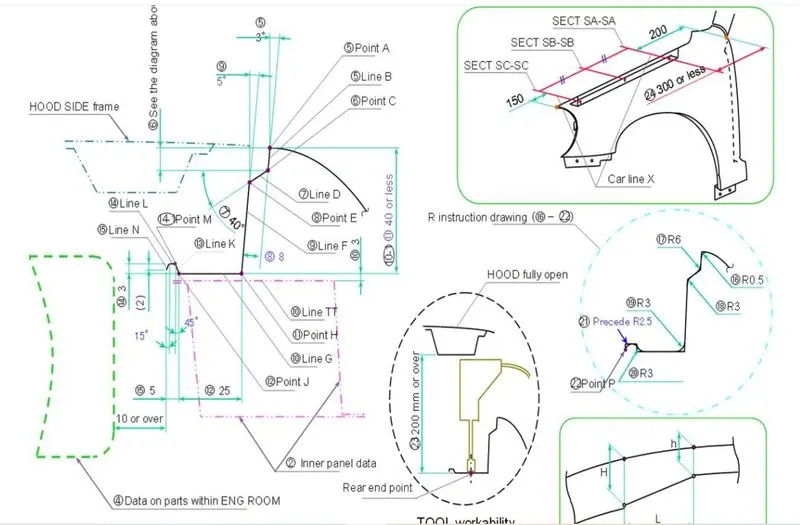
Image of side front fender and rear side fender
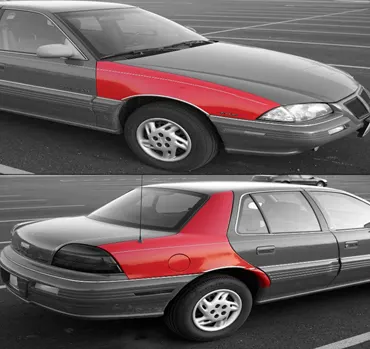
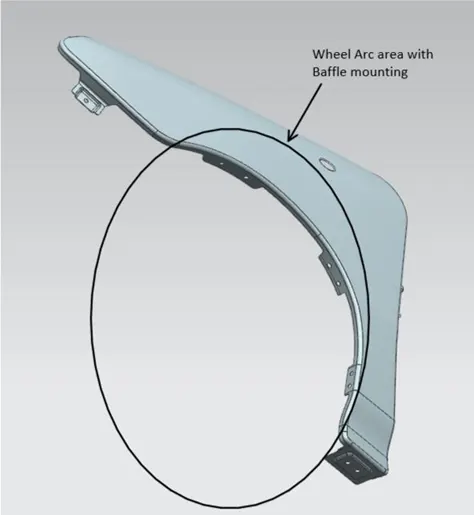
It is also called as quarter panel it is the part which is in between the front bumper and the front passenger door, same near rear. It is mainly there to protect the engine part, side collision of passengers and to prevent the dirt and debris falling on to the inside parts and creating damages to the internal other parts. It is attached with a baffle (plastic curved surface attached on circumference of the side fenders) with the help of push pins.
Here the part considered in topic is Front side fenders.
It can be differentiated into 2 types,
Front full side fender -
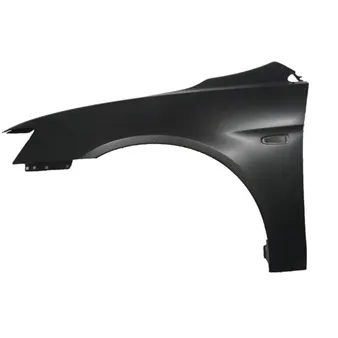
Half front side fender -
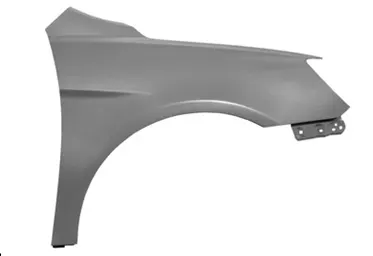
Instead of full side fender type half side fender are are used because of cost as well as the safety feature
Some of the features used in designing side fender are,
- Trim sheet – trims of a portion of sheet body.
- Law extension – from the edge of sheet metal/ curve a extended sheet metal is created.
- Curve on surface – creates a surface spline on the face of sheet metal.
- Face Blend – adds tangent blend faces between selected set of faces.
- Edge Blend – rounds sharp edges between the faces.
- Projected curve - projects the curve, edges, points on planes or on faces.
- Emboss – modifies a body with faces made by projecting a section along a vector.
- Extend sheet – extend a sheet body by a distance.
- Sew – combines two adjacent sheet bodies making it as one.
In Fender design, 5 major area are covered in design –
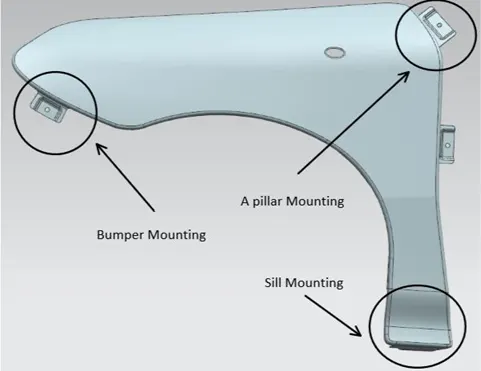
- A - pillar mounting area
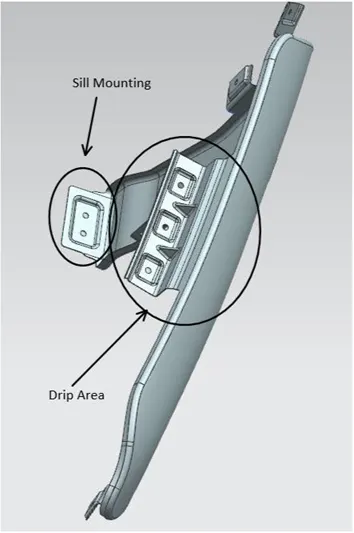
- Sill mounting area
- Bumper mounting area
- Drip area
- Splash cover mounting area (near Wheel arch for baffle mounting)
A-pillar mounting area – Its a vertical support on vehicle. These are important for holding glass and adding structural integrity to vehicle, primary to roof. It holds the windshield in place.
Sill mounting area – This mounting area links to the under side of front door of vehicle. Screwed bolts are used in fixing.
Bumper mounting area - this connects fender to the front bumper and holds it firmly ate edges.
Drip area – It is the area of fender where it attaches to the engine compartment area there are some standards for modelling the drip area,
- From the rear of the side fender the length of gap of drip area should be at least 200mm.
- From the front of fender, the gap od drip area should be at least 150mm.
- The length of the drip inside the fender connecting to engine compartment should be less the 40mm.
- From the farthest point of drip design to the engine it should be around 5-10mm gap.
- The distance from the front bonnet to drip area it should be at least 200mm gap for operator to fix it to engine compartment.
- The angle between the fender inner edge to bonnet edge is 5* for blocking the visibility of the inner parts.
- Between the fender edge corner and bonnet edge corner the is angle tilt of 3*.
- And Darts are added in between the embosses the give move strength to the drip area.
Splash corner mounting area – It is the area near wheel arch that is present to mount plastic part called baffle via push pins to prevent dirt and debris hitting the engine compartment.
Images of the above description attached below,