Fender Design
INTRODUCTION:
Fender is the American English term for the part of an automobile, motorcycle or other vehicle body that frames a wheel well (the fender underside). Its primary purpose is to prevent sand, mud, rocks, liquids, and other road spray from being thrown into the air by the rotating tire. Fenders are typically rigid and can be damaged by contact with the road surface.
OBJECTIVE:
In this project we are going to design the mounts for the Front fender such as drip, sill, bumper, A-pillar, cowl and baffle for this we are going to design mounts.
FEATURES/TOOL USED:
- SKETCH
- OFFSET IN FACE
- CURVE ON SURFACE
- BRIDGE CURVE
- EMBOSS
- TRIM SHEET
- LAW EXTENSION
- FACE BLEND
- EDGE BLEND
- DART
- THICKEN
DESCRIPTION:
In this project as we said we are going to design the front fender mounts.
Master sketch:
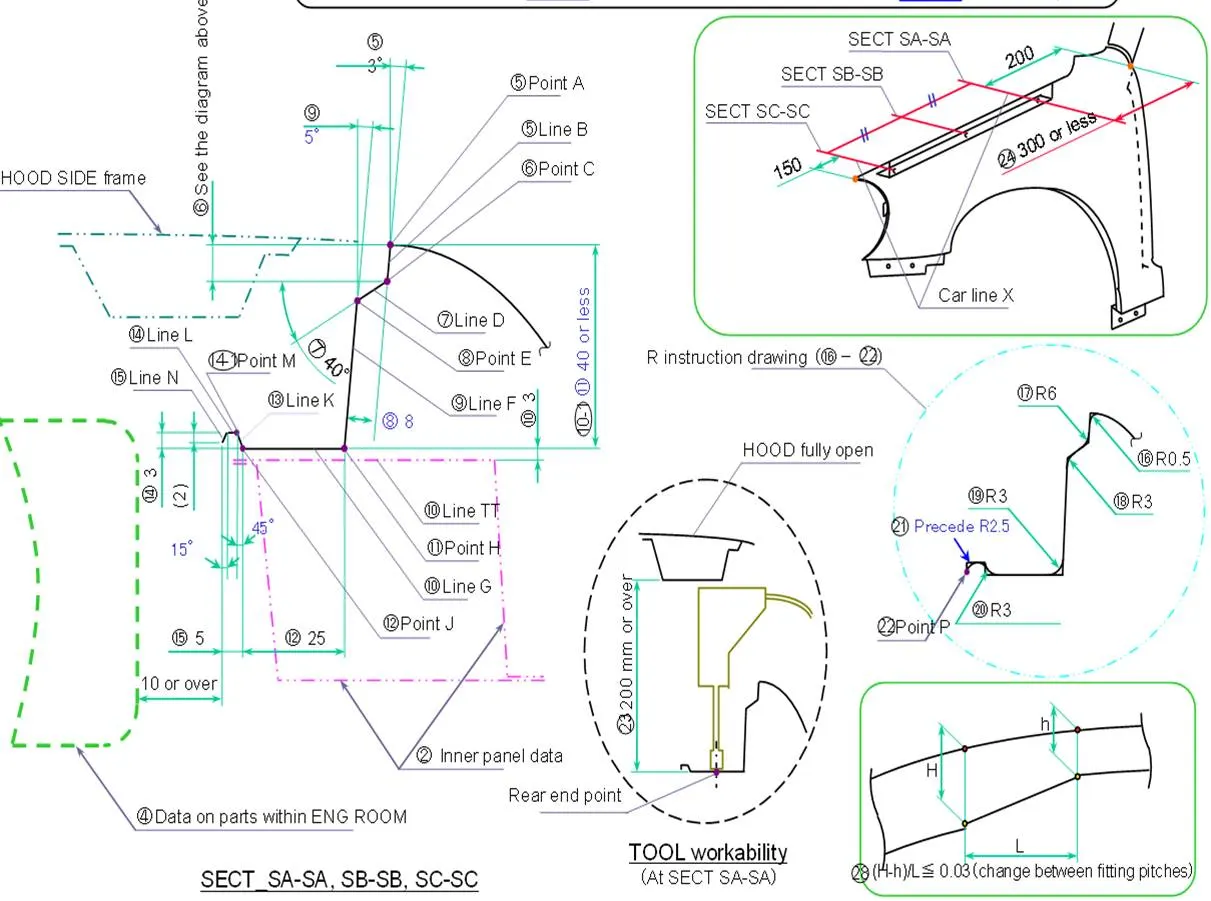
As per the master sketch we are going to design the drip mount and we will follow the design parameters as per industry for the other mounting area too.
And we are going to design the fender in NX CAD.
MOUNTING REGIONS ON FENDER :
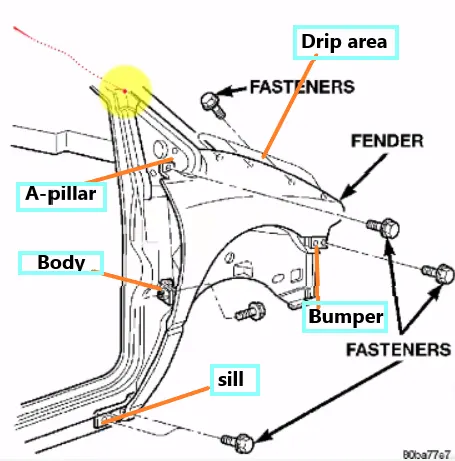
There are 5 mounting regions on the fender , they are
- 1) A- pillar mounting
- 2) Body mounting
- 3) Sill mounting
- 4) Bumper mounting
- 5) Drip mounting
DESIGN CONSIDERATION FOR THE FENDER:
- 150 mm Distance from front end is kept for the headlamps. some time it varies depend upon the car
- 200 mm Distance from the rear end is maintained for wiper assembly. some times it varies depend upon the car
- Engine components should not be visible from outside. For this purpose initially 3 degree of angle and suitable lenght should be provided
- To avoid spring back effect drip depth should be at maximum 40 mm
- The gap between engine compartment and drip area should not be less then 10mm
Drip Area:
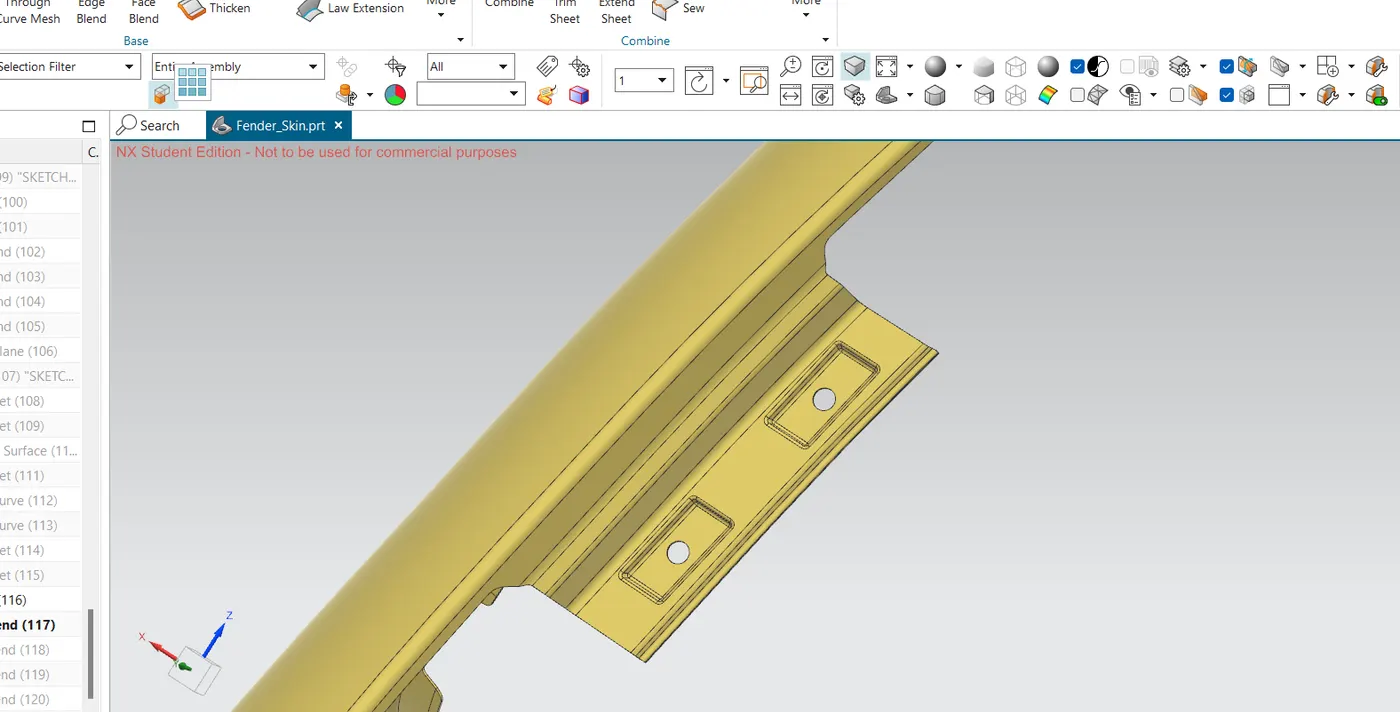
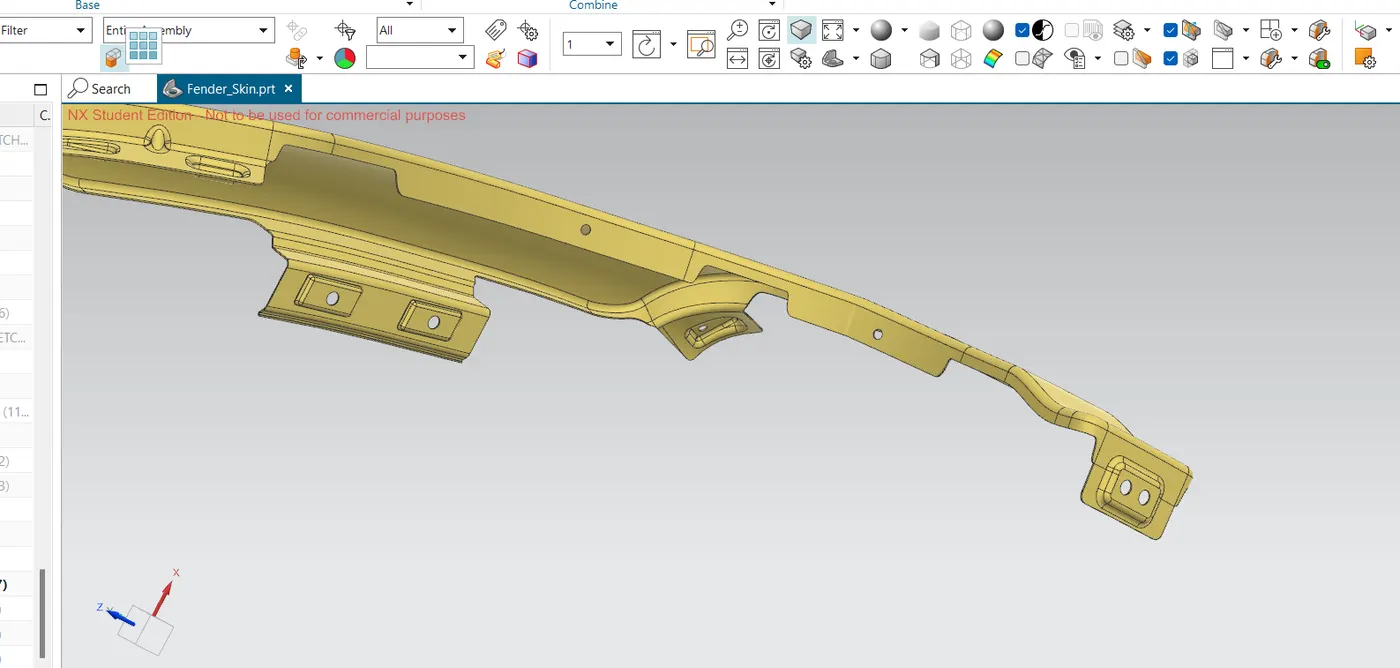
The area at which the fender gets attached to the engine housing through fasteners. It is the major mounting for the fender. Mountings at the drip area are designed leaving a clearance of 200mm from the back of the fender for the cowl setup. And clearance of 150mm from the front of the fender for a headlamp housing unit.
A-Pillar Mounting Area:
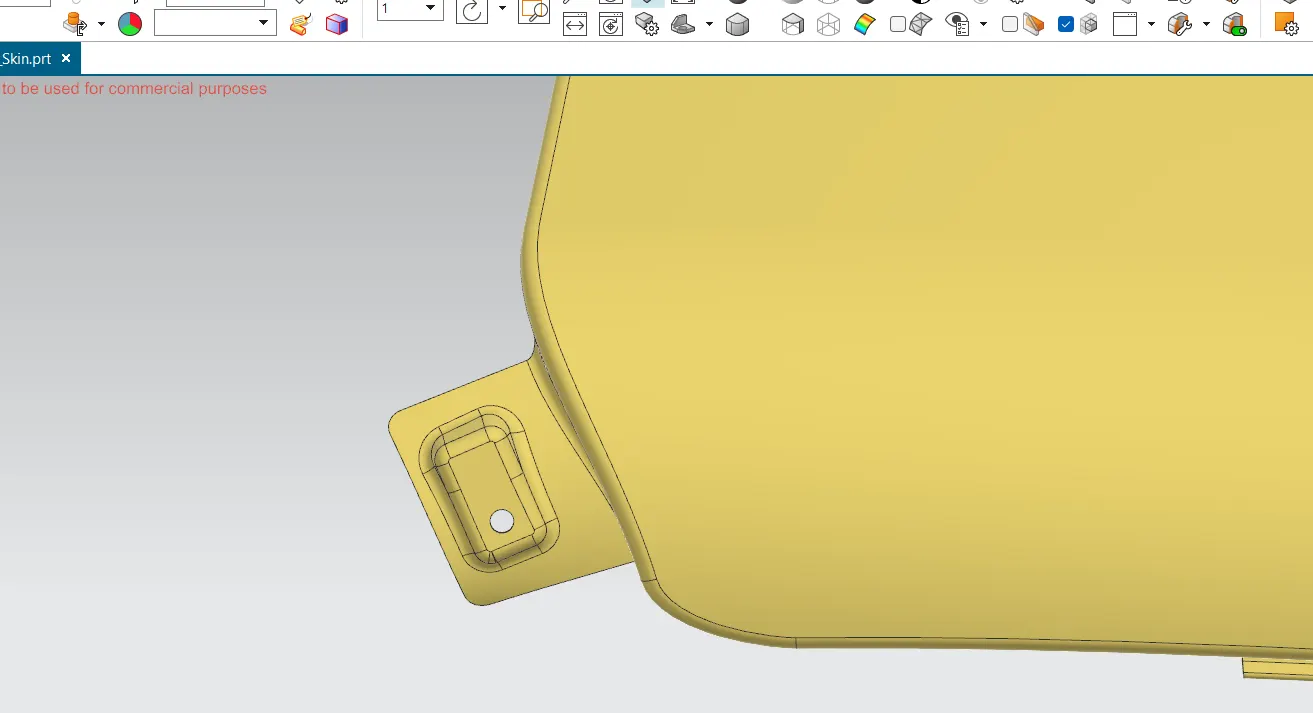
This Mounting region is located near the cowl of the vehicle where the fender is fastened with the bottom edge of the windshield. This mounting is covered with the side rear-view mirror.
Sill Mounting Area:
The area at which the bottom of the fender gets connected to the floor near the bottom edge of the door. The Embossed sill mounting of the fender is attached with the fasteners.
Bumper Mounting Area:
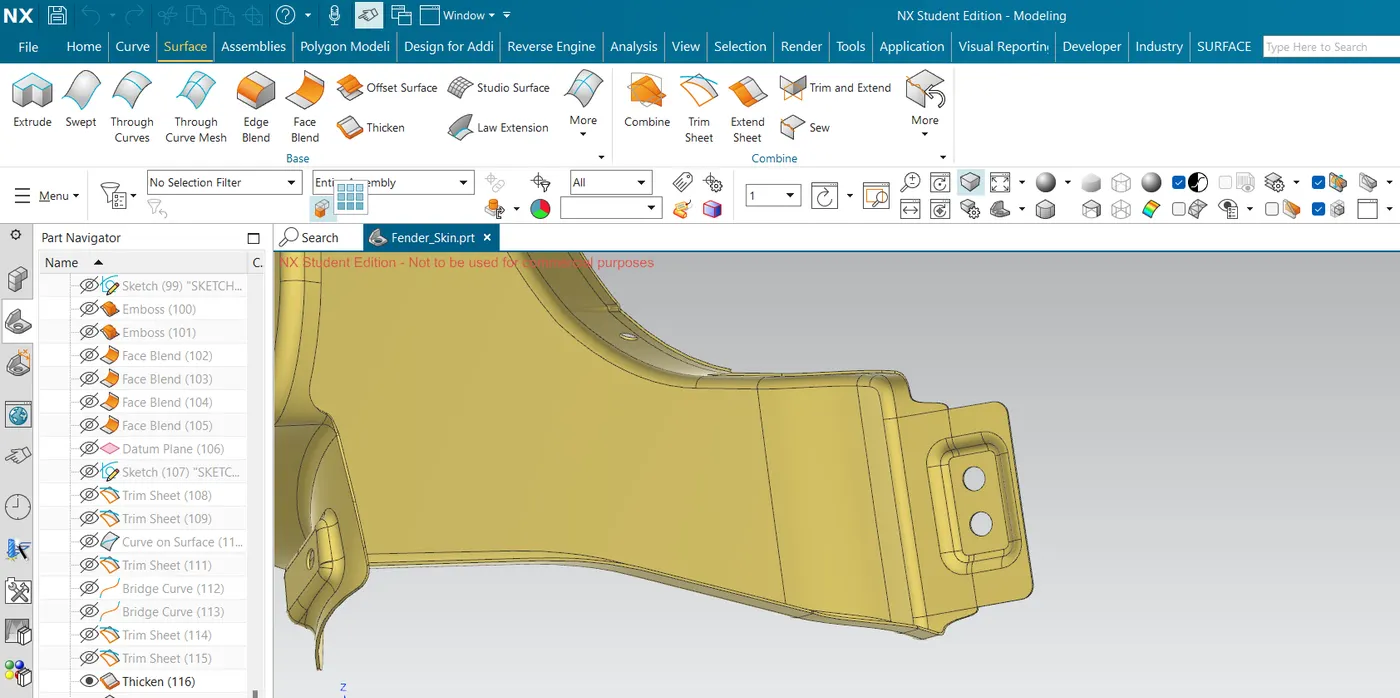
The bumper mounting region is located beneath the bumper. The fender gets attached before the installation of the bumper. After fixing the fender with fasteners the bumper will cover the bumper mounting.
Baffle Mounting Area:
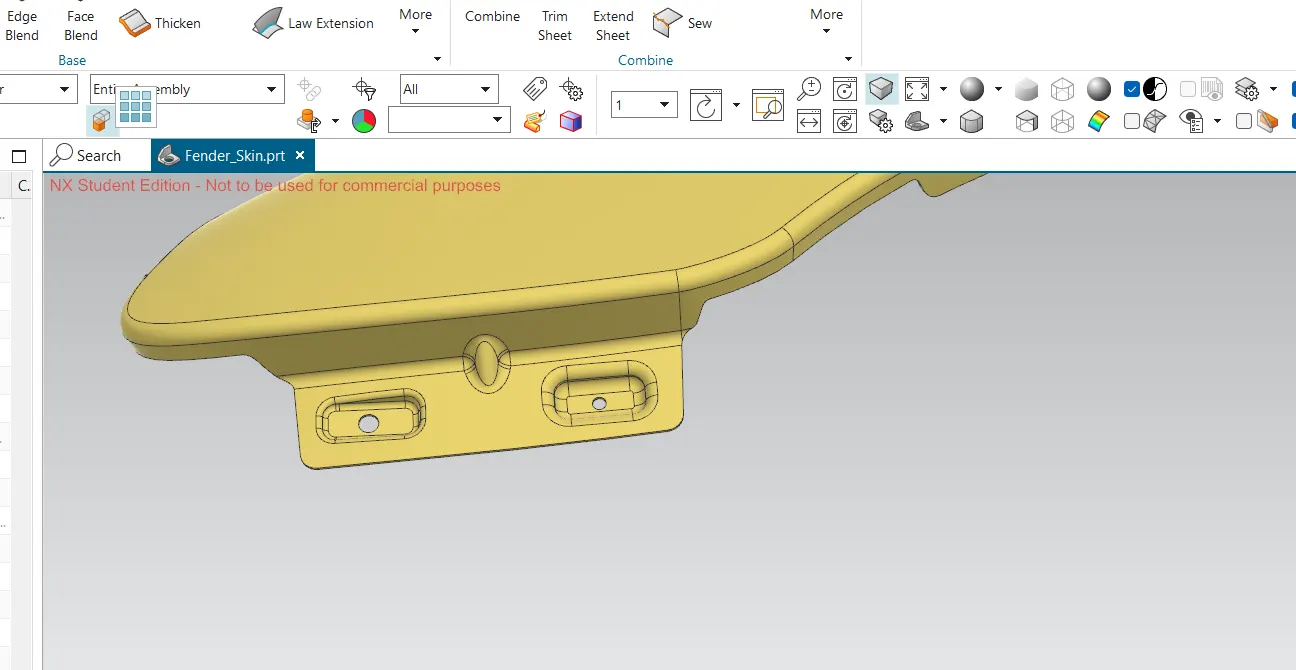
In this region, the baffle gets installed to the fender with the help of clips which holds the baffle with the fender along the wheel arch.
Manufacturing process
The manufacturing of the fender majorly involves these operations.
1.Embossing
2.Bending
3.Cutting and Blanking
 (embossing)
Embossing
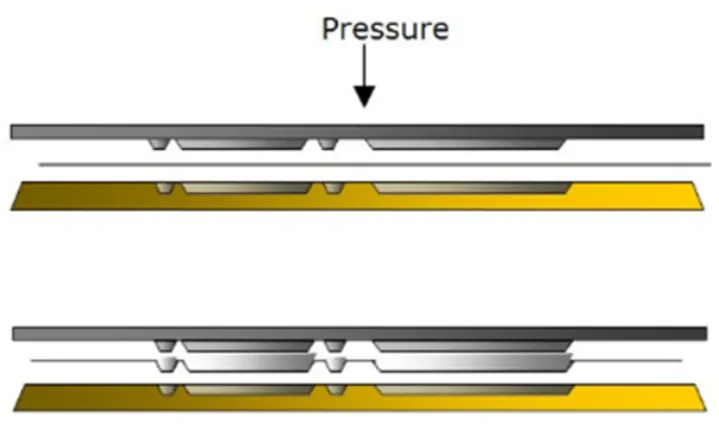
Embossing is a metal forming process for producing raised or sunken designs or relief in sheet material using matched male and female roller dies, theoretically with no change in metal thickness, or by passing sheet or a strip of metal between rolls of the desired pattern.
 (bending)
Bending
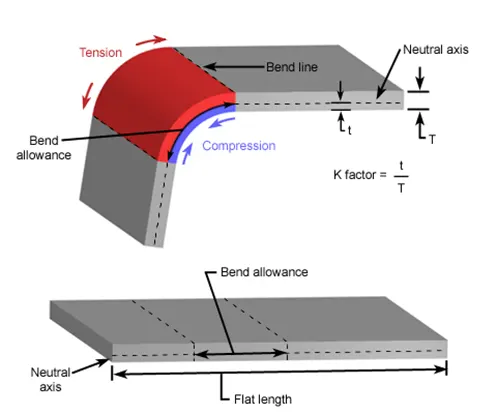
Metal bending is a process by which metal can be deformed when applying force to the subject, which causes it to bend at an angle and form the anticipated shape, which often results in it being in a ‘V’ or a ‘U’ shape. This is done through the application of force on a workpiece. The force on the work piece can be mechanical, pneumatic or hydraulic.
 (drilling and cutting)
Cutting and Blanking
Cutting processes are those in which a piece of sheet metal is separated by applying a great enough shearing force to cause the material to fail.
Blanking is a steel manufacturing process in which a flat, geometric shape is created by feeding a coil of sheet metal into a press and die. In this process, the blank is punched out from the large metal sheet.
Conclusion:
As we successfully learn about the feature and purpose of front fender and made it in NX CAD and we have learn the tools involved in it.