Fender Design
OBJECTIVE:
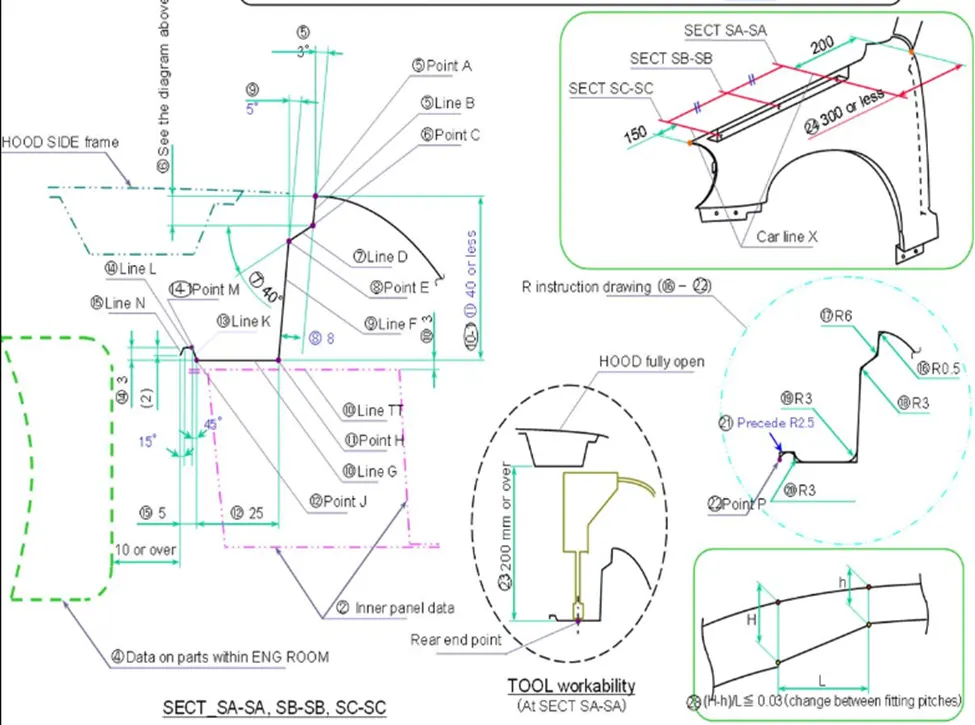
The main objective is to create a Fender design using Siemens NX 12 by using master section as a input.
MASTER SETION:
BASICS OF FENDER:
A metal or plastic enclosure over the wheels of an automobile or other vehicle to protect against splashing mud, etc.
All cars have fenders. A fender is a body panel covering the space over the wheels. It’s attached to the side of the vehicle, and its primary purpose is to protect your wheel assemblies and suspension components from damage. They “fend” off the danger.
Historically, fenders stuck out from the car in a flare-like fashion. This gave rise to cars with very distinctive looks. Today, however, most passenger vehicles’ fenders are subtly blended in with the rest of the body.
Older cars were made before we had the technology to reduce road spray. As such, the huge fenders were essential for protecting the wheels and the rest of the body from spray, mud, debris, or stones. Nowadays, tire treads, fender undersides, mudguards, and advanced aerodynamics all contribute to this.
All passenger cars have broadly the same kind of fender. It’ll be made of the same material and color as the rest of the body and, as mentioned, blend as smoothly into the rest of the body as the design team can manage.
The fender’s shape will roughly follow the curvature of the wheel sitting underneath it. It won’t run precisely parallel since cars often come with various wheel-size options, but it’ll be pretty close.
The fenders used to be a significant part of the design.
TYPES OF FENDER:
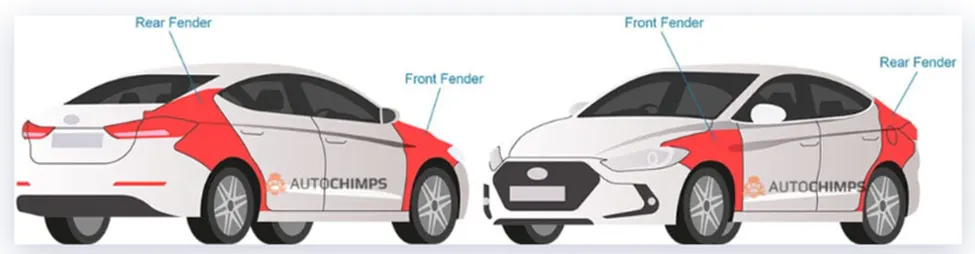
There are 2 types of fenders used in autombiles. They are,
1.Front fender
2.Rear fender
BUMPER:
Bumpers can be found on the front and rear of every car in the world, no matter where you are. They’re all about absorbing any front- or rear-end impacts – or “bumps” and preventing frame damage.
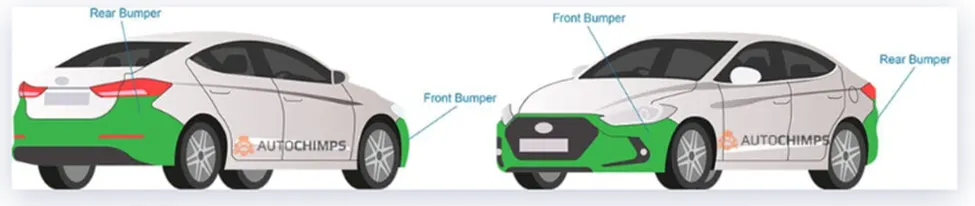
Bumper one end is fixed by using Fender rivert area.
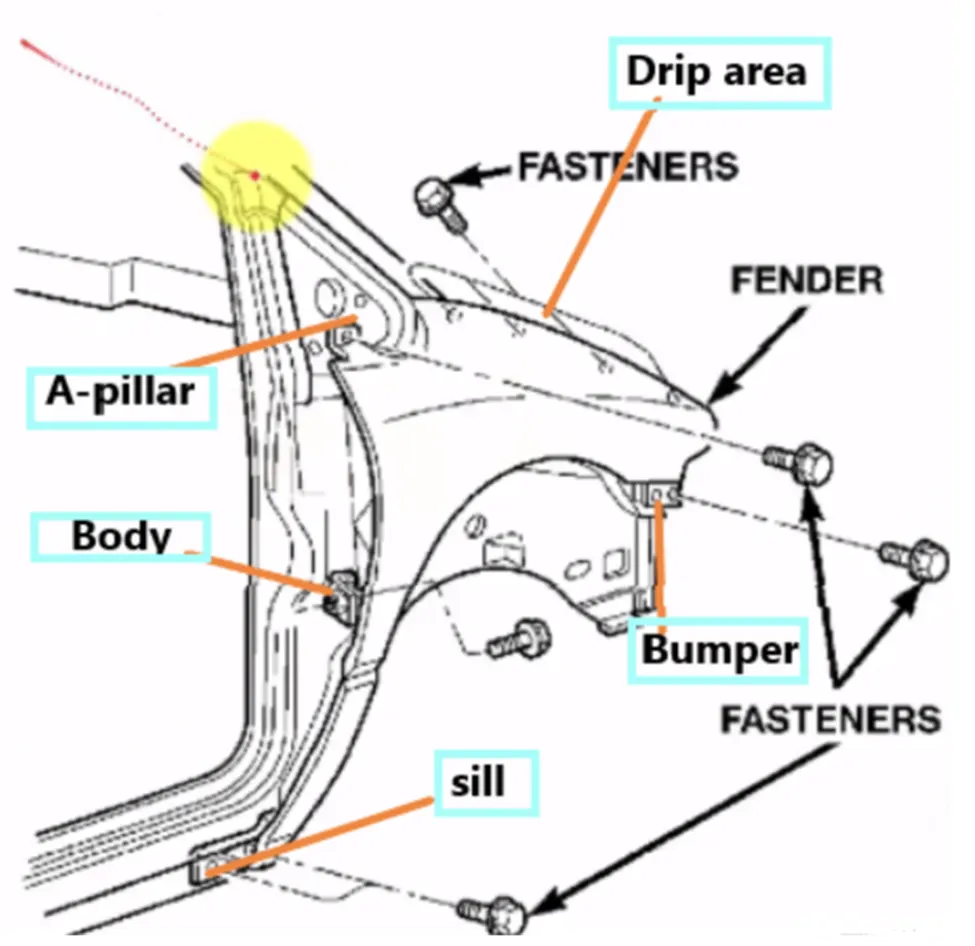
MOUNTING AREA:
● Bumper Mounting
● Drip Mounting
● Body Mounting
● A-Pillar Mounting
● Sill Mounting
A-PILLAR:
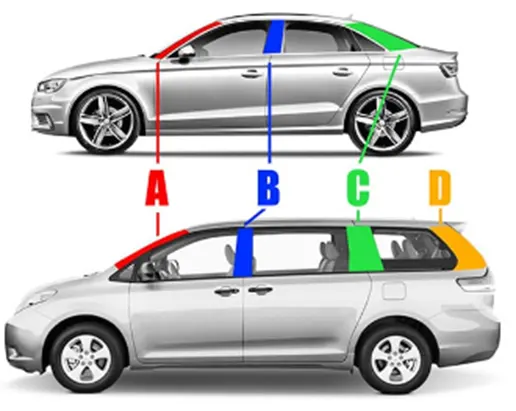
In the case of cars, “pillars” refer to roof pillars, and they're lettered front to back. A-Pillars straddle the windshield, B-Pillars are in the middle of the passenger compartment (just behind the front doors) and C-Pillars are those at the rear of the passenger compartment.
PROCEDURE FOLLOWED TO FENDER DESIGN WITH ENGINEERING FEATURES ARE:
● Insert a skin surface into NX cad and fix it in a respective plane.
● Check the boundary conditions whether the give skin is proper manner.
● Now make the offset of tangent edge at the outer most edge of the fender and make the value of 5mm.
● Create a sketch that should be distanced at least 150mm from the front side for the headlamp housing unit and 200m from the rear side for the cowl setup.
● The drip area should be 10mm away from the engine compartment and the height of drip area mounting is less than 40mm.
● Trim the unwanted area by using curve on surface option with no sharp corners and as well as good trim profile.
● Create a sketch where the EMBOSS option needded and convert the edge into round profiles.
● By using DART option create a support between the emboss (fixing area), it will make the profile into rigid condition.
● Finally by using SEW option to make the two surface into single surface (joining).
● Now thicken the surface skin into 0.75 mm thick as solid convertion.
DRAFT ANALYSIS REPORT:
CONCLUSION:
Thus Fender design is executed with Engineering features and as per master section given.