Fender Design
Objective:
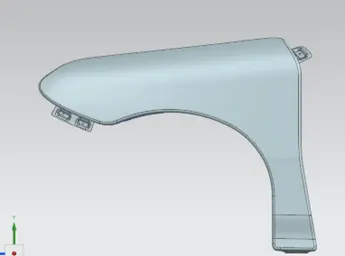
- To design the front fender of a car from the given Class A surface.
- To create the drip area from the given master section dimensions.
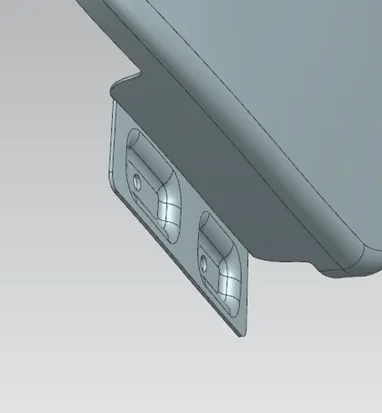
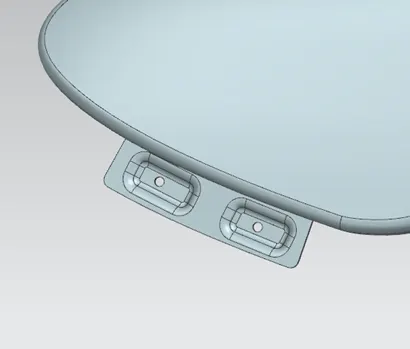
- To create Sill, Bumper, Baffle (Splash), and A-Pillar mountings.
Fender Design Methodology.
Fender is the American English term for the part of an automobile, motorcycle or other vehicle body that frames a wheel well (the fender underside). Its primary purpose is to prevent sand, mud, rocks, liquids, and other road spray from being thrown into the air by the rotating tire. Fenders are typically rigid and can be damaged by contact with the road surface.
Sticky materials, such as mud, may adhere to the smooth outer tire surface, while smooth loose objects, such as stones, can become temporarily embedded in the tread grooves as the tire rolls over the ground. These materials can be ejected from the surface of the tire at high velocity as the tire imparts kinetic energy to the attached objects. For a vehicle moving forward, the top of the tire is rotating upward and forward, and can throw objects into the air at other vehicles or pedestrians in front of the vehicle.
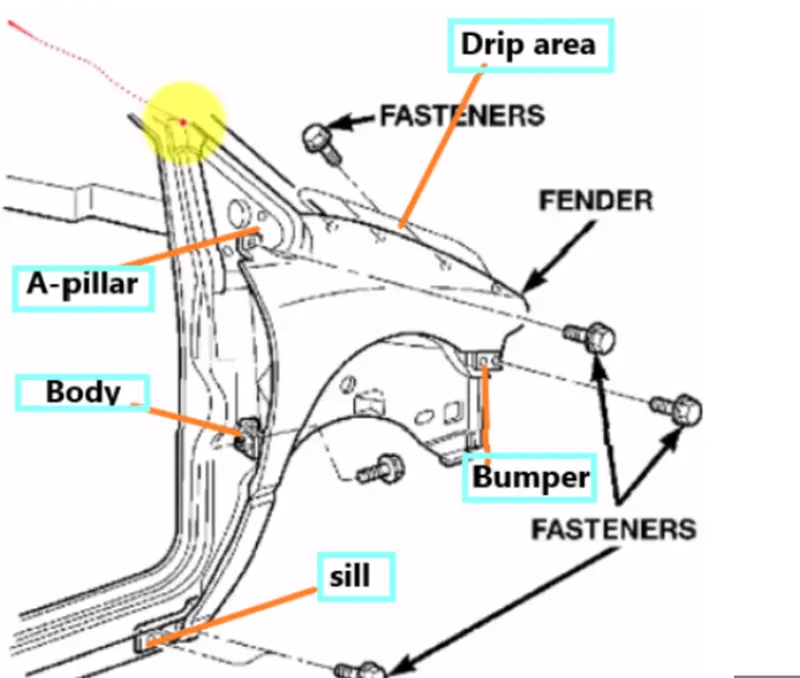
Fender is mounted with the car frame at 5 locations namely drip area, A -Pillar , sill , Splash and bumper areas.
To start with, we gonna design the fender drip area from the given master section and to create A-pillar , sill , splash and bumper mountings.
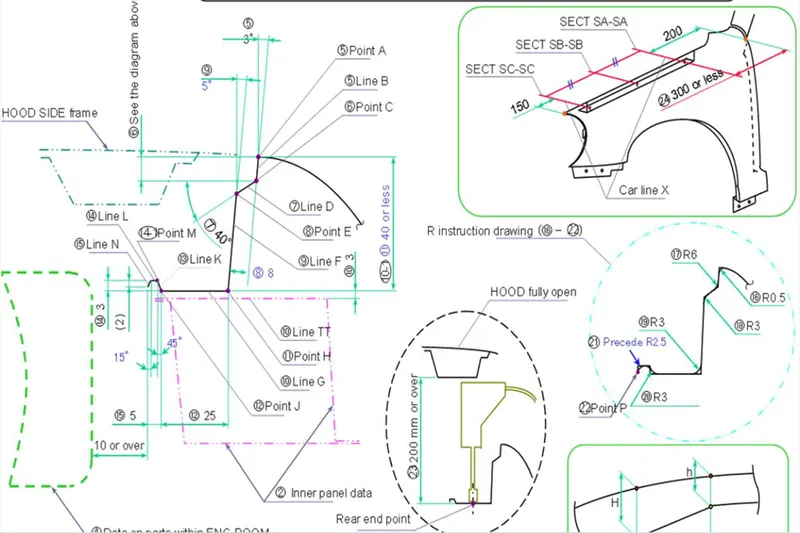
Fender Drip area:
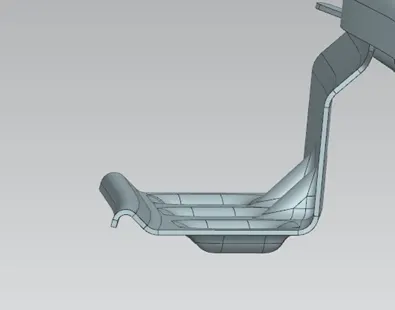
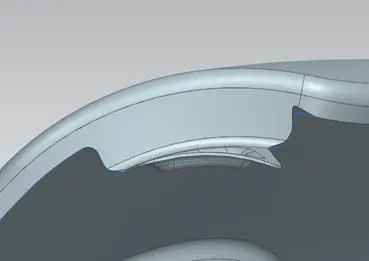
This is the critical mounting point for fender as majority of the load acts on this drip area. Drip area is designed according to the master section.
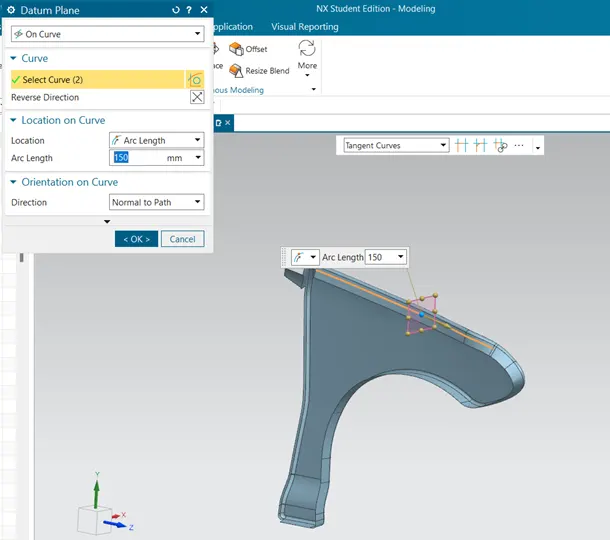
Two planes are created one from a-pillar side and bumper mounting side.
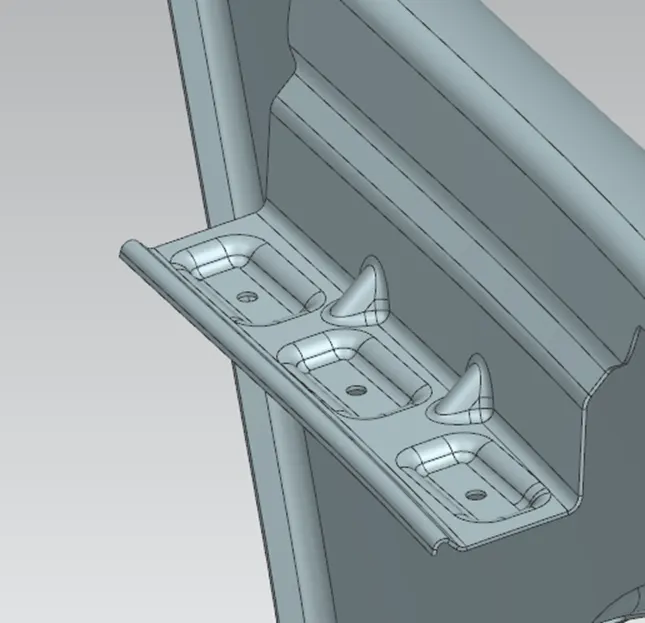
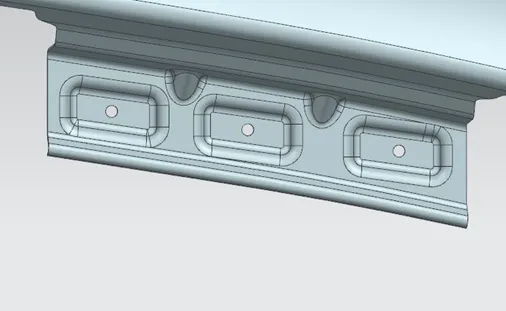
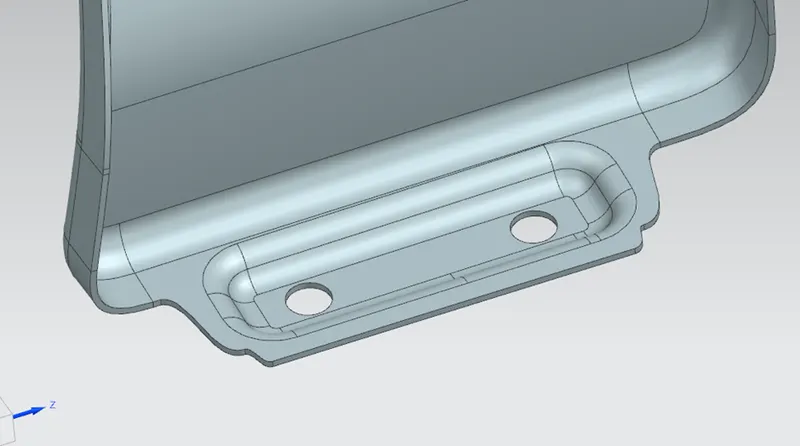
Drip area is mounted on the Engine Compartment. So, Embosses are created on the Drip area and darts are added to the corners to provide rigidity to the drip area during vehicle movement and also to arrest the vibration.
Final Drip Area:
A Pillar Mounting
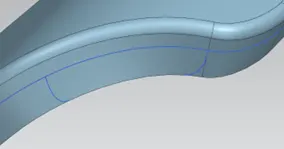
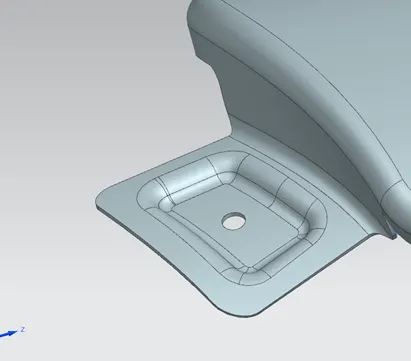
To create a pillar mounting, a certain portion of flange is trimmed off using curve on surface command. Using Law extension , the surface is extended to form a mounting area.
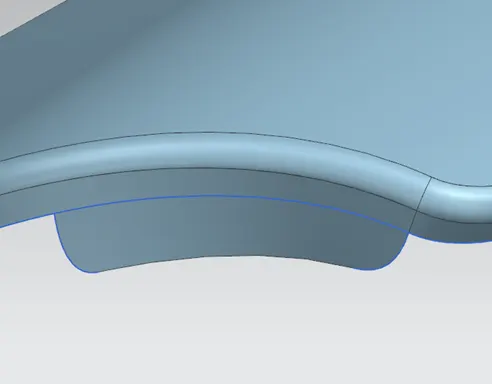
Final Mounting:
Splash Mounting:
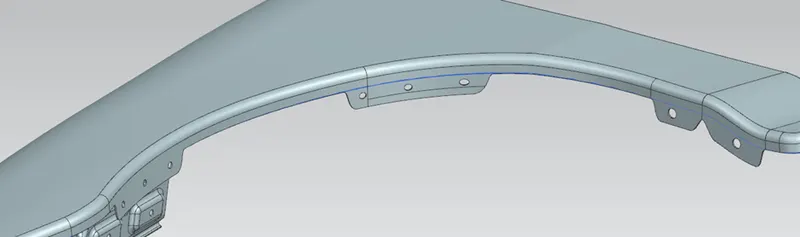
As stated earlier, when the wheels rolls forward, it throws away the debris , durt all around the place. Inorder to prevent it to get accumulated inside the car body a splash is mounted over the wheel periphery to prevent it to get inside the car body.
Sill Mounting:
Bumper Mounting:
Fender Manufacturing Process:
Metal Forming:
One of the most important things about metal is that it can undergo plastic deformation. That doesn't mean metal is made out of plastic, but it can do one of the things that plastics can: It literally can take on almost any shape that we can imagine.
The process of deformation begins with a blank, a quantity of metal in some basic form that will undergo the change in shape. The blank becomes the workpiece -- the piece of metal to be reshaped -- in the metal forming process. For automotive metal forming, the blank is often made of sheet metal, which can be stamped, cut or bent into a shape needed for an automobile's body. Alternatively, it can be a solid block of metal in a cubical or lens-like shape. Here are some ways that a metal workpiece can be deformed during the automotive manufacturing process:
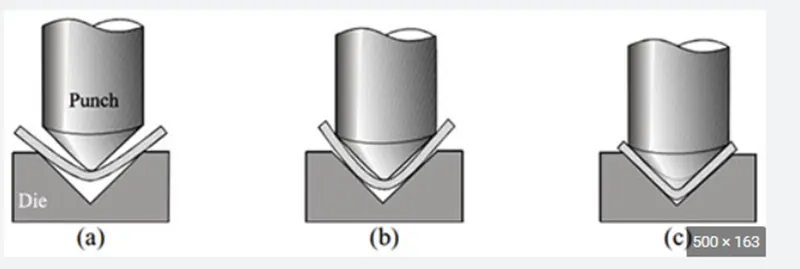
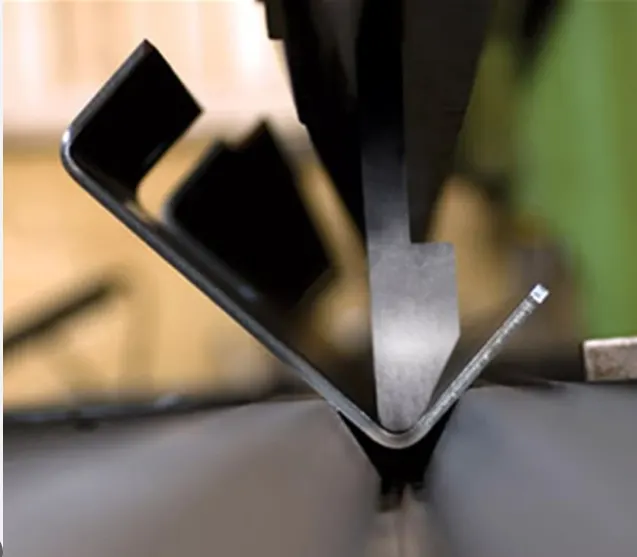
Bending: In bending, force is applied to a sheet metal workpiece to produce a curvature of the surface. Bending is generally used to produce simple curved surfaces rather than complex ones. A mechanically operated press drives a punch against sheet metal, forcing it into a simple die with enough pressure to produce a permanent change in the metal's shape. The amount of pressure is important. If not enough pressure is applied, the metal can simply spring back into its original shape. If too much is applied, it can break.
Drawing: In drawing, the sheet metal is forced against a die that has been cut into the three-dimensional, often curved shape that the sheet metal is to take on. In effect, the die is used as a mold for the metal. This technique can produce relatively complex shapes. Once again, pressure is applied to the workpiece using a hydraulically or mechanically operated punch. There are a number of dangers involved, not so much to people (since the process is largely mechanized) but to the metal itself. It can crack from too much pressure or wrinkle from its interaction with the die. Lubricant can be used to make the metal slide more smoothly against the die, avoiding the possibility of wrinkling. Alternatively, the wrinkled edges can be trimmed from the metal in a separate operation. This method is commonly used to make auto body parts and fuel tanks.
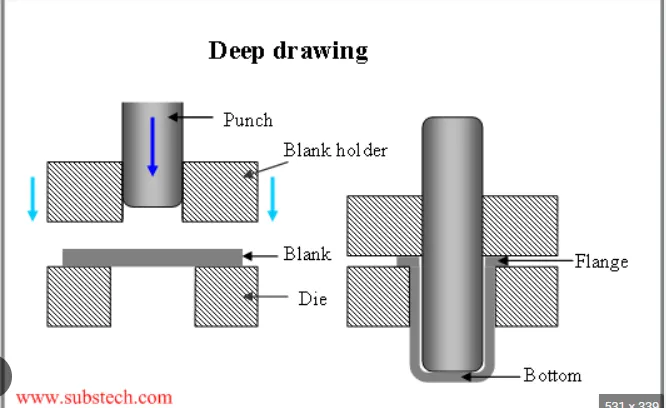
Stamping: In stamping, a device called a stamping press is used with a series of dies to cut and form metal into various shapes. This is commonly used to make auto parts such as hubcaps and fenders.
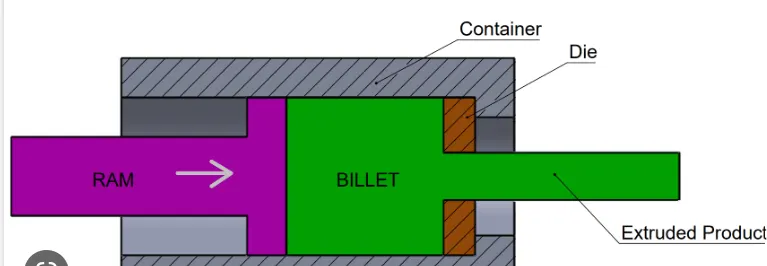
Extrusion: Extrusion can be used to produce long metal objects, such as rods and tubes. The metal workpiece is forced into a die with a hole in the opposite end. The metal is extruded through the hole to form the shape. Extrusion can be used to manufacture important parts of a car's drive train or the anchors that hold seatbelts in place.
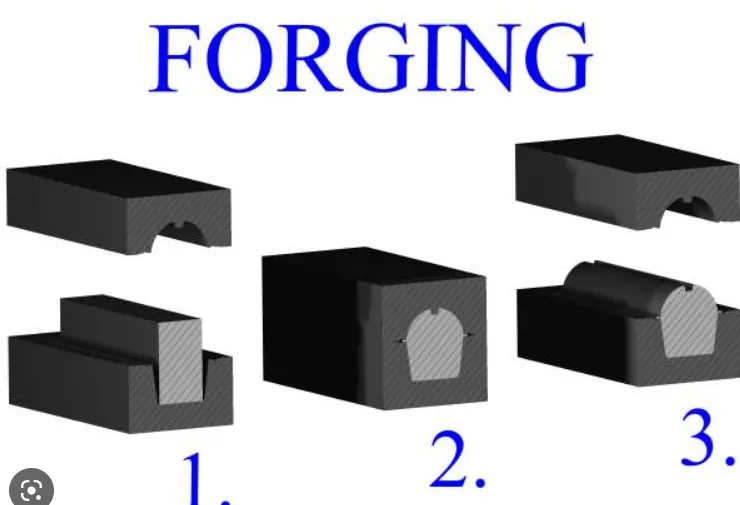
Forging: The forging process uses a hammer or press that is essentially a mechanized version of the hammers used by ancient blacksmiths. The metal is hammered against a surface that serves as an anvil. It can be hammered repeatedly so as to form complex shapes. This can be used as an alternative to the drawing process.
The above processes are generally used with cold metal. Hot metal can also be used, sometimes at high enough temperatures that the molten metal can be poured into a die. This requires very expensive dies that can withstand the heat and must be done quickly, to minimize the exposure of the die to the molten metal.