Design of backdoor
Back Door Design
Aim: To Design outer upper and lower panel, inner panel and the necessary reinforcements by following the Master section with the design parameter for the given class A surface.
Introduction: Passenger car is a wheeled motor vehicle used for transporting passengers, which also carries its own engine or motor. Tailgate is the closing door of the luggage compartment. It provides the aesthetic outer appearance to the vehicle as well as wind flow aerodynamic surface. Tailgate is a single stamped or splitted outer panel. It integrates with the inner reinforcement panel. To avoid air rushing noise as well metal rubbing noise, protected with sealer application process. Outer edges hemmed by Robot hemming process with 3 pass hemming to ensure sealer fill rate uniformly as well clinch tightness rigidly. in such a way easy to open at the same time, it should not pass external environmental noise inside the passenger compartment and should not leads to any water leak. High closing effort leads to improper locking. Gas Stay are used to easy access of opening and closing.
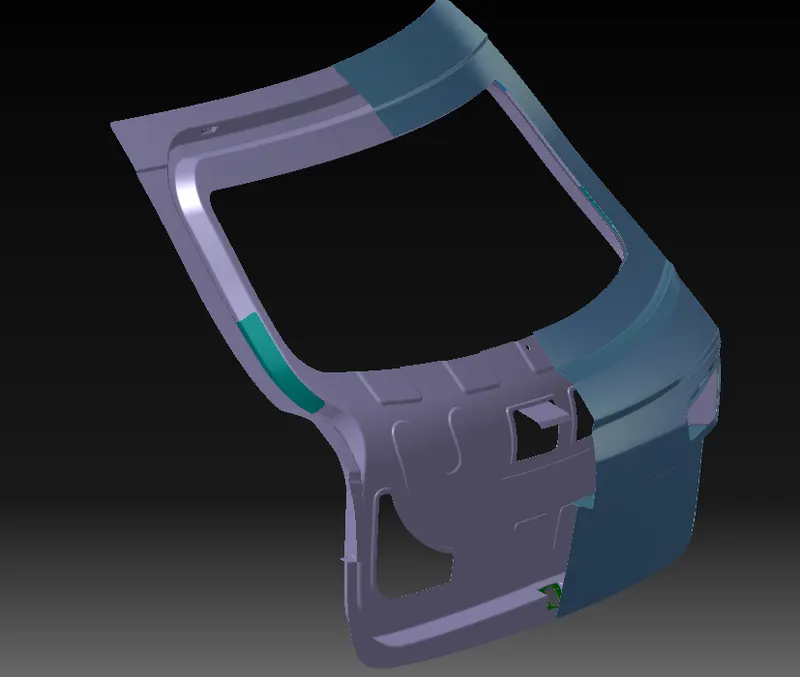
In the fig 0.1 shown back door of car
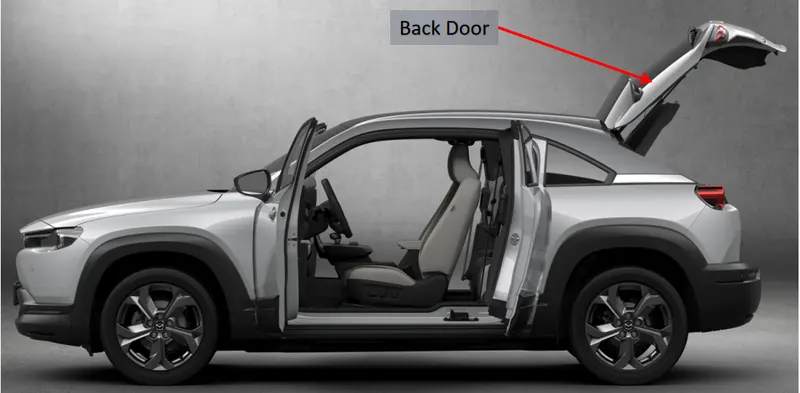
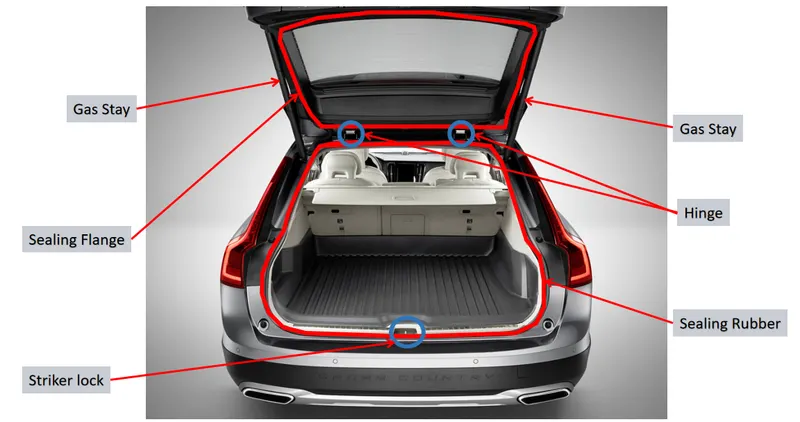
Fig. 0.1: Back Door of Car
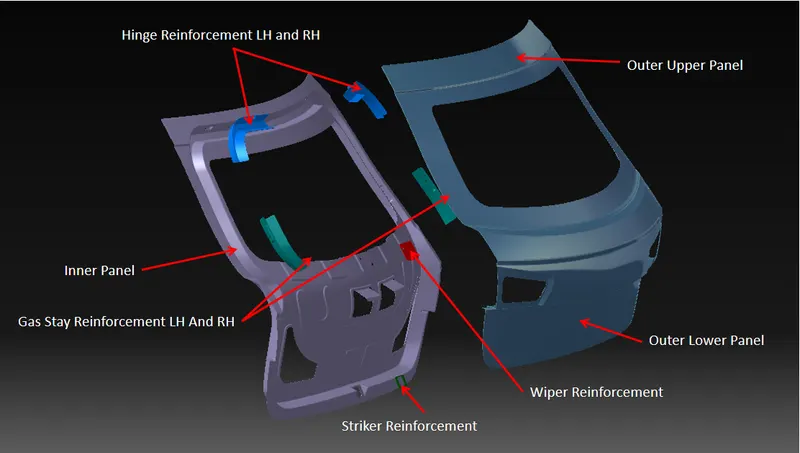
In the fig 1.2 shown back door and its parts
1. Outer Upper Panel.
2. Outer Lower Panel.
3. Inner Panel.
4. Gas Stay Reinforcement LH And RH.
5. Hinge Reinforcement LH and RH.
6. Striker Reinforcement.
7. Wiper Reinforcement.
Design requirements for Back Door:
1. Functional Requirement: Hinge and gas stay are Functional Requirement
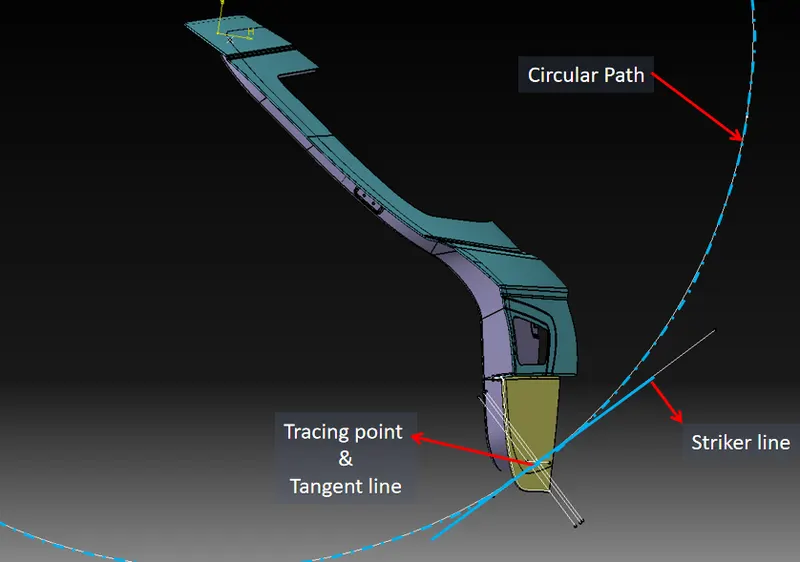
In order to design striker locks while closing the back door, first Position the hinge and create mid point b/w hinges. draw a circle and place stricker in such a way that it should trace the path of the circle.
Depending on the position of gas stay and opening angle length of gas stay is decided.
2. Rear visibility criteria: Federal motor vehicle safety standard (FMVSS) No. 111, “Rear Visibility,” currently requires that vehicles be equipped with rearview mirrors to provide drivers with a view of objects that are to their side or to their side and rear. For more information Click here
3. Rear crash regulation.
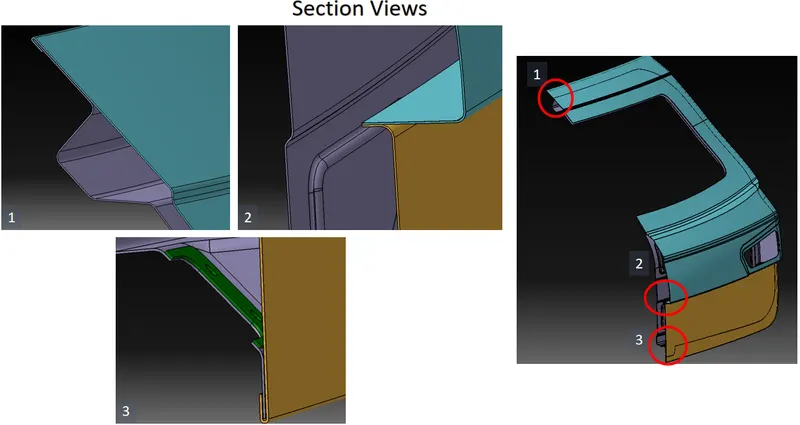
4. Requirement of sealing and its function: In order to prevent water entering into the cabin we are introducing a sealing area where the sealing flange is provided on the inner panel and rubber mounting area is provided on the body side.
5. Joining techniques: To join inner and outer panels the Hemming process is used and to join outer upper and lower panels laser brazing welding is used.
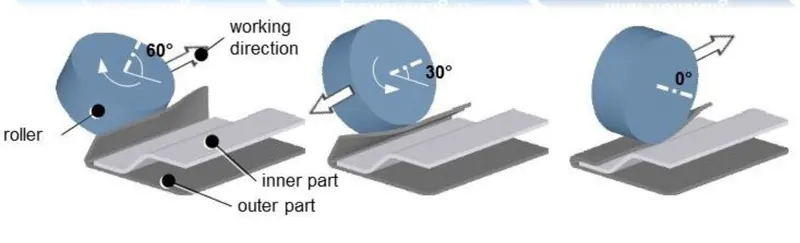
Hemming: Hemming is a forming operation in which the edges of the sheet are folded or folded over another part in order to achieve a tight fit. Normally hemming operations are used to connect parts together, to improve the appearance of a part and to reinforce part edges.
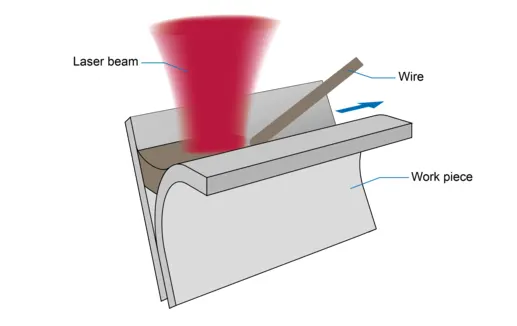
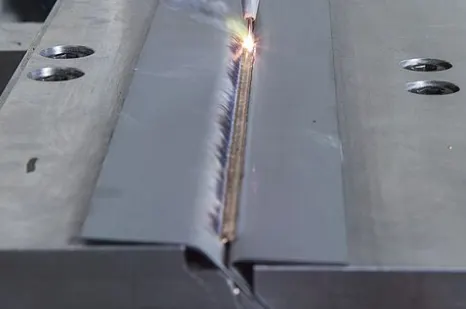
laser brazing welding: Joining methods, in which the brazing solder is melted with the help of an industrial laser, have been used mainly in the mass production of vehicle bodies. There, laser beam brazing is mostly used for joining galvanized metal sheets or lightweight components made of aluminum, but also for other brazing material. Laser automobile brazing is usually realized with a brazing optic that is integrated in a robot. The laser beam is guided along the joint where it melts the brazing solder
6. Gap and flushness requirement: Mastic Seals: Mastic Seals place b/w Inner and outer panel to reduce Noise, vibration, and harshness. Every Mastic will have an effect of 80mm Dia locally. shown in the fig 3.1. Inner and outer panel gap is 2 to 5mm. 0.2mm gap is required for from the Hemming and that gap will filled by sealed past.
7. Adding reinforcements and stiffener pad: reinforcements are added where and all the weight is added. On the inner panel we have Hinges and striker, which are attached to the inner panel so due to this attachment the strength of the inner panel is going weak. In order to strengthen the inner panel reinforcements will play a very important role. Stiffener pad is the sponge-like material place b/w Inner and outer panel to reduce vibrations.
8. Emboss definition: Emboss are provided in the inner panel of the hood assembly. This helps in weight reduction of the hood and also to dissipate the force during collision. Force dissipate is shown in the fig. 4.1 this project design.
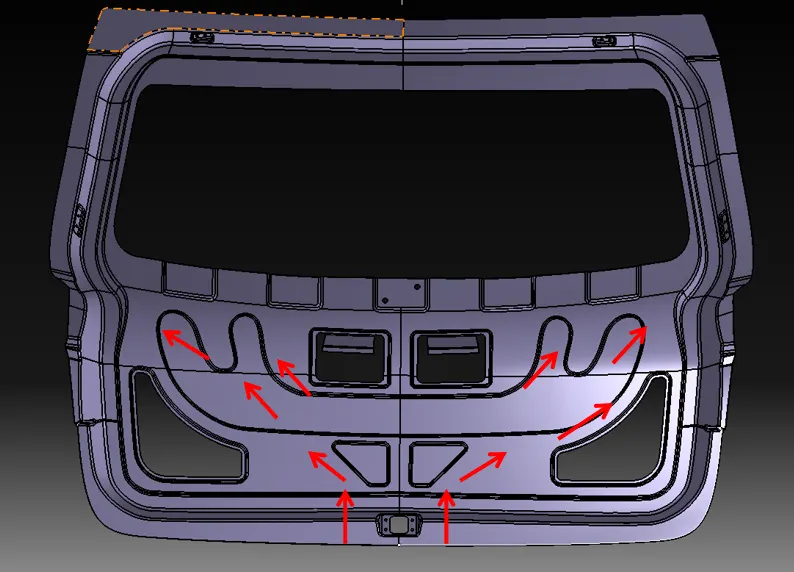
Fig.3.1: Force dissipate
Design Procedure
1. Import the file: File > open > browse file and select the given file (Product name.igs) shown in the fig. 1A.
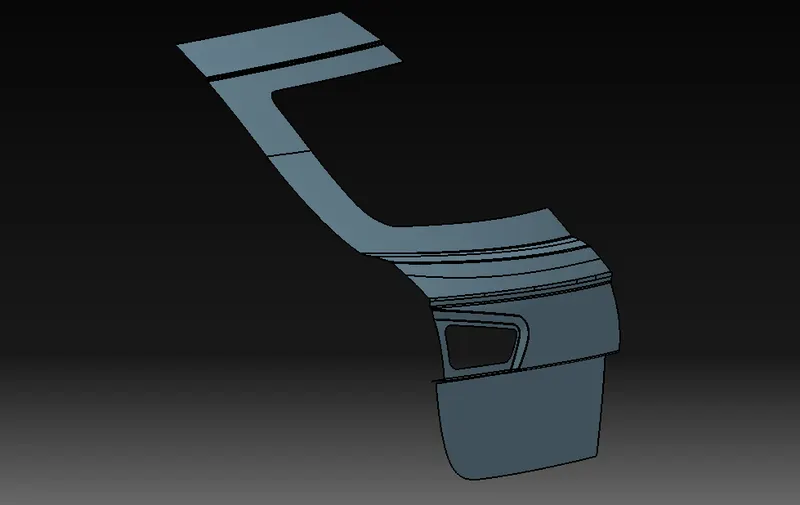
Fig.1A: Imported File
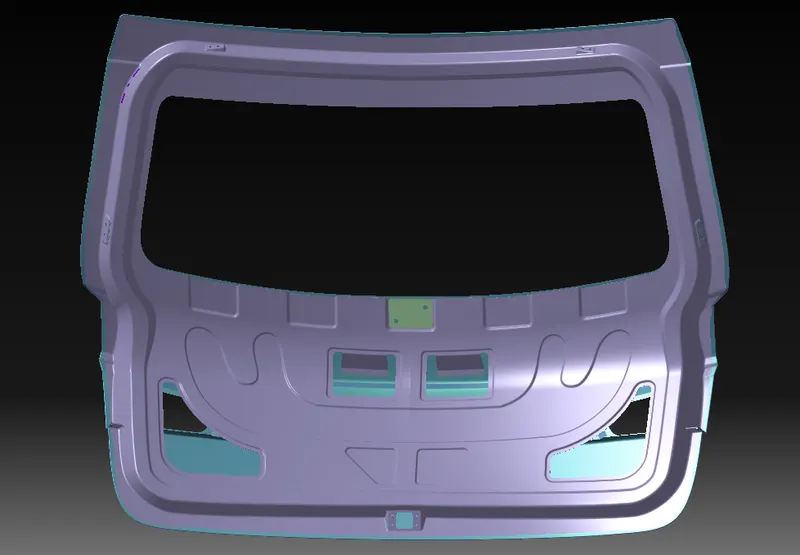
2. Inner Panel Design:
In order to prevent water entering into the cabin we are introducing a sealing area where the sealing flange is provided on the inner panel and rubber mounting area is provided on the body side.
The gap between body side and inner panel is minimum of 15mm.
The flange area should be perpendicular to the body side and width of flange is minimum 25mm. Shown in the fig. 2.1A
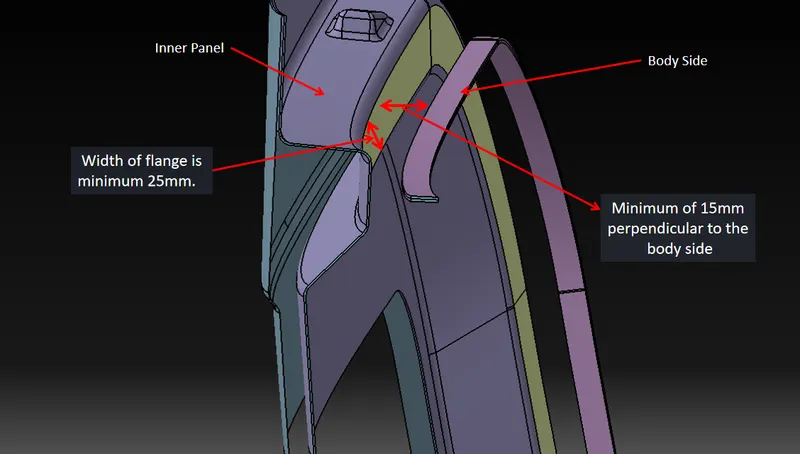
Fig2.1A: Inner Panel Flange
Before starting design Find the tooling axis so all the feature operations are drafted along the tooling axis.
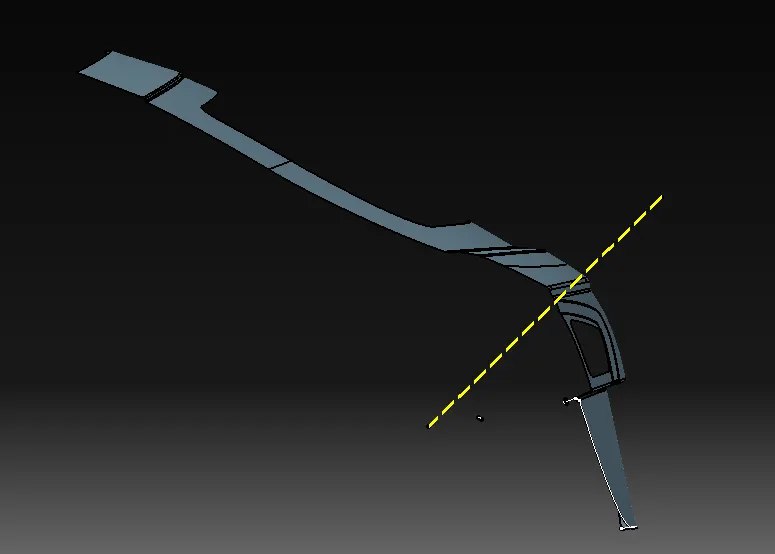
Fig2.2A: Tooling Axis
In the Fig 2.3 Shown the inner panel.
In part design, use a thick surface option to make sheet, here 0.75mm is the thickness of the inner panel.
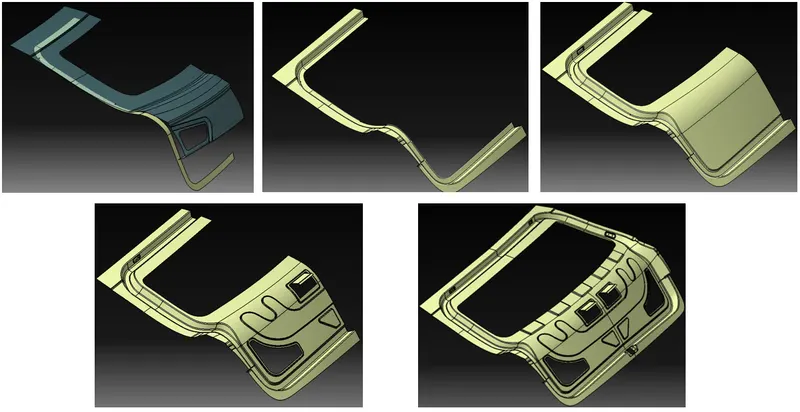
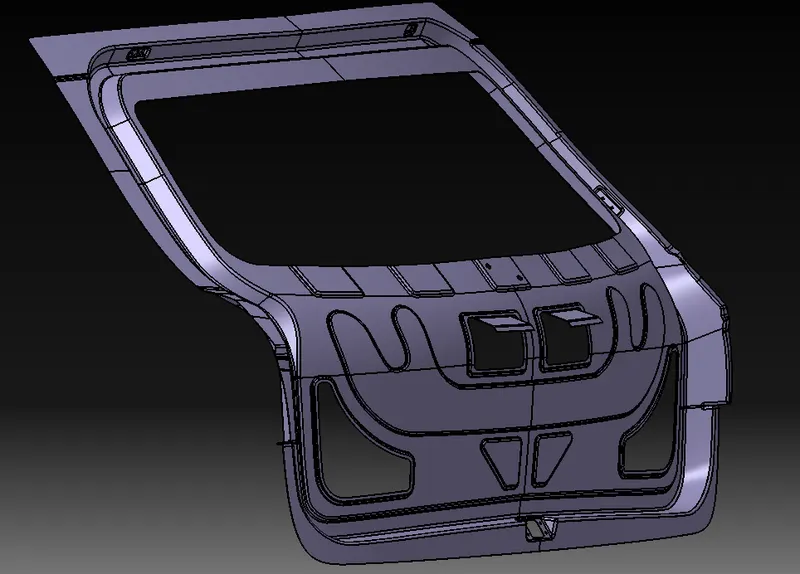
Fig2.3: Inner Panel
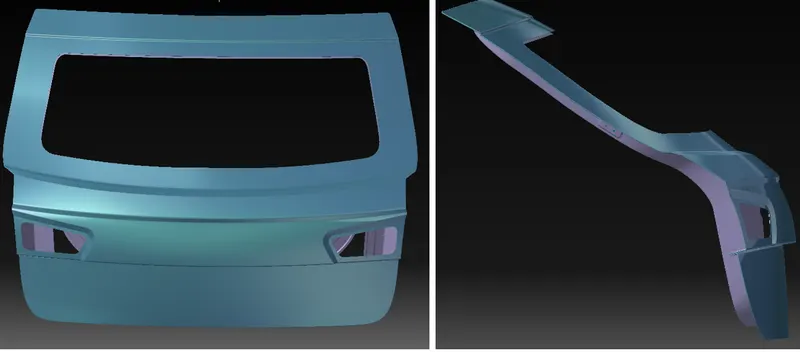
Similarly Design Outer Upper and lower panel using Shown in the fig. Fig. 2.4
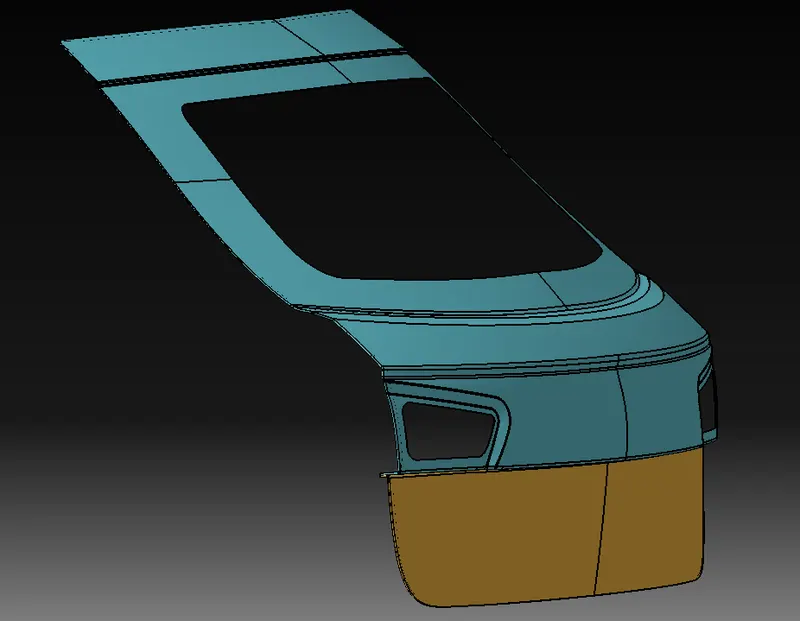
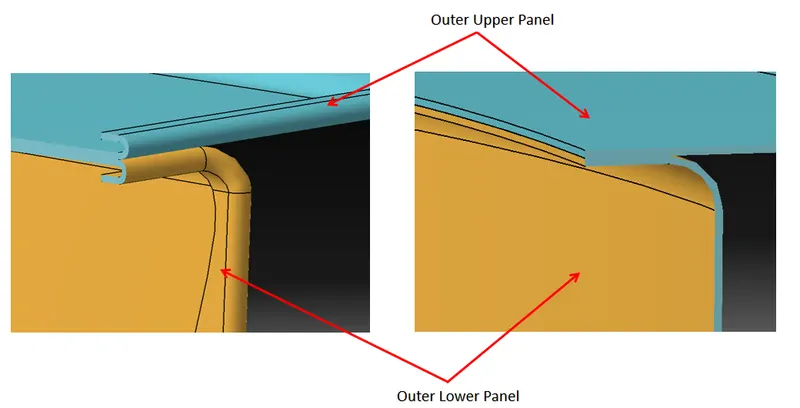
Fig2.4: Outer Upper and lower pane
Create reinforcement where ever needed, and same is show in the fig 2.5.
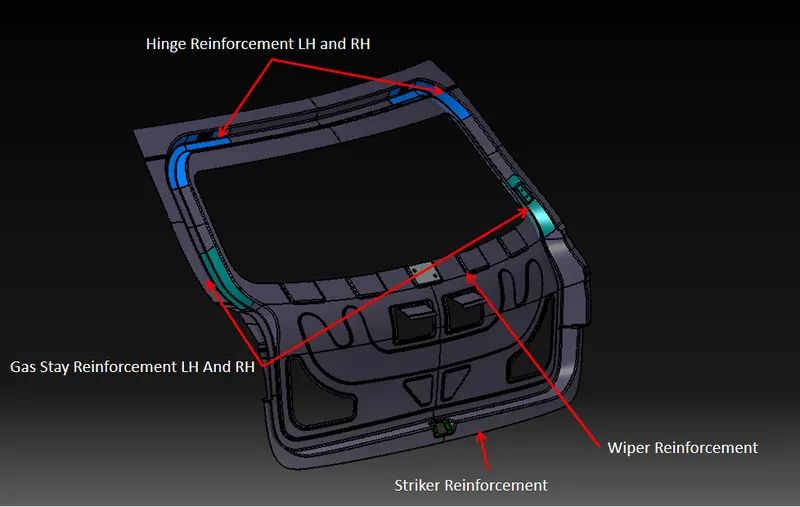
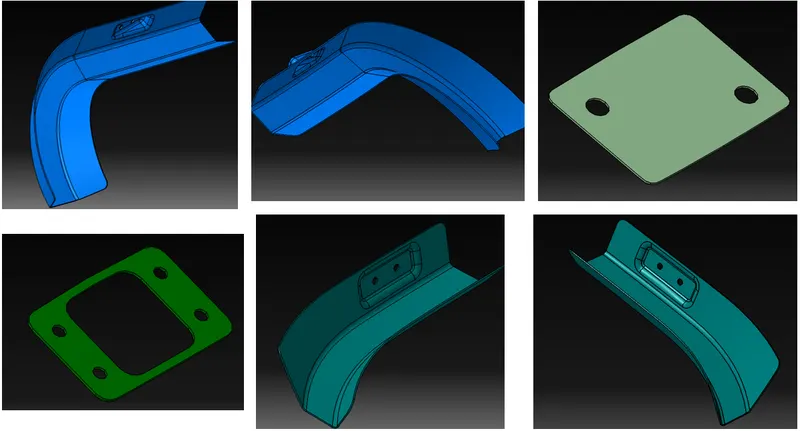
Fig2.5: Reinforcements
Thickness data for all components are shown in the table.
| S.No | Name | Thickness (mm) |
| 1 | Upper Panel | 0.75 |
| 2 | Inner Panel | 0.75 |
| 3 | Lower Body | 0.75 |
| 4 | Reinforcements | 1 |
2. Draft Analysis: Draft analysis is a method of checking the draft angle on various faces of a part with a particular direction. it should be more than 7 deg.
In the fig 2.6 show the draft analysis for the inner panel.
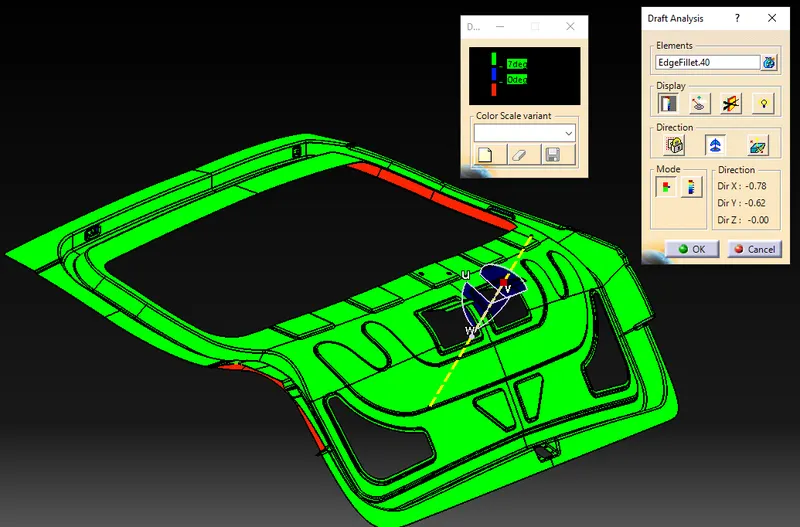
Fig.2.6: Draft analysis
Results: The Design outer upper and lower panel, inner panel and the necessary reinforcements by following the Master section with the design parameter for the given class A surface is done and the final model is shown in the fig. below.