Design of backdoor
Design of backdoor
week 12
Introduction:
It is a panel at the back end of a vehicle (as a station wagon) that can be let down for loading and unloading. A tailgate is a door located at the back of a car, designed to provide access to the trunk or cargo area. It is attached to the vehicle using hinges positioned at the top or sides, allowing it to swing downward or sideways when opened. Some tailgates are equipped with a separate window that can be opened independently, offering convenient access to the cargo space without fully opening the entire tailgate. Tailgates are commonly seen on hatchbacks, pickup trucks and SUVs, where they serve as a practical feature for loading and unloading cargo.
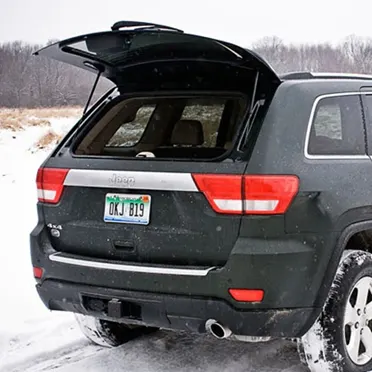
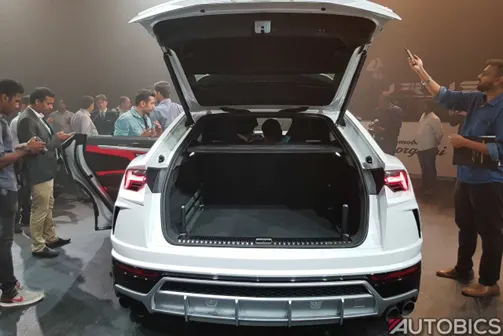
Types of tailgates:
Based on level of autonomy:
Manual tailgate:
The conventional car tailgate operation involves manually dismounting the tailgate. In the majority of cars, the process of opening and closing the tailgate is performed manually. This means that individuals need to physically exit the vehicle to access and manipulate the tailgate using the car key. While this method has been widely used, it can be time-consuming and require additional effort. However, it provides a direct and hands-on control over the tailgate, ensuring a secure closure. It has its own advantages:
- Cost-effectiveness: Manual tailgates are affordable for budget-friendly vehicles.
- Reliability: Mechanical simplicity reduces chances of failures.
- User control: Users can adjust speed and force when operating.
- No power dependency: Works without electrical power.
- Simplicity: Easy operation without specialized knowledge.
- Key-based security: Provides additional theft deterrence with a car key.
They are usually found in lower end and mid-range vehicles.
Power tailgate:
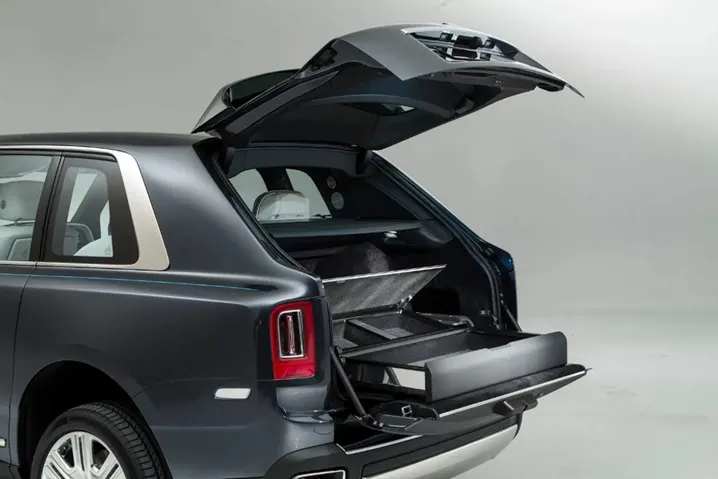
A power tailgate is a convenient feature in vehicles that enables automatic opening and closing of the tailgate or cargo area. With the press of a button or switch located inside the vehicle, the tailgate can be effortlessly operated, saving the driver from physically pulling or pushing the heavy doors. In some cases, remote control functionality allows the tailgate to be operated from outside the vehicle, adding further convenience.
Some of the advantages of power tailgate are:
- Convenience: Power tailgates provide effortless opening and closing.
- Hands-free operation: Users can operate the tailgate without physical contact.
- Enhanced safety: Anti-pinch sensors prevent accidents and injuries.
- Remote control functionality: Convenient remote operation for loading/unloading from a distance.
They are usually found in high end and premium vehicles.
based on number of doors:
Single tailgate:
The traditional single-door tailgate is commonly found in SUVs, hatchbacks, and pickup trucks. It consists of a single panel that covers the entire rear side of the vehicle, providing a seamless appearance and structural integrity. This design is simple, providing a large and continuous surface. Additionally, it integrates features such as rear windows, rear-view cameras, or rear-mounted spare tires, enhancing functionality and aesthetics. The advantages of having it are:
- Simplicity: The single-door tailgate is easy to design, manufacture and maintain.
- Cost-effective: It is a more affordable option for vehicle manufacturers compared to complex tailgate designs.
- Structural integrity: The single-piece backdoor panel ensures durability and strength.
- Integration options: Additional features like windows or cameras can be easily incorporated.
- Easy access: Users can conveniently access the cargo area with a single door.
- Familiarity: The design is widely recognized and offers a sense of familiarity and user-friendliness.

Split tailgate:
A split tailgate, also known as a dual tailgate, consists of two doors that open independently rather than a single door opening upward. The two doors can be opened independently, providing flexibility in accessing specific areas of the cargo space. It has some unique advantages compared to single tailgate:
- Easy access from both sides for convenient loading and unloading.
- Flexibility to open each door independently, accommodating various cargo sizes.
- Wide opening facilitates handling of large or bulky items.
- Access to specific portions of the cargo area for better organization.
- Lower lift-over height and added security for safer loading.
- Stylish appearance with a unique design element.
Materials and manufacturing techniques:
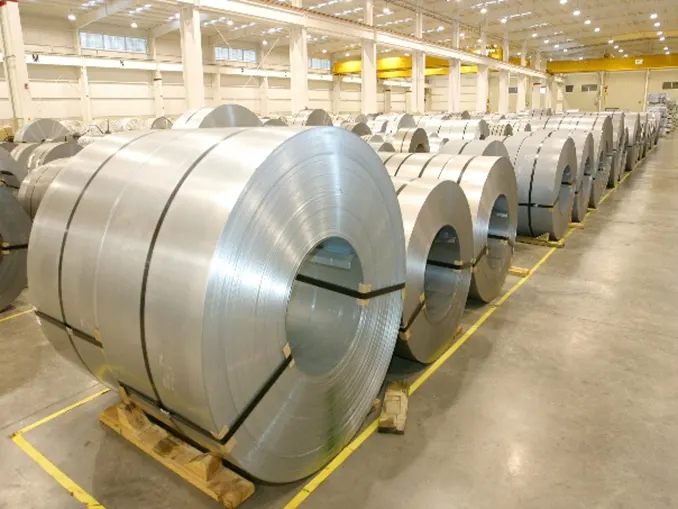
The body of the tailgate is made up of different automotive grade steels such as high-strength low-alloy (HSLA) steel or dual-phase (DP) steel. It has the ability to withstand loads ranging between 270 MPa to 410 MPa and might elongate relatively between 28% to 32%. Sometimes, aluminium alloys are also used in the manufacturing of automotive tailgates. Aluminium is widely used in the automotive industry, in chassis and body structure due to its low weight and high specific energy absorption and precise strength.
Deep Drawing
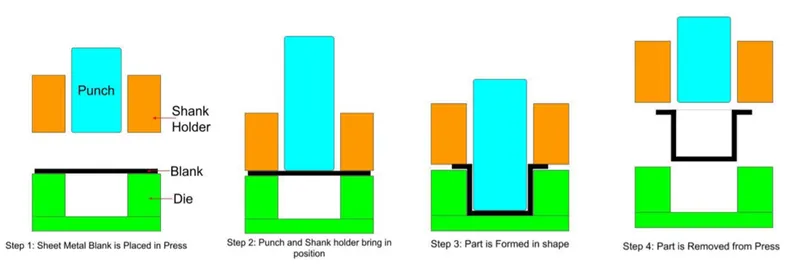
The body in white (BiW) of a car is made using a process called deep drawing. Deep drawing is a sheet metal forming process where a blank is drawn into a forming die by a punch. Deep drawing produces complex shapes with high dimensional accuracy, resembling a cutting operation but with radial deformation. It is considered "deep" when the depth exceeds the diameter. Factors like punch-die clearance and pressure allow metal to be drawn instead of sheared. The clearance should be less than the sheet metal thickness, and sufficient pressure overcomes friction. The process includes 6 steps:
- The first step is to create a blank of the desired size and shape.
- The blank is then placed over the die.
- The punch is then lowered onto the blank.
- The punch applies force to the blank and draws it into the die cavity.
- The material flows into the die cavity and takes on the shape of the punch and die.
- The punch is then raised and the part is removed from the die.
Hemming:
Hemming is a sheet metal forming process commonly used in the automotive industry to join sheets by bending them typically to a 180° angle. It is extensively employed in the manufacturing of automotive body panels and parts such as deck-lids, trunk-lids, doors, hoods, and tailgates. The hemming process involves folding one sheet over another, creating a secure and seamless connection. By employing hemming, manufacturers can enhance the structural integrity and aesthetics of the assembled components. This technique provides a robust joint, improving rigidity and preventing the ingress of moisture or debris.
- Prepare the sheet metal that needs to be hemmed.
- Place the sheet metal on the hemming die.
- Bend the sheet metal using the hemming die.
- Remove the sheet metal from the hemming die.
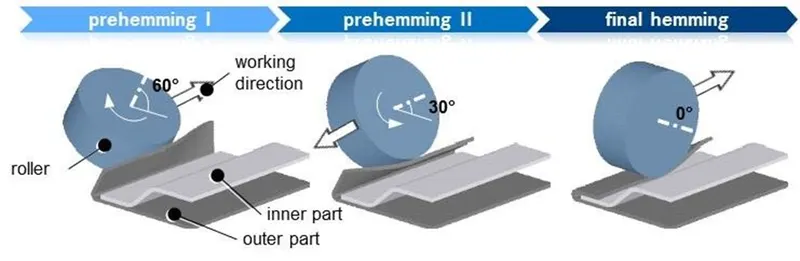
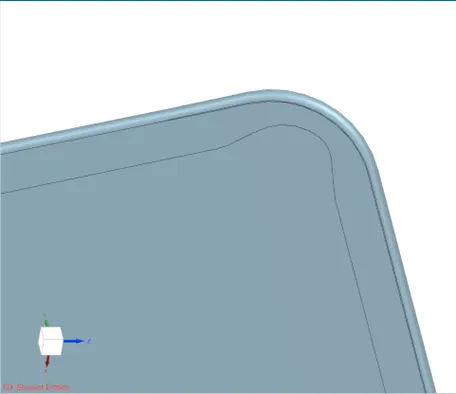
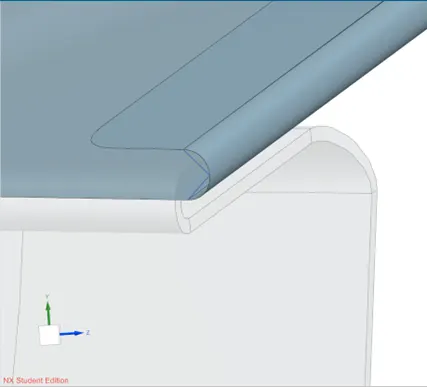
Note: Corner reliefs are provided on the corners. Here, the flange width is kept half the width on the rest of the surface. It reduces stress on the sheet hence improving the life and joint strength of the panels.
Components inside a tailgate:
The tailgate is a complex assembly of different parts which has their respective functionality. A number of other components are also mounted. It involves the rear windshield, wiper sub-assembly, licence plate, etc. Thus, a design engineer has to design it keeping in mind its respective place and design according to its function. The tailgate assembly includes:
- Outer panel (upper and lower)
- Inner panel
- Gas stay reinforcements (Left and right)
- Hinge reinforcements (Left and right)
- Latch and striker reinforcement
- Wiper motor reinforcement
Outer panel:
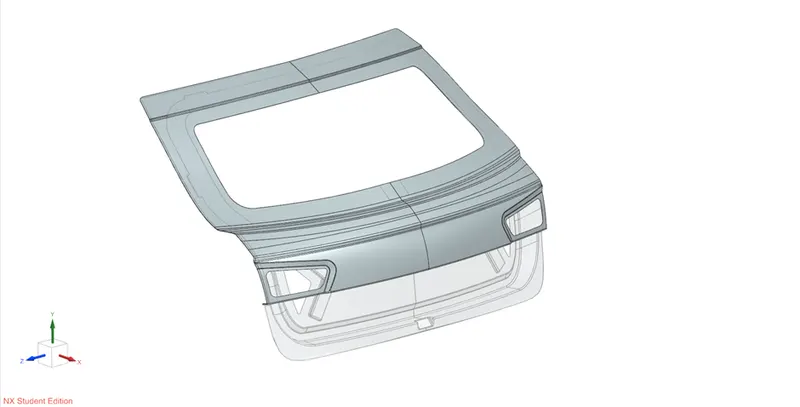
The outer panel is the visible surface that is exposed to external environmental factors such as dust, rain, heat, and more. It plays a crucial role in the overall aesthetics of the vehicle, requiring careful consideration in terms of design and material selection to ensure durability and resistance to various environmental agents. The outer panel serves as the protective barrier, safeguarding the interior components of the tailgate from potential damage caused by external elements. A design engineer receives a styling surface from the styling department.
Design considerations:
- To maintain the outer panel's aesthetic appearance, spot welding should be avoided to prevent any visible defects.
- Instead, the hemming process is used to join the outer panel with the inner panel, ensuring a seamless and clean surface.
- Minimum width of the flange must be 6mm. But at the relief it cannot be less than 3mm.
- Relief should be provided at the corners of the outer panel to prevent stress concentration, ensuring structural integrity and longevity.
- The hemming process should be carried out consistently until the outer panel reaches the lower panel, ensuring a secure and durable connection.
Flow of commands:
- Start by repairing the surface, removing any defects and creating a new surface.
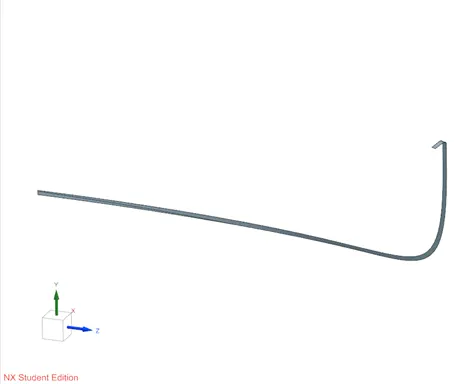
- Create a flange with a minimum distance of 6mm, which will be used for hemming the outer panel.
- Join the outer panel with the flange using fillets along the outside edges.
- Ensure relief is provided at the corner part of the flange to avoid stress concentration.
- Sew all the surfaces together and thicken the sheets inwards for material application.
Images: upper section:
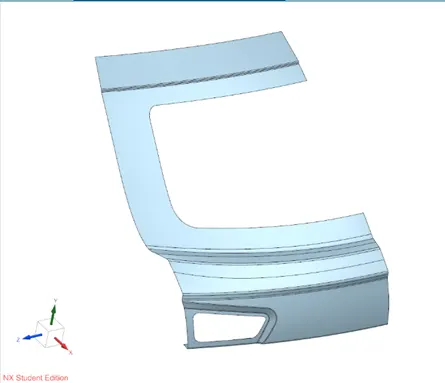
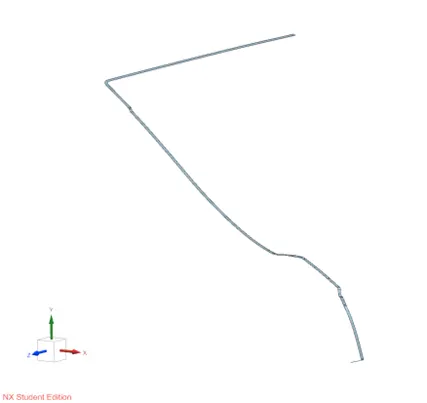
Final output:
Images: lower section:
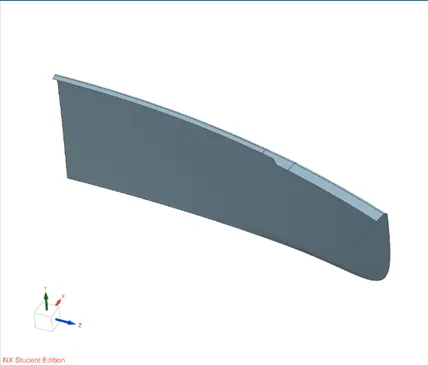
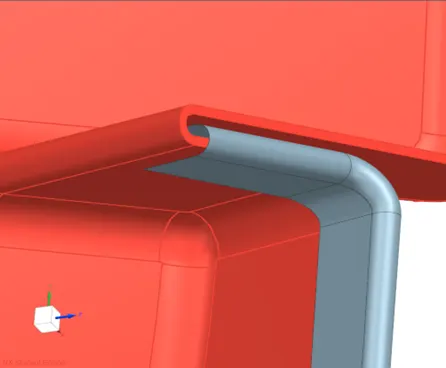
Final output:
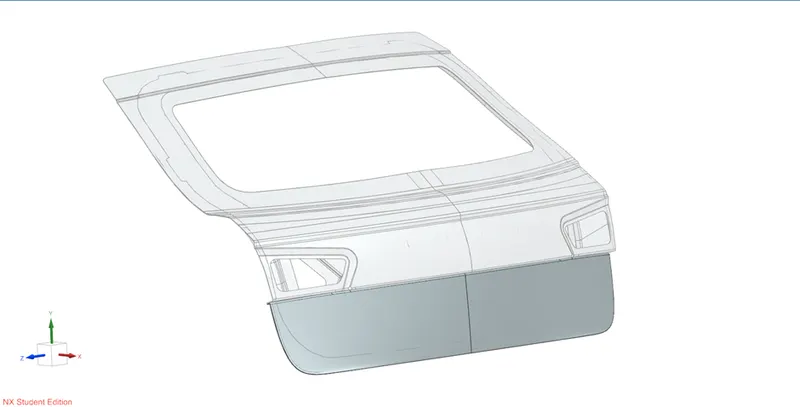
Inner panel:
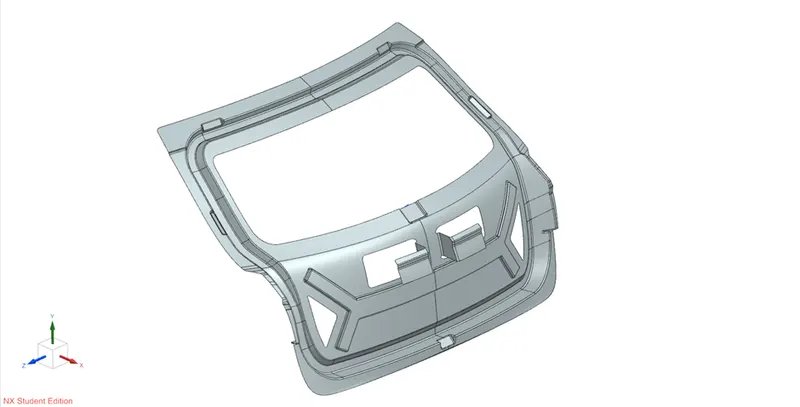
The inner panel plays a crucial role in the tailgate assembly as it serves as a structural component that securely holds the outer and inner panels together. It is responsible for transferring a significant portion of the load during impacts, providing structural integrity to the tailgate. Additionally, the inner panel incorporates essential mounting points for reinforcing elements like gas stay mounts and hinge mounts, ensuring the proper functioning and stability of the tailgate system. The design and construction of the inner panel are critical to ensure the overall strength, durability, and safety of the tailgate assembly.
Design considerations:
- Consider neighbouring components (C and D pillars, roof, floor) during inner panel design.
- Ensure sealing flange width is not less than 30 mm.
- Gather prior knowledge of gas stay specifications to design appropriate gas stay mounts.
- Account for tailgate trajectory around hinge axis when designing latch and striker mount.
- Ensure component clearance along the tooling direction during tailgate ejection.
- Plan for proper mounting of taillights on the inner panel.
- Accommodate wiring passages through the inner panel for electrical connections.
- Maintain uniform weight distribution in the vehicle by considering the tailgate design.
Flow of commands:
- Use the repaired surface of both the panels.
- Draw a tooling axis starting from the wiper motor area.
- Offset the surface for 1.7mm to provide thickness.
- Create a strip of width 30 mm using various trimming options and offset them for around 25 mm inward. This is the sealing flange.
- Using this flange, create 2 opposite surfaces at an angle greater than 7 degrees so that it can clear the die through the tooling axis.
- Extract the top and bottom side of the sheets above and below the windshield area and join the sealing flange using the connecting flanges. Provide a fillet more than 3.75mm to avoid sharp corners.
- Join the central surface of the inner panel to the outer panel. For that offset a part of the central part of the outer panel to 5mm where the mastic sealing will be applied.
- Join the inner panel with the offset surface using law extension and provide relief at the corners.
- Create an emboss below the windshield area such that it can efficiently transfer the load towards outside. The height of the emboss should be nearly 5mm.
- After that we need to have a hinge emboss. The surface of the emboss should be around 45 degrees with respect to both connecting flange and the outer part of the tailgate inner panel. Trim the sheet to a desired length of the hinge.
- To create latch and striker mount, first we have to draw the trajectory the striker will follow with respect to the hinge axis. The hinge axis can be any arbitrary point on the hinge emboss. Then the area where it will sit should be normal to the striking vector. Trim the sheet for suitable for length of the latch.
- To create a gas stay emboss, similar to the hinge emboss identify the place where the gas stay has to be mounted. Create a surface at 45 degrees from both the outer part of inner panel and its connecting flange. Trim that surface for the desired length of the gas stay mount. Provide necessary fillets on each of the mounting area.
- The wiper motor emboss is easier to construct, we just have to create flat emboss in the corner from where the tooling axis is passing. Mirror the whole geometry with respect to x-y plane. Sew both of them and apply thickness of 0.75mm outward.
Images:
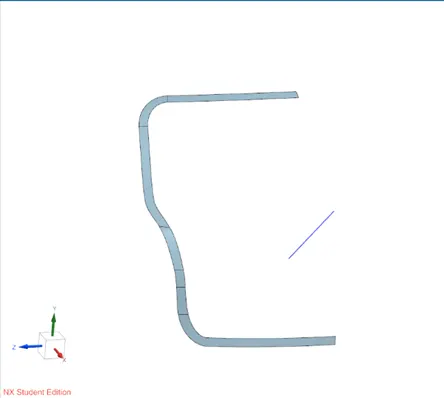
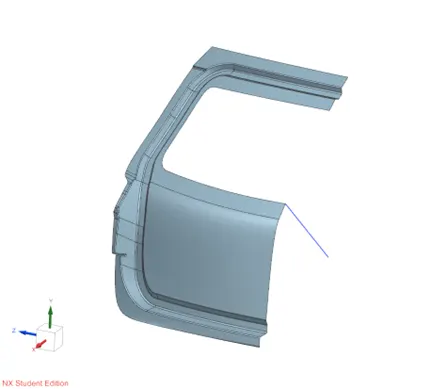
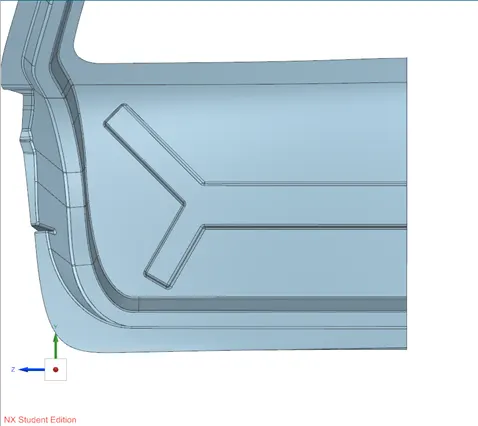
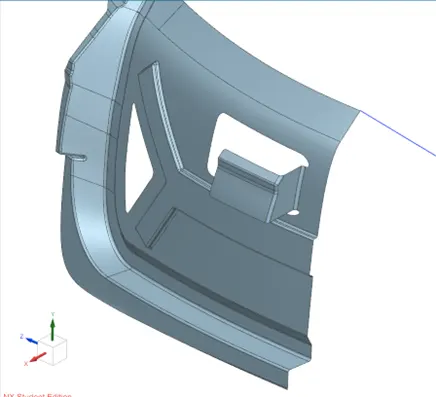
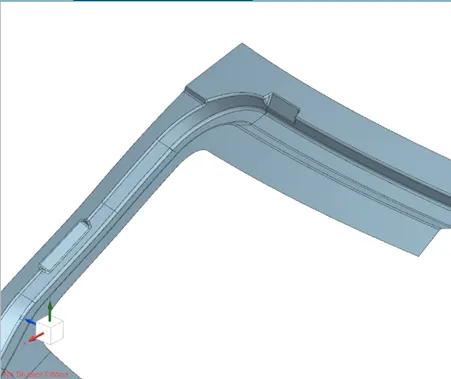
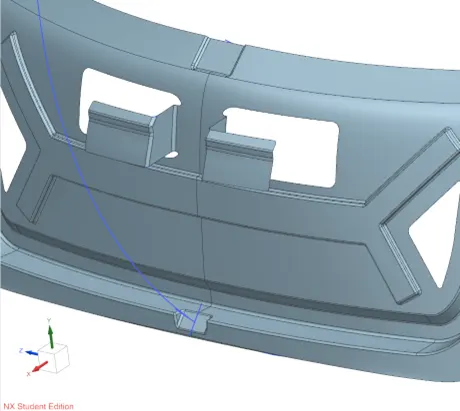
Final output:
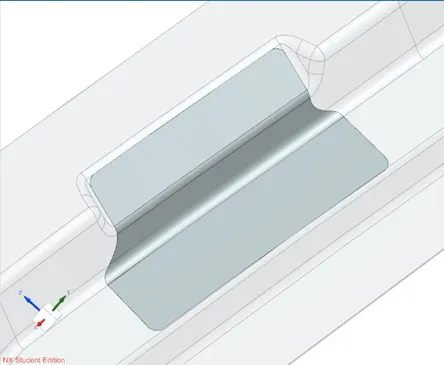
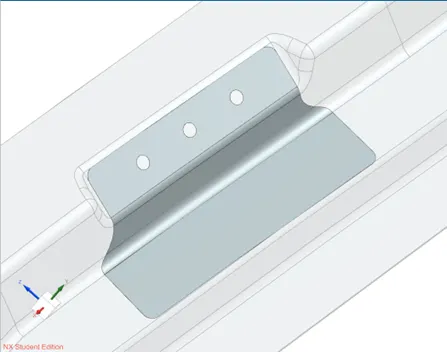
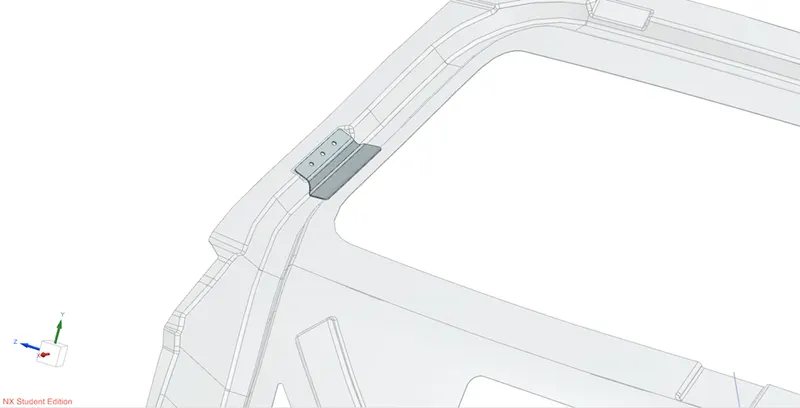
Gas stay reinforcement:
A gas stay reinforcement is a structural element that is mounted onto the inner panel of a tailgate assembly to enhance rigidity and strength. Its primary purpose is to withstand bending loads resulting from the mounting of the gas stay and counteract the gravitational force acting on the tailgate. This reinforcement covers the region where the gas stay is attached, as well as the surrounding area. Typically, the gas stay reinforcement is thicker than both the inner and outer panels to provide the necessary structural integrity required for the tailgate assembly.
Design considerations:
- Select an area prone to stress accumulation for the gas stay reinforcement.
- Ensure that the gas stay reinforcement has a greater thickness compared to the outer and inner panels.
- Obtain prior knowledge of the gas stay specifications, such as its length, elongation, and contraction characteristics.
- Consider the distance between the starting and ending points of the pneumatic gas stay when designing the reinforcement.
- Evaluate the structural integrity and load-bearing capacity of the chosen area to ensure it can support the gas stay effectively.
- Account for potential vibrations, shocks, and dynamic forces that the gas stay reinforcement may experience during operation.
- Ensure proper alignment and compatibility between the gas stay and the reinforcement, considering factors like mounting points and attachment mechanisms.
Flow of commands:
- Extract the required surfaces for the reinforcement placement.
- Trim the excess surface and create relief that connects the gas stay emboss and sealing flange.
- Use bridge curves to fillet sharp corners.
- Create the necessary number of mounting holes on the emboss side for gas stay installation.
- Thicken the final component to achieve a thickness of 1.5mm.
Images:
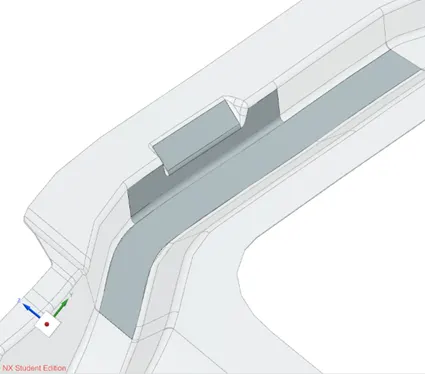
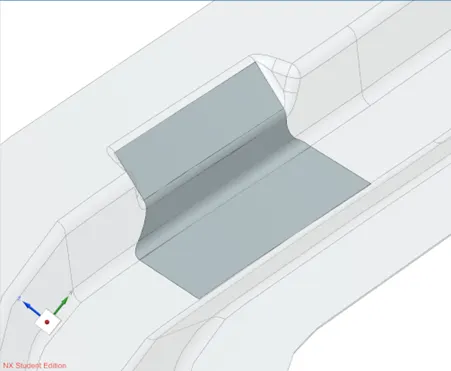
Final output:
Hinge reinforcements:
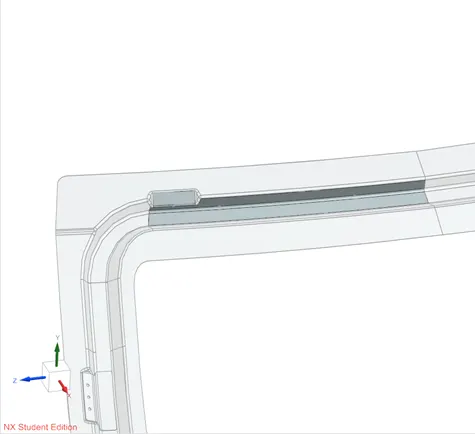
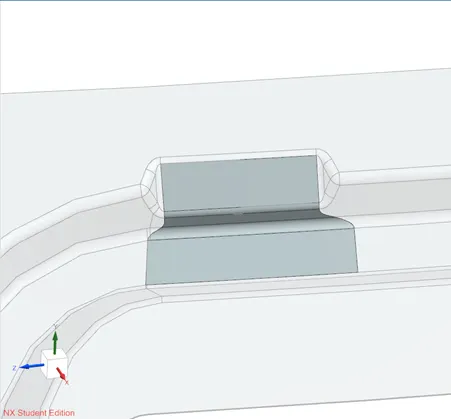
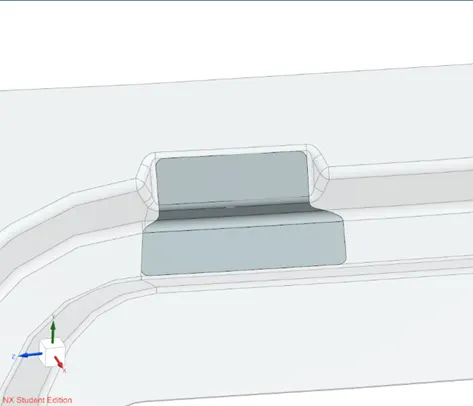
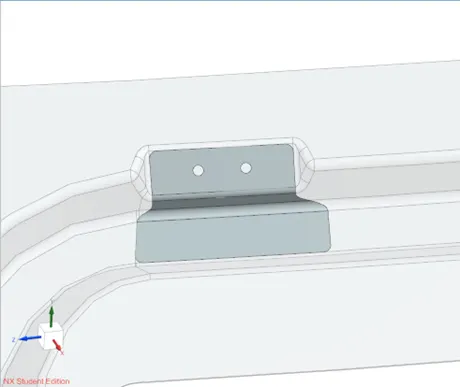
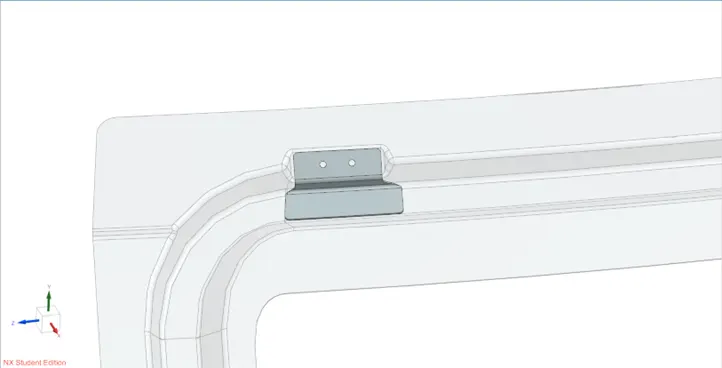
A hinge reinforcement is a structural element incorporated into the inner panel of a tailgate assembly to provide support and strength for mounting hinges. Hinges play a crucial role as load-bearing components in the tailgate sub-assembly, and therefore, they must be securely attached to reinforcements. These reinforcements are designed to absorb bending and impact loads, ensuring the stability and durability of the hinge system. Typically, the hinge reinforcements are positioned near the roof section of the tailgate. Similar to gas stay reinforcements, they also have a thickness of 1.5mm, offering the necessary structural integrity to withstand the forces exerted on the hinges during operation. This reinforcement design enhances the overall performance and longevity of the tailgate assembly.
Design considerations:
- The position of the hinges should be as near to the windshield end as possible.
- The hinge reinforcements should be designed to withstand the load and stresses exerted on the tailgate during opening, closing, and operation.
- The placement and configuration of the hinge reinforcements should align with the mounting points of the hinges to provide secure and stable attachment.
Flow of commands:
- Extract the required surfaces for the reinforcement placement.
- Trim the excess surface and create relief that connects the hinge emboss and sealing flange.
- Use bridge curves to fillet sharp corners.
- Create the necessary number of mounting holes on the emboss side for hinge installation.
- Thicken the final component to achieve a thickness of 1.5mm.
Images:
Final output:
Wiper motor reinforcement:
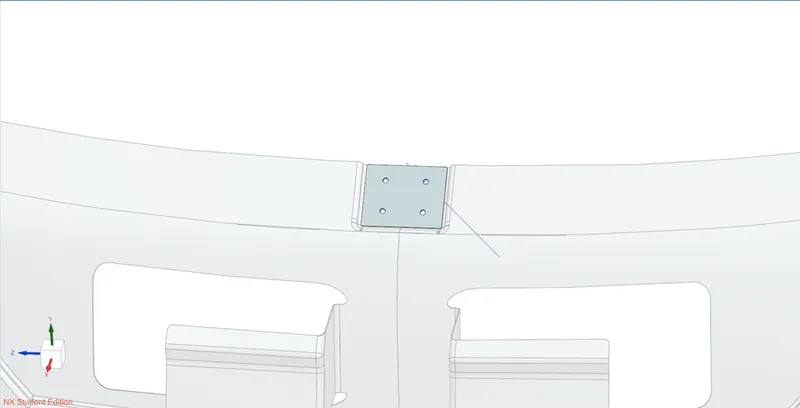
The wiper motor reinforcement is a straightforward component within the tailgate sub-assembly. Its primary purpose is to provide a housing for the wiper motor. With a thickness of 1.5mm, it ensures adequate support and stability for the motor. The wiper motor reinforcement is specifically designed to sit on the wiper motor emboss located on the inner panel of the tailgate, facilitating proper alignment and integration of the wiper motor into the overall tailgate design.
Design considerations:
- We should have an idea of the dimensions and weight of the wiper motor system.
- Know the number and exact positions of the fasteners and their diameter.
Flow of commands:
- Extract the flat surface of the wiper motor emboss
- Fillet the sharp corners of the flat surface to necessary radius.
- Determine number of holes, their diameter and their position on the wiper motor sub-assembly and draw holes on it accordingly.
- Provide necessary thickness to it (same as of other reinforcements, i.e., 1.5mm).
Images:
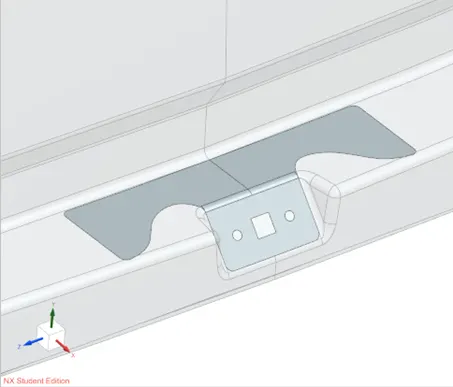
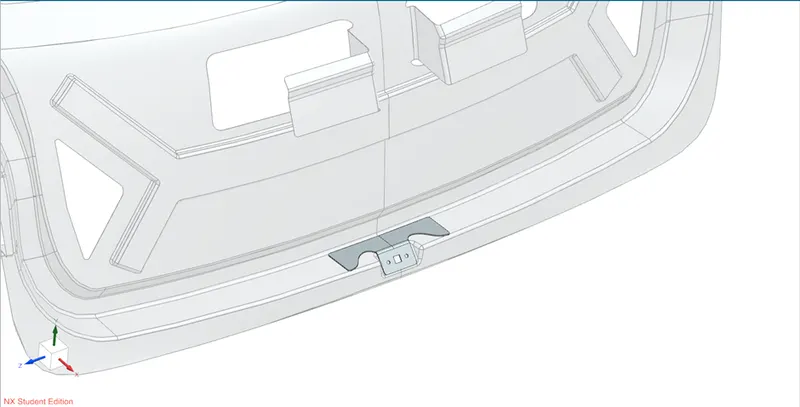
Latch and striker reinforcement:
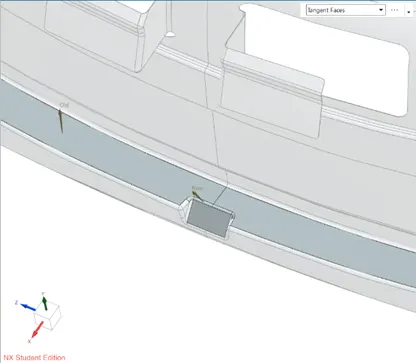
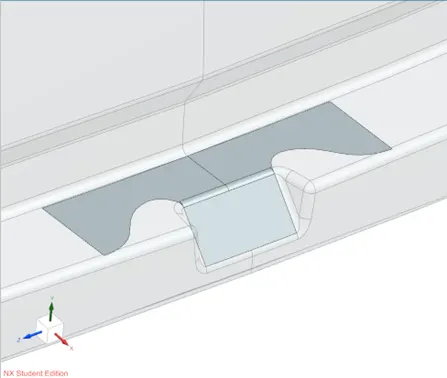
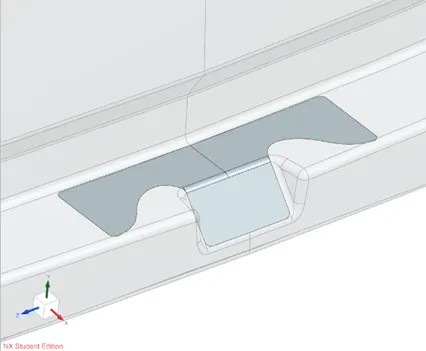
It is one of the important reinforcements which has to be applied on the tailgate of the car. It is designed to withstand heavy impact loads when we slam to close it. It is used to tightly hold the tailgate in place when it is closed. It houses the latch in place and doesn’t let the latch get loose upon frequent open and close cycles.
Design considerations:
- It must be sturdy enough to sustain heavy impact load and have good fatigue resistance.
- The reinforcement surface must be perpendicular to the tailgate trajectory at all times for perfect closure.
- It can be placed either on the lower or upper part of the sealing flange, depending on the hinge axis and the height of the tailgate.
Flow of commands:
- Similar to the hinge and gas stay reinforcements, extract the emboss surface and the side flange of the sealing flange.
- Trim it to the necessary length, such that it has uniform length on both the sides.
- Provide relief between the emboss surface and flange surface. Fillet sharp corners with appropriate radius.
- Create holes to support the latch and thicken it to 1.5mm.
Images:
Final output:
Draft analysis of the tailgate inner panel
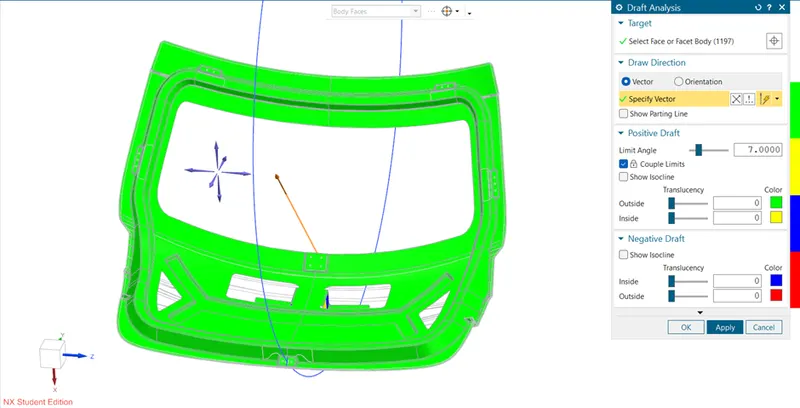
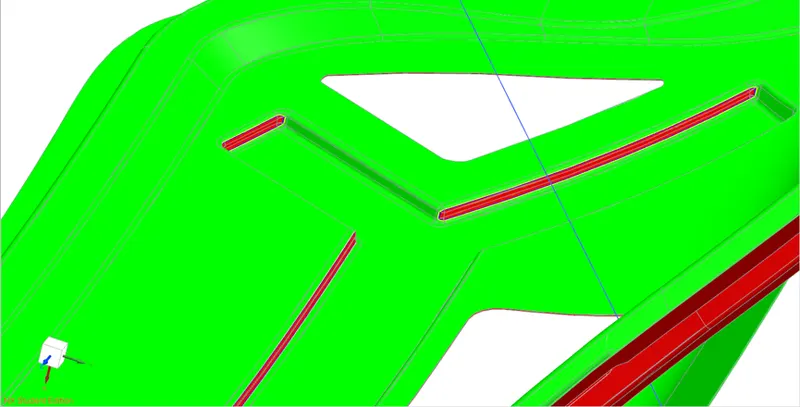
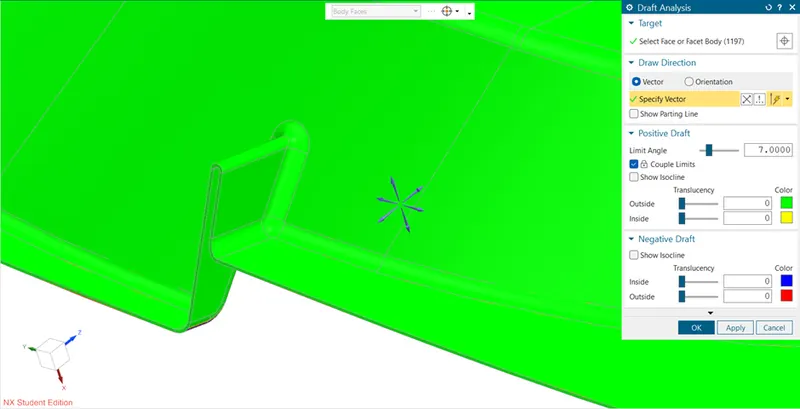
The inner panel is manufactured using the process of deep drawing. In this process the component has to clear the die along a tooling direction. Thus, it must have a minimum draft angle of 7 degrees with respect to the tooling direction.
While creating the inner panel, the ejection along the tooling direction has been taken care of. Thus, the flanges along the sealing flanges have been given a draft angle of more than 20 degrees. The draft of the embosses have been done with respect to the tooling direction instead of the face normal.
The fillets radius is sufficient to eject the component easily. Hence there is minimum to no undercuts at the embosses.
The x emboss is a quite complex geometry. Thus, the auto emboss feature won’t work as expected in this scenario. In that case we have to emboss the surface using conventional techniques. It can increase the chances that the inner panel might require additional or different tooling direction.
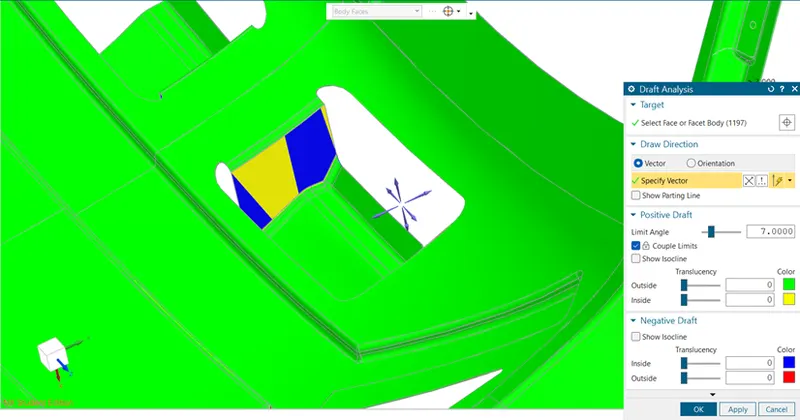
There is a chance of undercut at the junction where there is a provision of slot joining the upper and lower sections of the outer panel. As it is an important design element of the inner panel, it cannot be eliminated completely. Thus, we have to provide an additional tooling direction just for clearing the section off the die.
The cutout which was created to join the inner panel with the outer panel using mastic, will be manufactured using cutting and folding and not inside a die. Thus, the negative draft can be neglected here.
Conclusion:
In conclusion, the tailgate is an important structural element of a car. Its design can impact a lot of other parameters in a car such as the boot space, opening area, proper sealing, etc. While designing it, one must also keep in mind its assembly work flow and come up with appropriate solution to mount the peripherals of the tailgate such as taillights, rear wind screen, wiper motor, etc. Deciding the hinge axis is crucial for the motion of the tailgate. Hence the position of the latch and striker depends on it. Reinforcements should be applied at the areas which are vulnerable to failure of the material due to bending and impact loads and fatigue. When performing hemming, corners should have proper relief so that we can avoid overlapping of the sheet.
PART FILE: tailgate design.zip
DOCUMENT: Design of backdoor.docx.
images inserted in the document file.