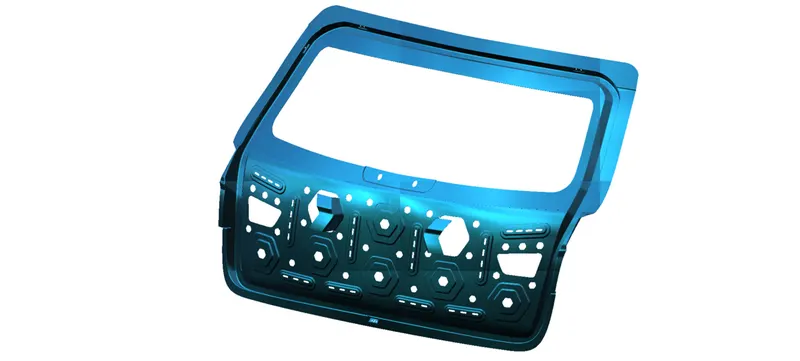
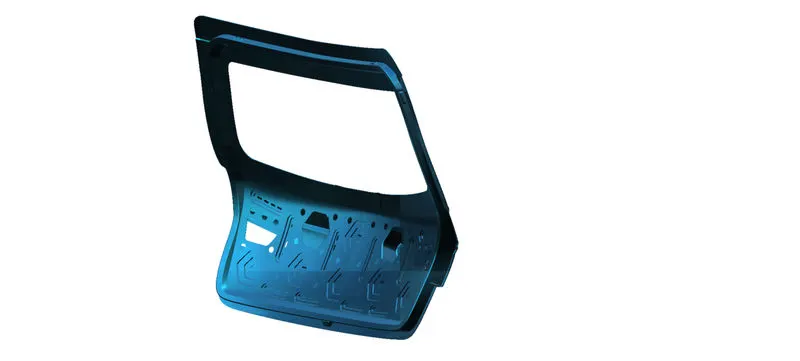
Design of backdoor
Design of backdoor
Aim:
Using the provided styling surface to come up with a back door design and using appropriate design methodologies and make the necessary reinforcements and embosses .
What is a back door?
A door is a hinged part which is used for entry and exit of the vehicles. Back doors are one of the type doors of the vehicle which are located next to the passenger seat which provides access to the luggage compartment. In most of the cars, these back doors are operated with the help of gas stay which in turn reduces the effort required to lift open the door. Some luxury cars have powered backdoor which in turn is driven by an electric motor. This kind of system is also called a powered trunk lid system. Hatchback or station wagons are sold as 3 door or 5 door models. In this case, the rear hatch is classified as door this is because it enters the passenger compartment. The naming is mainly used in Europe countries. In case of safety, the back door designed should meet the safety requirement for the rear collision.
Types of the back door based on working positions.
The door or opening of a cargo area may be hinged at the top, side, & bottom. If the door hinged in the bottom it is called as a tailgate.
Top-mounted:
This type of back doors is used in a station wagon, pickup truck and some of the sport utility vehicles
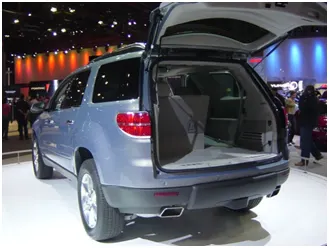
Today’s modern cars use top-mounted tailgating systems which are both powered and also gas stay supported. These top mounted tailgates provide greater rear visibility compared to side-mounted or bar doors which have canter pillars in it.
SIDE MOUNTED DOORS:
As the name signifies side-mounted doors are the one which is used in the van type MPVs, SUVs, pickup truck vehicles. These side-mounted doors or barn doors are a lot easier compared to top-mounted doors.
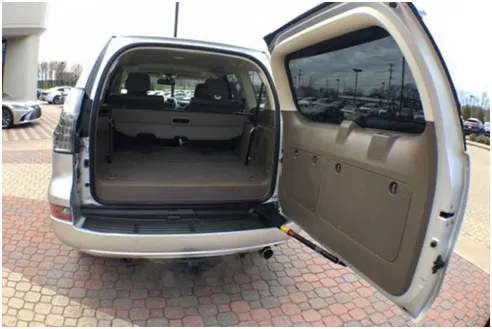
These doors are generally smaller in size and can be easily accessed. These doors are more convenient for the goods handlers for long pipe and lengthy components where one door is kept open. These doors also save accidental head impacts. It is a lot easier to load and unload items in the side-mounted doors.
Bottom / split type:
This bottom type or split type backdoor system are used in the car type such as estate type car, pickup trucks and some luxury SUVs.
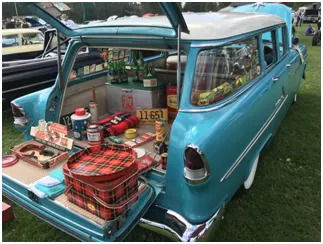
These are the most convenient type of back door in which the bottom split is used as a support or even as a table for the tour going people.
Types based on working mechanism.
Gas stays type:
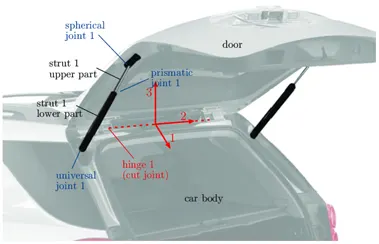
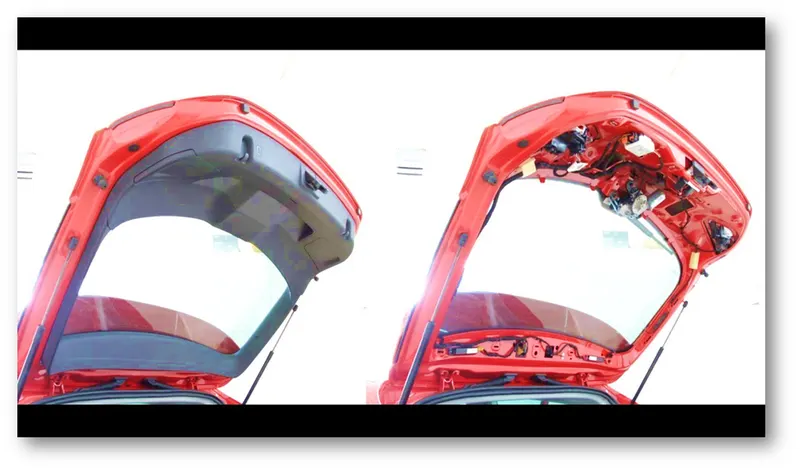
Gas stay types backdoor/liftgate/tailgate is an ideal and most commonly used tailgate mechanism from lower segment car to luxury car segment. The ideal components of tailgate consist of a hinge, door, gas stay and some rubber beadings for sealing of door which is shown in the image below:
Powered lift system:
Power trunk lid system is another sophisticated way of trunk/liftgate opening mechanism which is to automatically open and close of the trunk/liftgate and release of the latch by the touch of a button. The following image shows the component as used in the powered trunk/back door lift system.
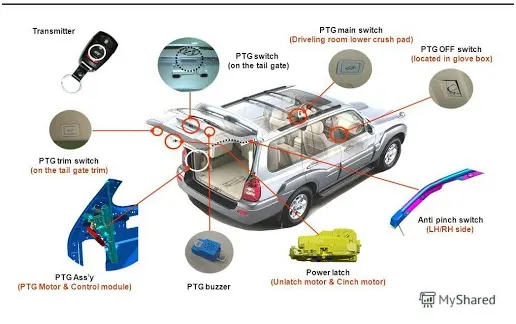
Powered trunk lift system consists of a power latch, anti-pinch switch, PTG ass’y, PTG main switch. When the switch is pressed in the compartment or outside the power latch releases the latch and the entire backdoor is opened. The anti-pinch switch is located in order to avoid accidental hand insertion during the operation of the door.
MANUFACTURING METHODS:
Recently, there have been two approaches to reducing automobile weight. One is by using material lighter than steel and the other is by redesigning the steel structure. Although the former seems very effective, it is very expensive so that it may only be used for an expensive automobile. Therefore, the automobile industry is trying to use steel, which is not costly and recyclable. Lightweight steel can be achieved by improving the performance of the structure or adopting new manufacturing techniques. One of the efforts is the ULSAB (ultra-light steel auto body) concept.
ULSAB suggests three main weight reduction techniques such as hydro-forming and the tailor welded blank (TWB).
Tailor welded blank:
A tailor-welded blank is a blank that is comprised of two separate pieces of sheet metal that have been welded together prior to stamping. Tailor welded blanks allow the welding of the different grades, different thickness or different corrosion coatings together in order to give the properties needed in different areas, without increasing the number of tools needed to form the part and eliminating the fit ability concerns. They also allow a high degree of flexibility in designing parts and large blanks can be formed from much smaller sheets. The use of tailor-welded blanks would reduce the weight of the car. Having the ability to selectively place different thickness of material would result in weight reductions. An example of this used in production is the door inner panel. The only strength requirement on a door inner is in the region where the hinges attach to the panel.
OOLS WE USED IN NX CAD FOR BACK DOOR ASSEMBLY
Trim Body/Trim Sheet. – The main difference is Trim Sheet is limited to trimming away areas of non-solid bodies (a single surface or collection of surfaces sewn into a sheet body) but the objects used to define the trimming boundary isn't limited to only faces or datum planes as is the case with Trim Body.
Offset surface. – The offset surface tool is useful way of creating a series of deposit or erosion contact surfaces from a reference mesh. The surface can be offset from the reference mesh by points or by a fixed distance, and additional options for offsetting to points can be adjusted once the surface has been created.
Through Curves. - You can create a sheet body through curves by using the “Through Curves” command. If the curves do not have closed contours, the created body will be a surface body.
Law Extension. - creates flanges or extensions when a particular direction is important or when it is necessary to reference the existing face. For example, in die design or mold design, draft direction plays an important role in creating parting surfaces.
Emboss. – Use the Emboss Sheet command to modify a sheet body by adding faces of a solid body, as if the solid body was pressed into the sheet body.
Sheet metal models are embossed to:
Increase a metal panels stiffness and rigidity.
Increase the surface area for heat transfer or acoustic applications.
Improve traction.
Enhance the ability of a metal surface to disperse fluids efficiently.
Reduce friction and static.
Project curve. - Use the Project Curve command to project curves, edges, or points that are external to the sketch, onto the sketch along the normal of the sketch plane.
Face blend/Edge blend. - Use the Edge Blend command to round sharp edges between faces. / Use the Face Blend command to add tangent blend faces between two or three sets of faces. The cross section of the blend can be circular, conic, or law controlled.
Wave geometry linker. - WAVE Geometry Linker is a means of associatively (or not if desired) linking (copying)geometry from one part into another. These can be bodies, faces, curves, sketches, routing objects etc which can then be used in the receiving part to design from or refer to.
Assembly constraint. - Assembly driven constraints provide you with a way to control the range of motion—both linear and angular—for the components of an assembly. This type of constraint allows you to include more design intent in your models, and you can make an assembly behave just as an actual model would in real life.
Mirror geometry/Mirror assembly. - You can create mirrored symmetric versions of the parts and components (sub-assemblies) in the NX assembly modelling. The “Mirror Assembly” command is used to create mirrored parts and components. / You can mirror solid or surface bodies in the NX. It might be hard to find this command in NX because there are two mirror commands in NX
Sew. - Use the Sew command to join two or more sheet bodies into a new single sheet body. If the collection of sheet bodies encloses a volume, a solid body is created. The selected sheet bodies must not have any gaps larger than the specified tolerance, or the resulting body will be a sheet body.
Thicken. - Use the Thicken command to offset one or more connected faces or sheets into a solid body. Thickening occurs by offsetting the selected faces along their face normal, and then creating sidewalls.
BACK DOOR ASSEMBLY:
The back door assembly of a hatchback or SUVs has the following components.
- Inner panel
- Outer panel
- Hinge reinforcement
- Gas stay reinforcement
- Wiper motor reinforcement
- Latch/striker reinforcement
INNER PANEL:
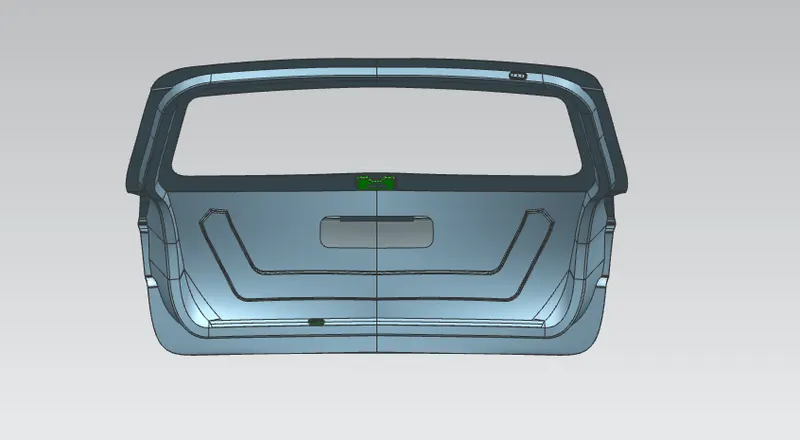
The inner door panel is a component which is used for strengthening the door assembly and it is one of the most important components on which all accessories are mounted like hinges, glass guide channel, moulded trim, latch etc. The possible method is the integration method. In the integration method, the part is stamped out of a single blank. This reduces the number of tools needed; the assembly cost and eliminates any fit ability problem.
Outer panel:
The outer panel of the back door is similar to other BIW components where it is the aesthetic part of a vehicle. The coating provided is of multi-stage which has the property of scratch resistance, rust prevention and smooth and attractive finishes. The outer panel also has the provisions for the tail lamp, rear fog lamp and also has the provision for licence plate mountings. Most of the hatchback cars have the provision for wiper motor.
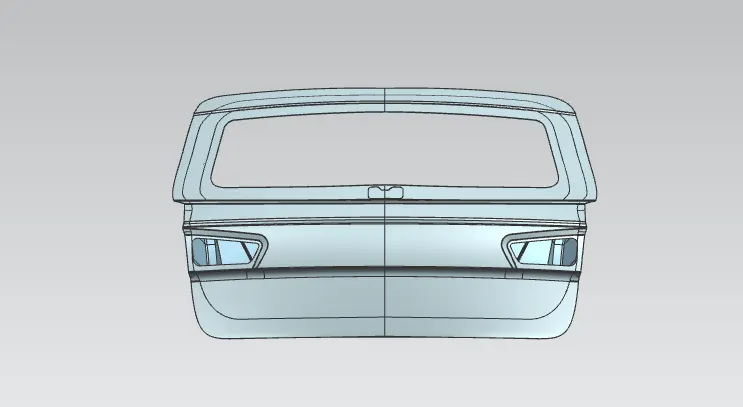
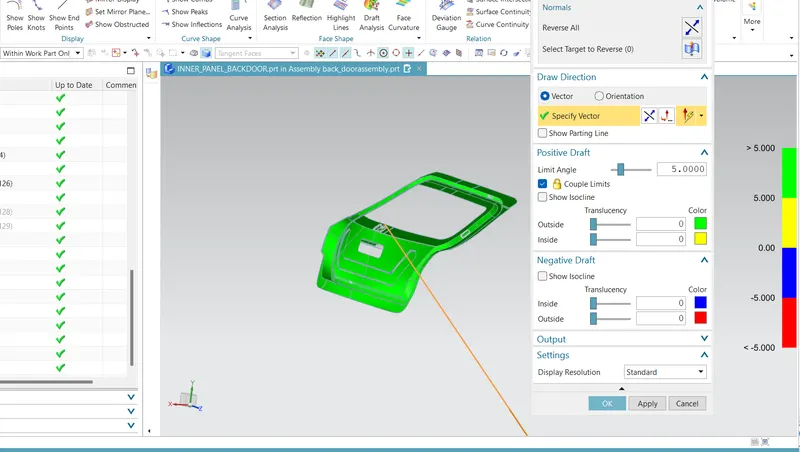
DRAFT ANGLE IS 5
DESIGNING THE REINFORCEMENTS:
The thickness provided for all reinforcements is 1 mm
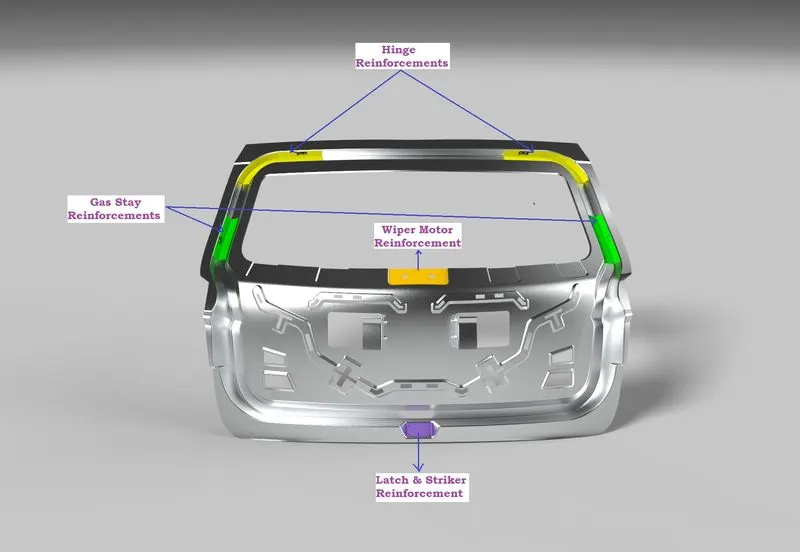
- HINGE REINFORCEMENT
- GAS STAY REINFORCEMENT
- WIPER MOTOR REINFORCEMENT
- LATCH REINFORCEMENT
All the reinforcements were created using the same method, first, the linked body was created separately for each with the help of extract geometry and then the required portion was trimmed out and then thickened.
REINFORCEMENT:
The reinforcement provided is of 4 numbers which consist of hinge reinforcement, gas stay reinforcement, wiper motor reinforcement and latch/striker reinforcement.
Hinge reinforcement
Hinges enable the opening and closing of the back door. One end of the hinge is fixed on the backdoor and the other end on the Roof, on both sides. Hinges can be placed outside or inside the backdoor.
The hinge reinforcements are added to compensate for the weak region due to the acting load over it.
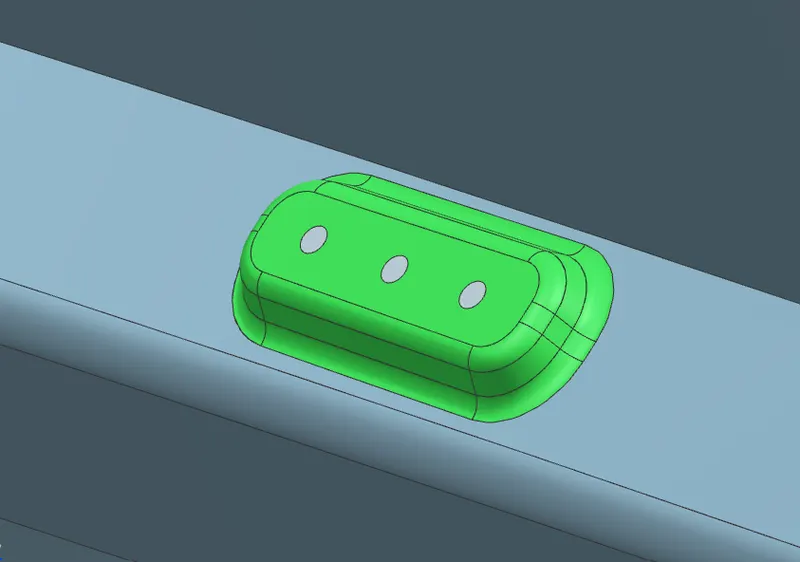
Gas Stay Reinforcement:
Gas Stay is a device used for supporting the back door in its open position. Gas stay requires no manpower and is engaged into support position automatically as the back door opens. One end of the Gas Stay is fixed on the backdoor and the other end on the Body Side or on the Back door stationary area.
Embossing is provided at the Gas Stay mounting area to compensate for weakness and improve strength.
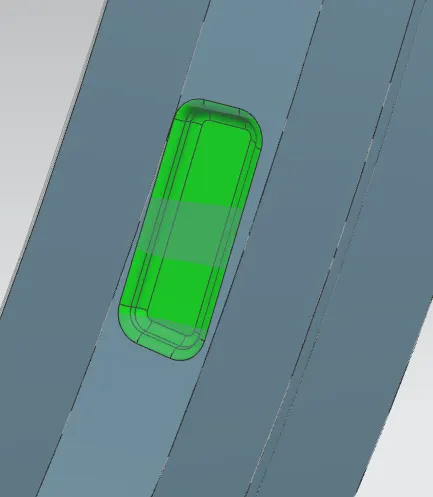
Wiper Motor Reinforcement:
Wiper motor reinforcement is created to mount the wiper motor assembly.
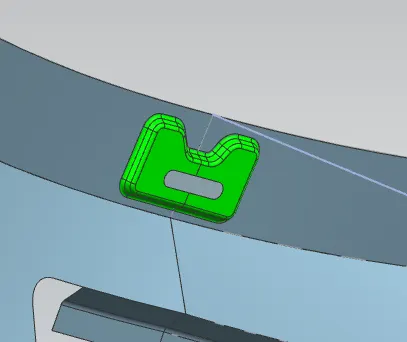
Latch and Striker Reinforcement:
The Latch & Striker forms the locking mechanism of the backdoor with the car. Due to regular opening, closing, and over slamming of the backdoor, there is stress developed in the Latch and Striker area. To compensate for the same, reinforcements are added in this area.
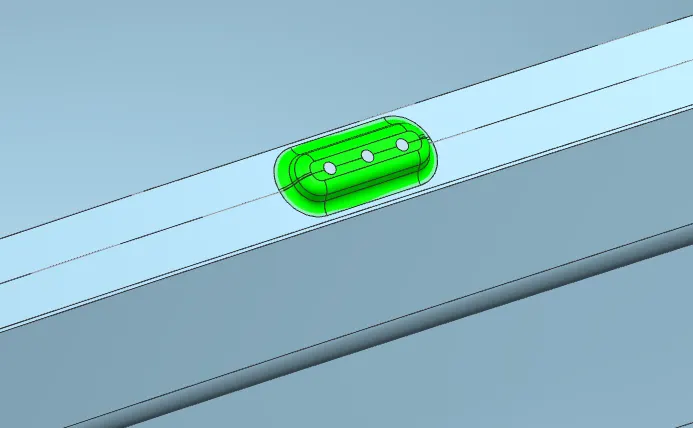
HEMMING OPERATION:
Hemming is a mechanical joint design which is used for joining inner and outer closure panels as found indoors, hoods, bonnets and lift gates. To increase crash resistance the gap between the hemmed panels is filled with a high-strength adhesive which also prevents from corrosion.
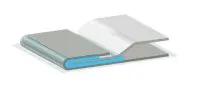
Hemming relief:
Hemming reliefs are cut-outs which are provided on the hemmed corner of the panel assembly which in turn to avoid some of the hemming defects such as wave-like OR wrinkle formed surface
Latch/striker rotation angle:
This rotation angle of the line denotes the line of action of backdoor when hinged to the body of the car.
FR. VIEW
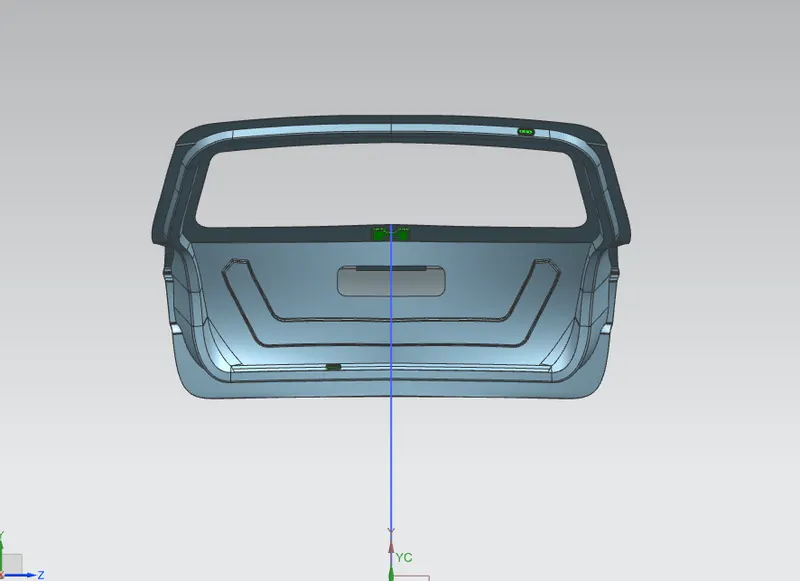
BACKSIDE VIEW
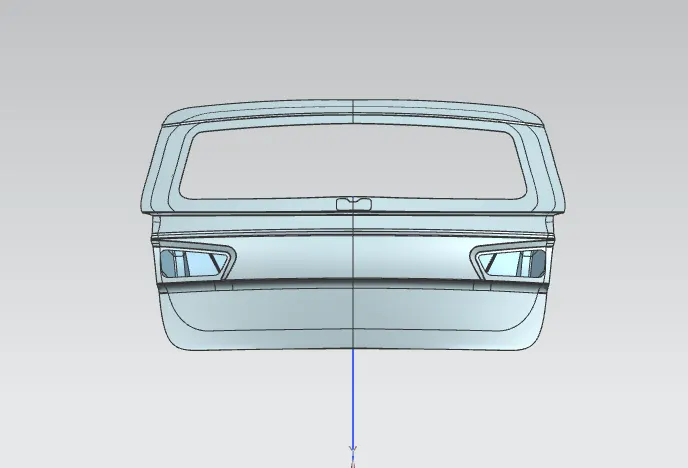
SIDE VIEW
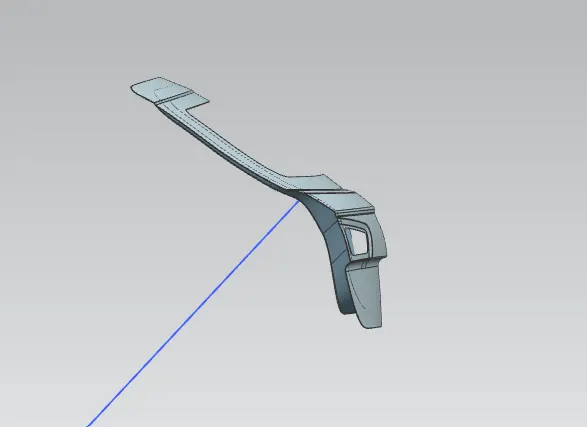
ISOMERTIC VIEW
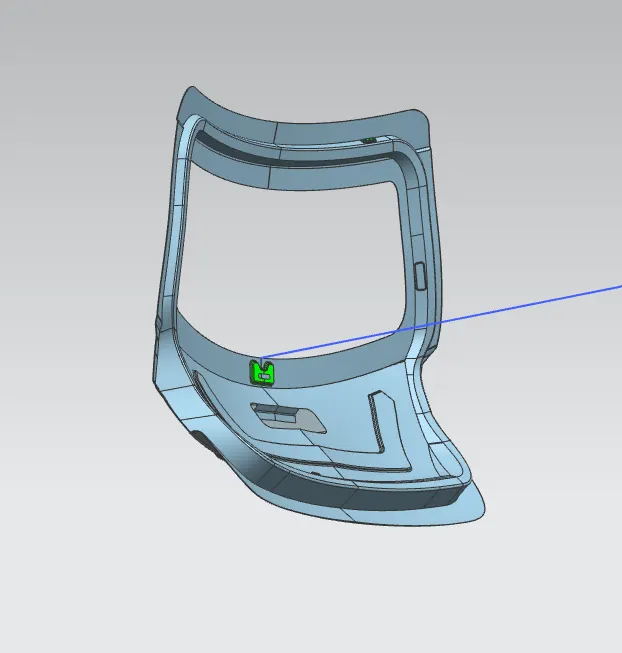
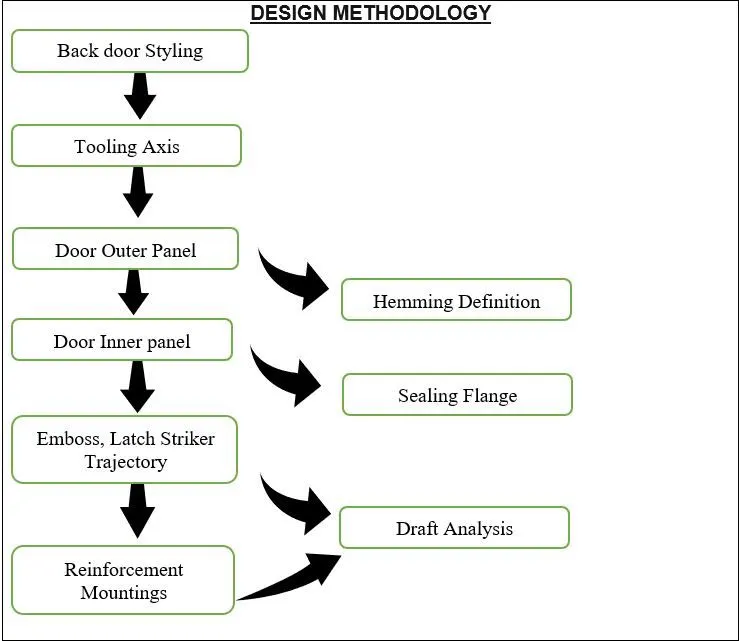
-when I inspected the Surface which got from the styling team having lots of irregularities and patches. All the patches and irregularities are clear to me after discussion with the styling team.
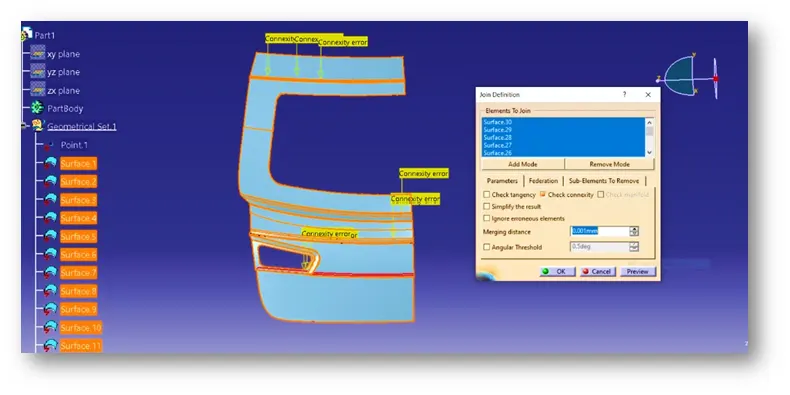
For Tooling Direction:-
-the inner panel is going to be manufactured by deep drawing process. In Deep Drawing process have a tool which is core and Die. The core part follows the single Straight path the inclination angle of the core is known as a tooling direction. The tooling direction/axis is created by me So, that the Manufacturing team take the reference of this tooling Axis and Manufacture the part accordingly
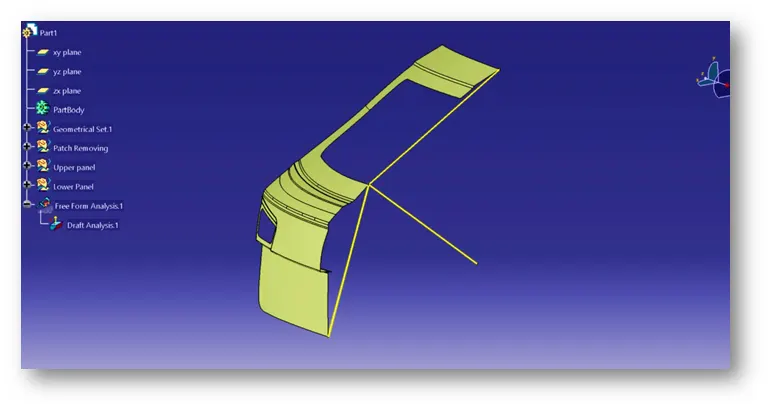
-Outer panel:
-The outer panel of the back door is similar to other BIW components where it is the aesthetic part of a vehicle. The coating provided is of multi-stage which has the property of scratch resistance, rust prevention, and smooth and attractive finishes. The outer panel also has the provisions for the tail lamp, rear fog lamp and also has the provision for licence plate mountings. Most of the hatchback cars have the provision for a wiper motor.
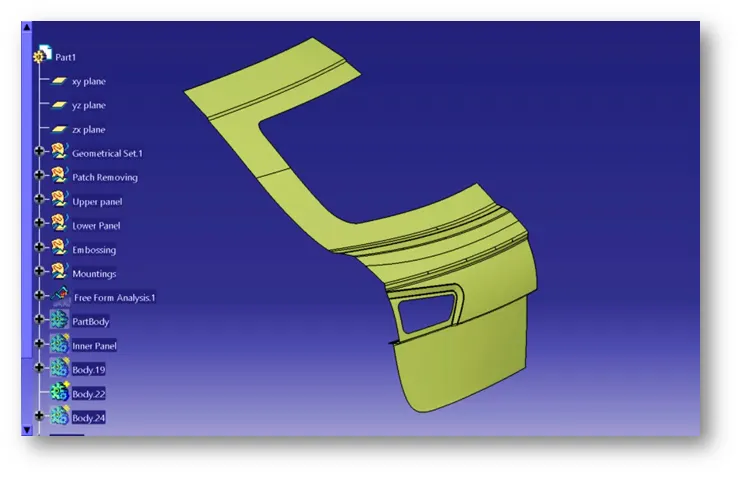
-Inner Panel
-Here the inner panel is created for strengthening the door assembly and it is one of the most important components on which all accessories are mounted like hinges, glass guide channel. The back door inner panel is mounted with the Roof. The weight of the Door inner panel is about 7to8kg depends upon its material and its thickness. The possible method is the integration method. In the integration method, the part is stamped out of a single blank. This reduces the number of tools needed; the assembly cost and eliminates any fit ability problem.
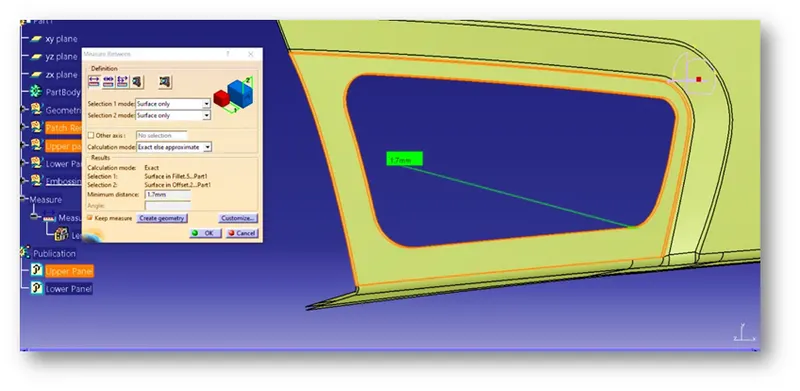
-To Create the inner panel of the back door. Firstly Make an offset of 1.7mm. From the outer panel. Here I considered 1.7mm offset because the inner panel and the outer panel is going to be thicken 0.75mm inwards side & 0.2mm Gap is needed to be given for the mastic sealant.
-here To Create the Sealing flanges on the inner panel. I Extracted The Surface from the outer panel & then offset it by 25mm.
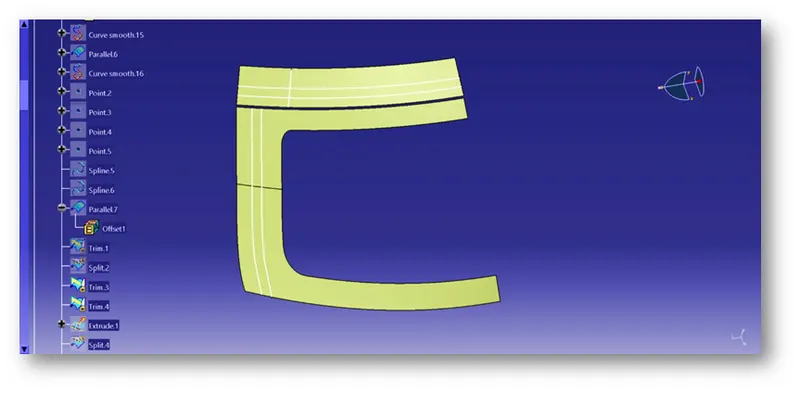
- -Here I have taken the offset of the curve and then split it with the offset surface. After splitting, the small strips are connected by drawing the proper curve as the guide for the multi-section surface.
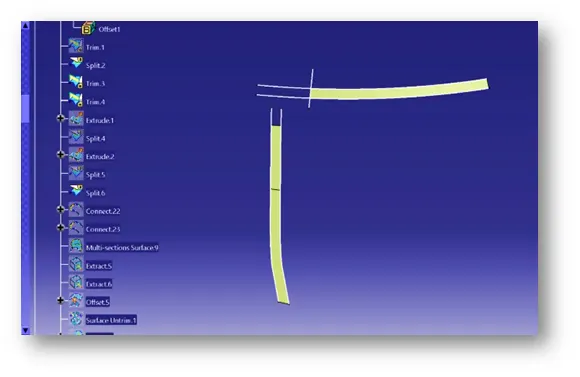
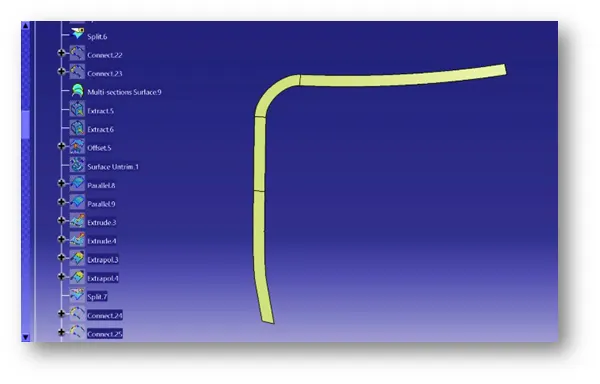
-The tail lamp part is offset to 65mm and untrimmed followed by splitting to have a continuous smooth aesthetic surface.
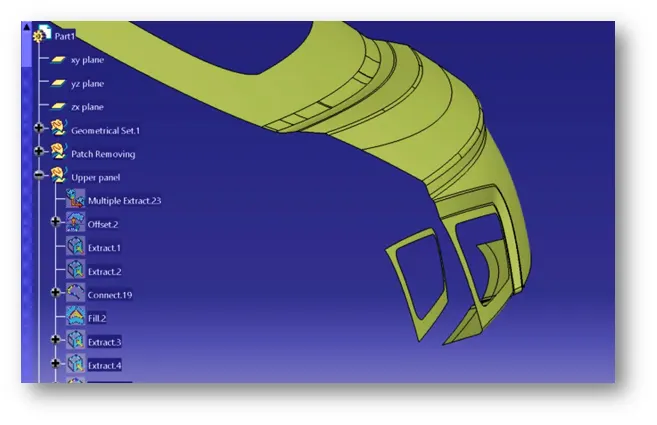
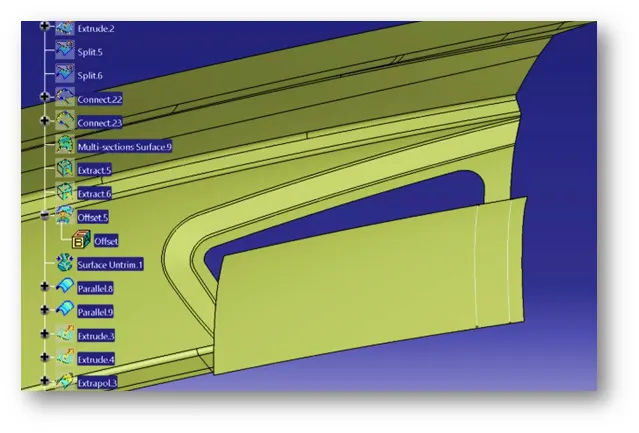
-Similarly, I have done For the whole boundary. All the small surfaces are joined to gather from the lower Sealing flange of the inner panel.
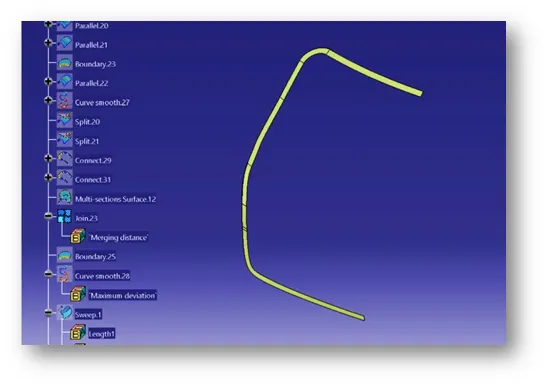
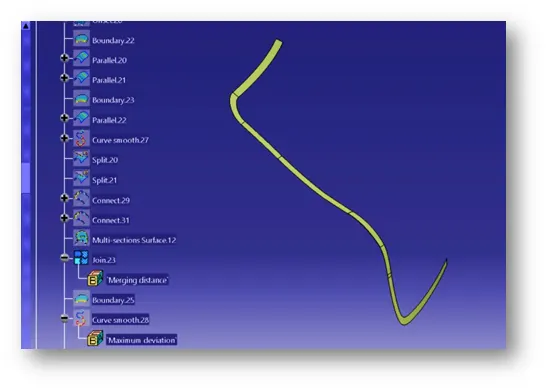
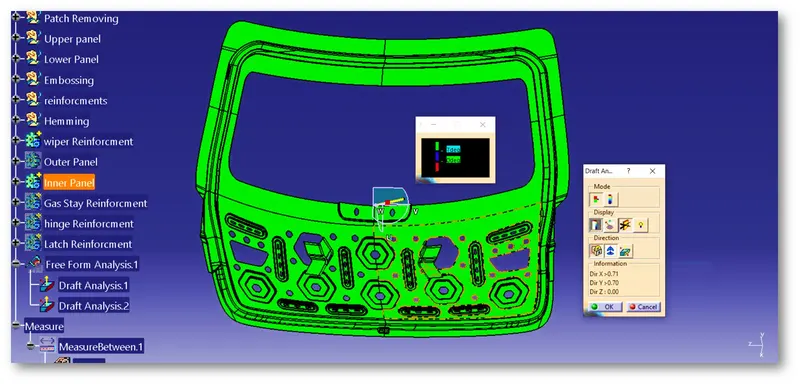
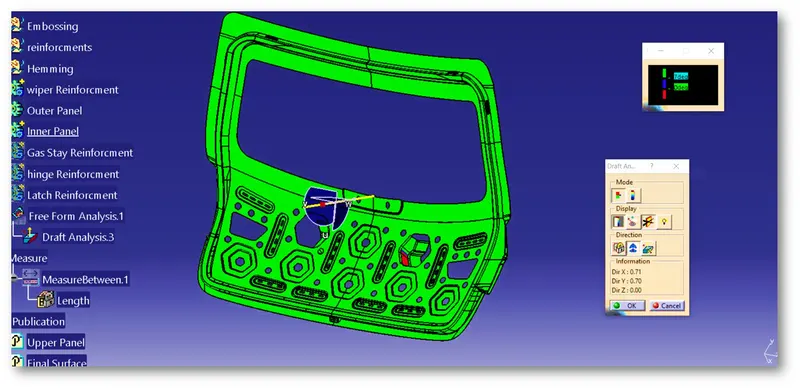
-Later on, edges are Swept along the tooling direction with the draft angle of 15 degrees (all the parts designed have to be producible).
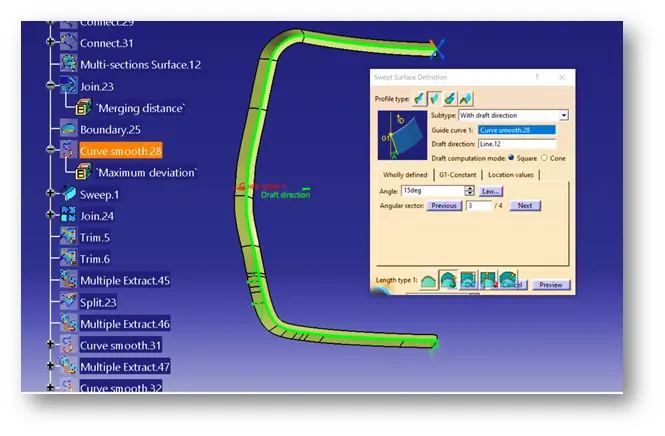
-Then, the swept surface is trimmed with the parent surface of the extract.
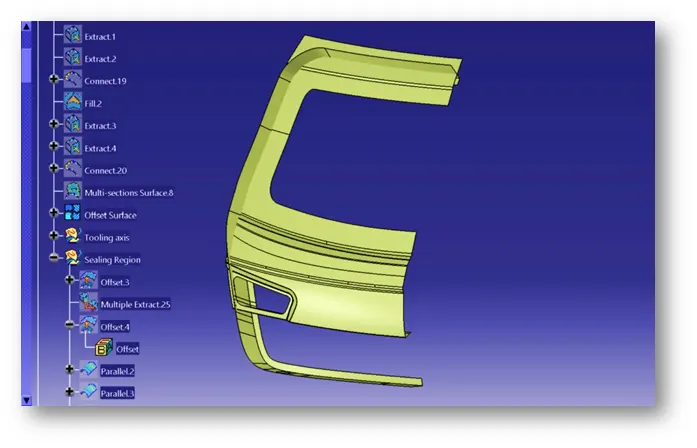
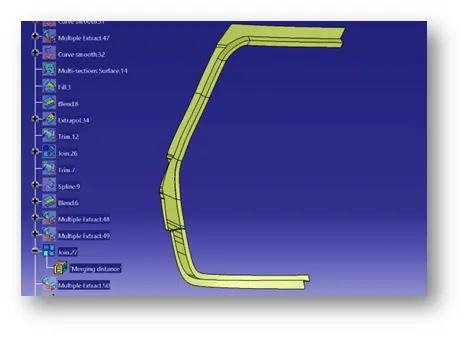
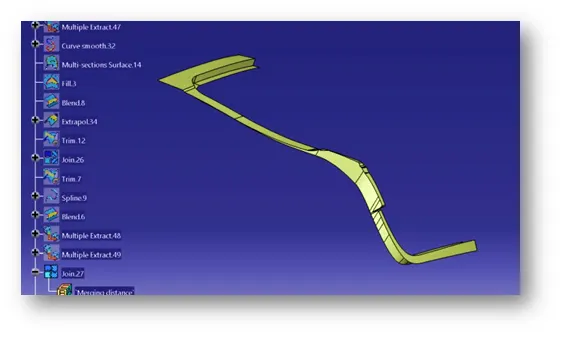
-Later on, edges are swept along the tooling direction with the draft angle of 15 degrees (all the parts designed have to be producible).
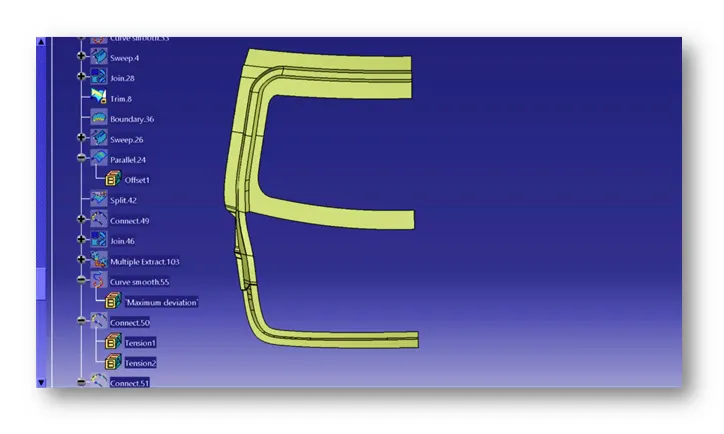
-Here The surface of the inner panel is created using the multi-section and then extrapolating and trimming.
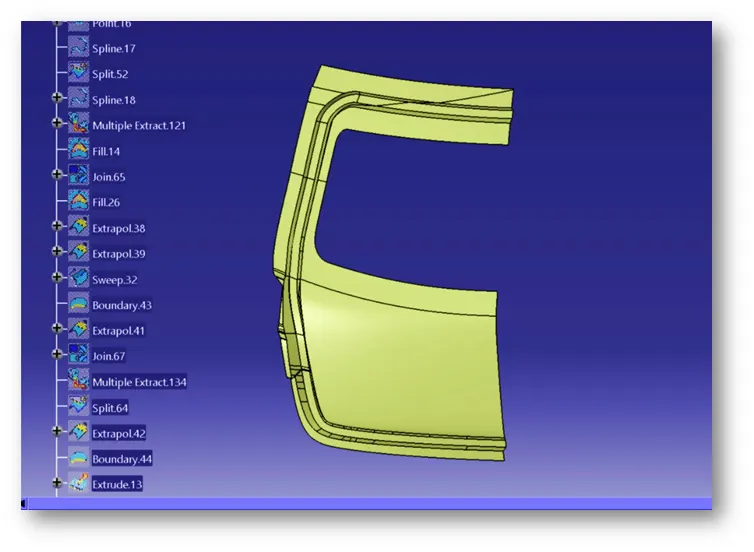
-At the trimming region of the upper and lower panel, the gap is filled using the blend and connect curve
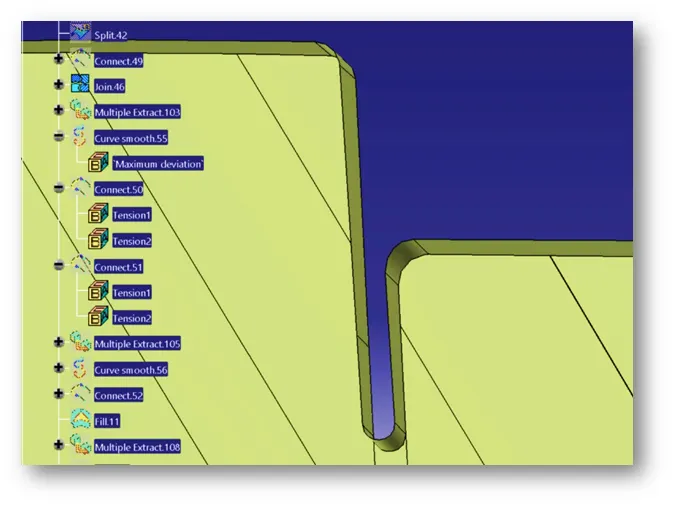
Mastic :
-Since we are reducing the overall weight of the door, this mastic providing the strength also serves the purpose of joining the inner and outer panels using the mastic sealants.
The mastic sealants help in reducing the NVH(noise, vibration, and harshness )levels of the door.
Create a Sketch and provide a cut out on the surface. Now, use the sweep option to create the surface perpendicular to the base surface.
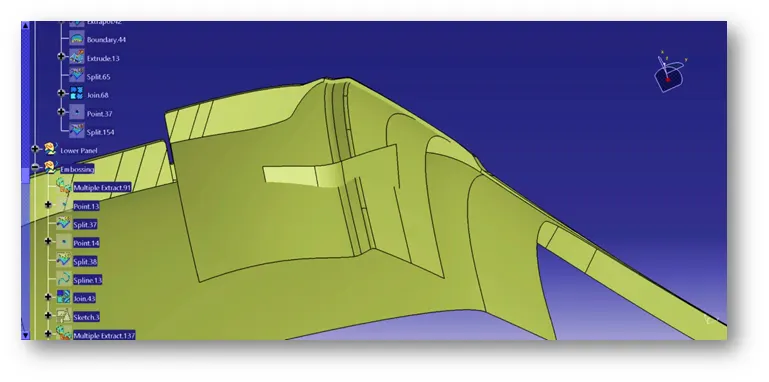
-Offset the main surface to 5mm and trim the surface with the sweep. Cut the unnecessary elements and make sure the trimmed outer surface is less than half of the length of the cut out created at the bottom.
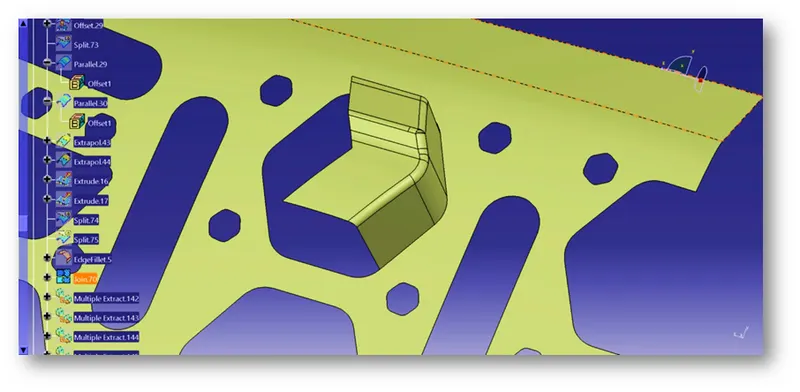
-Now, the free corner of the mastic is provided with relief by drawing the spline and then splitting it with the surface. The edges are provided with the appropriate fillets.
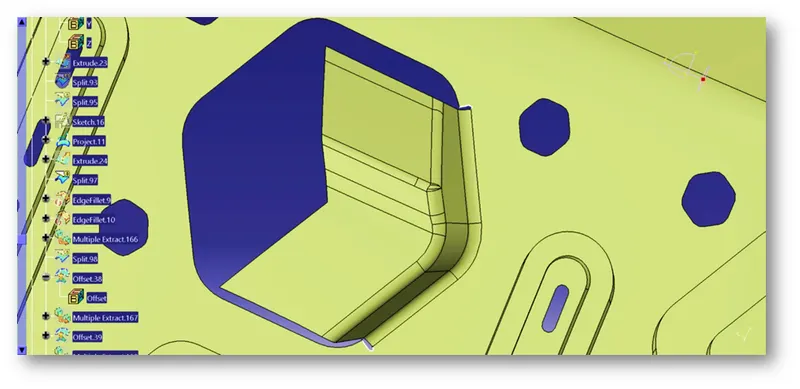
EMBOSSING
- Creating emboss in the outer panel direction because when a collision happens from the backside of the car this impact initially falls on the embossed faces then force dissipates according to the design of embossing then the remaining force hits the inner panel. For this case I designed my emboss towards the outer panel direction.
-Emboss should be in 7 degrees to 25 degrees inclined in angle and it should not be at a 90-degree angle, why because when we do stamping in manufacturing the stamping tool fits the sheet metal hence it will not come out of that sheet metal, So this is the main reason why the emboss face is in angle.
Hinge and gas stay:
-Hinge is used to connect the door to the BIW also enables the opening and closing of the hood.
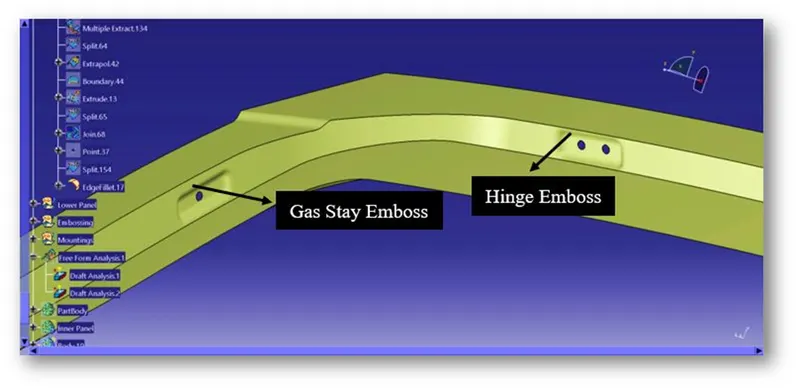
So, the embosses are created of the hinge along with reinforcements to provide additional support to the inner panel.
-The Hinges are created at the top of the inner panel using the parallel curves and corner option.
-Use the split option to cut the elements and perform a sweep with an angle of 10 degrees. Offset the surface to 4mm and trim it with the sweep surface. Give the fillets of 4mm to it.
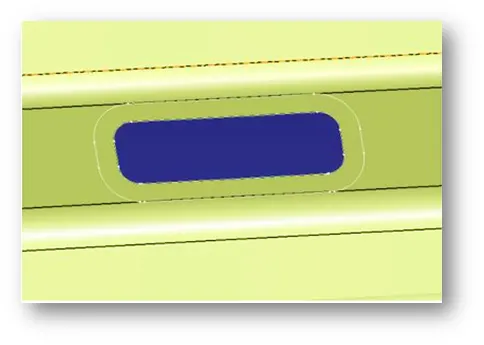
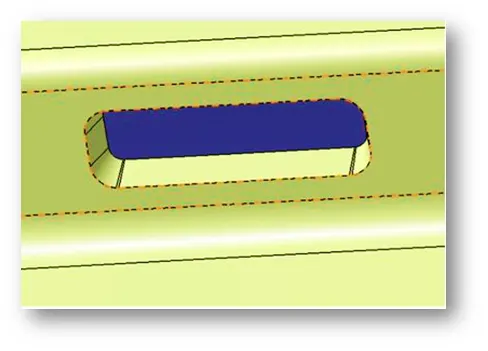
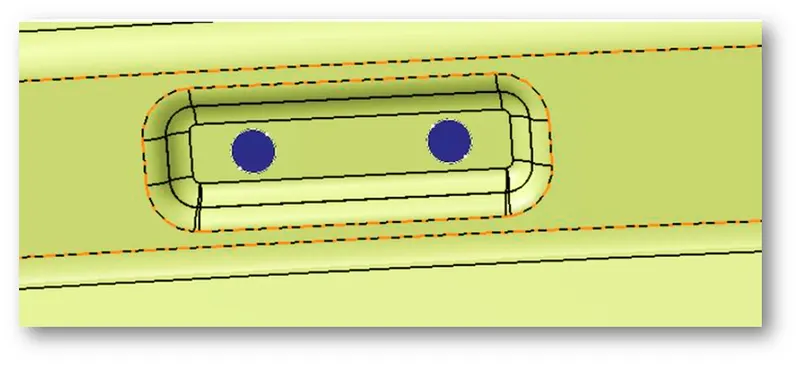
-Similarly, the gas stays embossment is created at the side of the inner panel following the above steps as mentioned for the hinge.
Latch :
For the latch, it is important to keep the latch embossment according to the trajectory the door opening and closing follows.
-Take create a center point between the two hinge parts and draw a circle marking the sweep of the lower end of the inner panel. Draw a Tangent to the Circle and create the cut on the tangent area and give the cut-outs to it.
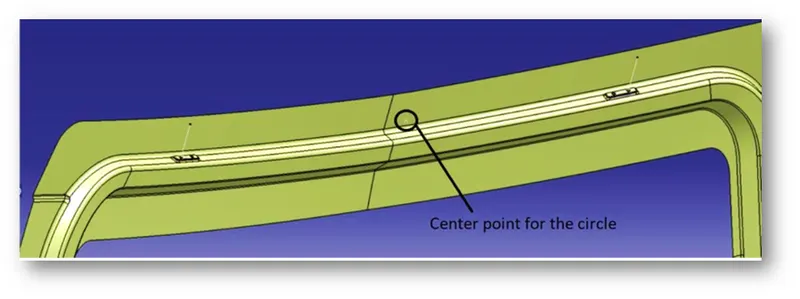
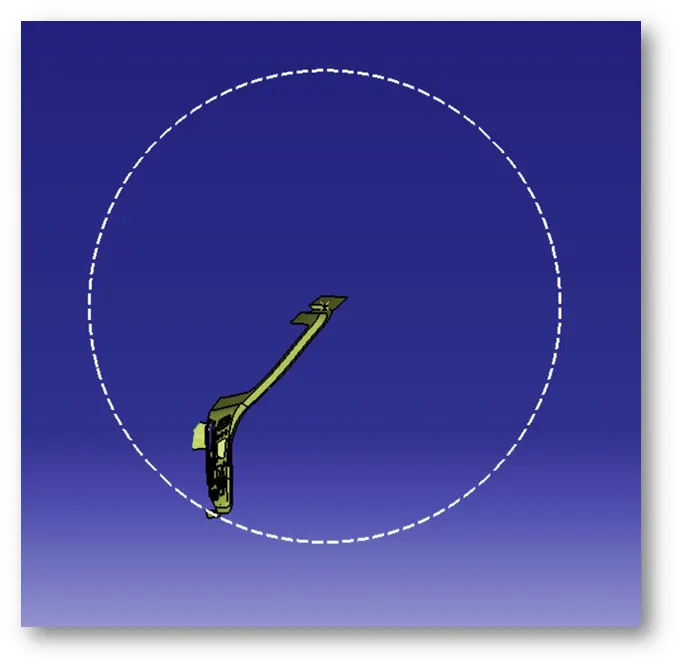
-Now draw the sketch on the plane where the circle intersects the inner panel lower side or where the latch follows the trajectory properly.
-Sweep the drawn sketch at an angle along the tooling direction.
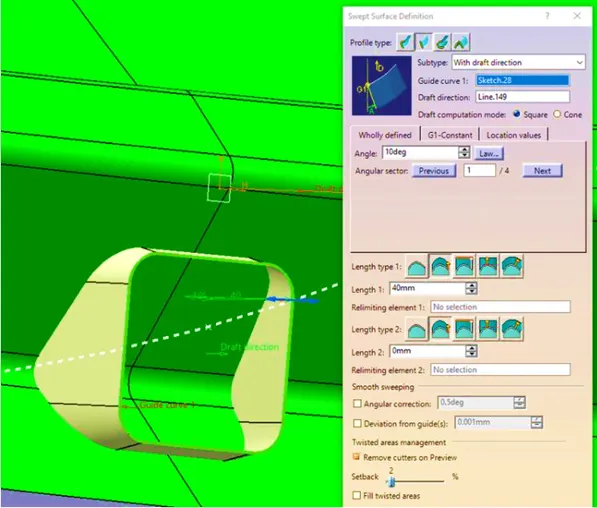
-Now, split the surface with the inner plane and then fill the opened surface followed by stitching all the surface.
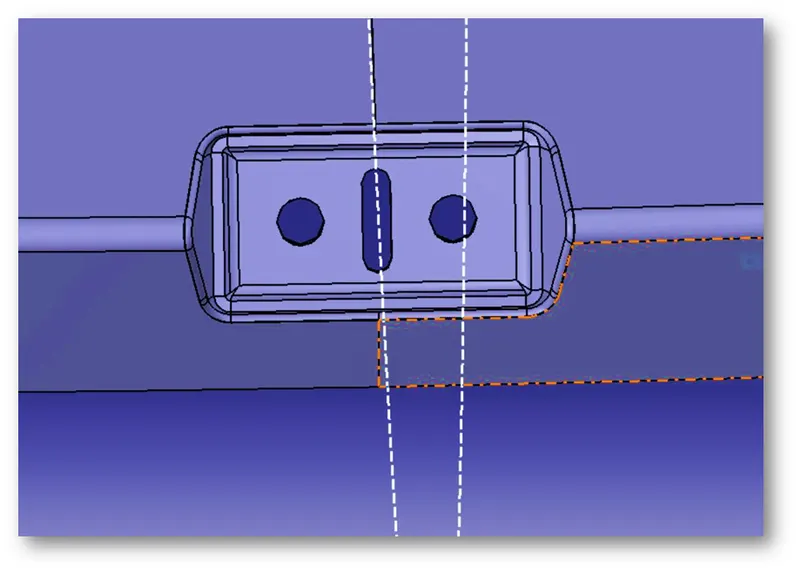
Wiper :
-Similarly, the embossment for the wiper motor has been created as shown below.
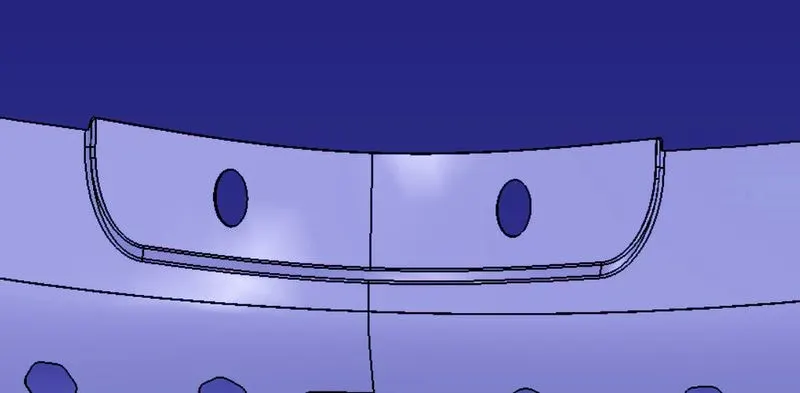
Reinforcements:
-Reinforcements and embosses are added or designed to compensate for the loss of strength in a region or area due to the load acting there. In the back door's caseload acts in the form of Hinge, Gas Stay, and Latch & Striker. These load cases are determined with the help of various tests and simulations.
-Thickened the inner panel and extract the hinge and around surfaces.
-Now, split the surface to obtain the required reinforcement surface.
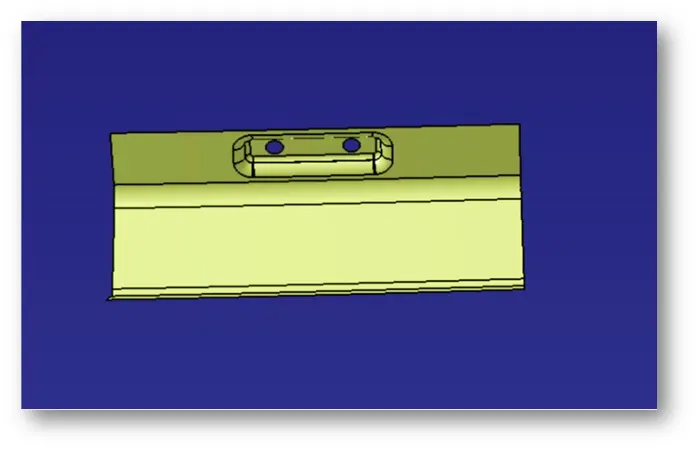
-Thickened the surface to 1-1.2mm since the reinforcement has to be stronger than the panel.
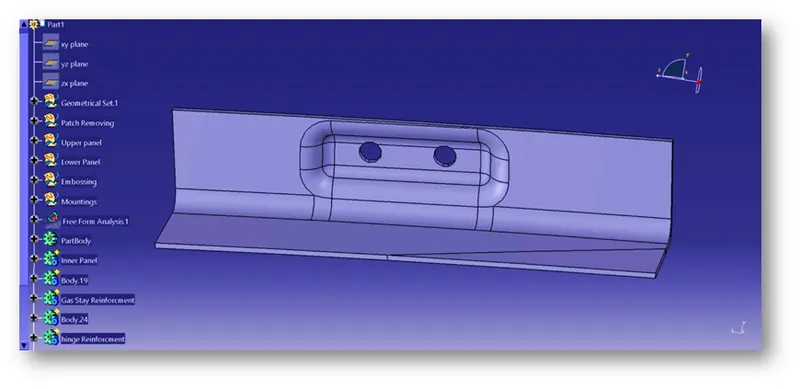
Gas stay Reinforcement:
-Gas Stay is a device used for supporting the back door in its open position. Gas stay requires no manpower and is engaged into support position automatically as the back door opens. One end of the Gas Stay is fixed on the backdoor and the other end on the Body Side or on the Back door stationary area. Embossing is provided at the Gas Stay mounting area to compensate for the functional holes punched.
Various simulation tests like Bend test, Torsion test, Abuse test performed on the back door, there a very weak zone developed at the Gas stay region. To compensate for that, reinforcement is added in that region.
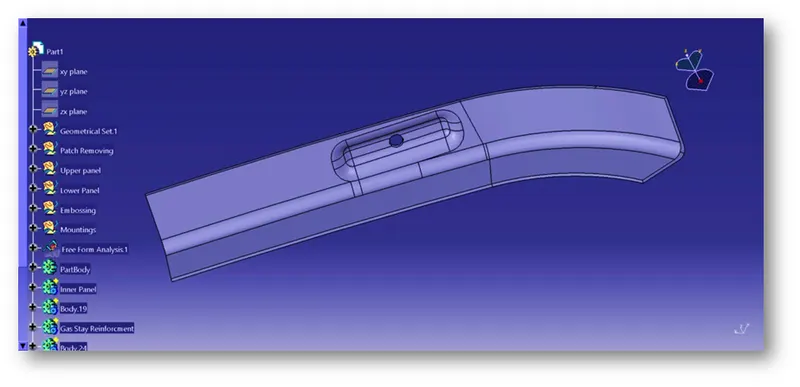
Latch reinforcement:
-The Latch & Striker forms the locking mechanism of the backdoor with the car. Due to regular opening, closing, and over slamming of the backdoor, there is stress developed in the Latch and Striker area. Further, during a rear collision, this area will be the first point of contact. To compensate for the same, reinforcements are added in this area.
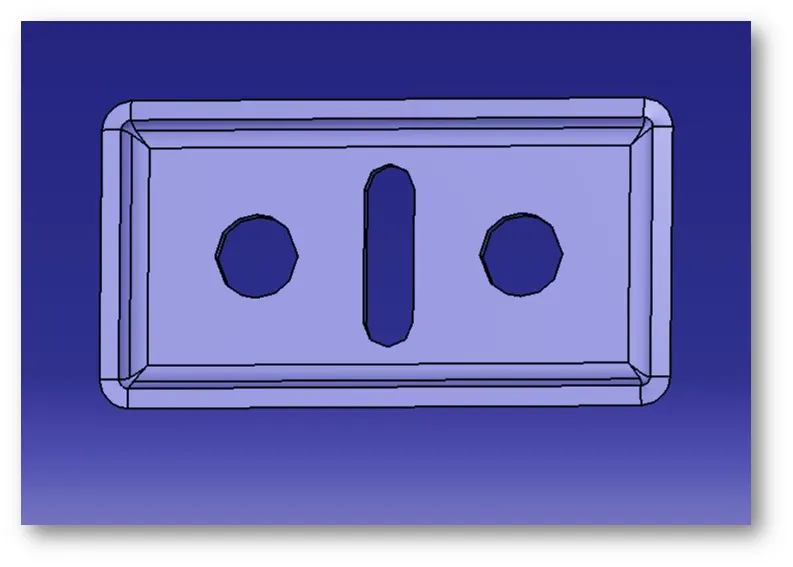
Draft analysis:-
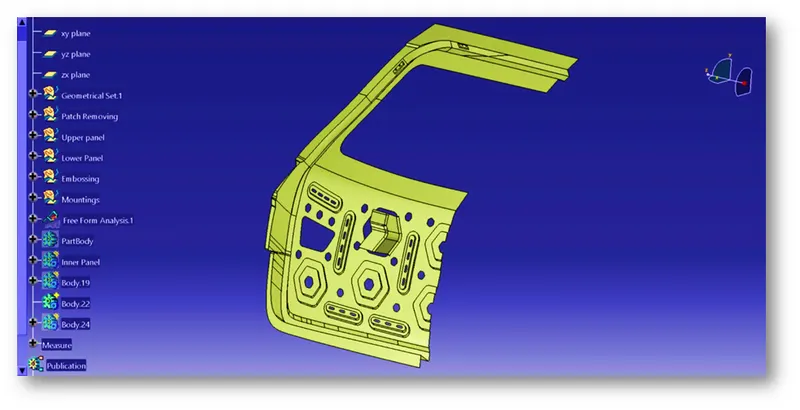
Rendered Back Door Model