Creating Levels, Grids, Layout and model elements for a residential unit using REVIT
1) AIM - What is BIM? Summarize the features of BIM and benefits of using BIM over 2D CAD tools.
Solution - BIM a shortform of Building Information Modelling. BIM is used by multidisciplinary engineering sectors such as Architects, structure engineers, Mechanical engineers etc to develop and manage digital representation of physical and functional characteristics of designs.
Features of BIM :-
1. It has user friendly interface
2. Multiple workboards for multidisciplinary engineering inputs
3. 3D design & rendering
4. Real time changes
5. Evaluation of performance
6. Import/Export 2D designs
7. Input model elements like Civil elements, MEP design etc.
Benefits of using BIM over 2D CAD tools:
2D CAD is a widely known in the construction industry but 2D CAD does not aptly capture the physical interfaces between multidisciplinary engineering inputs on the same model in 3D. With BIM modelling capability a user can use mapping tools allowing users to use real world information like aerial imagery, and also use scans of large structures. A BIM model can be used for prefabricate elements during the initial desogn therefore nullyfying the need to reattach such elements during later stages of design.
--------------------------------------------------------------
2) AIM - Understand the concept of Categories, Families, Elements, Instances in Revit. Go to Insert Tab, choose a category. Pick a family and element. Understand the instances and insert it to Revit model.
Solution - Elements are the basic components of a general family such as the lights, kitchen utensils, tables, chairs etc. whereas a user can use the collaborate tool and create a cloud file and create multiple instances of independant files to collaborate on a project.
In the insert tab under the load from library section select load family tool which presents the families from local or networked libraries. Then select load to place the component an instance of the family type in the drawing area.
-------------------------------------------------------------------------------------------
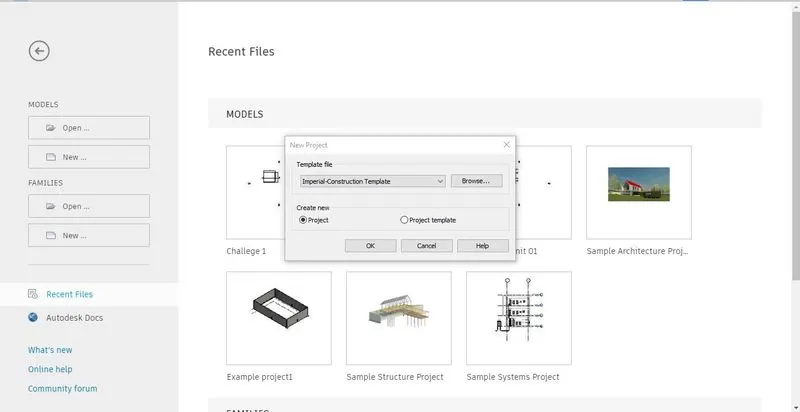
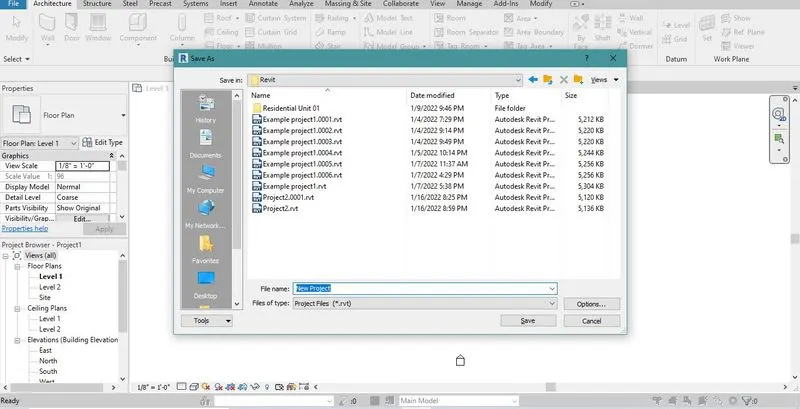
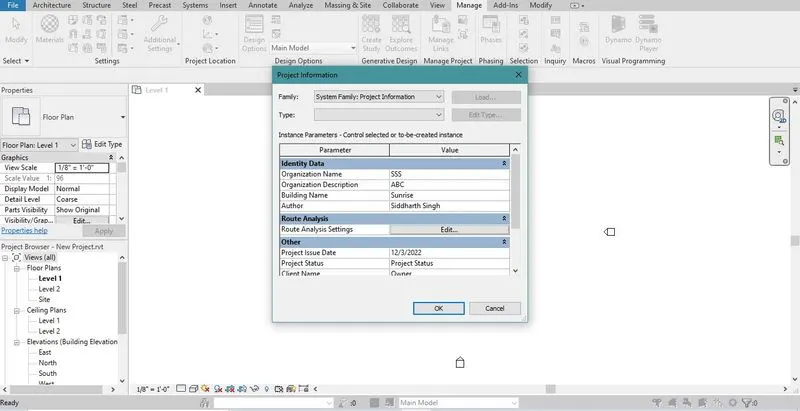
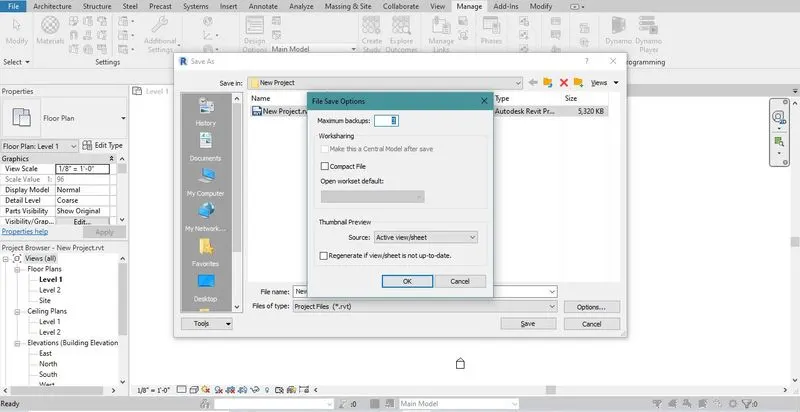
3) AIM - Setting up a Project – Open a project file with architectural template. Save the file with appropriate name. Set up the project units to Imperial / Metric based on your convenience of modelling. Complete the project information under Manage tab. Set up the maximum backups for project file to 3.
Solution -
Step 1 ) Open revit 2022
Step 2 ) CLick on new toolbar on the left side and select architectural template - imperial and press ok
Step 3) click on the manage toolbar and select project information tool
Step 4) Fill in the project details and again open save as menu and select save options in which fill as maximum backups as 3.
--------------------------------------------------------------------------------------------------------------------------------
4. AIM -
Understand the concept of Levels and Grids. Follow the naming and conventions. Create the following Levels: ( Convert to metric equivalents if metric is your units)
Ground Floor @ 0’
First Floor @ 10’
Second Floor @ 20’
Roof @ 30’
Grids Transverse Grids A, B,C,D, E @ 10’ spacing
Longitudinal Grids from 1 to 10 @ 20’ spacing
Solution -
Step 1) After saving the file from the last question click on the Architectural toolbar and draw a rectangular wall layout of 100' X 50'.
Step 2) Selcet the view tool to open the section. Modify the section as per the question requirement then select levels to specify the levels.
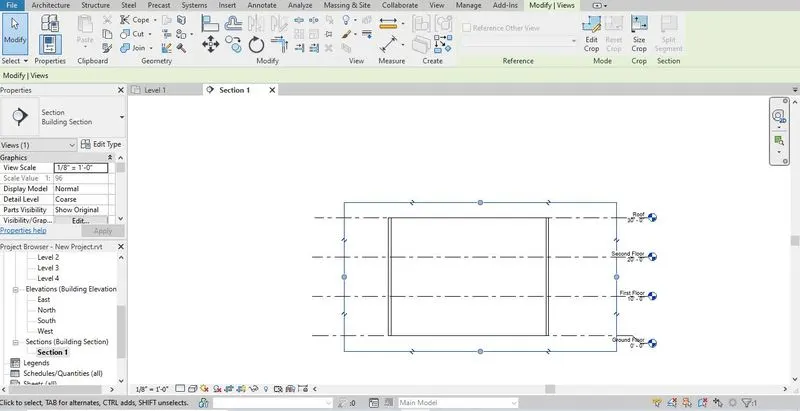
Step 3) Again go to the architectural tool and select grid option to draw the grids in longitudnal and transverse direction.
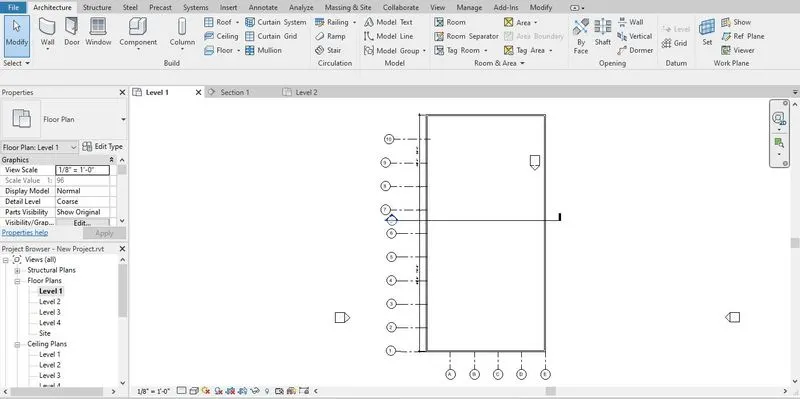
--------------------------------------------------------------------------------------------------------------------------------
5. AIM - 3D modelling of residential unit – From looking at your house / or a place you aspire. Create a conceptual layout of the residential unit. You can measure using a tape or
you can access your residential plan to create a similar layout.
Solution -
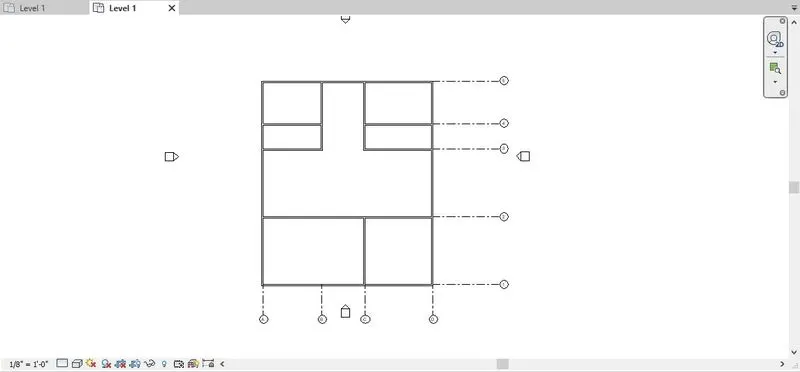
Step 1) From the new model in architectural - imperial template select Architectrual Wall and creat the layout as per the question requirement.
Step 2) Draw the walls 80' X 96' with various room as per the layout imagined.
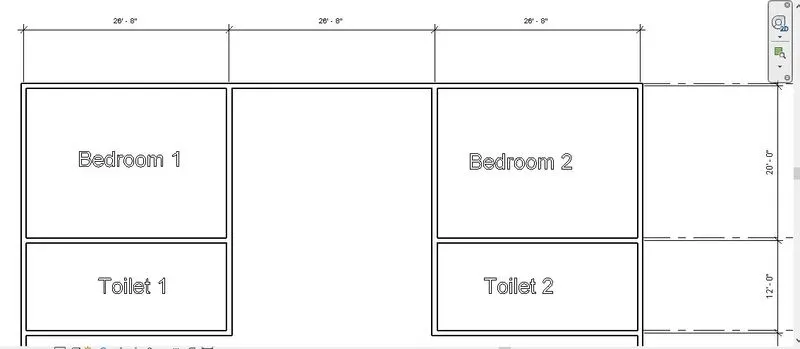
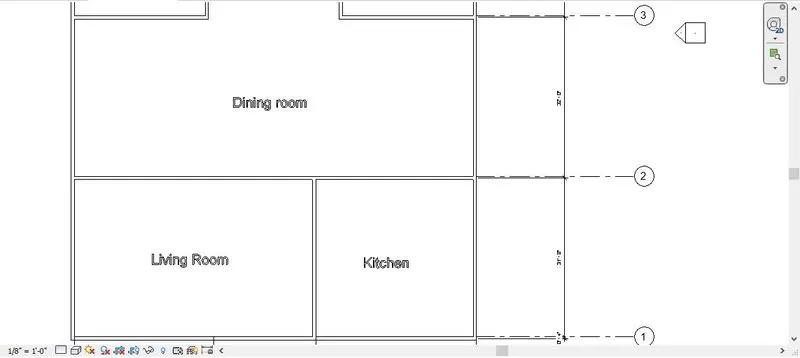
--------------------------------------------------------------------------------------------------------------------------------
6, AIM - In the layout created draft the level of details you are planning to include – Dimensions of room, components you plan to add in the residential unit.
Solution -
Step 1) Open the project file created in the last template.
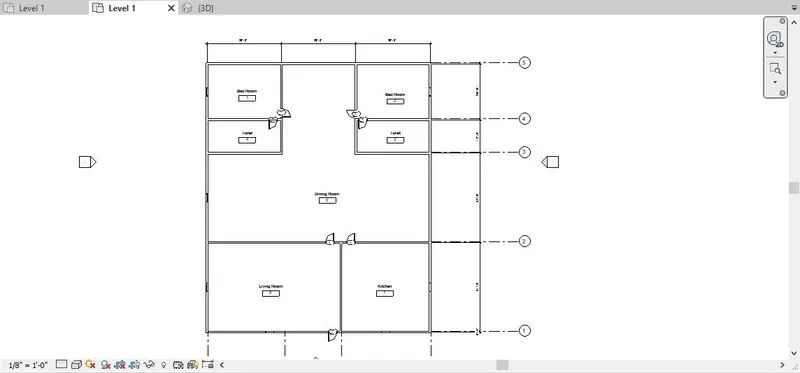
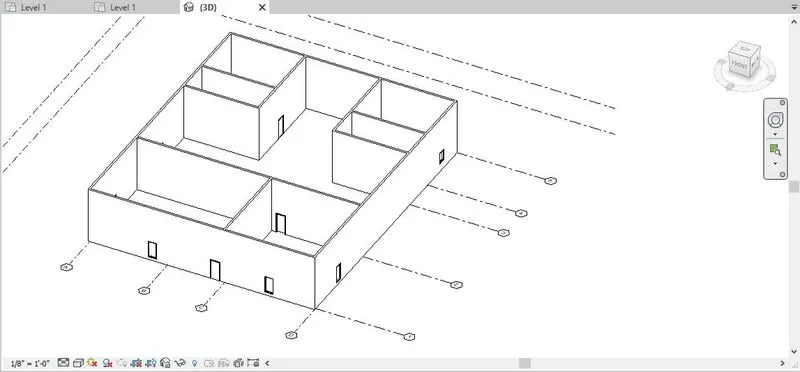
Step 2) In the Architectural toolbar select the type of door and window required for the layout and place at the designated places.
Step 3) Click room command and place the rooms.
Step 4) Select tag room and tag each room.
--------------------------------------------------------------------------------------------------------------------------------
7. AIM - Identify the residential model elements such as Door, Windows, Tables, Chair, Couch, Bed, Lamps from the library and insert them to the model . Save the project for use
for Assignment 3
Solution -
Step 1) Open the file created above.
Step 2) Select the doors and the window from the architectural tab and place in the model.
Step 3) Select insert tab and then select Load family
Step 4) Select the elements furniture at the required places.
Note- Elements likes furniture, kitchen elements are not available in the version i have downloaded therefore could not place them in the model.